Guide by Char2Cool
How to make fertilizer from biochar
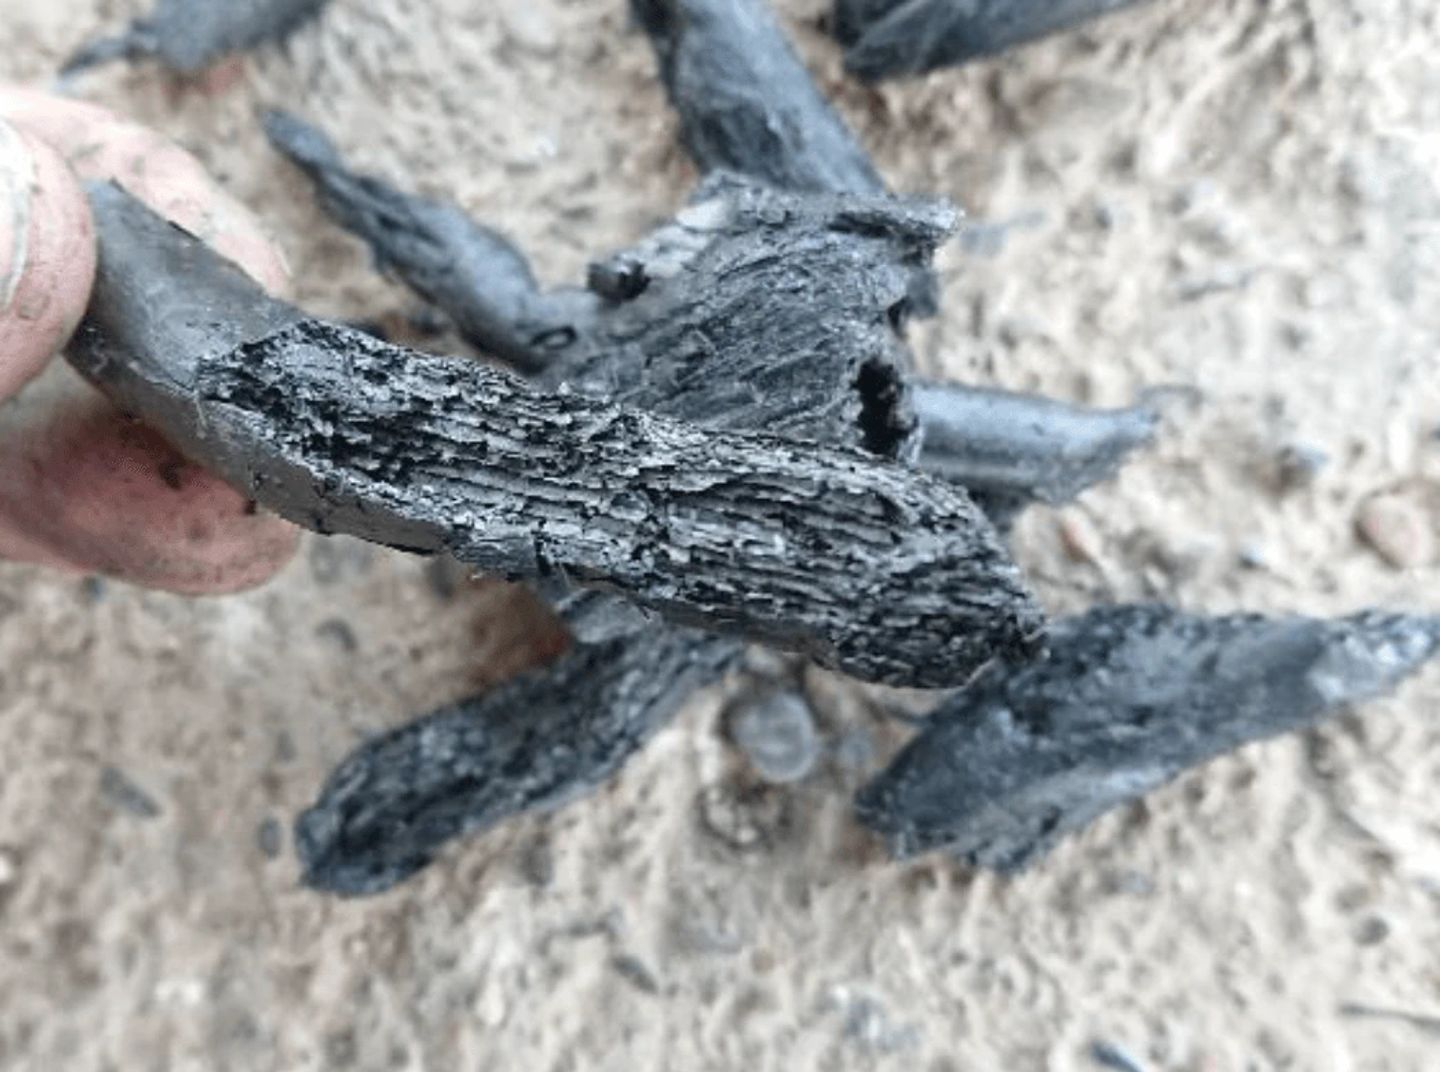
Biochar has a porous structure and functions as a water and nutrient storage.


Using this special kiln, you can make your own biochar. There is no better way to enhance your soil, save water and boost your harvest. But of course you can also use the coal for cooking.
| Done in | 2 hours |
|---|---|
| Skill level | expert |
This kiln was developed to carbonize water hyacinths, an evasive plant that covers most of the lakes in Africa by now. But you can also use the kiln with other dried organic materials from your field (like dried corn cobs).
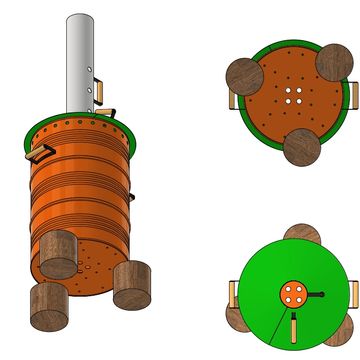
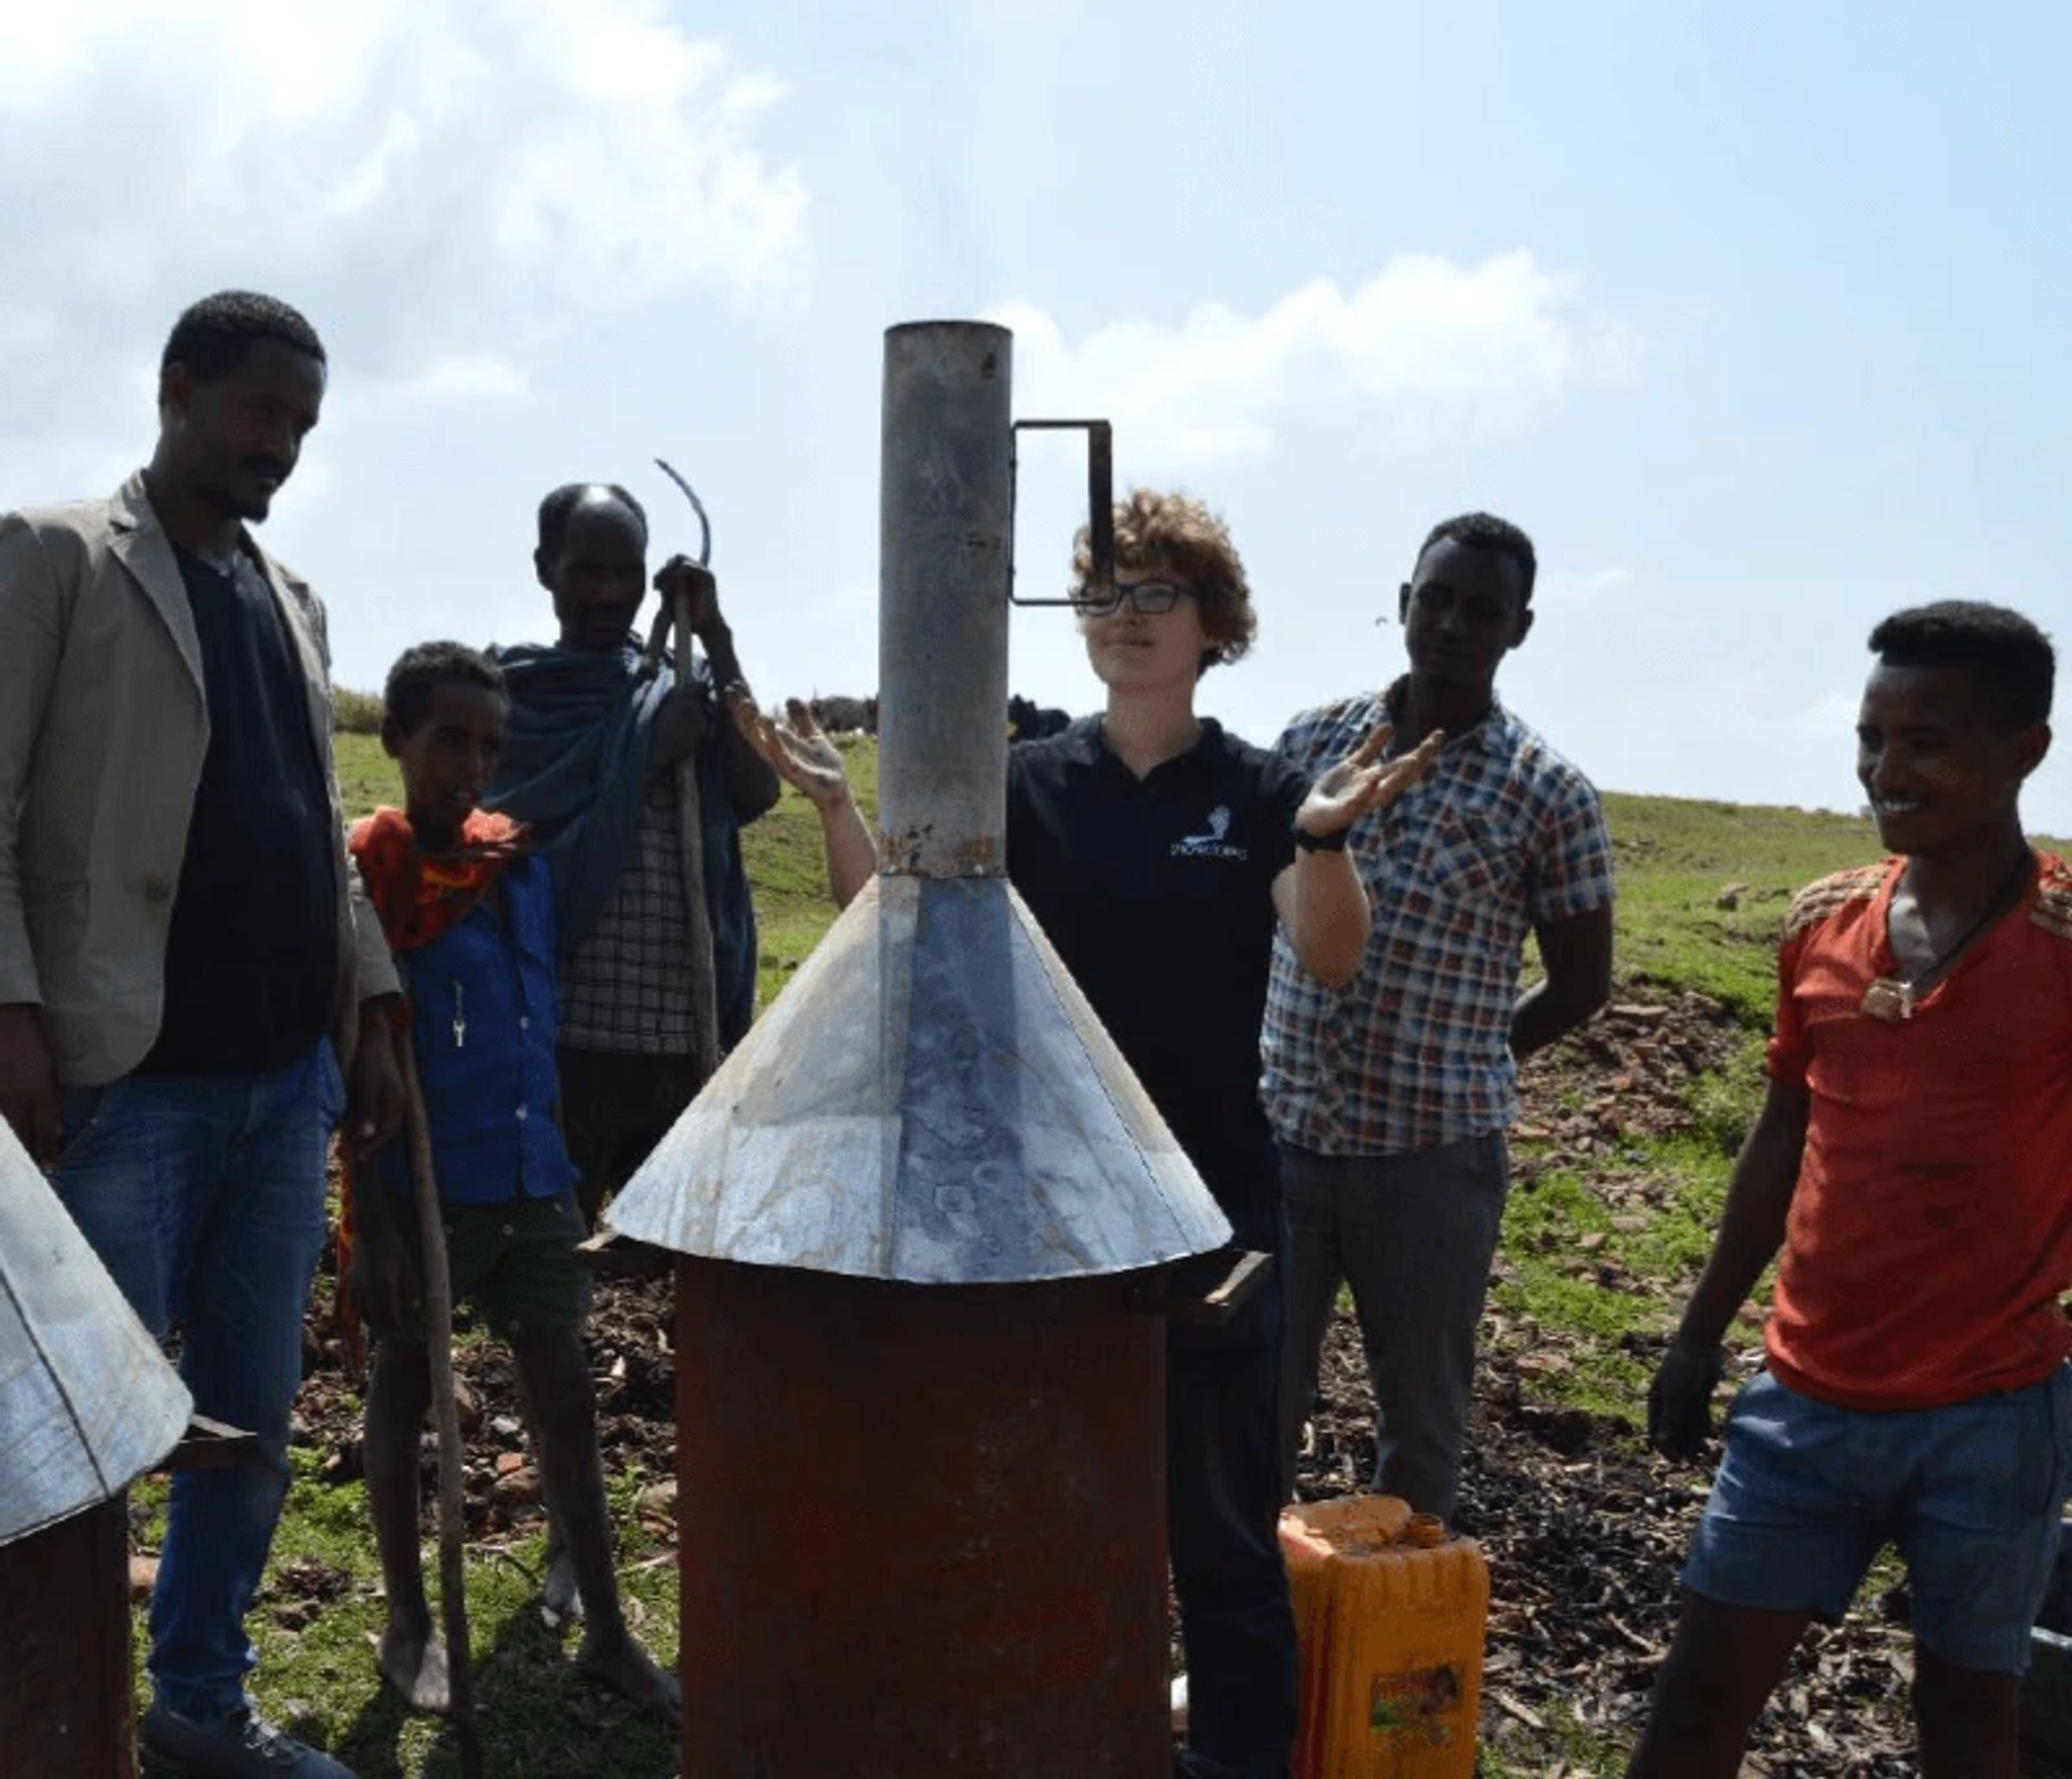
The kiln consists of only two parts, is easy to build and intuitive to use.
This is also a great business hack if you have access to enough organic ressources to carbonize. If you want to start a biochar business in your community, feel free to get in touch with Char2Cool.


Published under CC:BY-NC-SA by
Char2Cool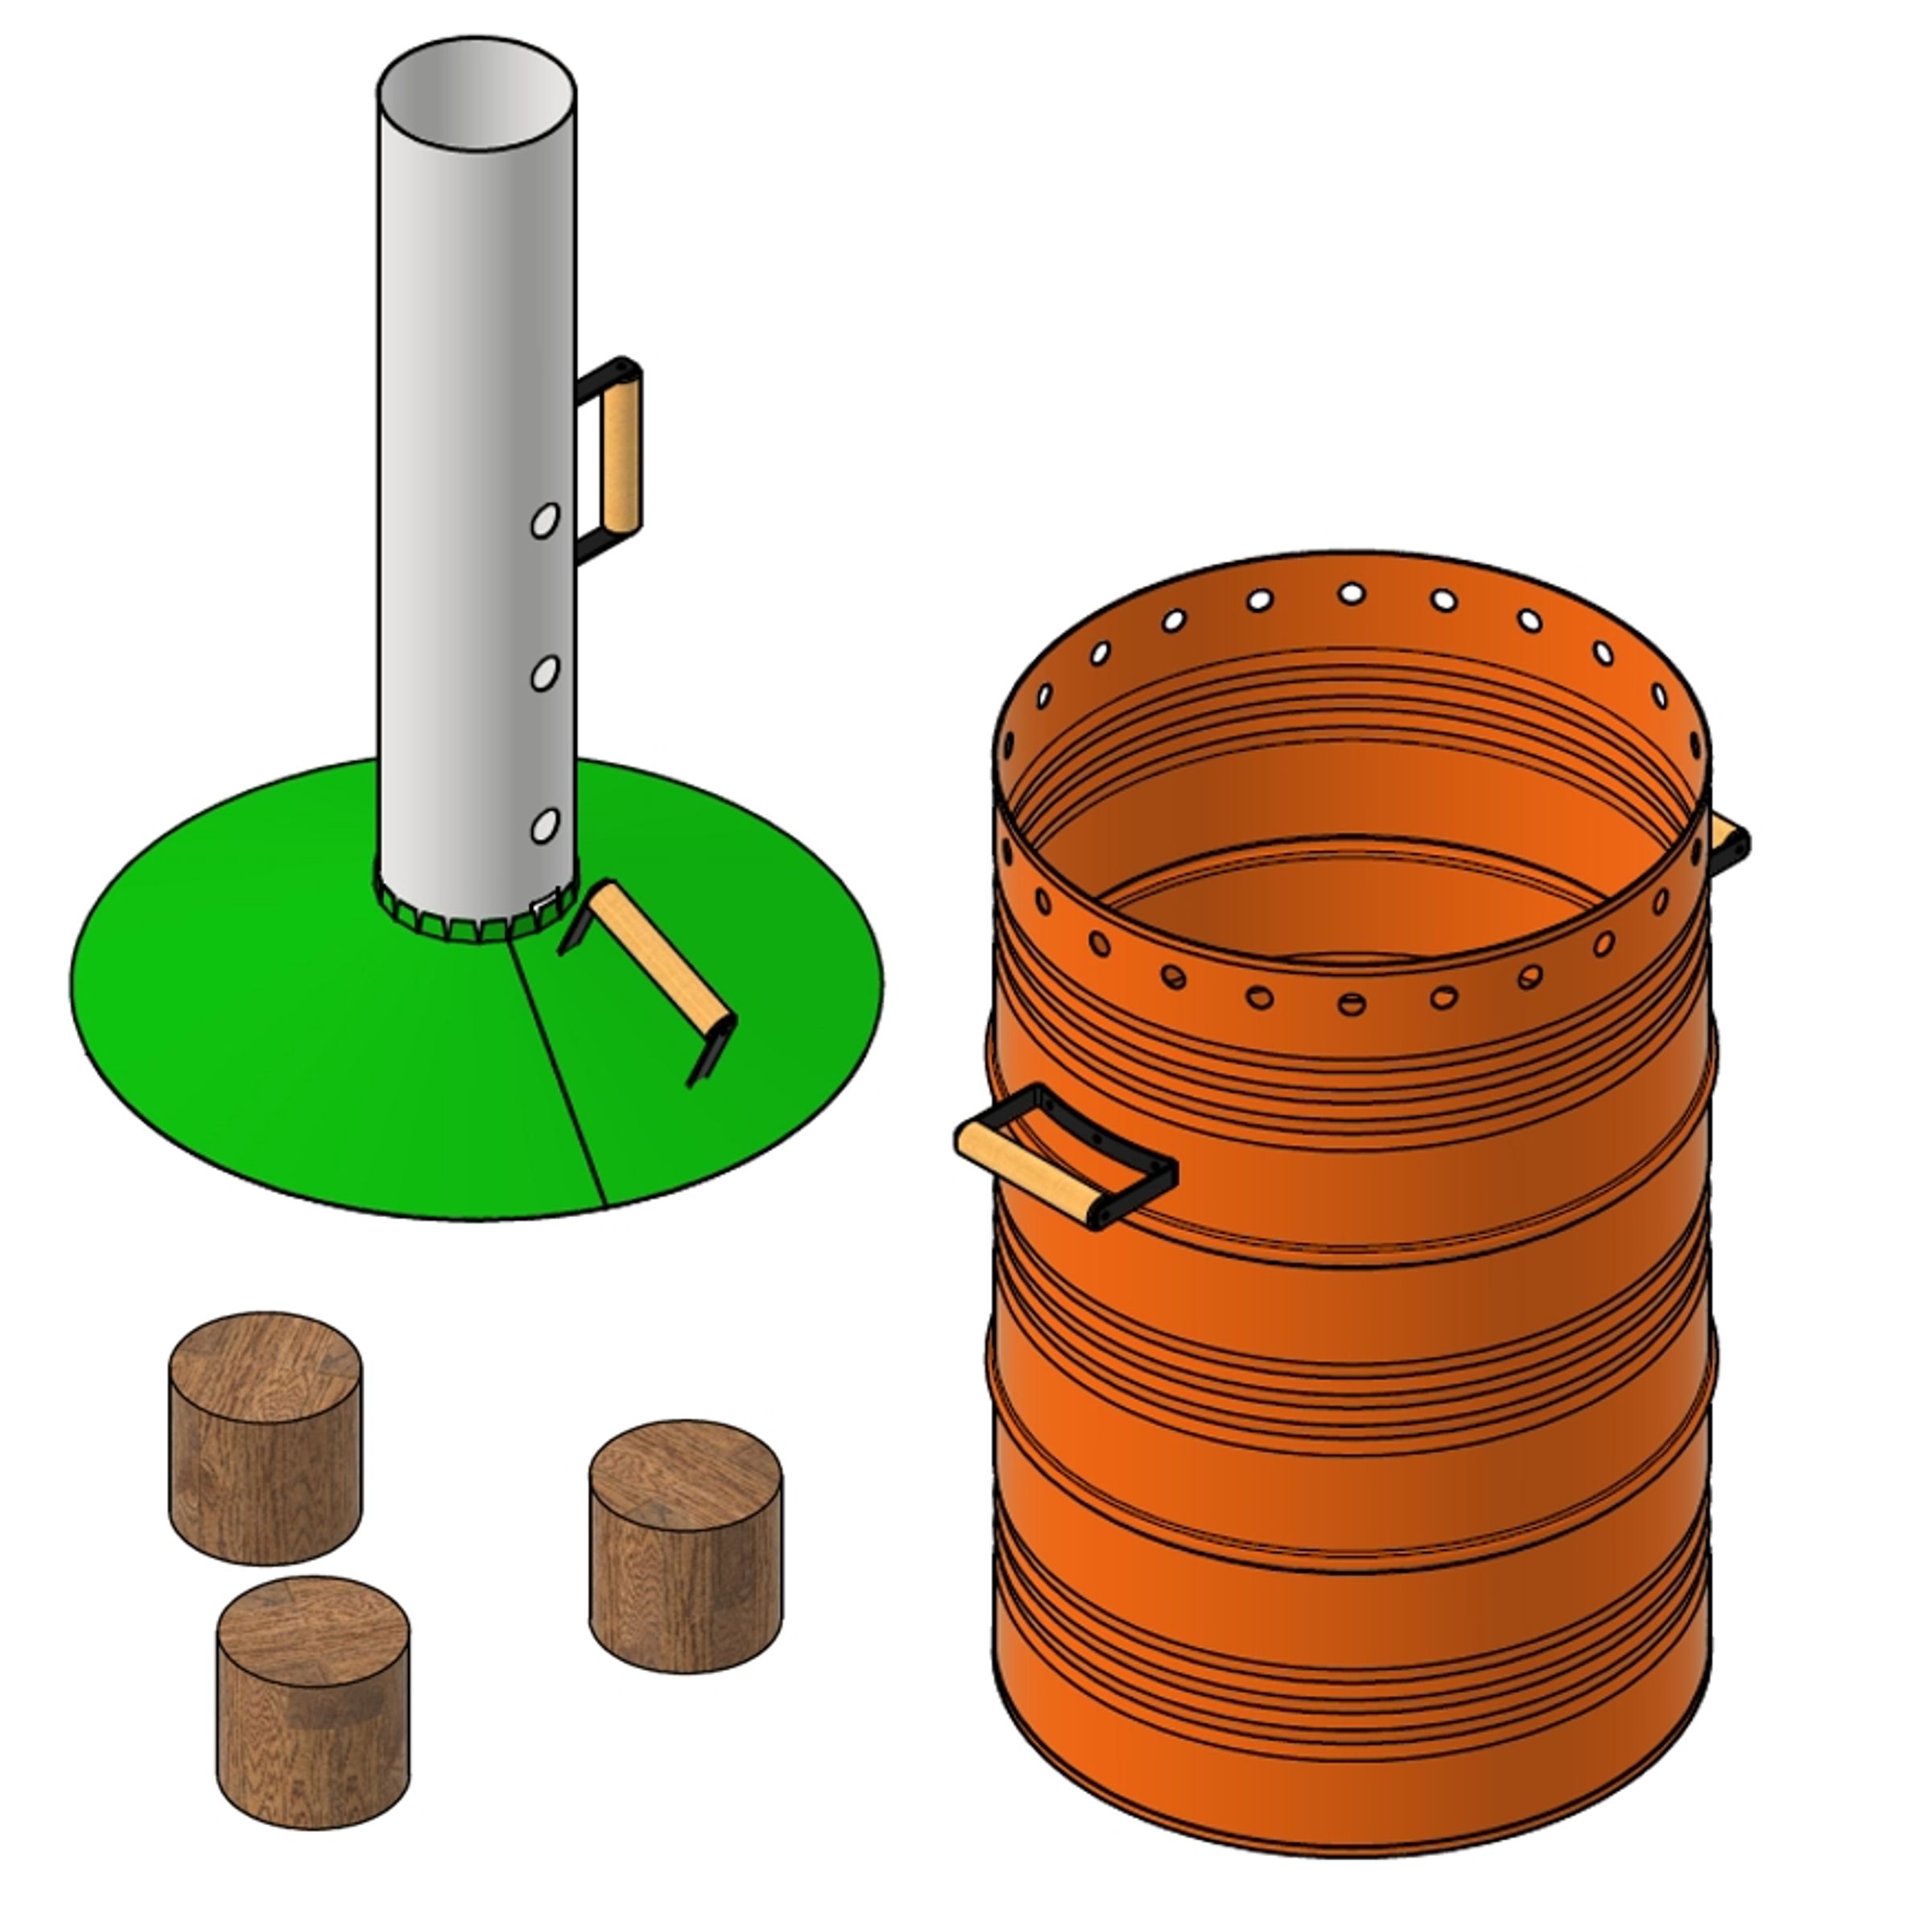

Metal Sheet
70cm x 70cm, 0.75 - 1mm thick
Metal Sheet 52cm x 78cm, 0.75 - 1mm thick - for this sheet you can use an old side panel of a washing machine for example
200 litre Metal Oil Drum
empty
4 Handles
3 Bricks, stones or pieces of wood to elevate the kiln.
20 Screws
3 Nails
String
Measuring Tape
Step cone drill bit
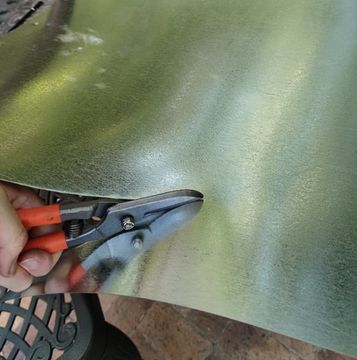
Tin snips
Hammer
Optional: Welding device
If you don’t have the mentioned tools you can also use longer nails and a hammer. It does not work as easily but it works.
With all the measurements and drawings, this guide looks very complicated at first. Do not hesitate if you do not understand all the measurements. You can improvise. In the end, it only has to look like in the following pictures.

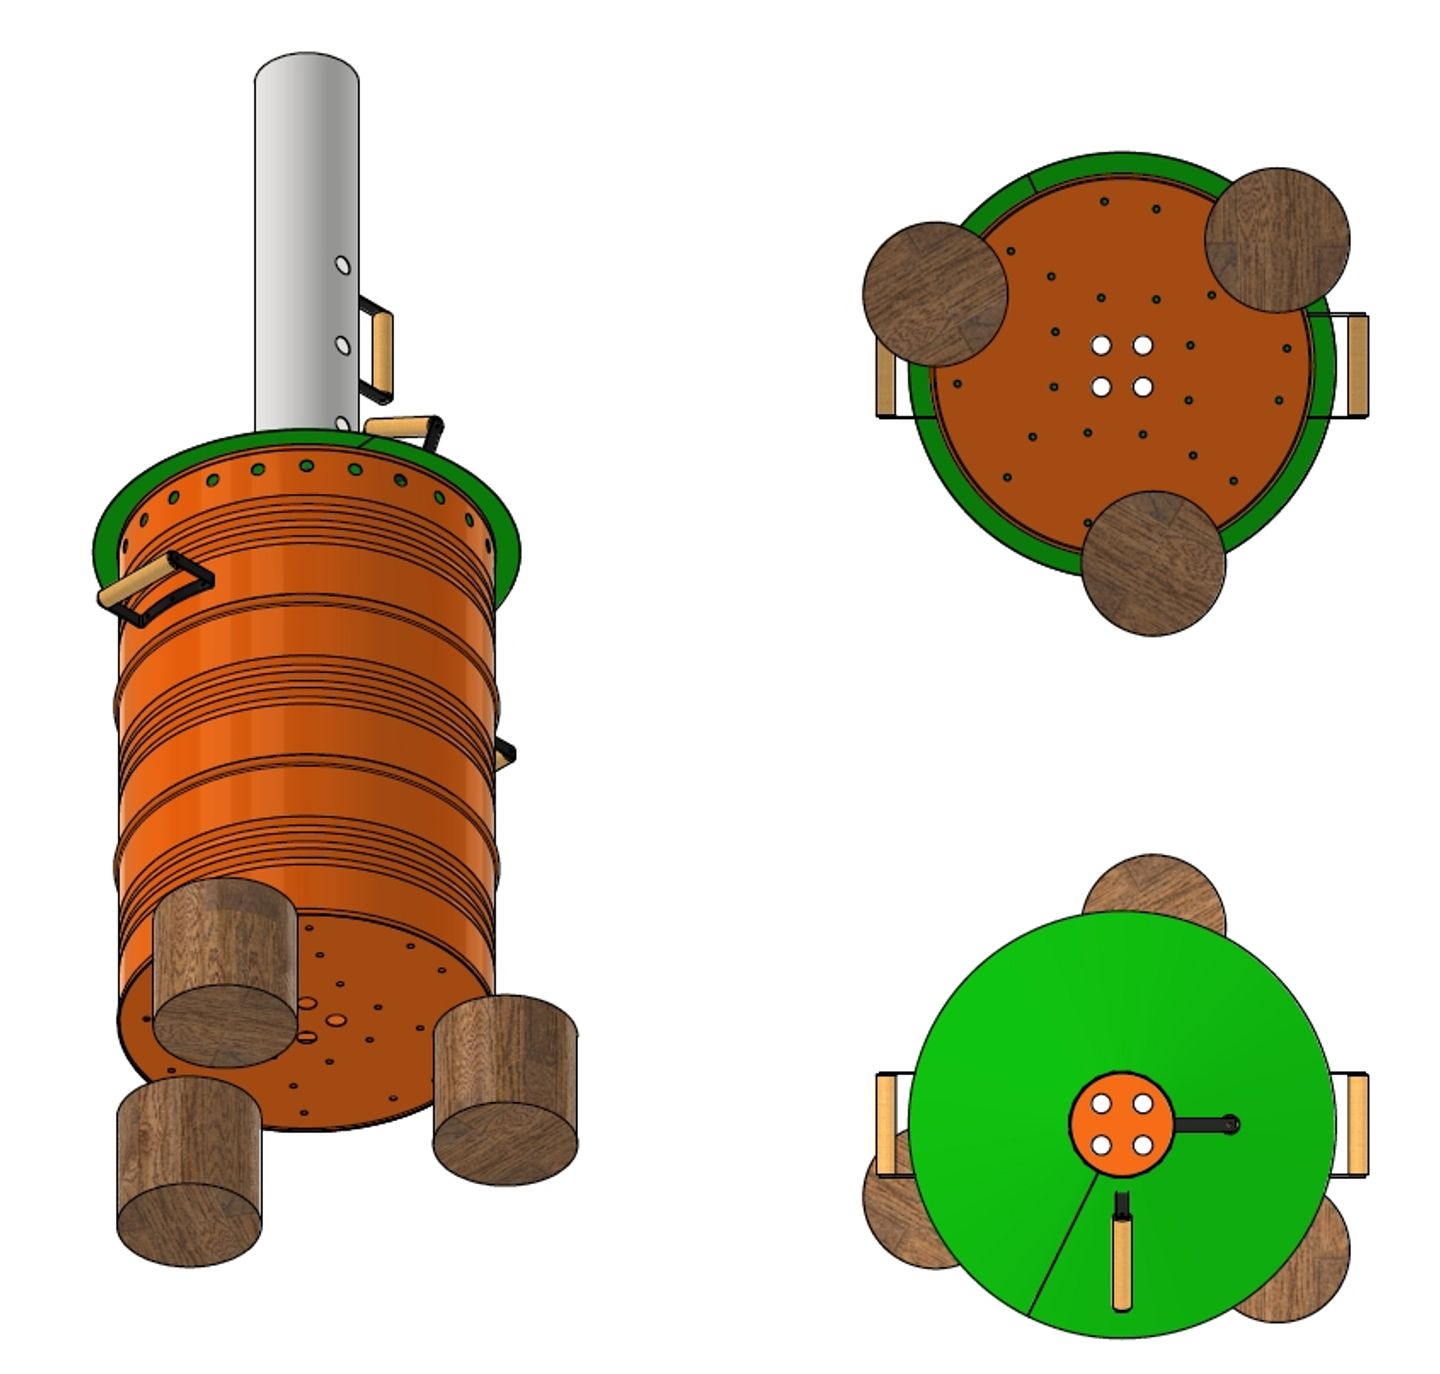

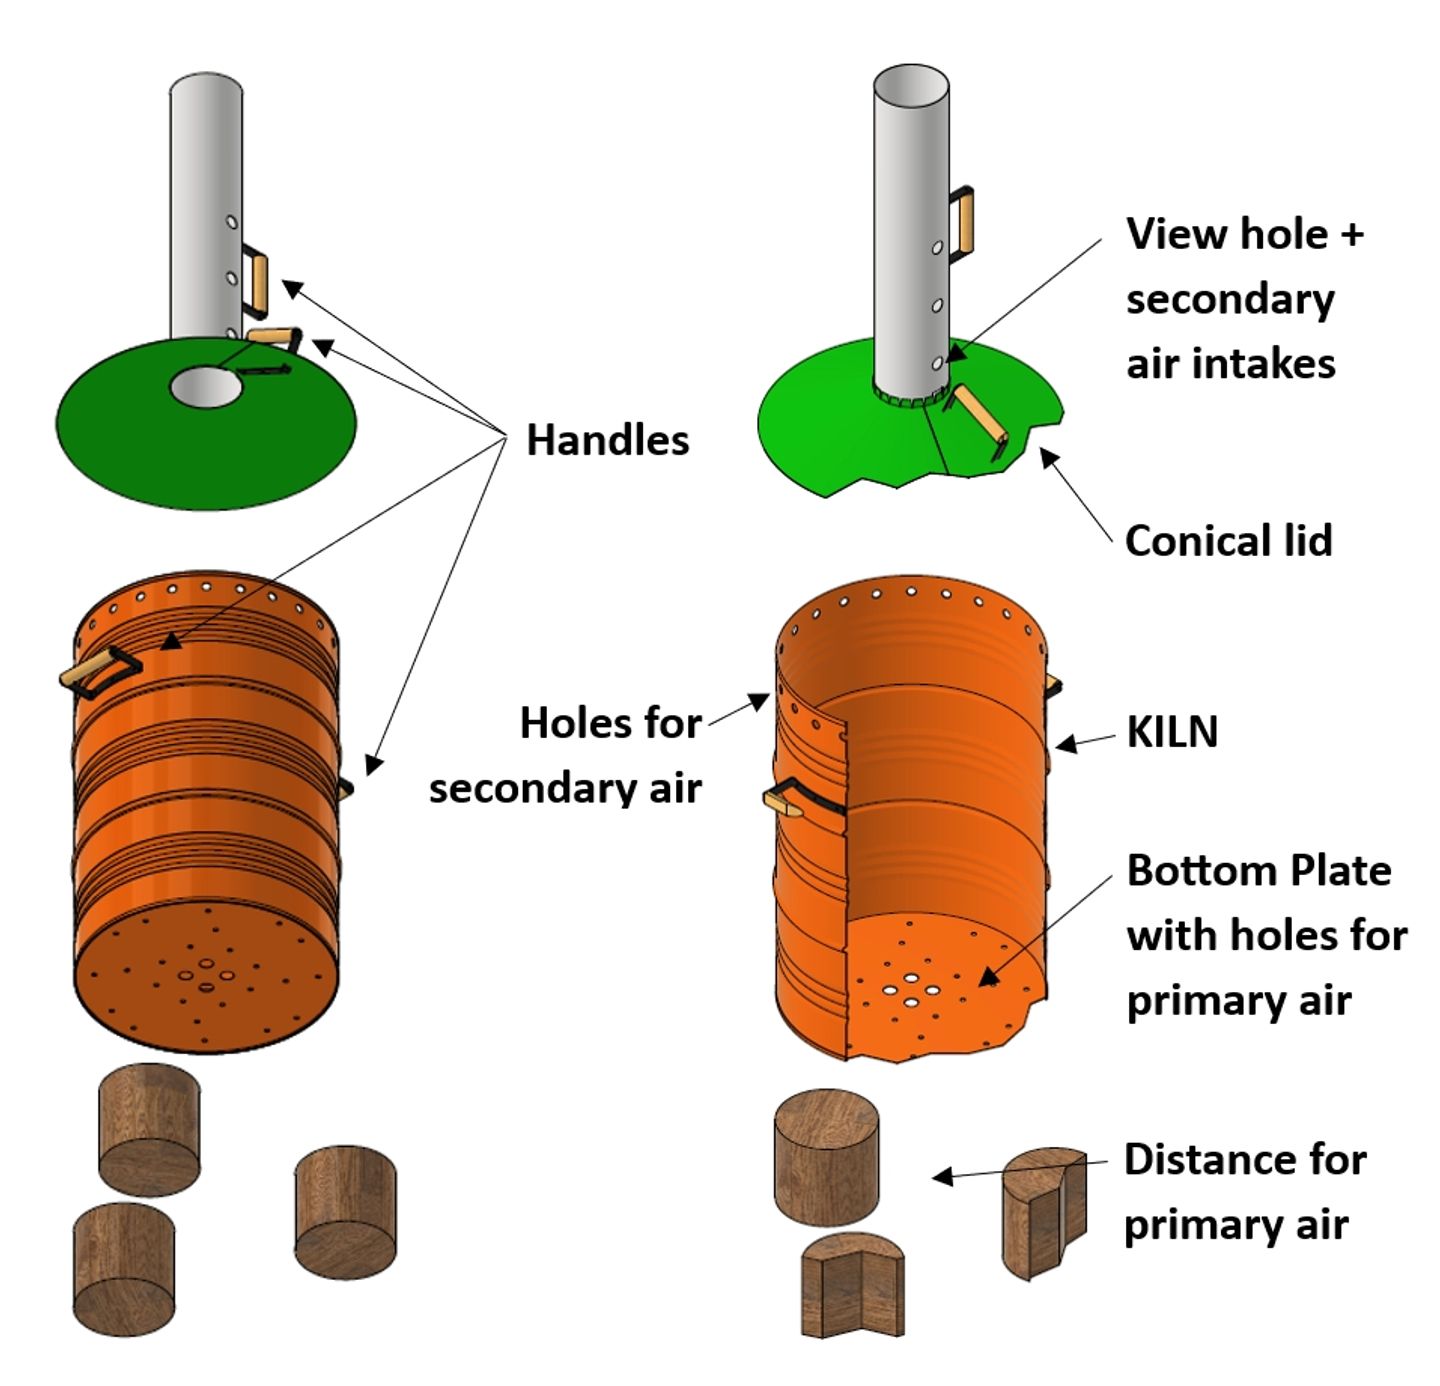
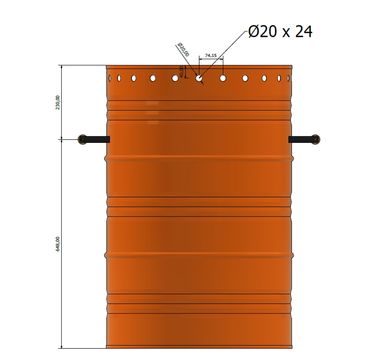
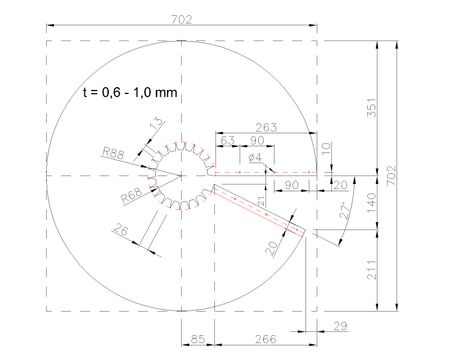
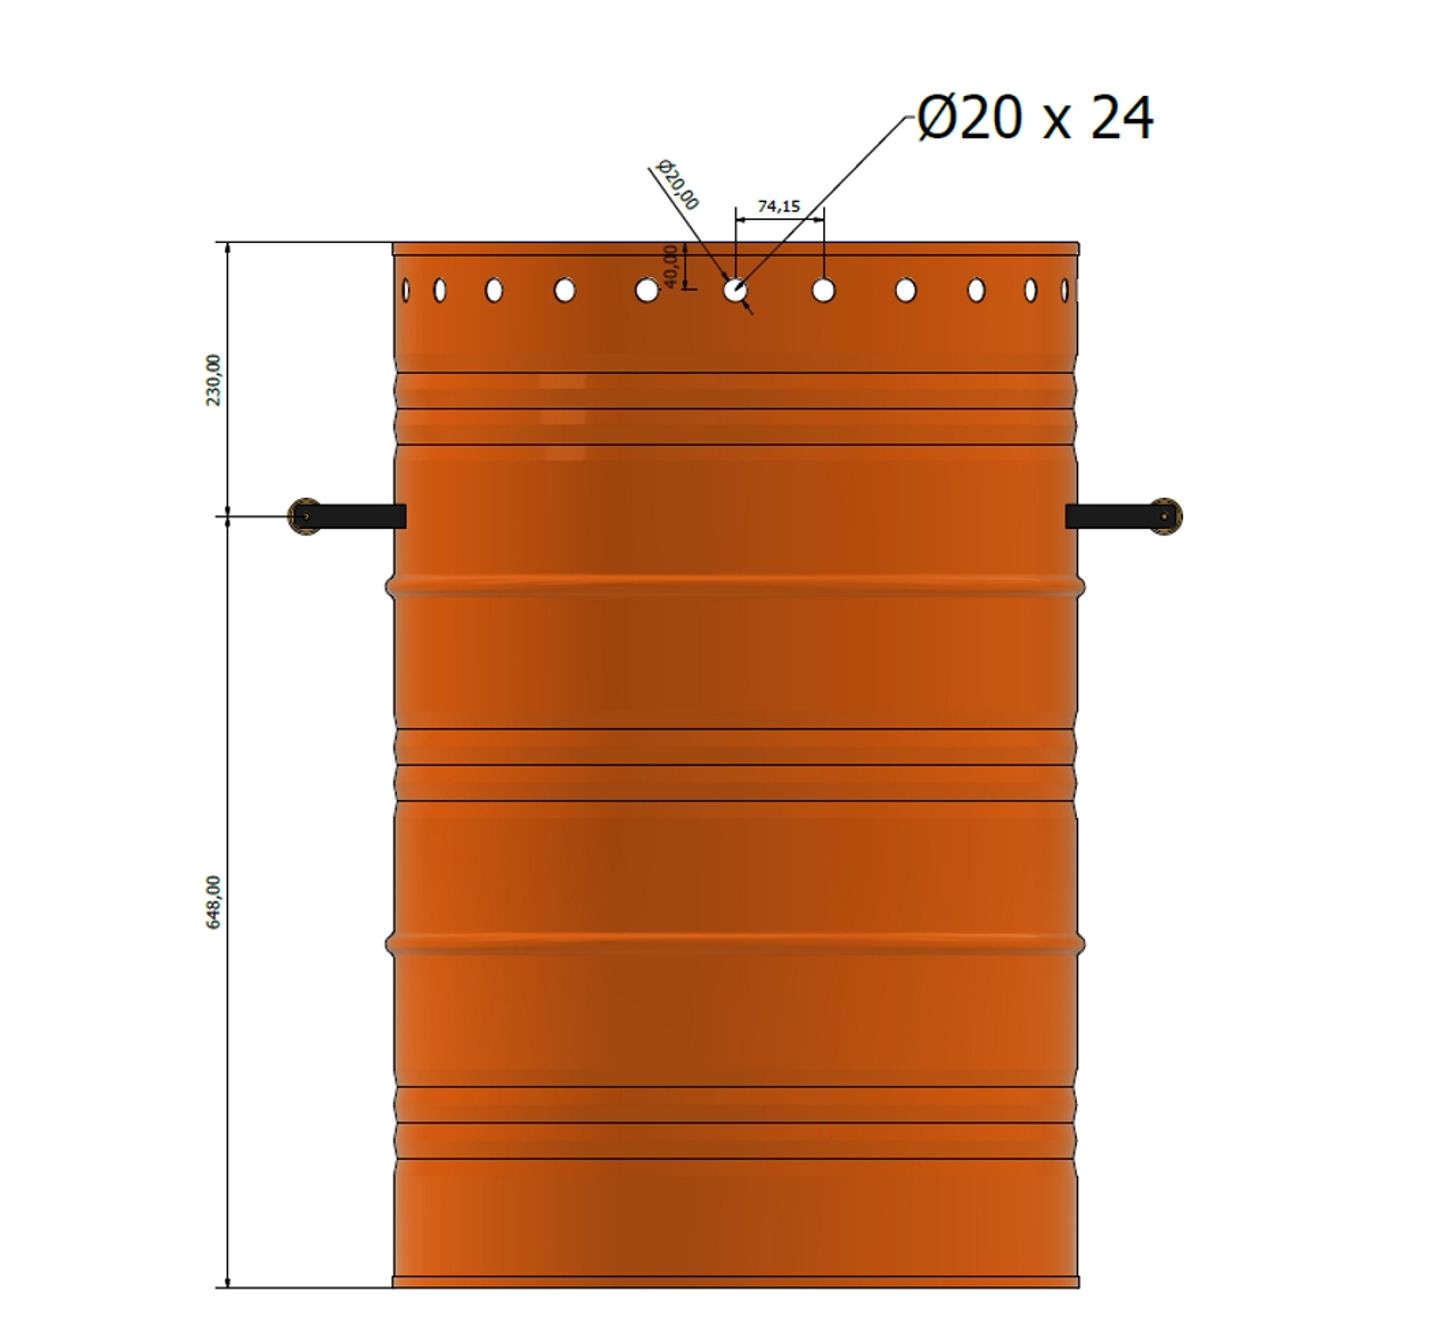
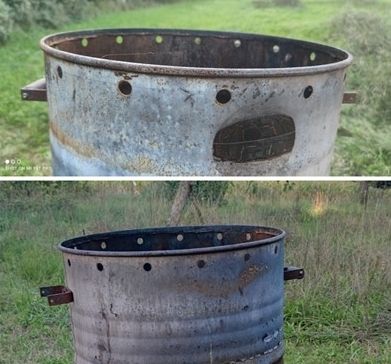
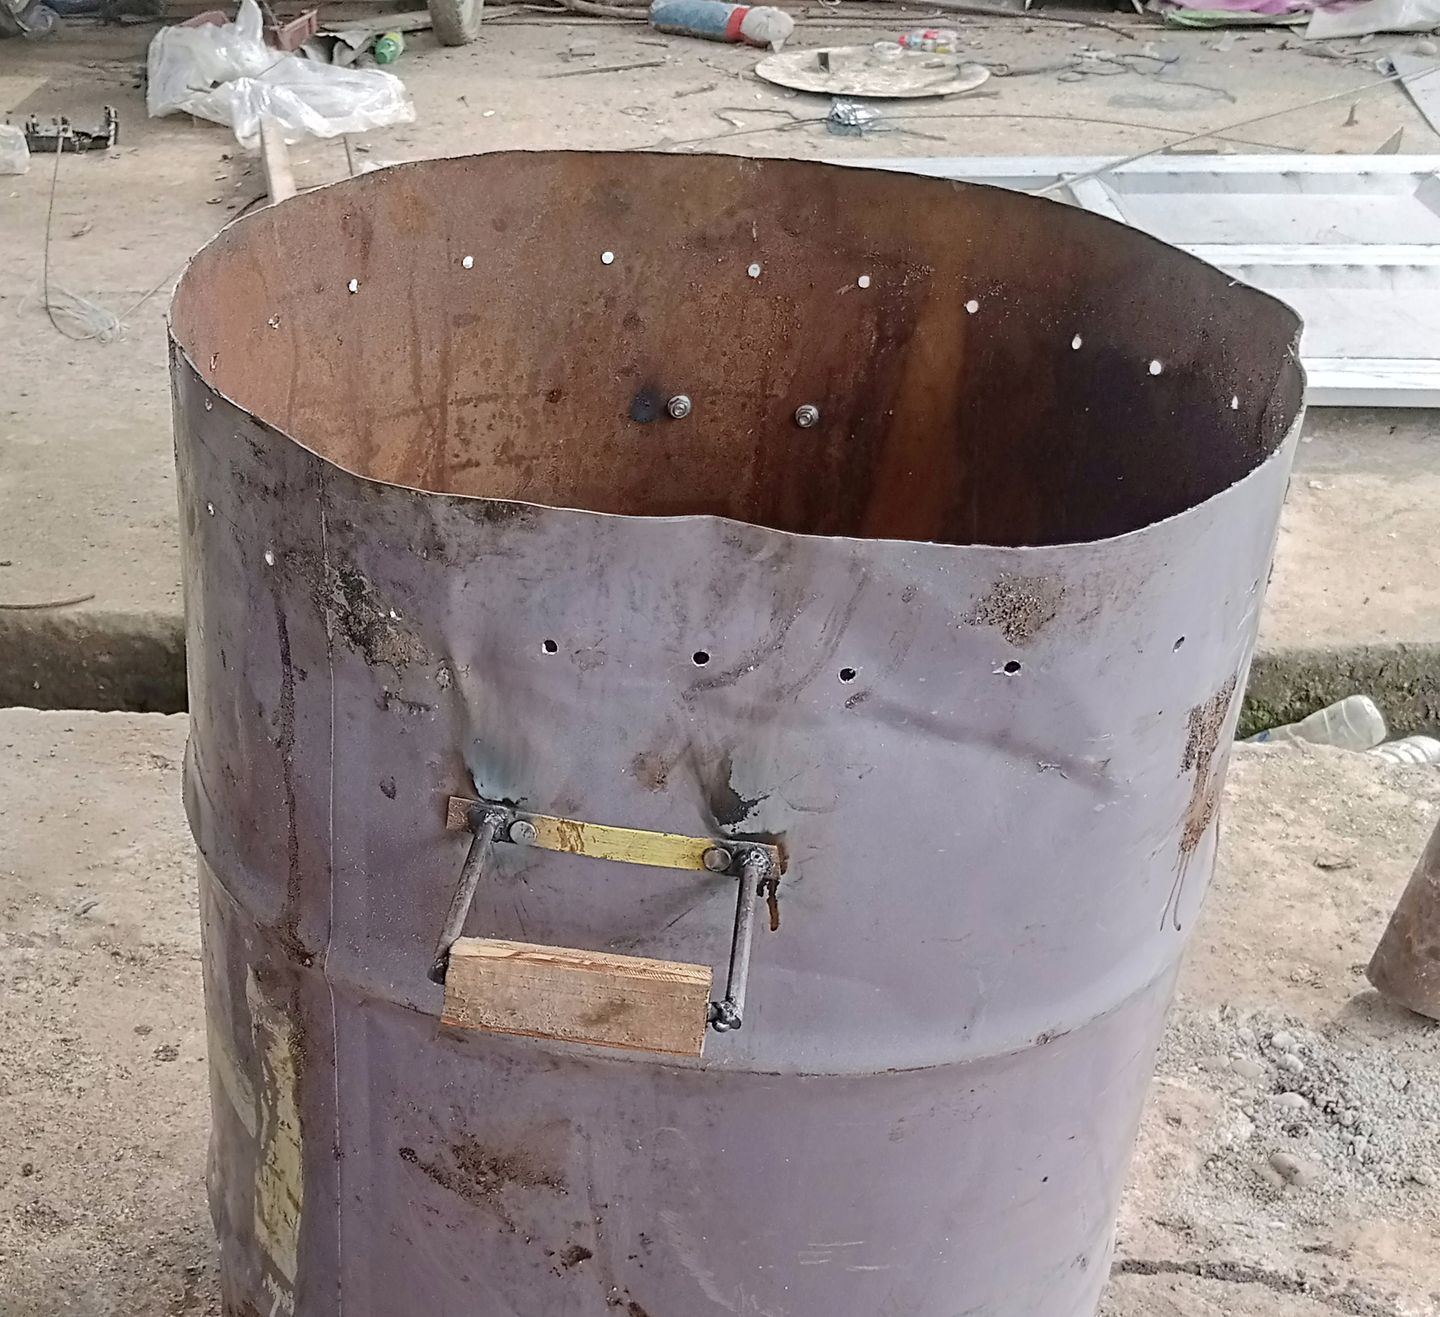
Drill 24 holes, each approximately 20mm in size (similar to the size of your thumbnail), and position them about 40mm below the top of the drum (equivalent to the length of your little finger). You can use a cone drill bit for this task, or you can make the holes with a hammer and a nail.

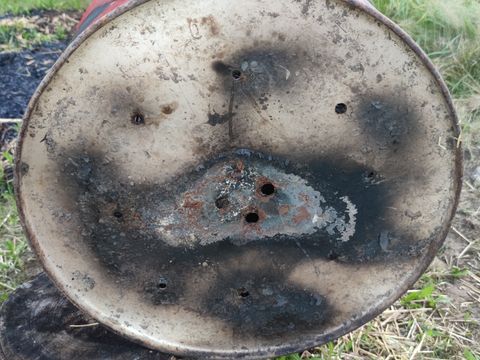
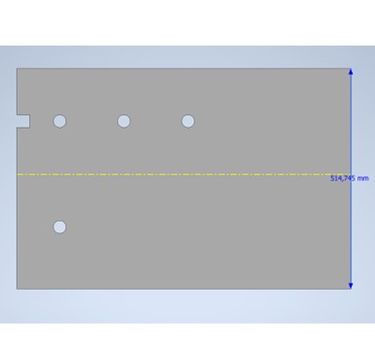
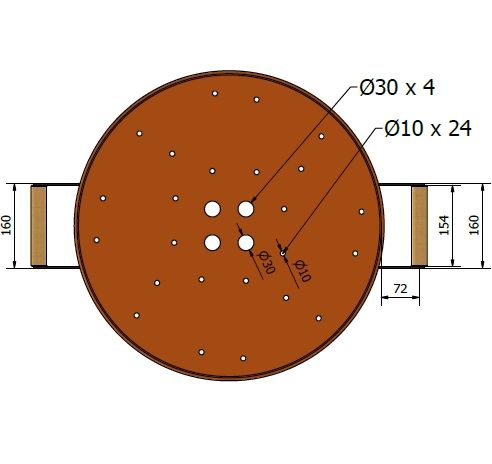
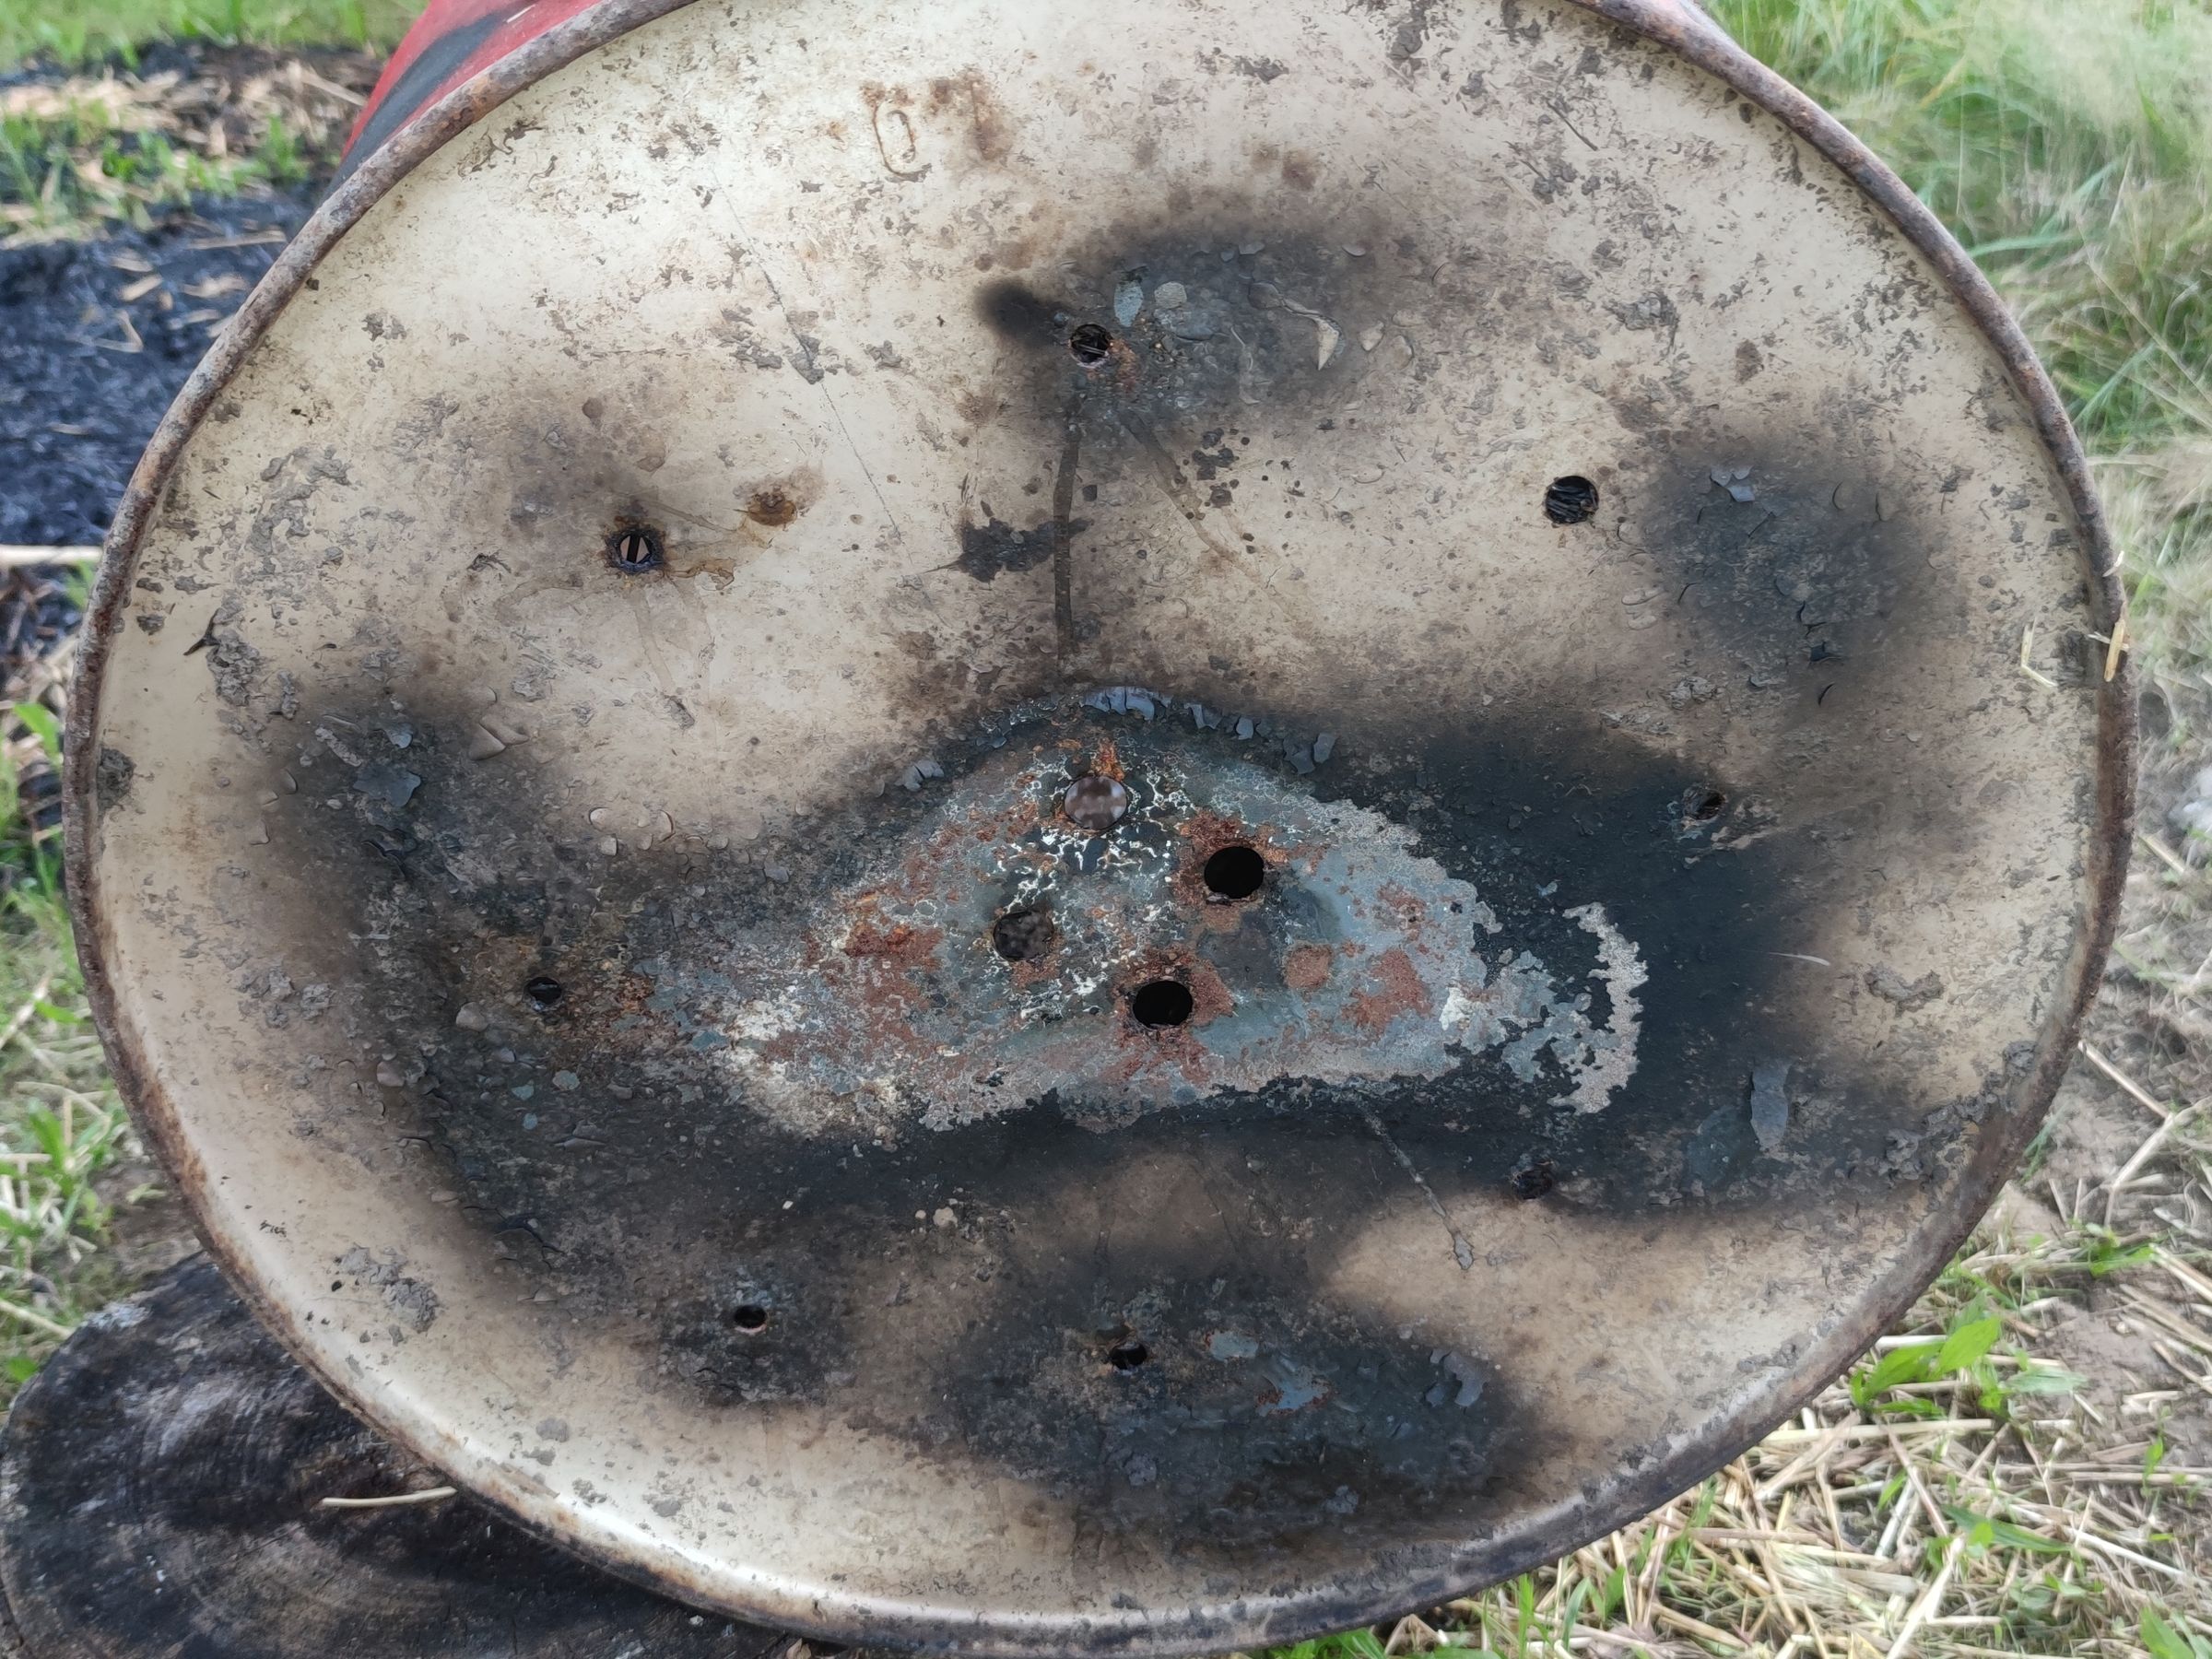
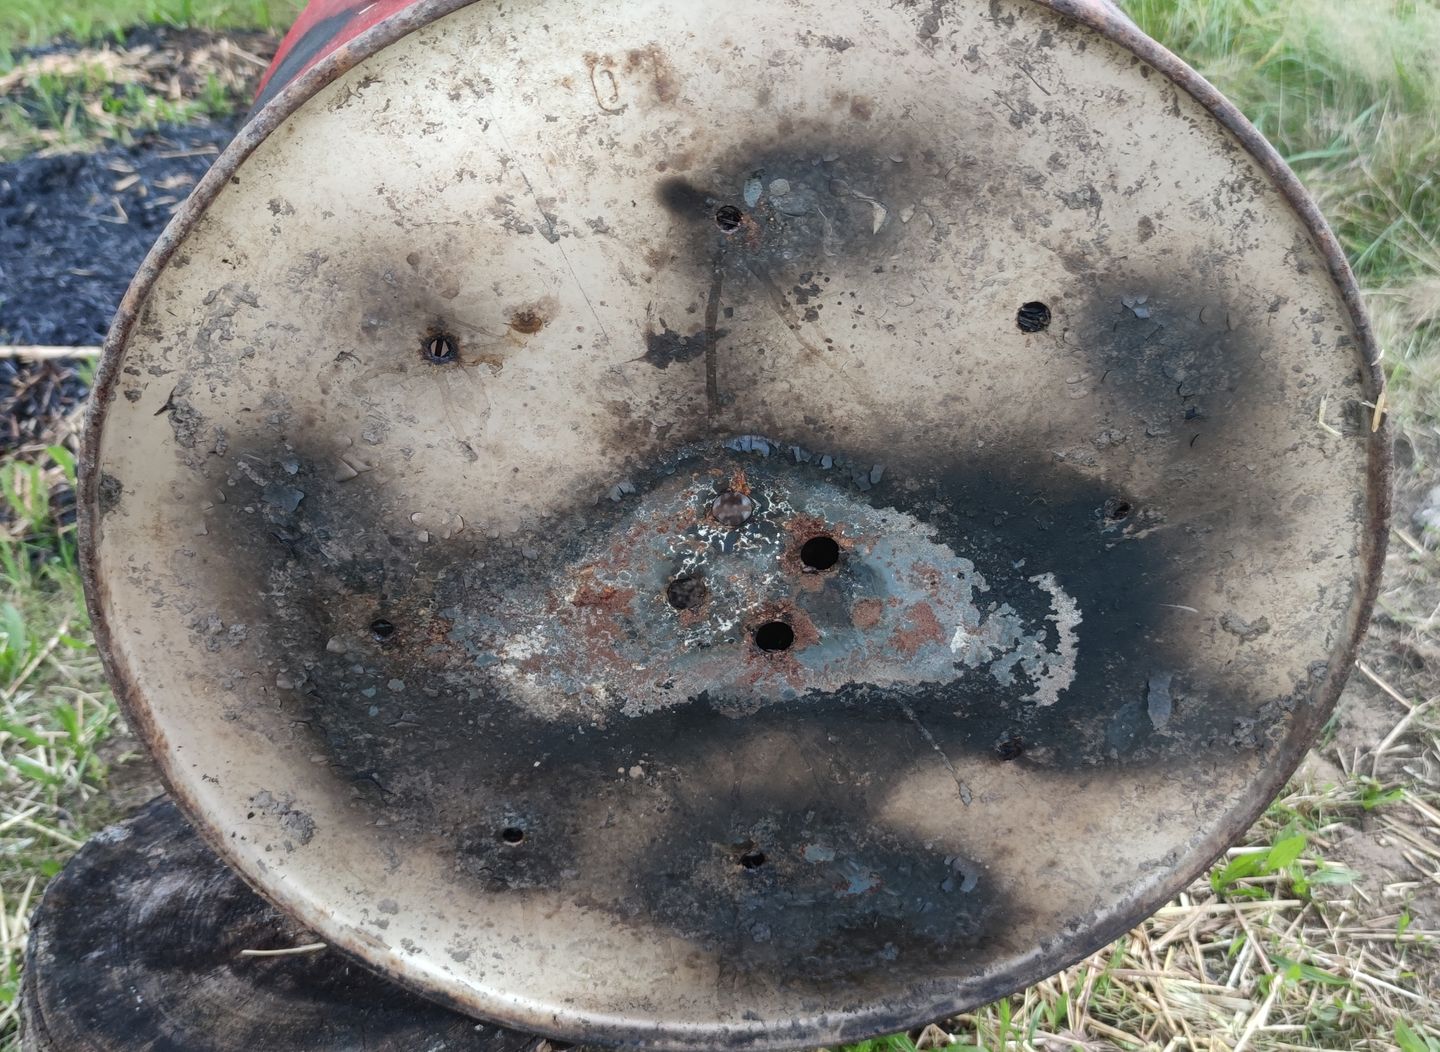
Create four larger holes in the center with approximately 30mm in diameter and around 24 smaller holes with a 10mm diameter. You can use a cone drill bit for this step, or simply make the holes using a hammer and a nail.

If you do not have proper handles, you can also take chunks of wood.


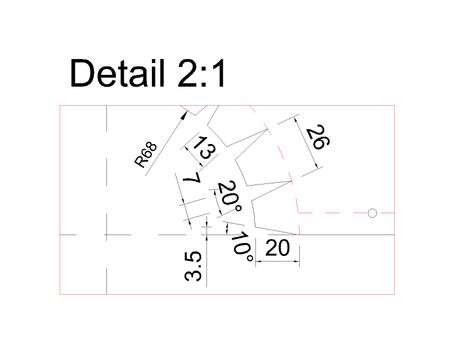
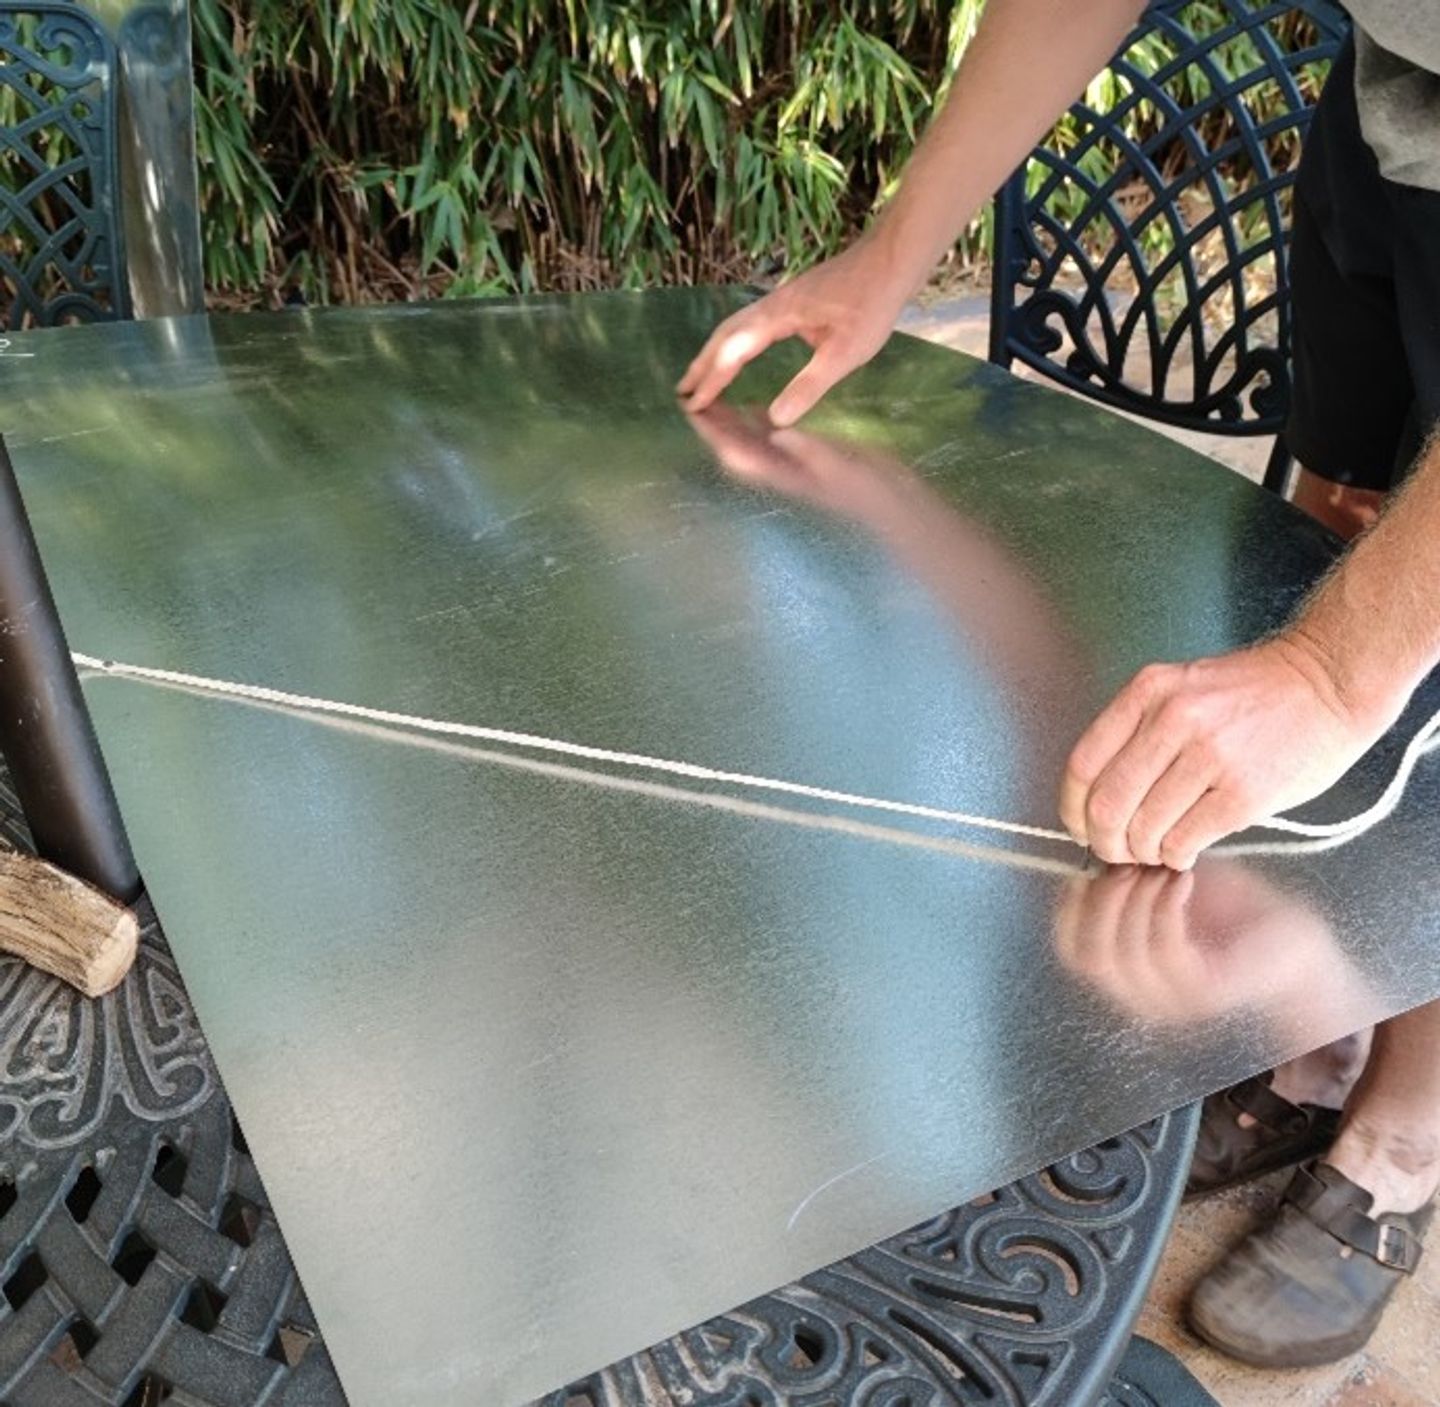
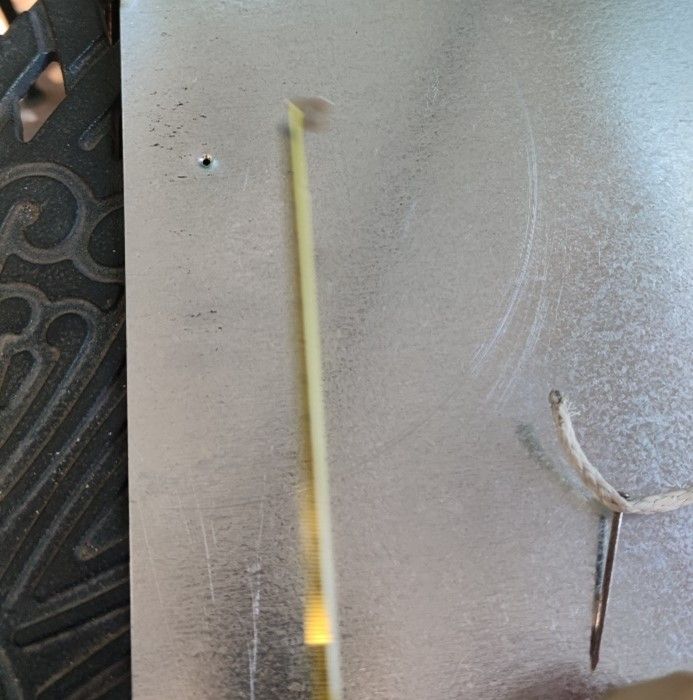
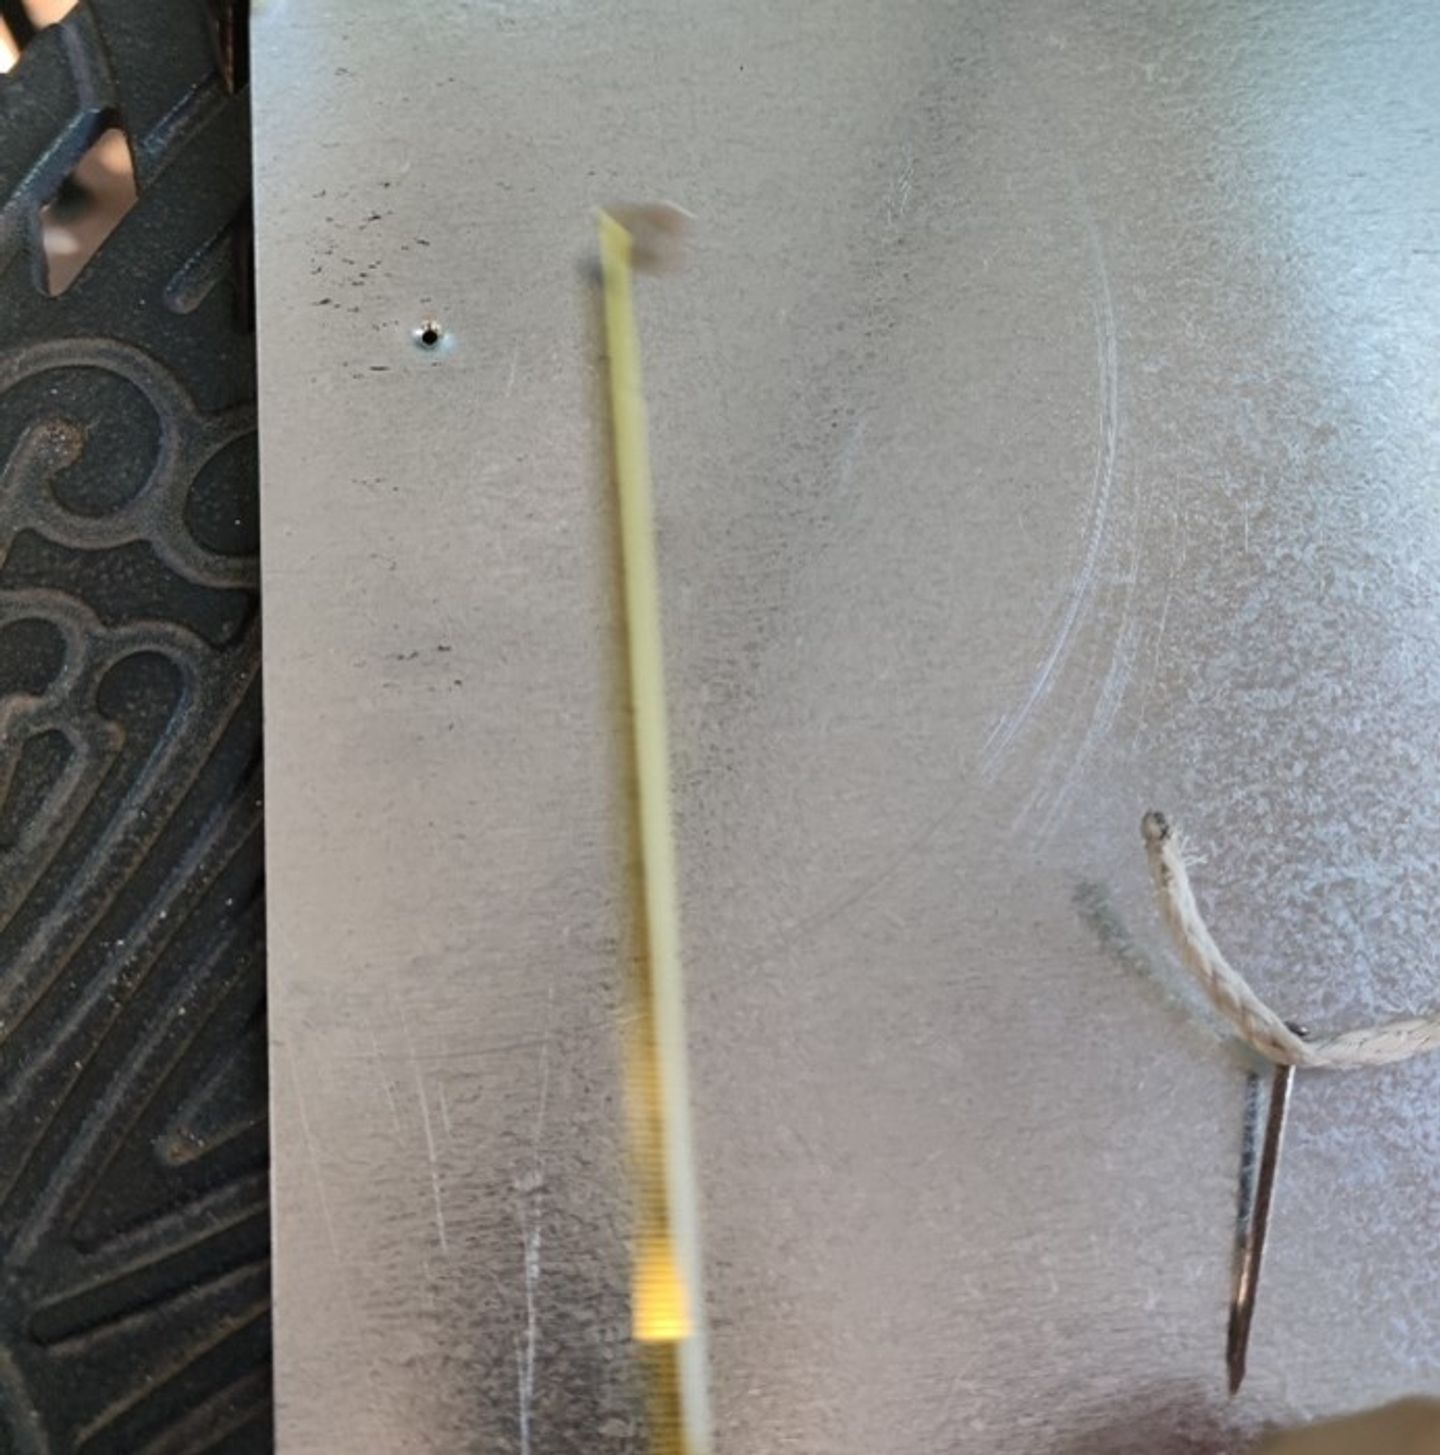
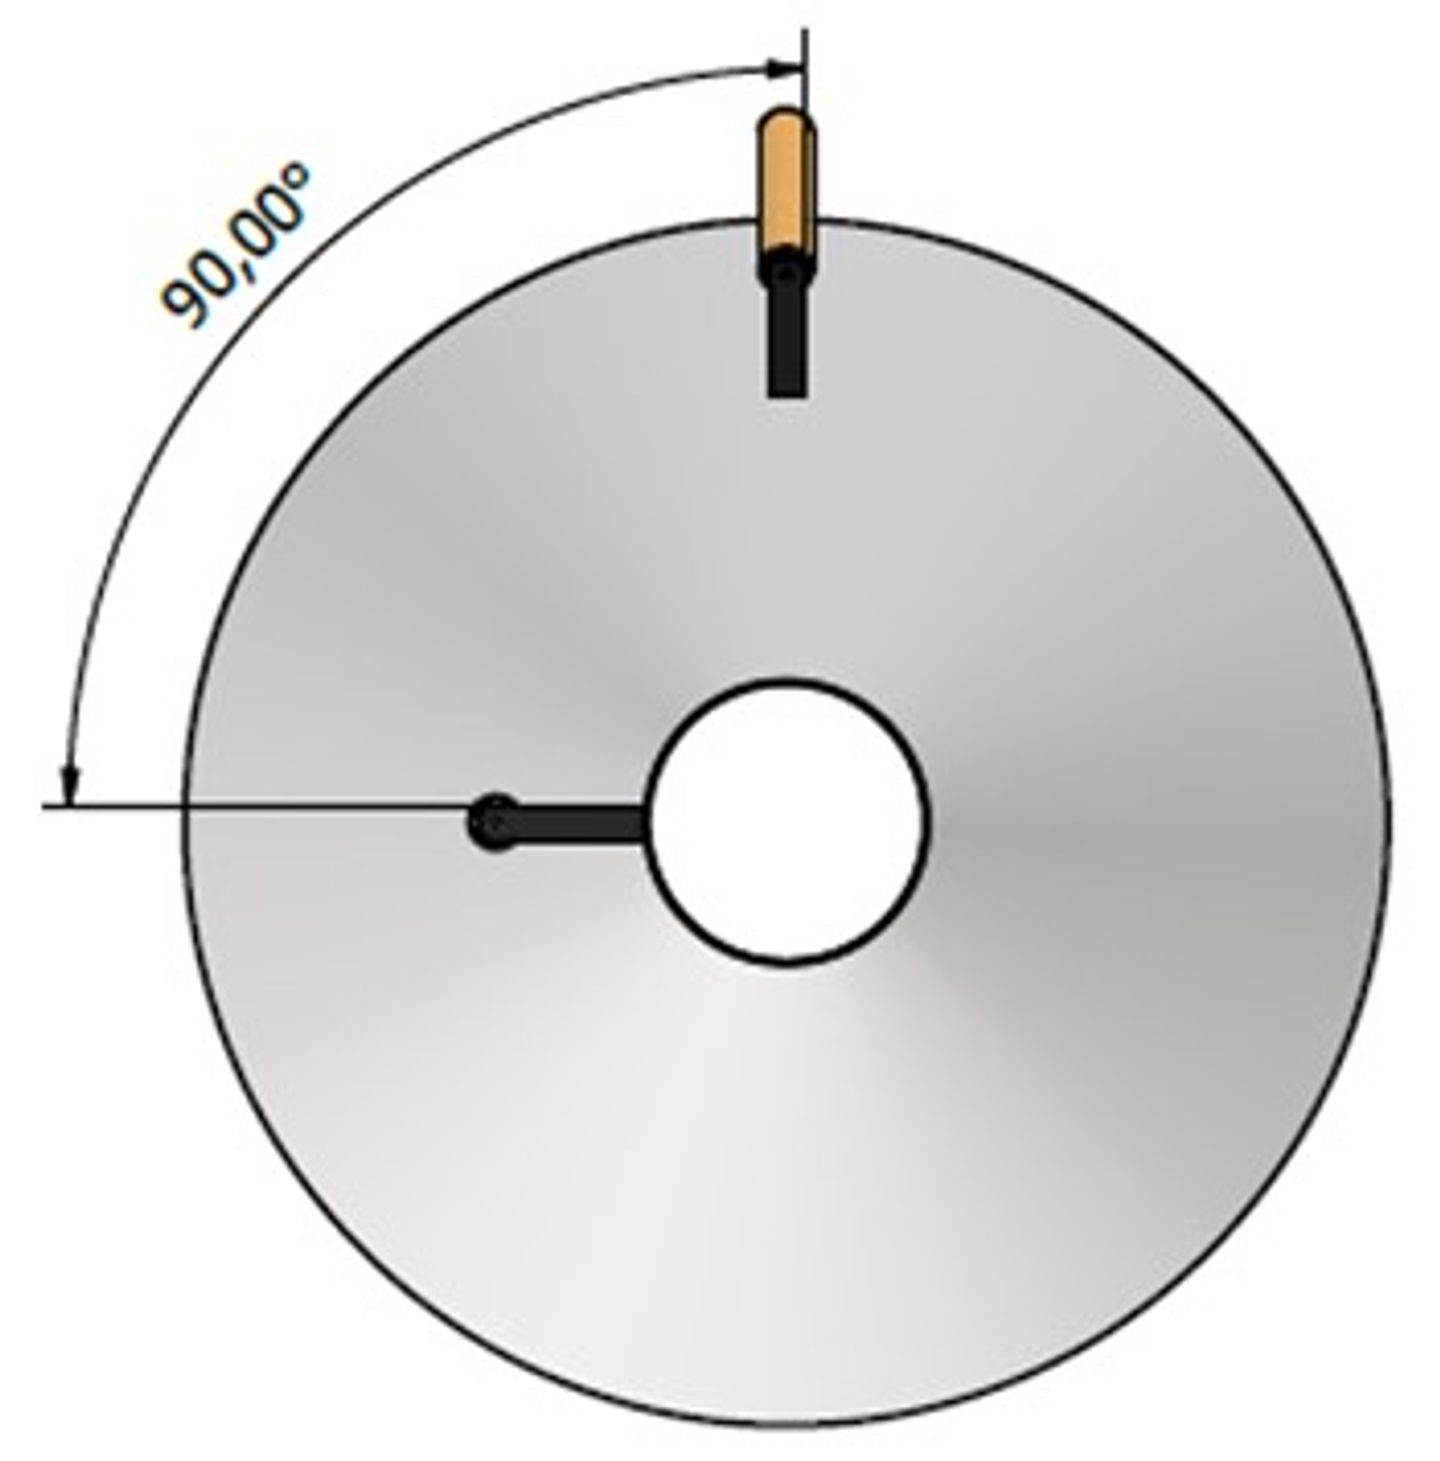
To ensure the chimney has the right size, it should be slightly larger than the 200-liter metal drum, with some overlap. To mark the half circles on the metal sheets, use a string with a length equal to the radius of your drum’s diameter. Secure one end of the string with a nail at the top of the metal sheet and tie another nail to the other end. You can then scratch the metal with this nail to mark the circle. In our example, the outer radius is 35cm and the inner radius is 8,5cm.
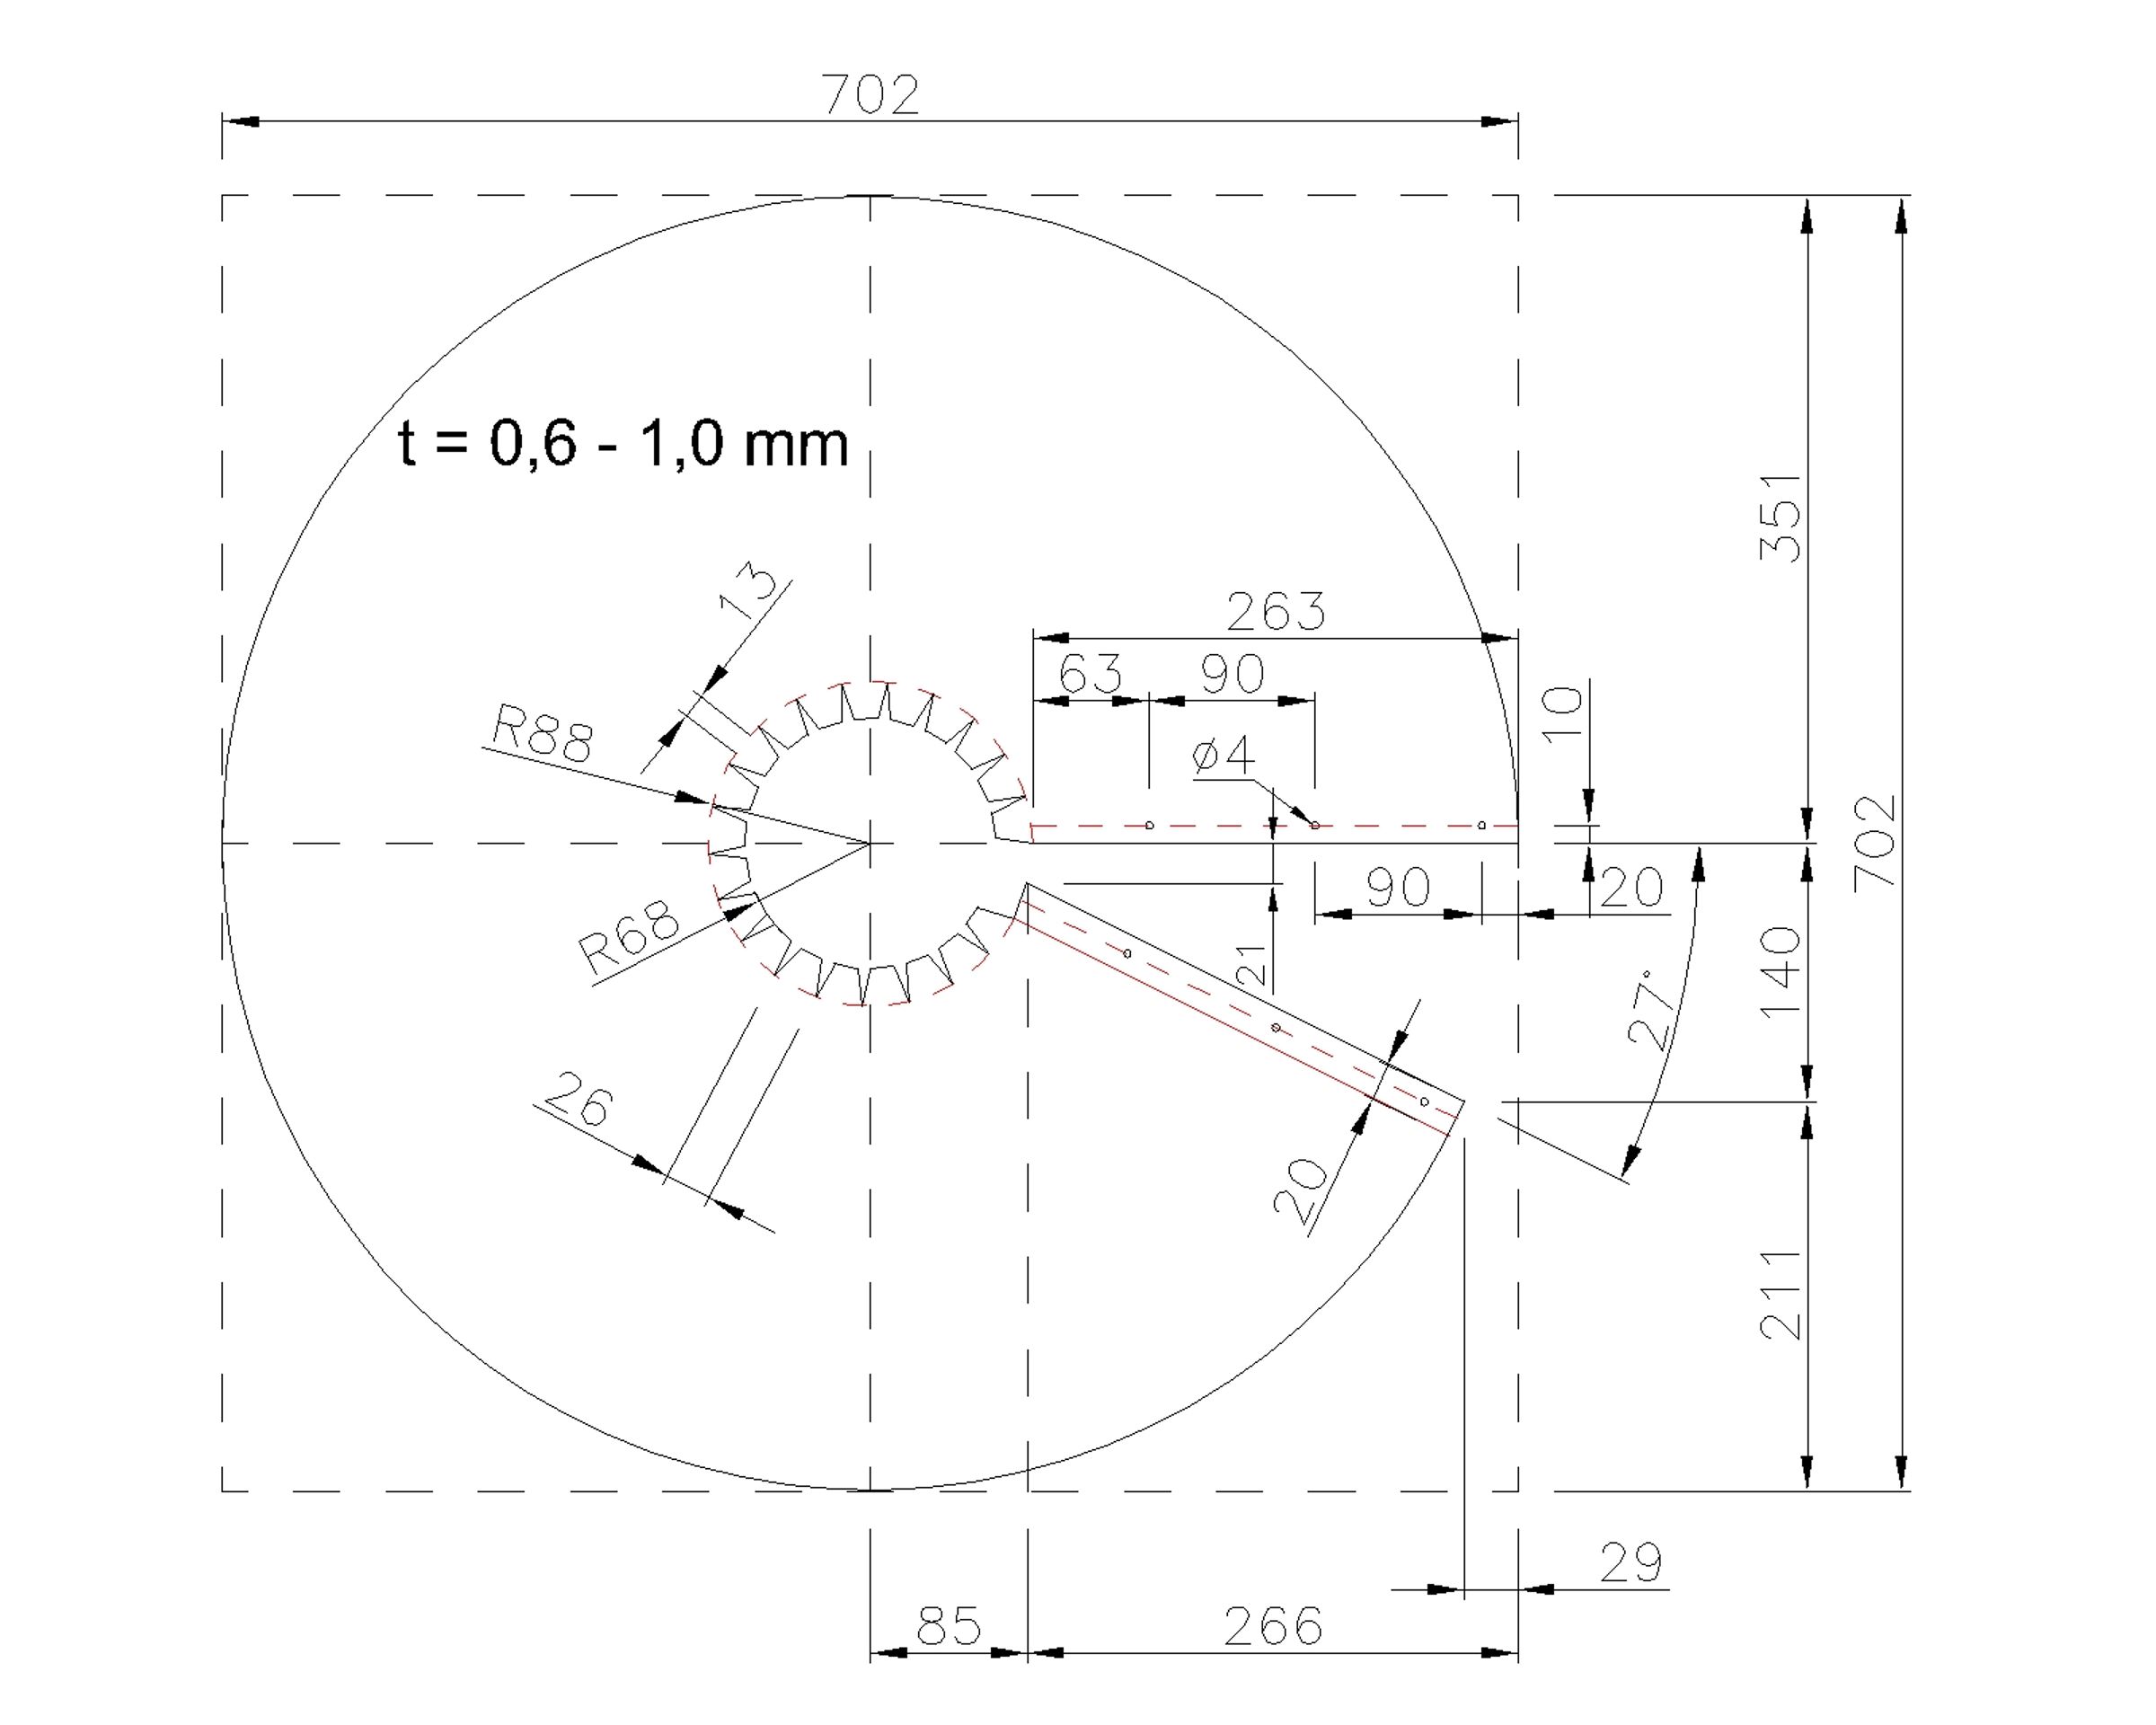
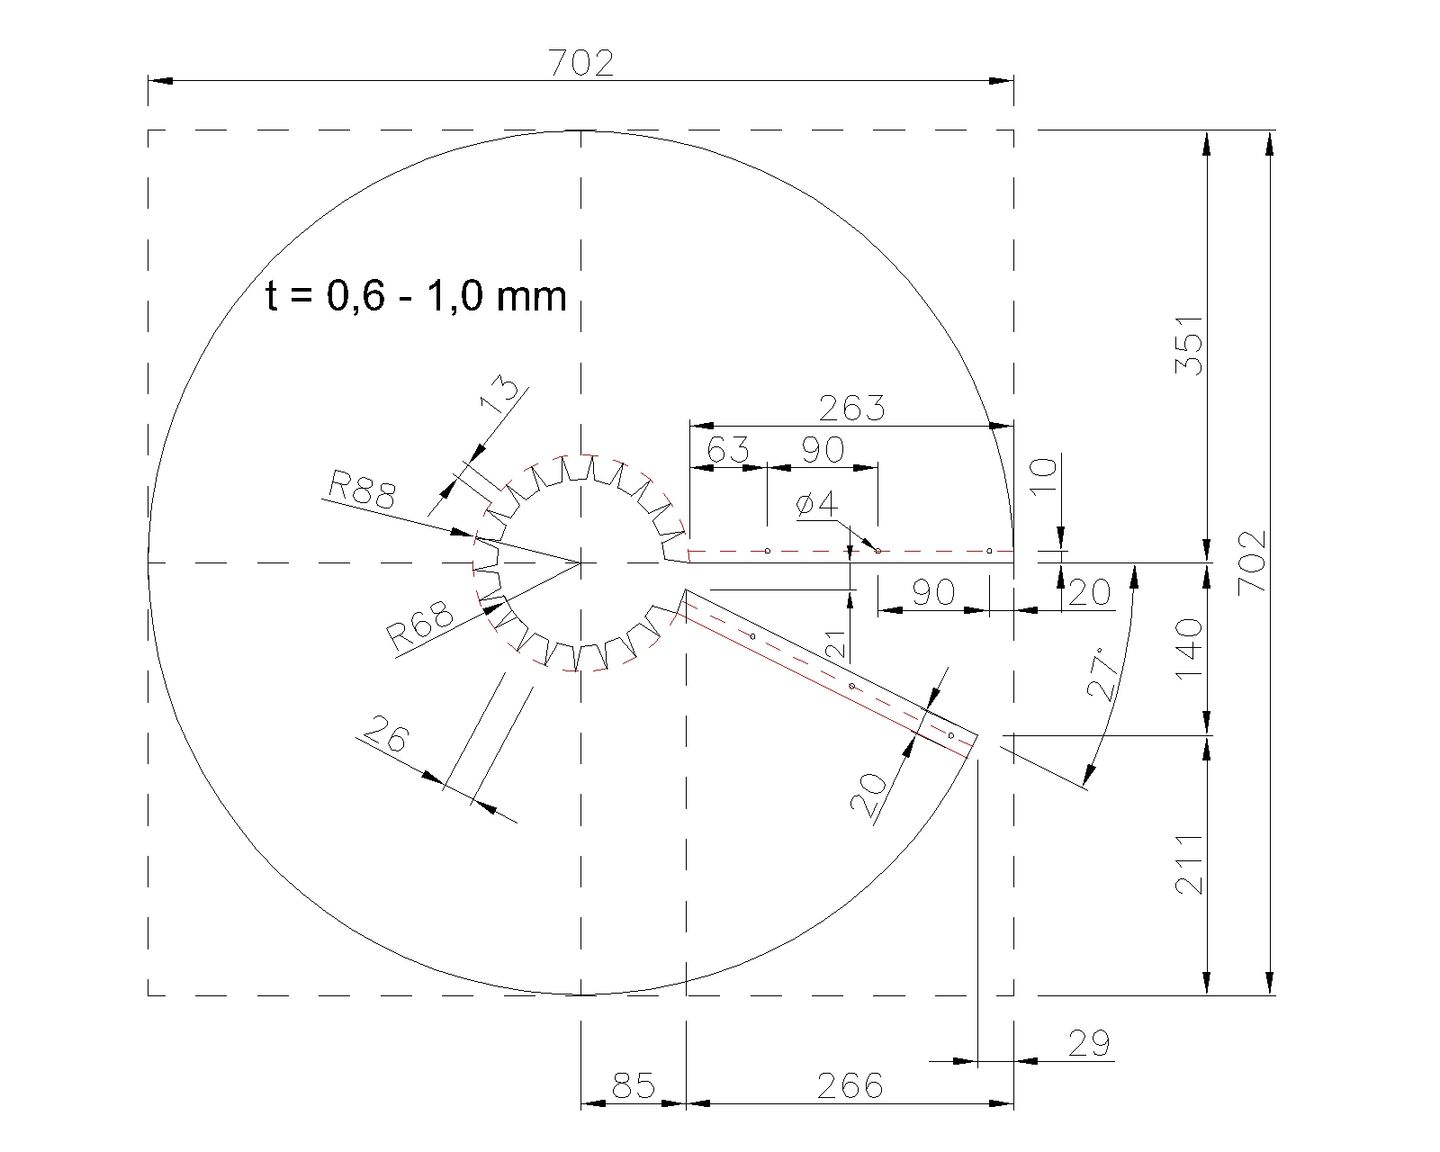
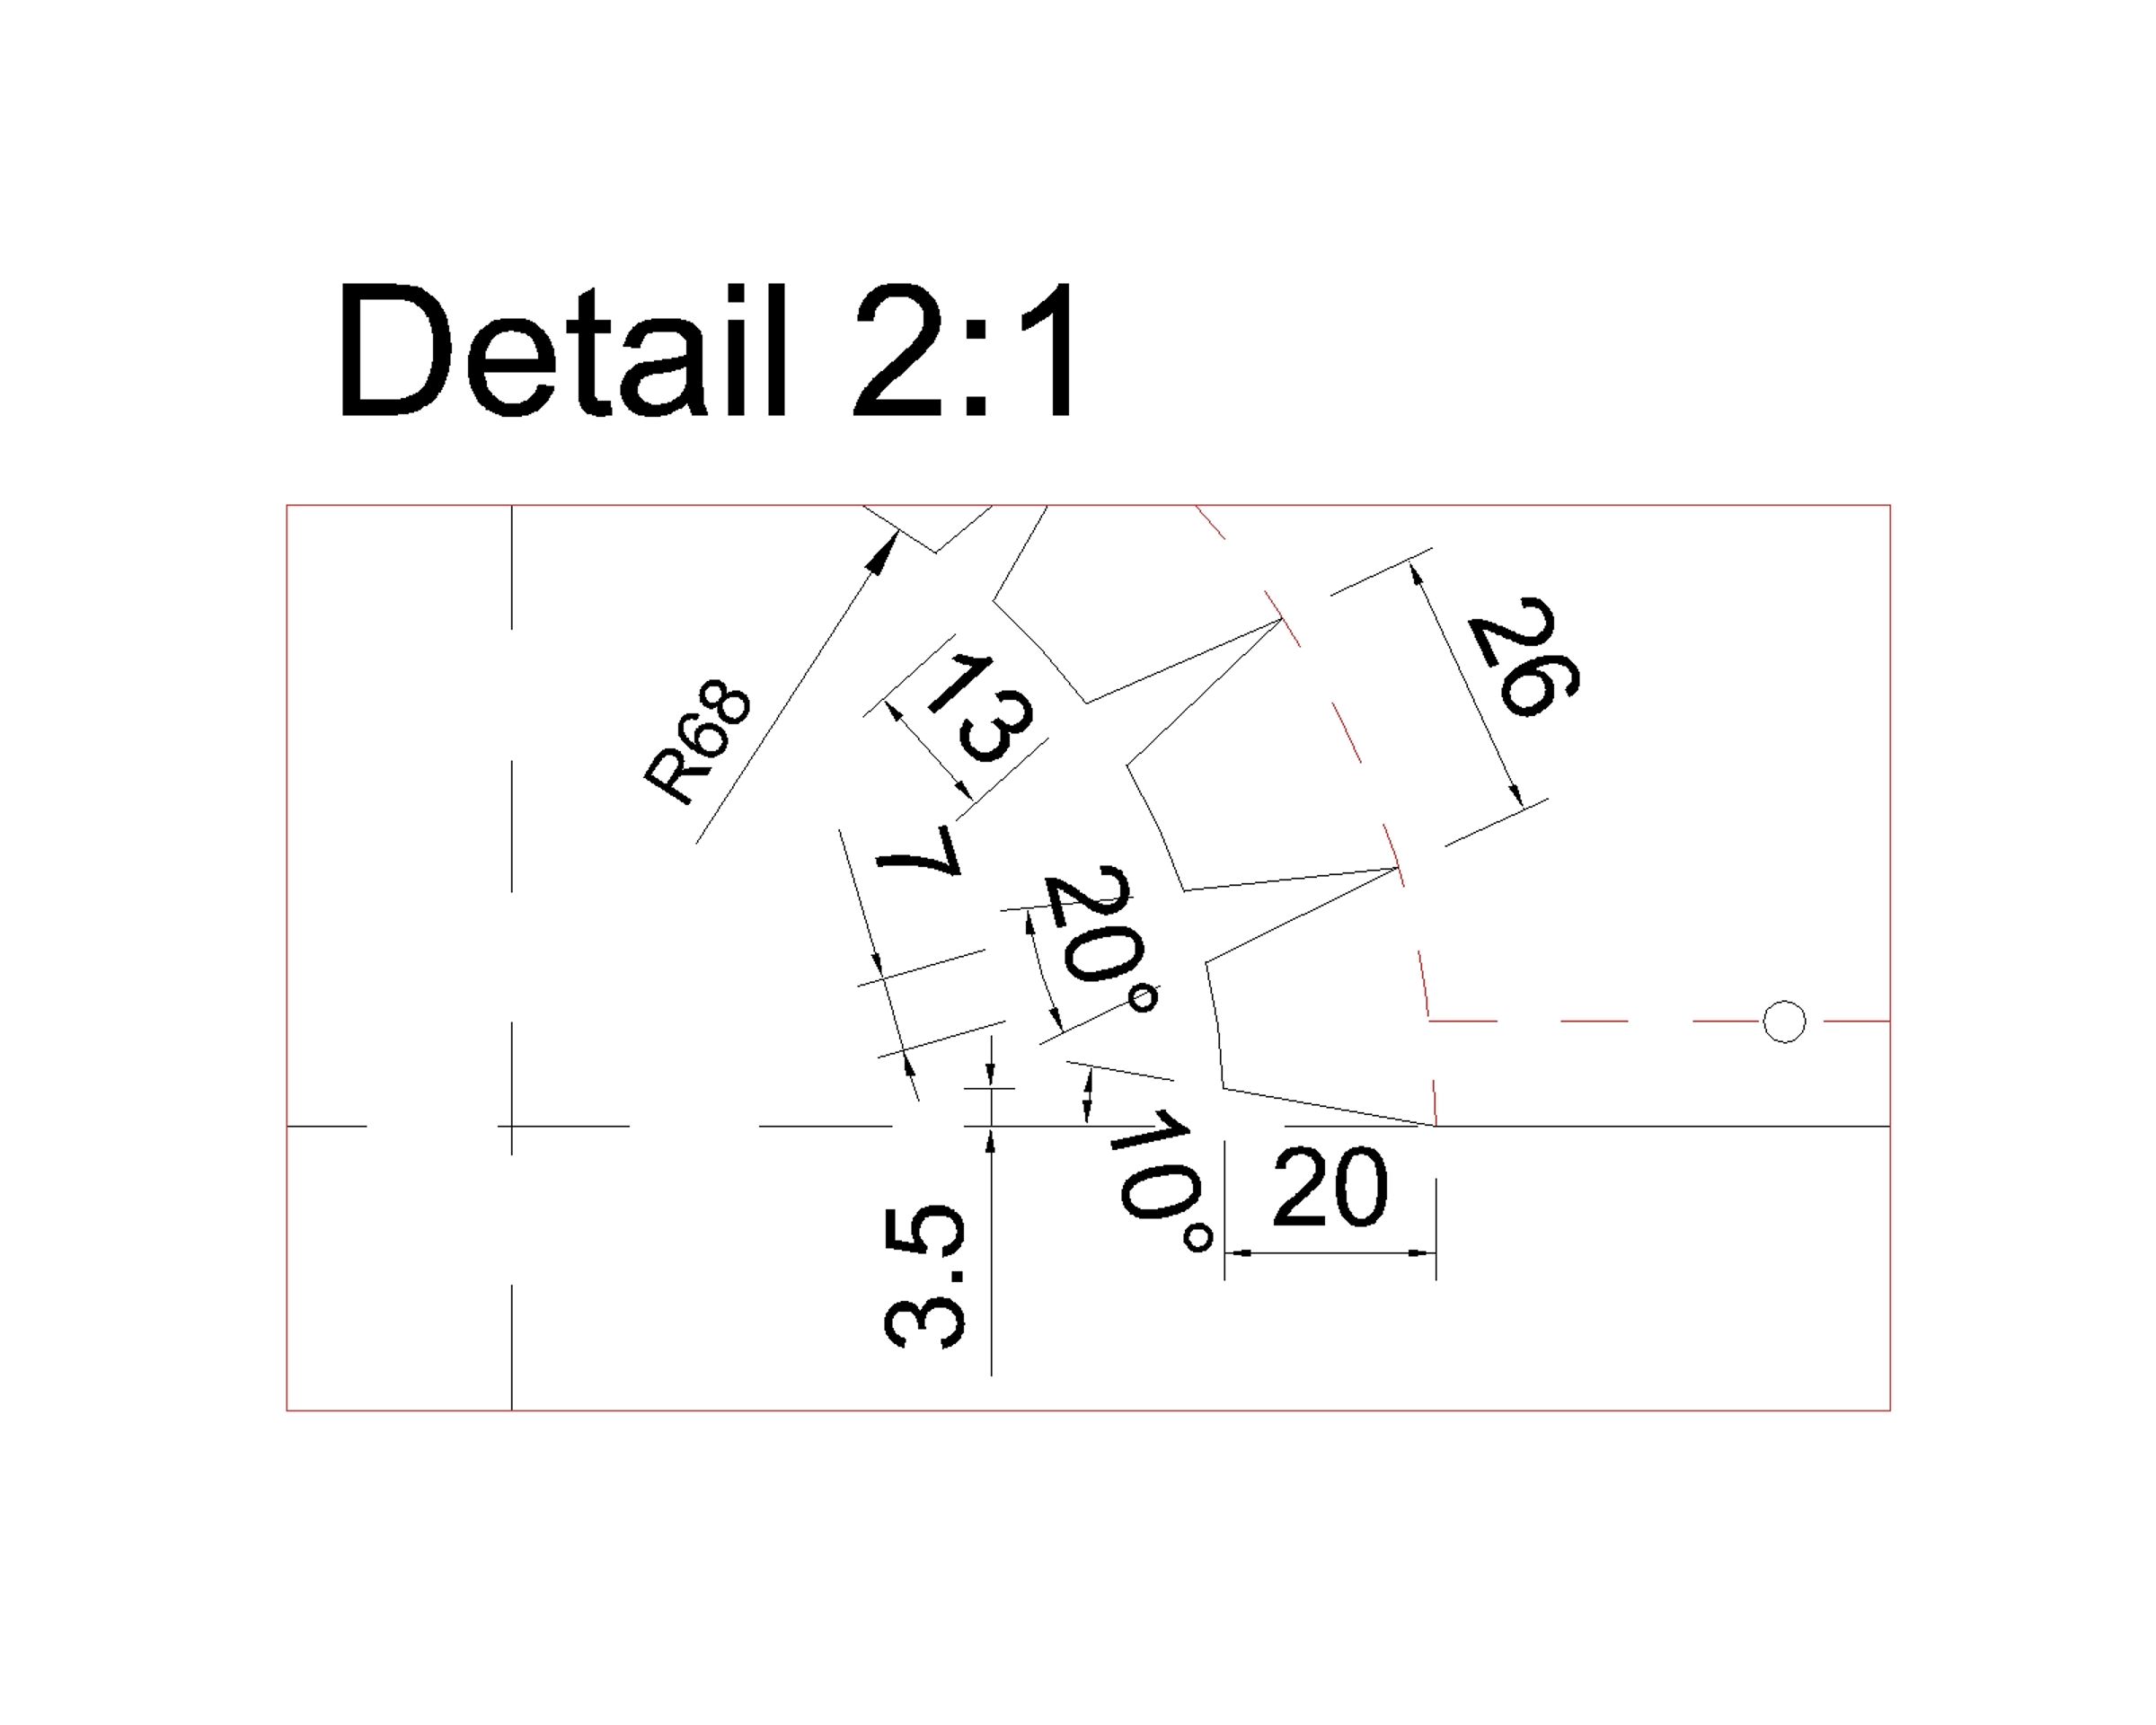
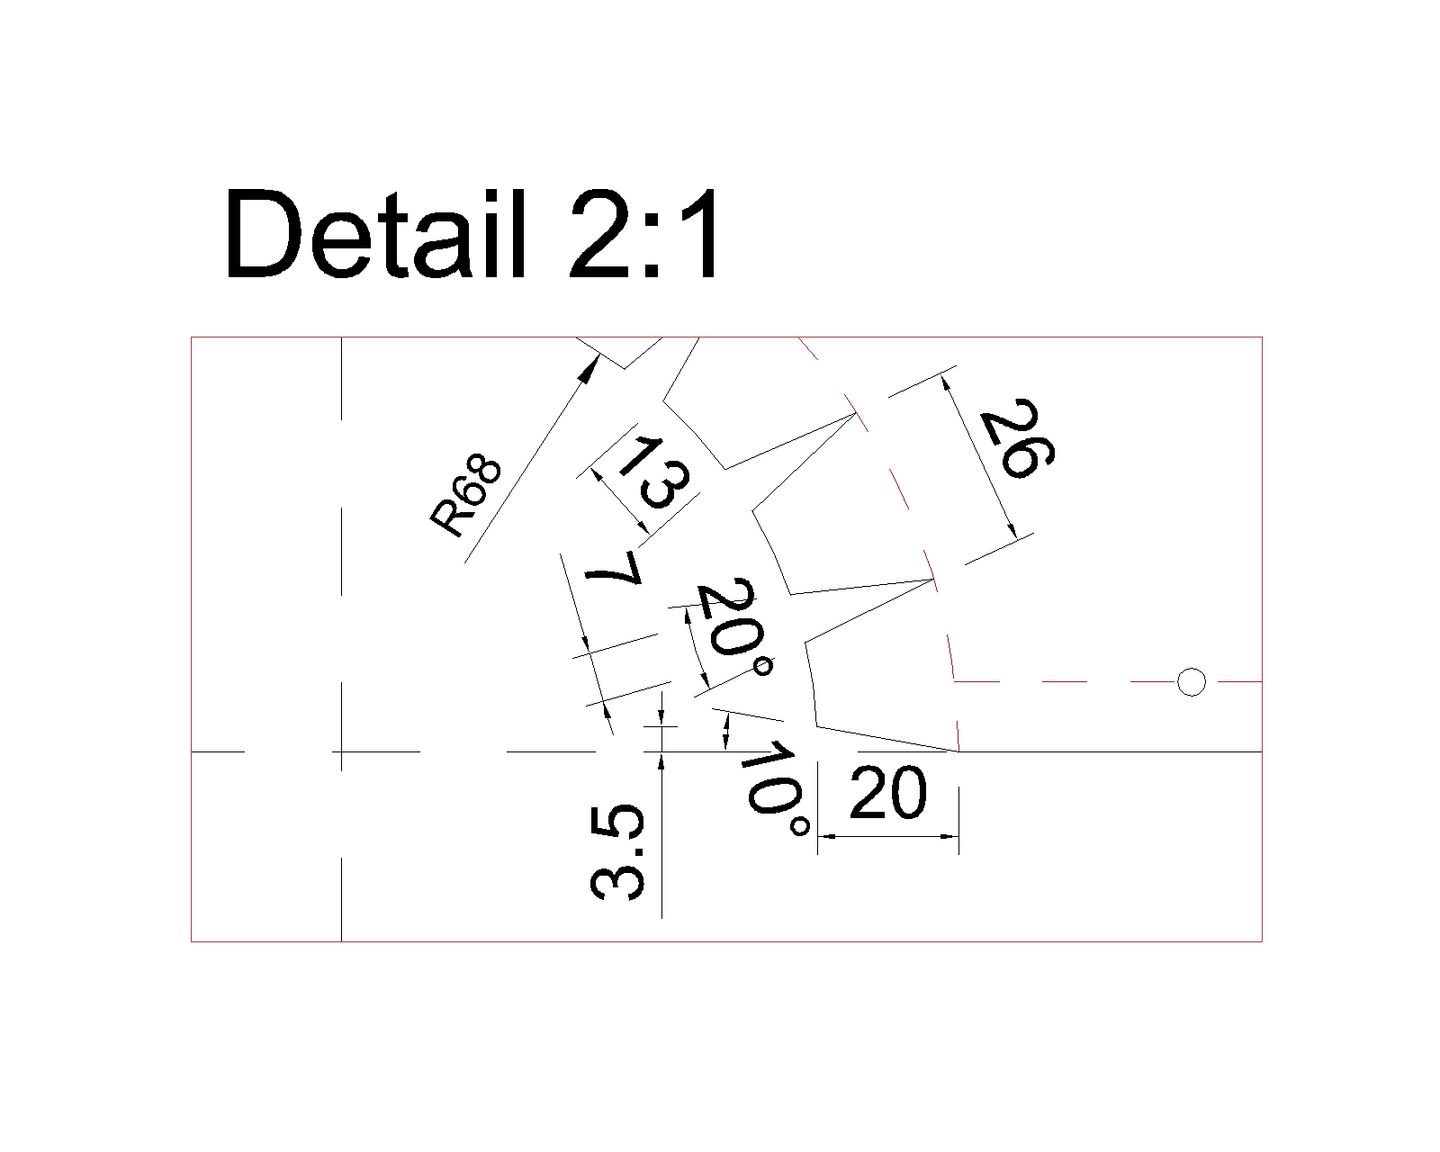


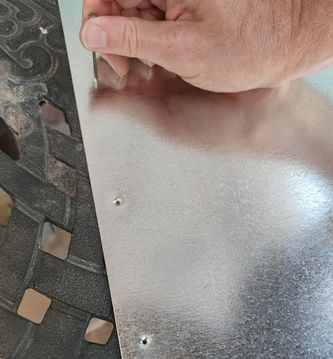
Make holes in the edge along the long side of the metal sheet. The holes should be 9 cm apart from each other and have to symmetrical. If you later fold the sheet into a cone, the holes must be on top of each other. Use a hammer and a nail to make the holes or drill them.


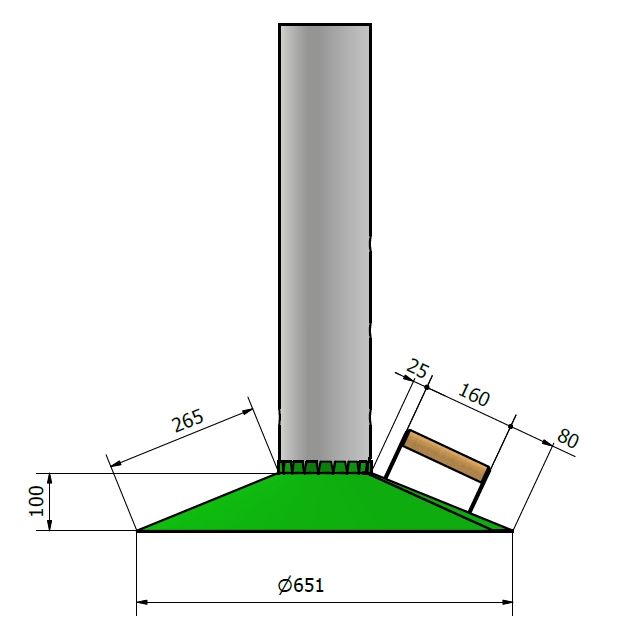


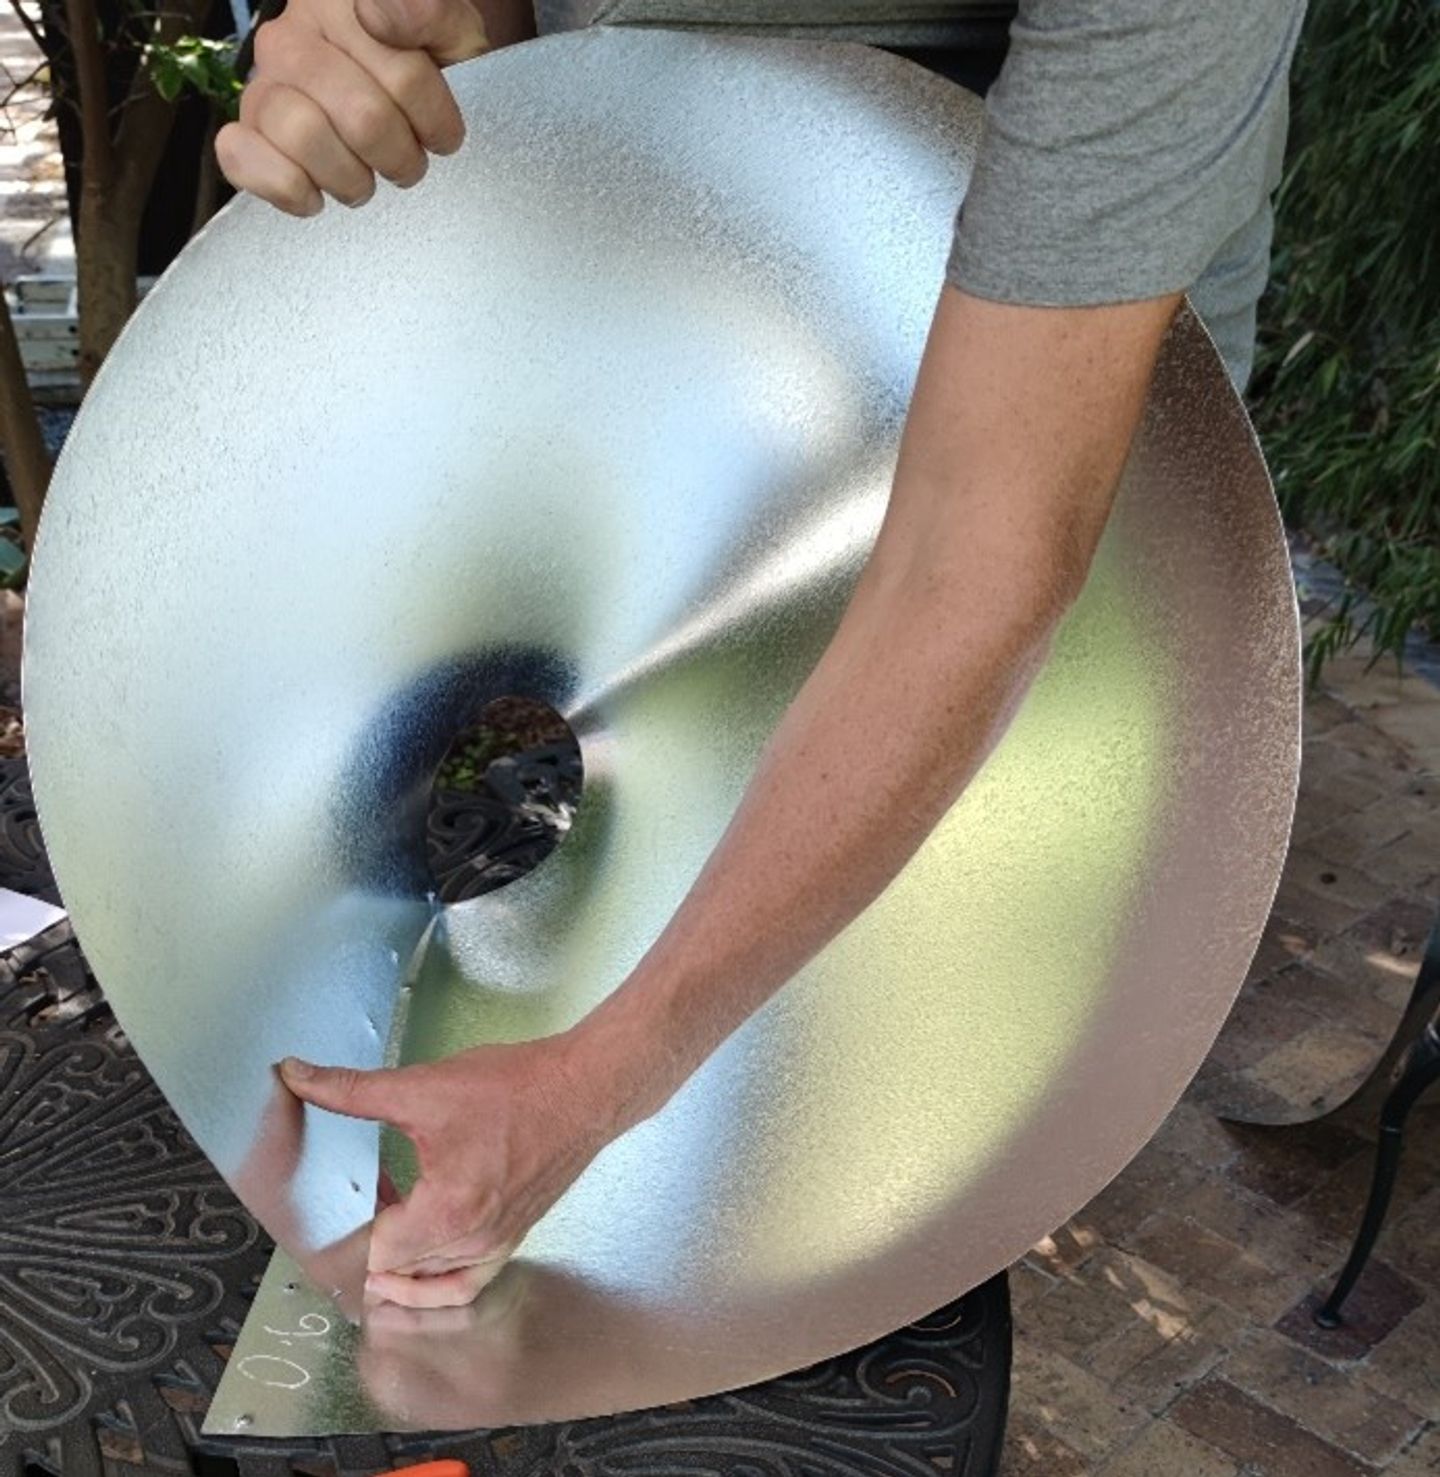
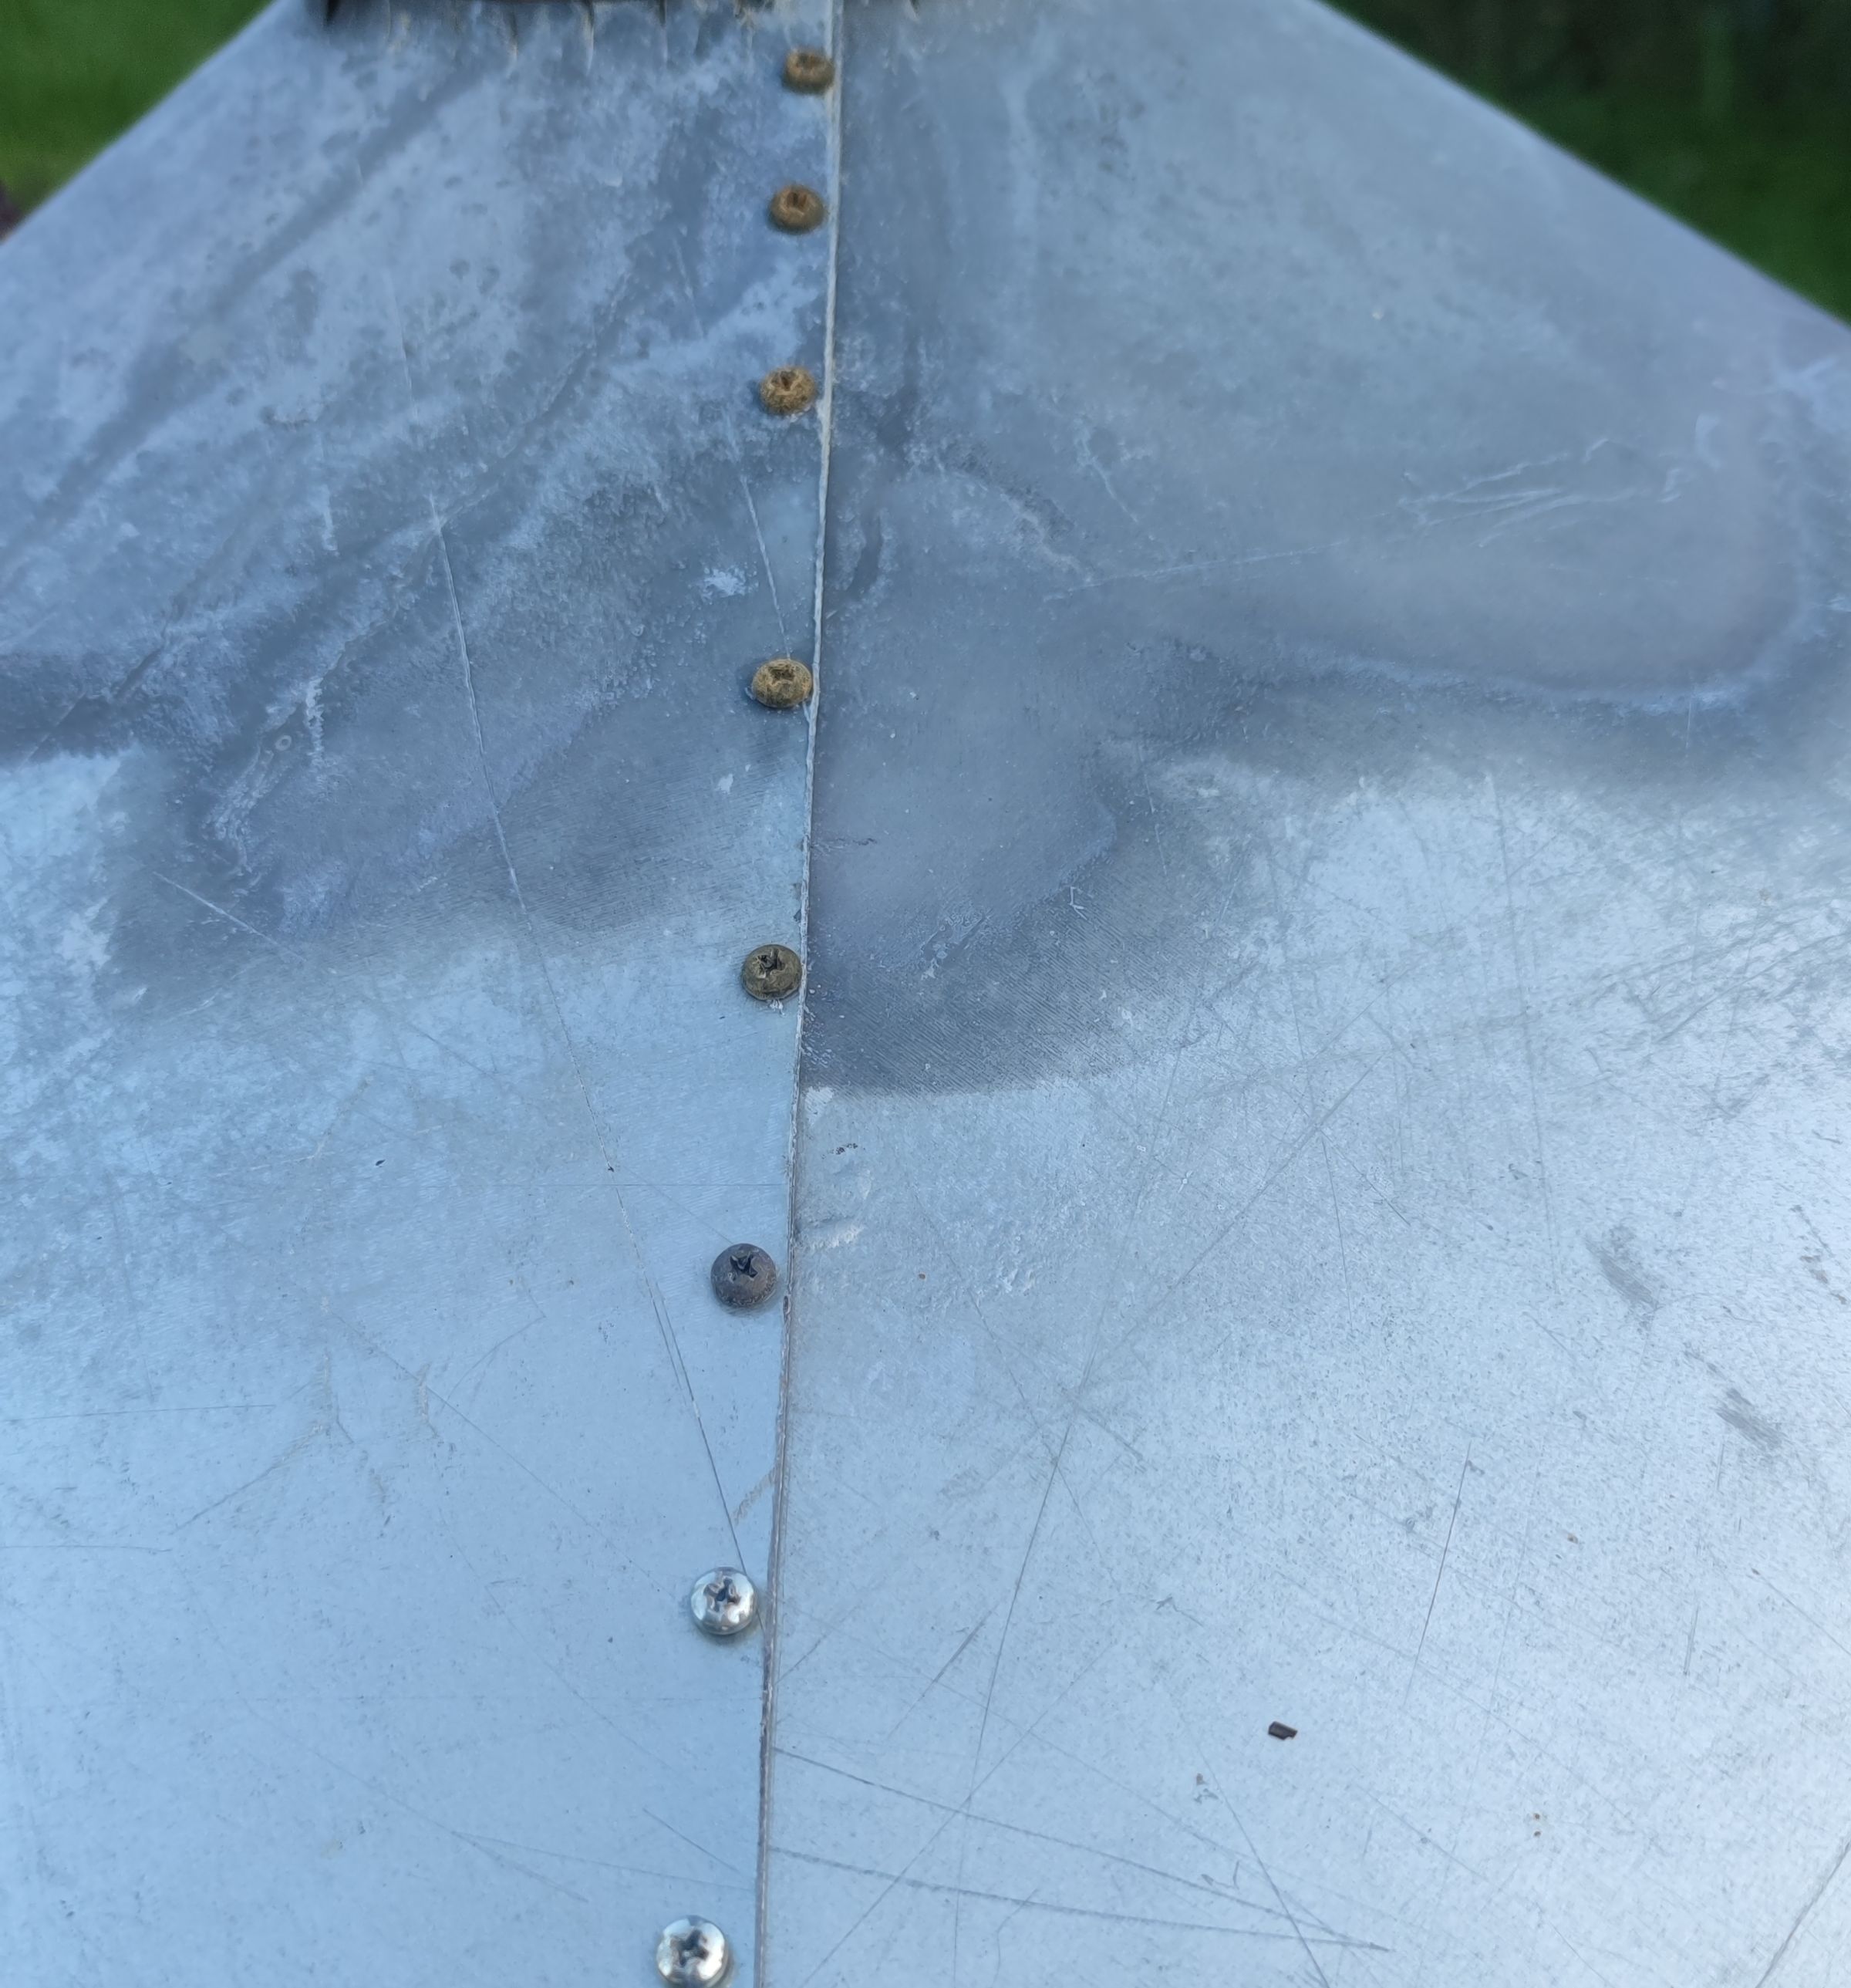

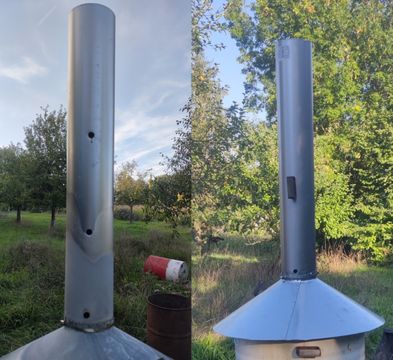
If you followed the measurements, the cone should be 10 cm high and the diameter should be 16 cm at the top and 65 cm at the bottom. Fix the cone with 3 screws.
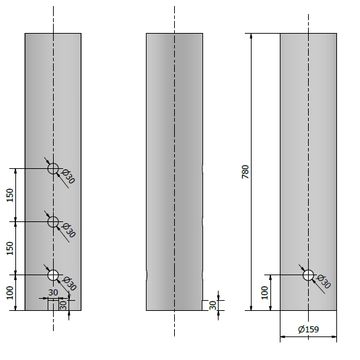
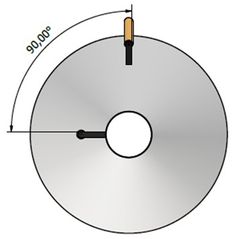
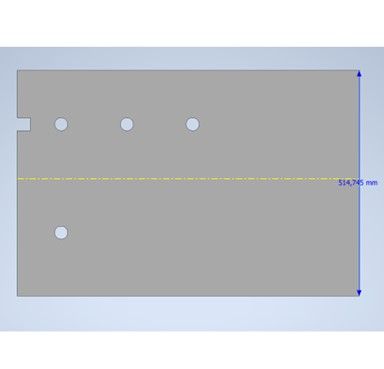
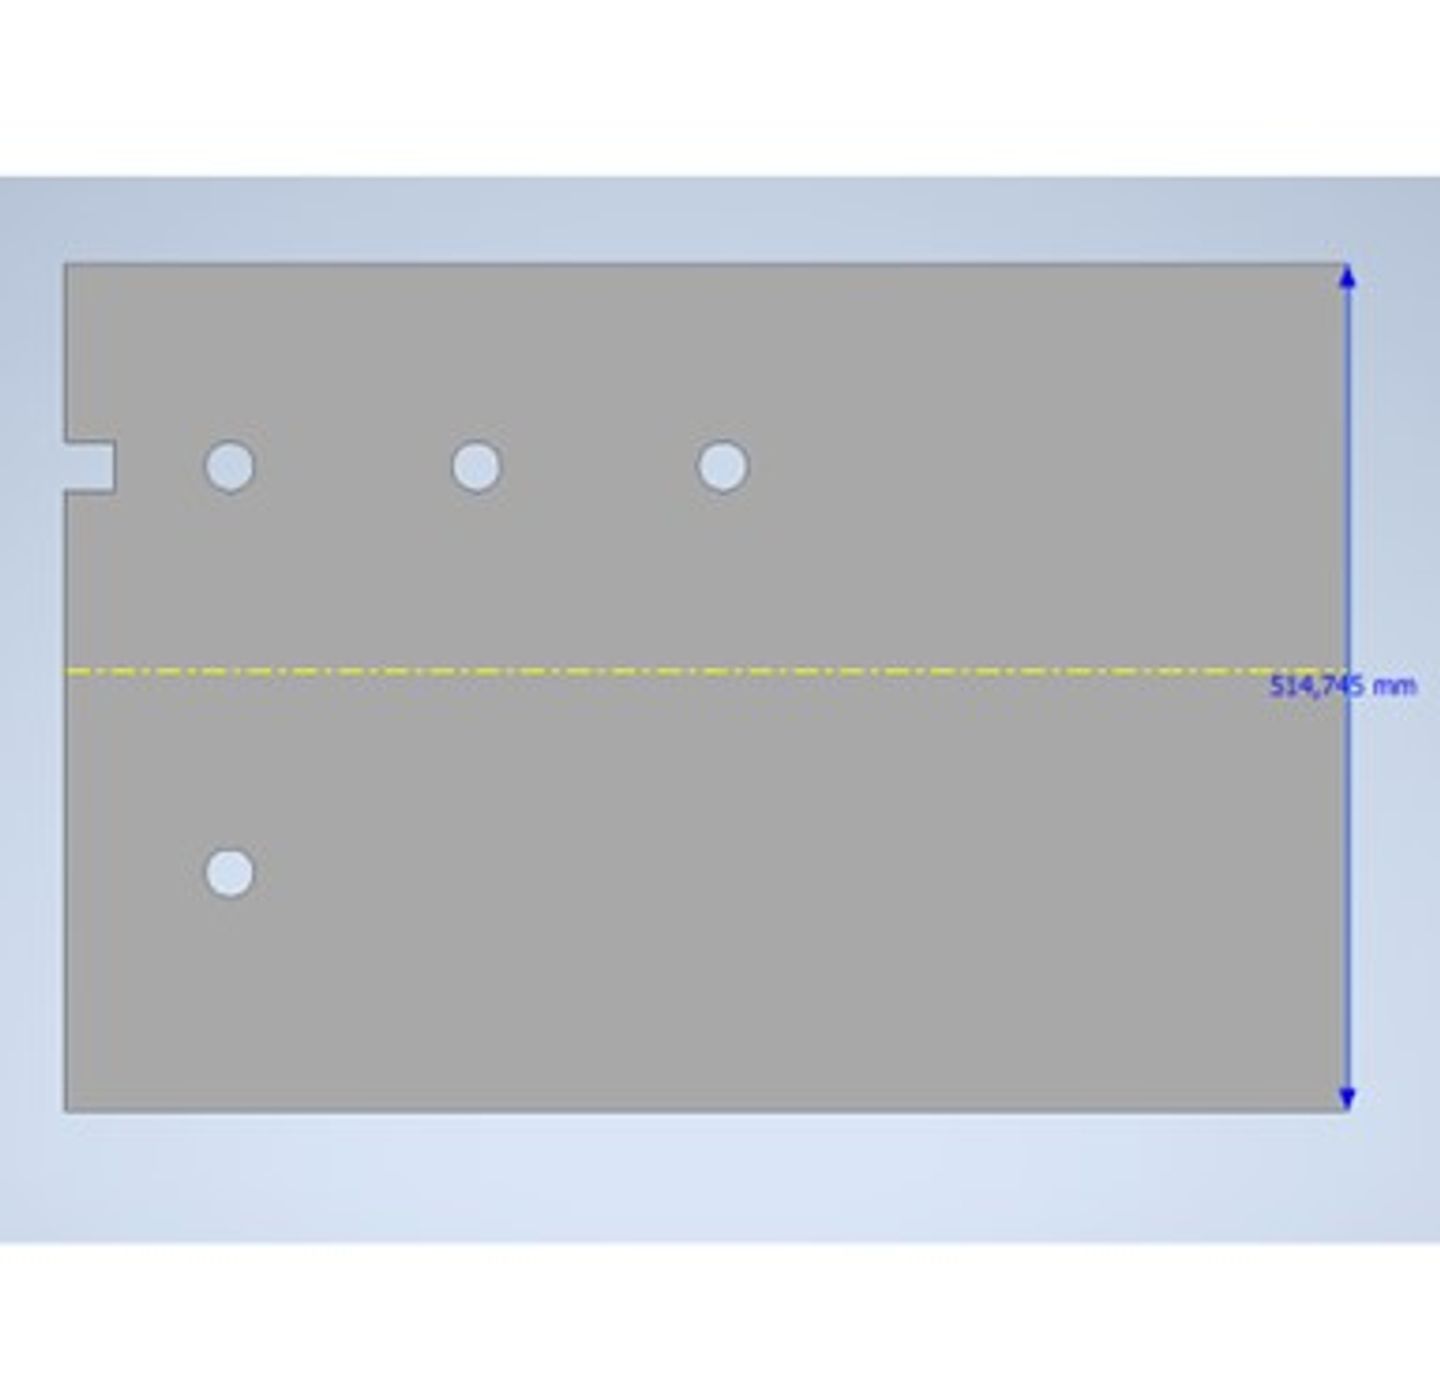
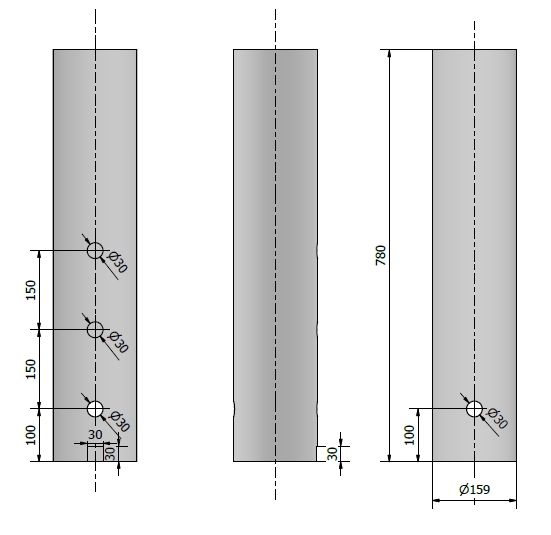
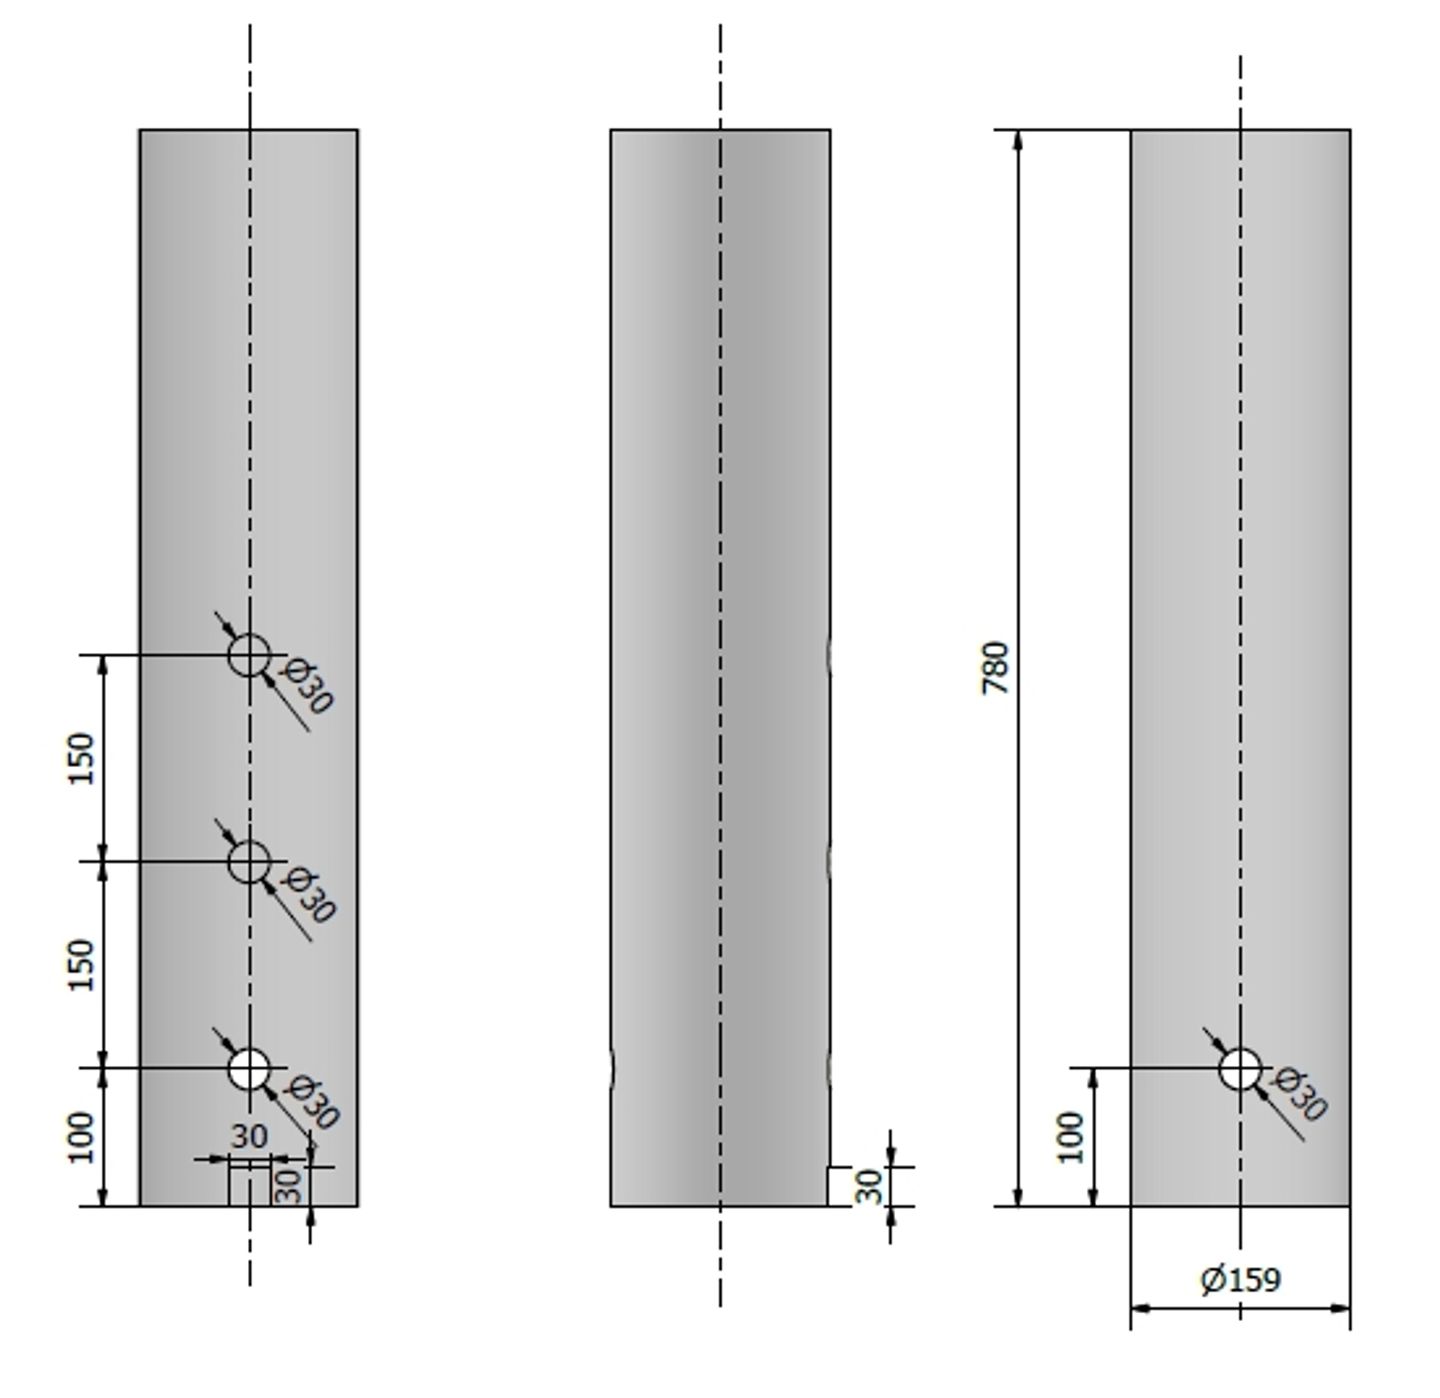
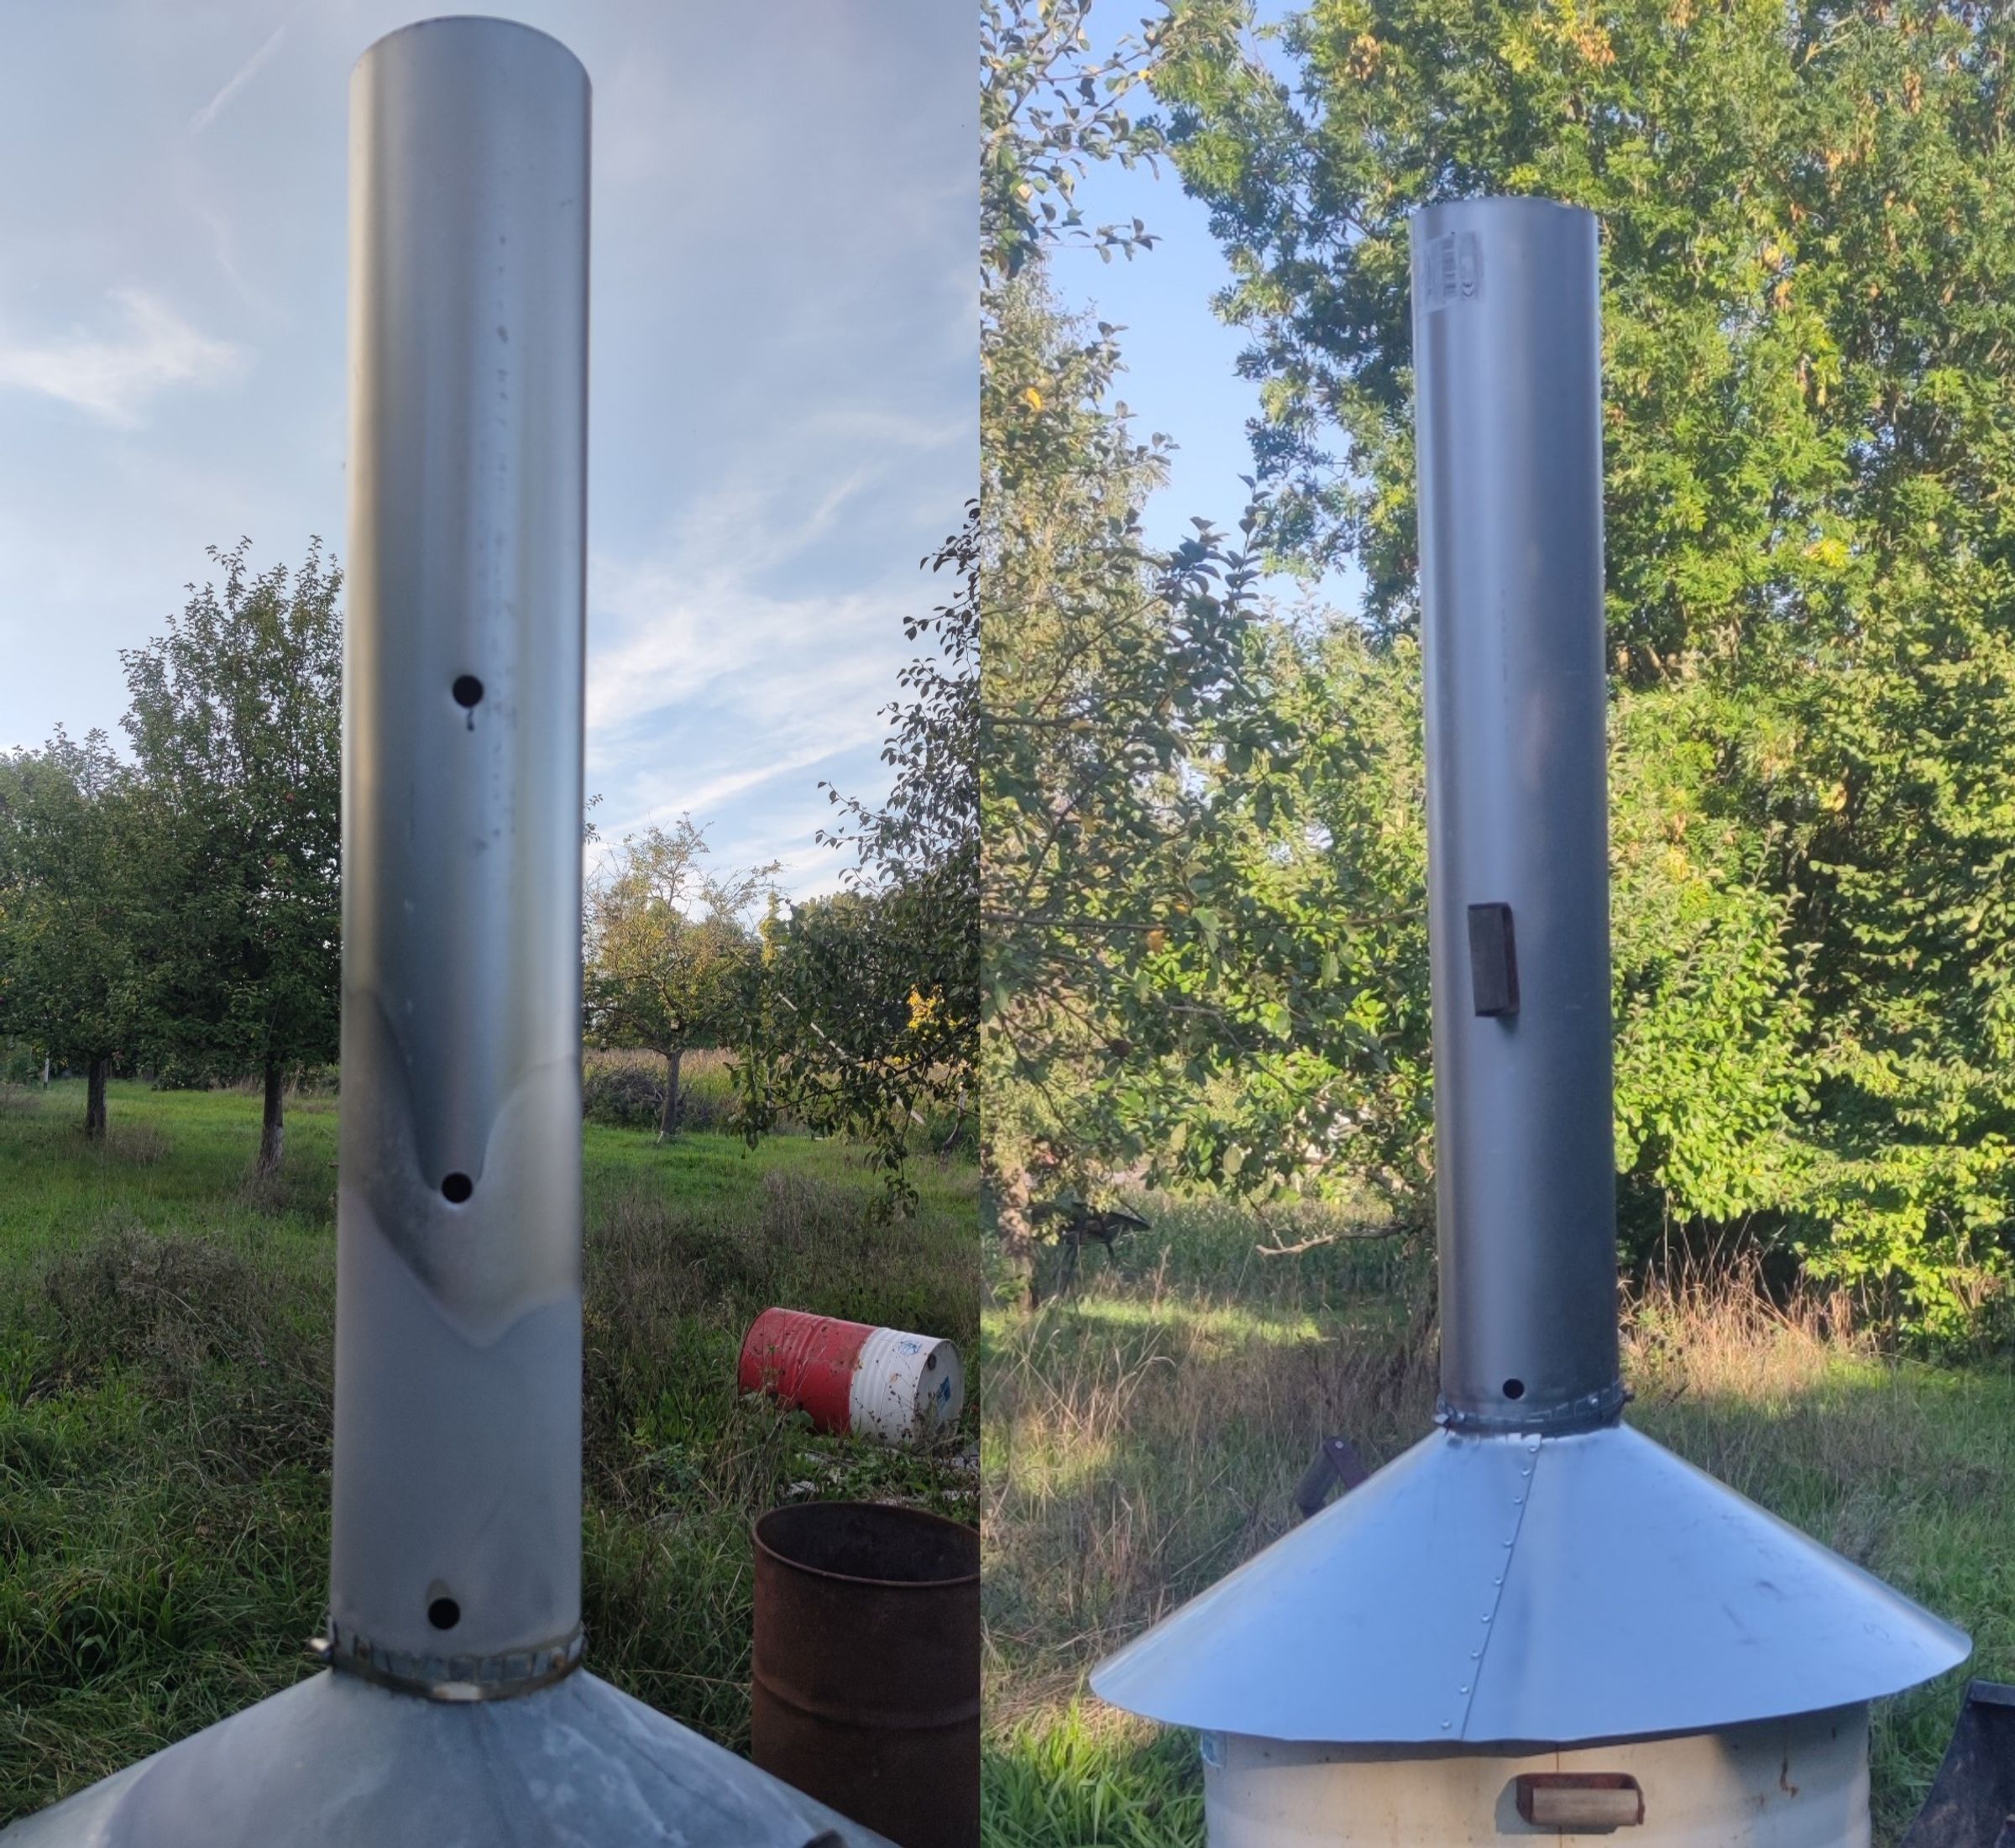
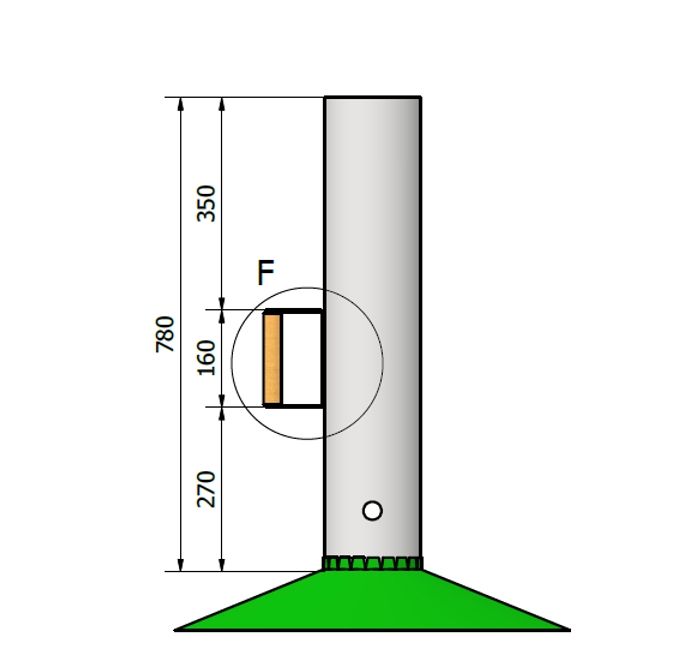
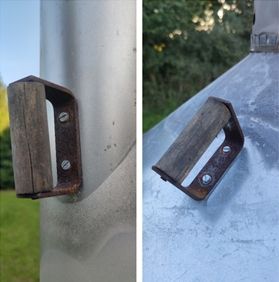
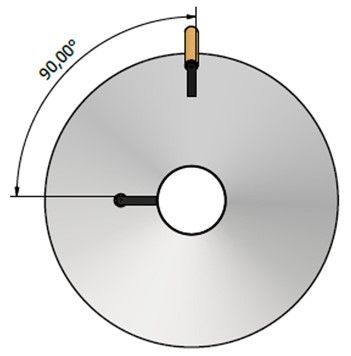
Use the 52cmx78cm for this. The openings should be round and have a diameter of 30mm. At one point there must be 2 holes opposite, so that you can look through the chimney at this point.
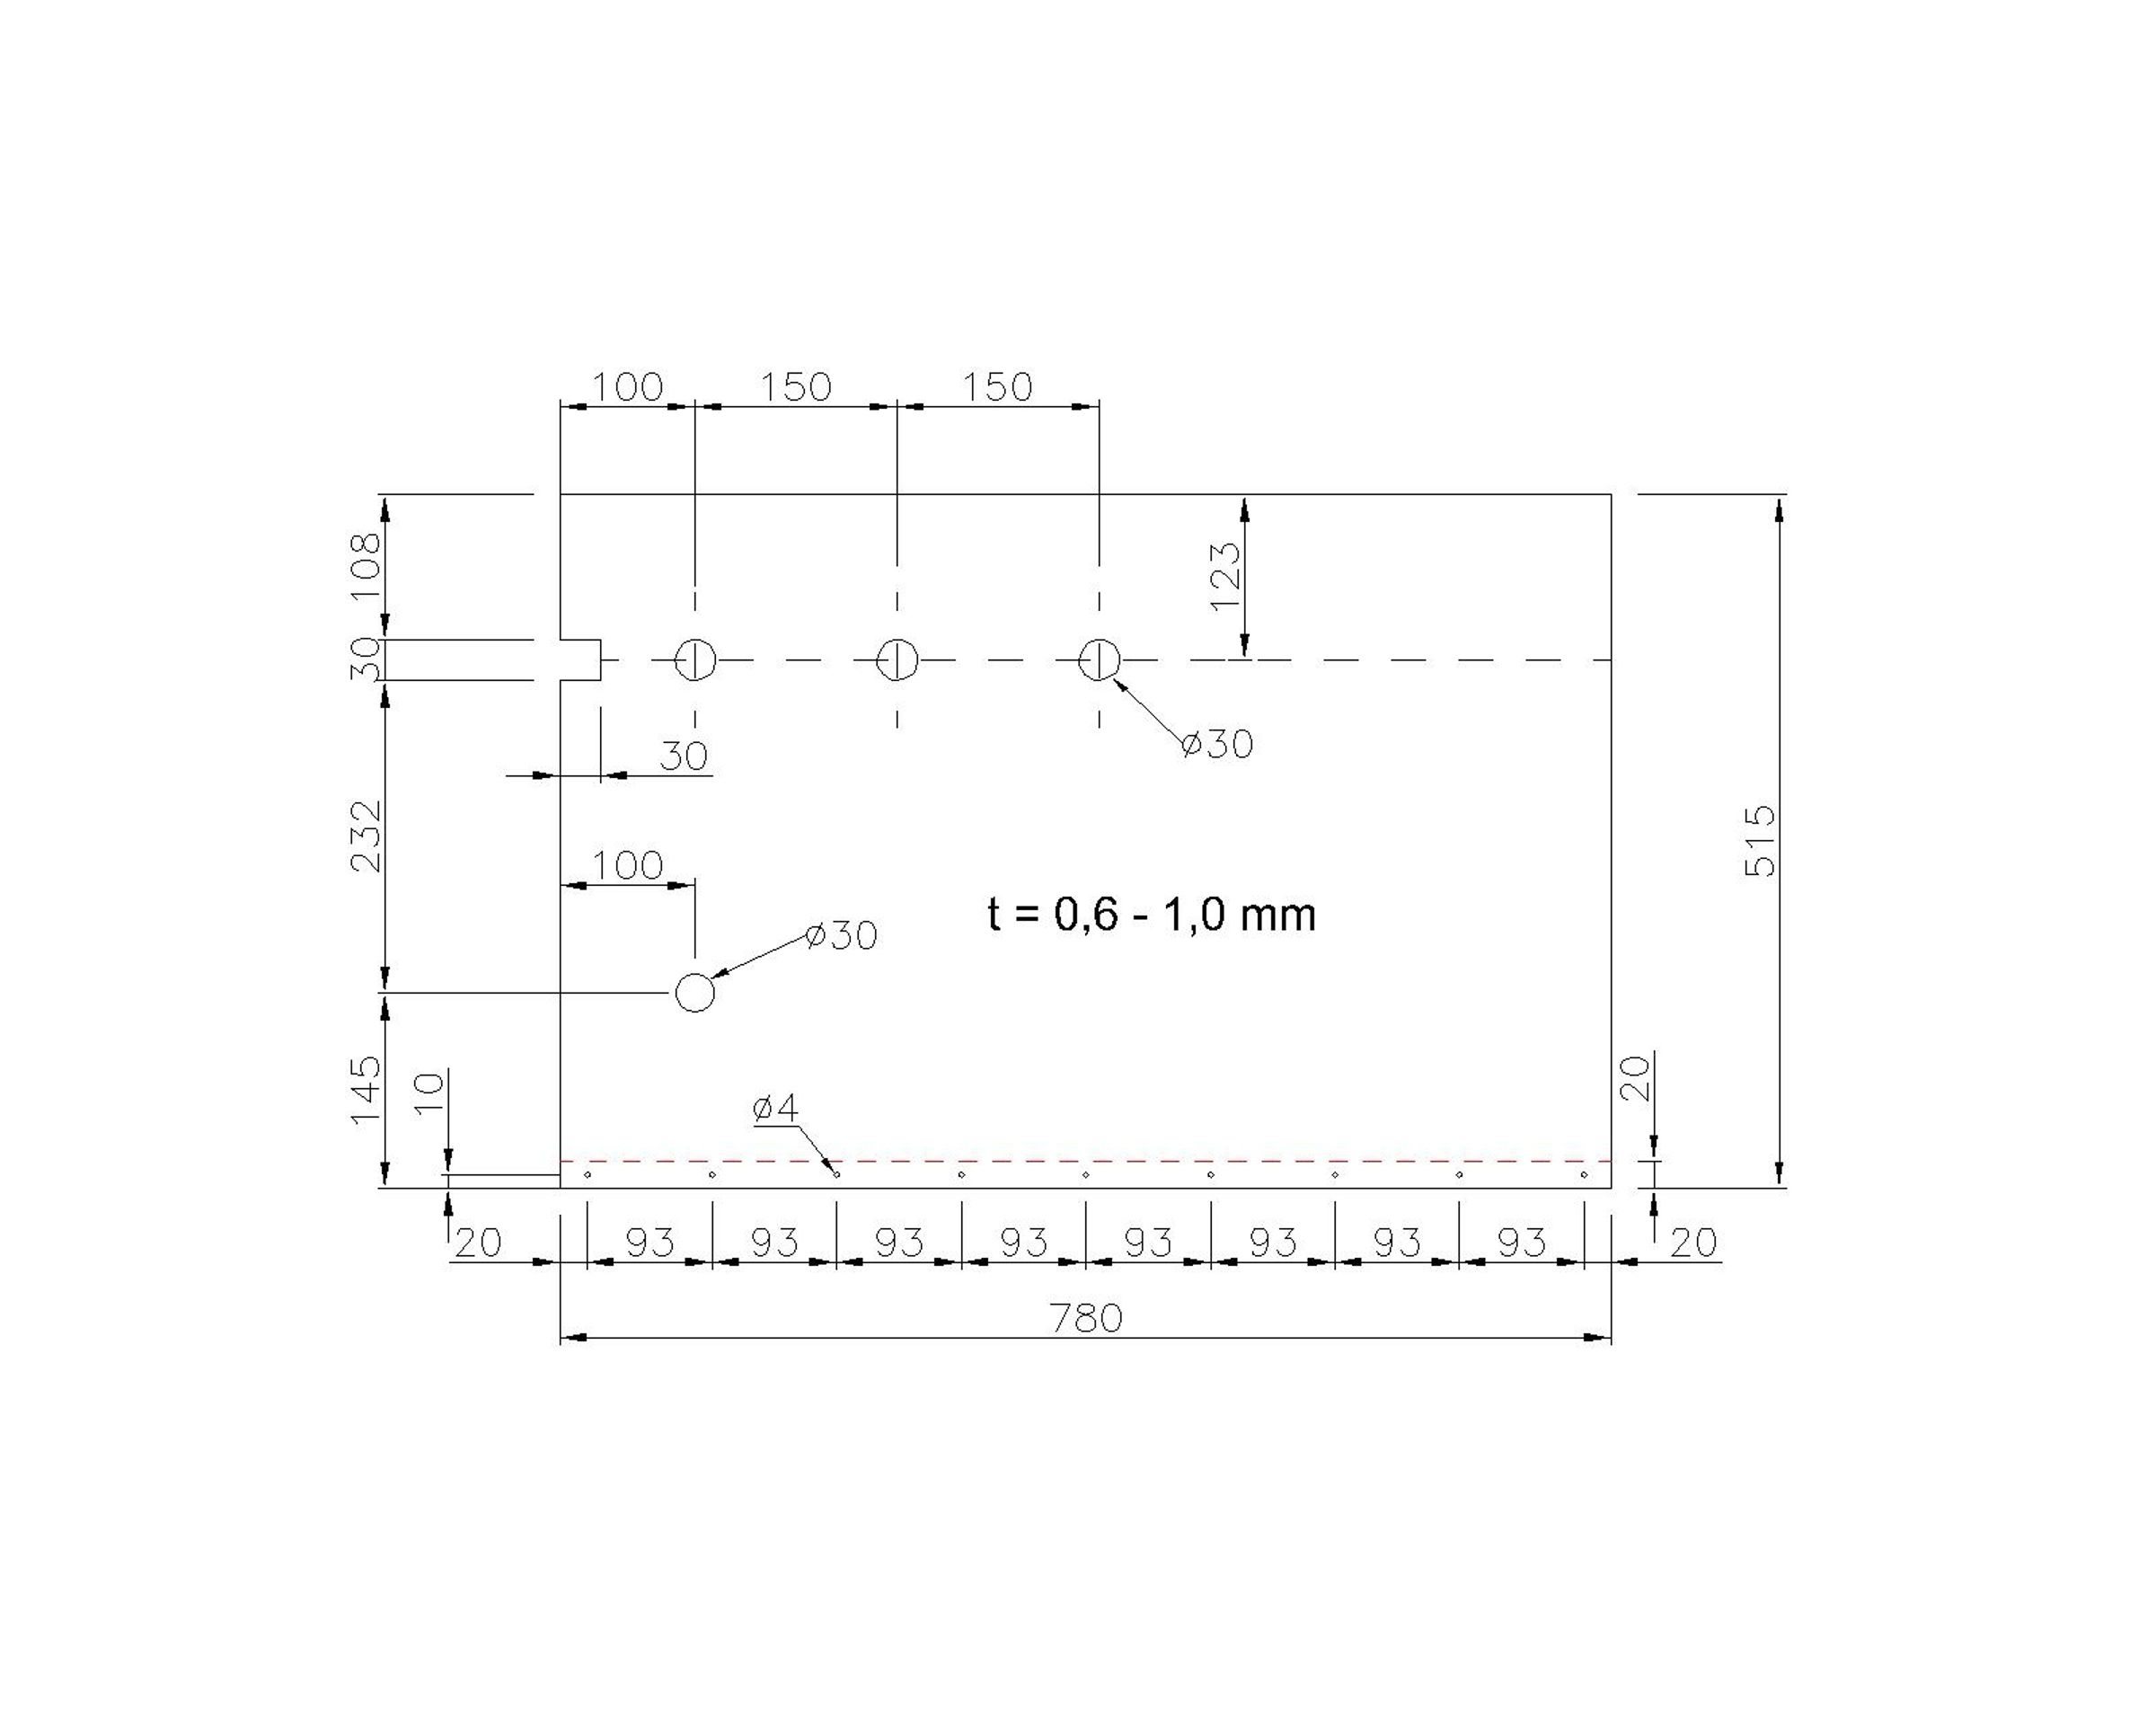
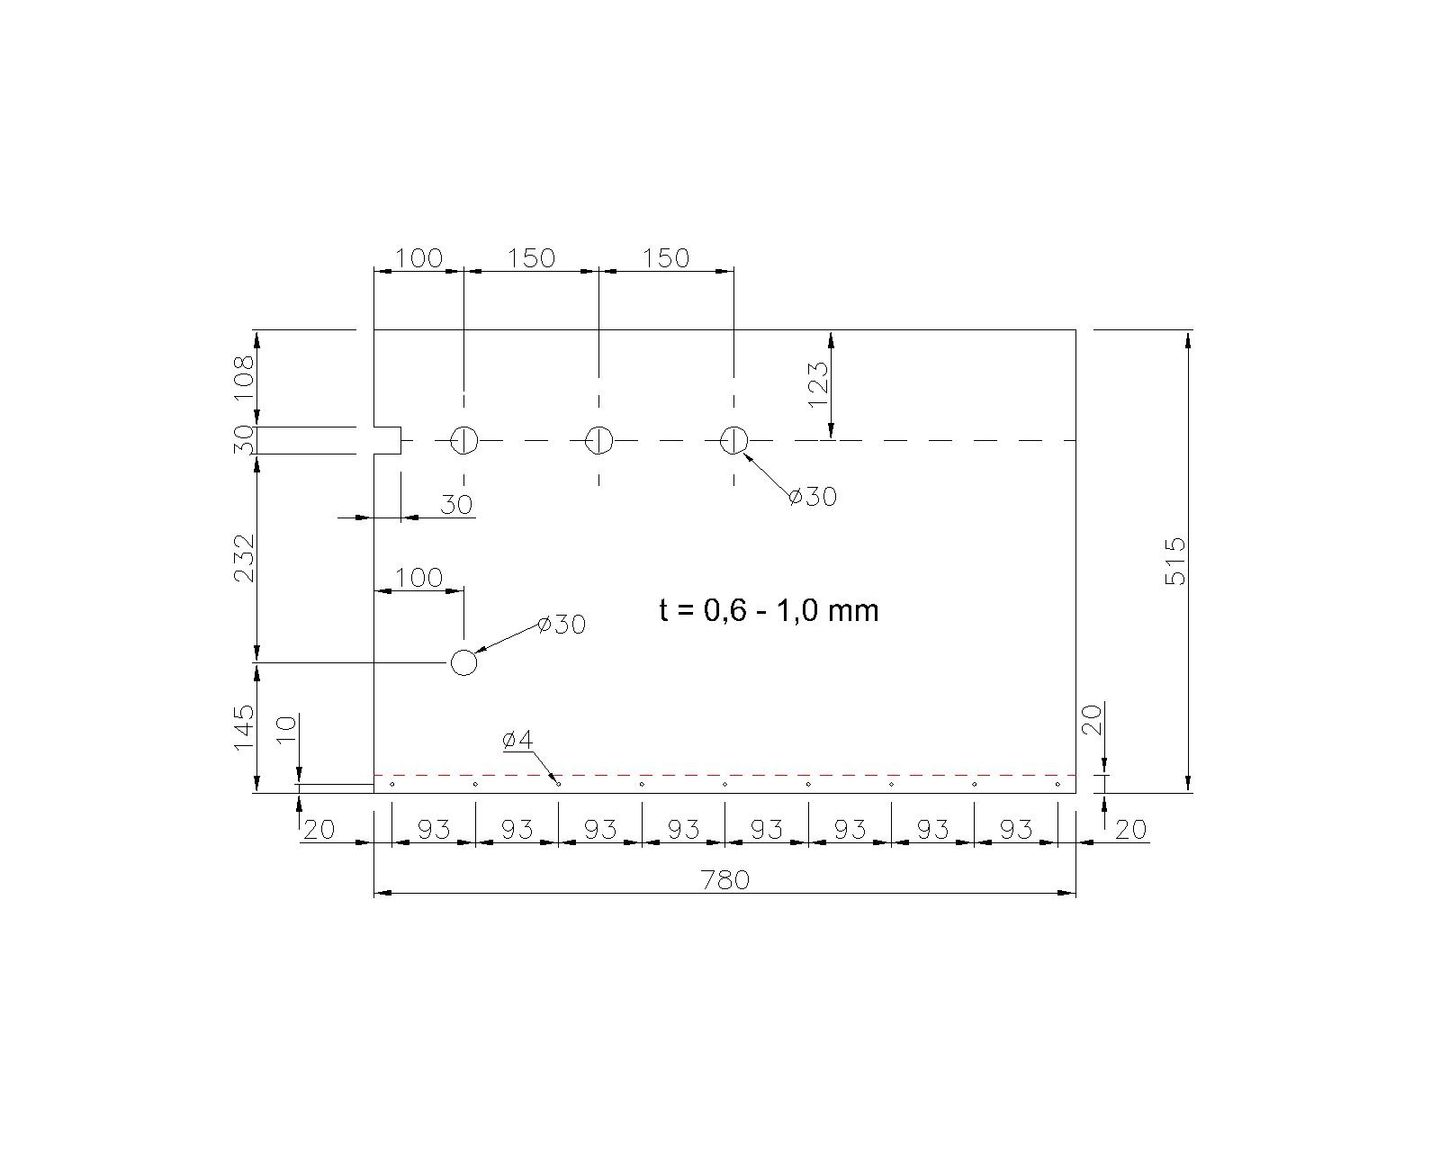
Make holes in the edge along the long sides of the metal sheet. The holes should be 9,3 cm apart from each other and have to symmetrical. If you later fold the sheet into a cylinder, the holes must be on top of each other. Use a hammer and a nail to make the holes or drill them.


Fix it with 2 screws per handle.

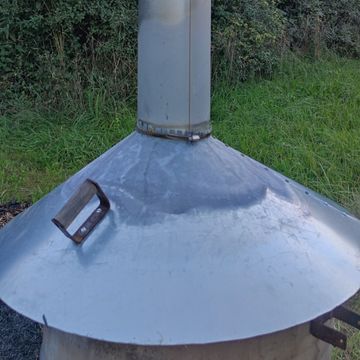
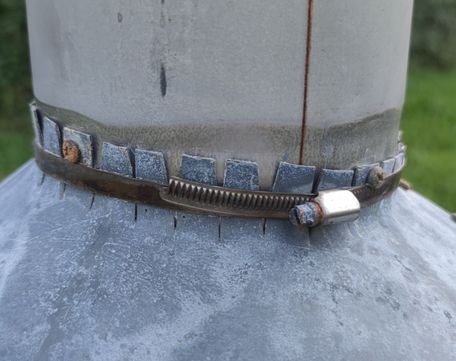
Use a welding device for this step. ⚠ Be sure to wear gloves and safety goggles as protective equipment. Welding can make you blind.

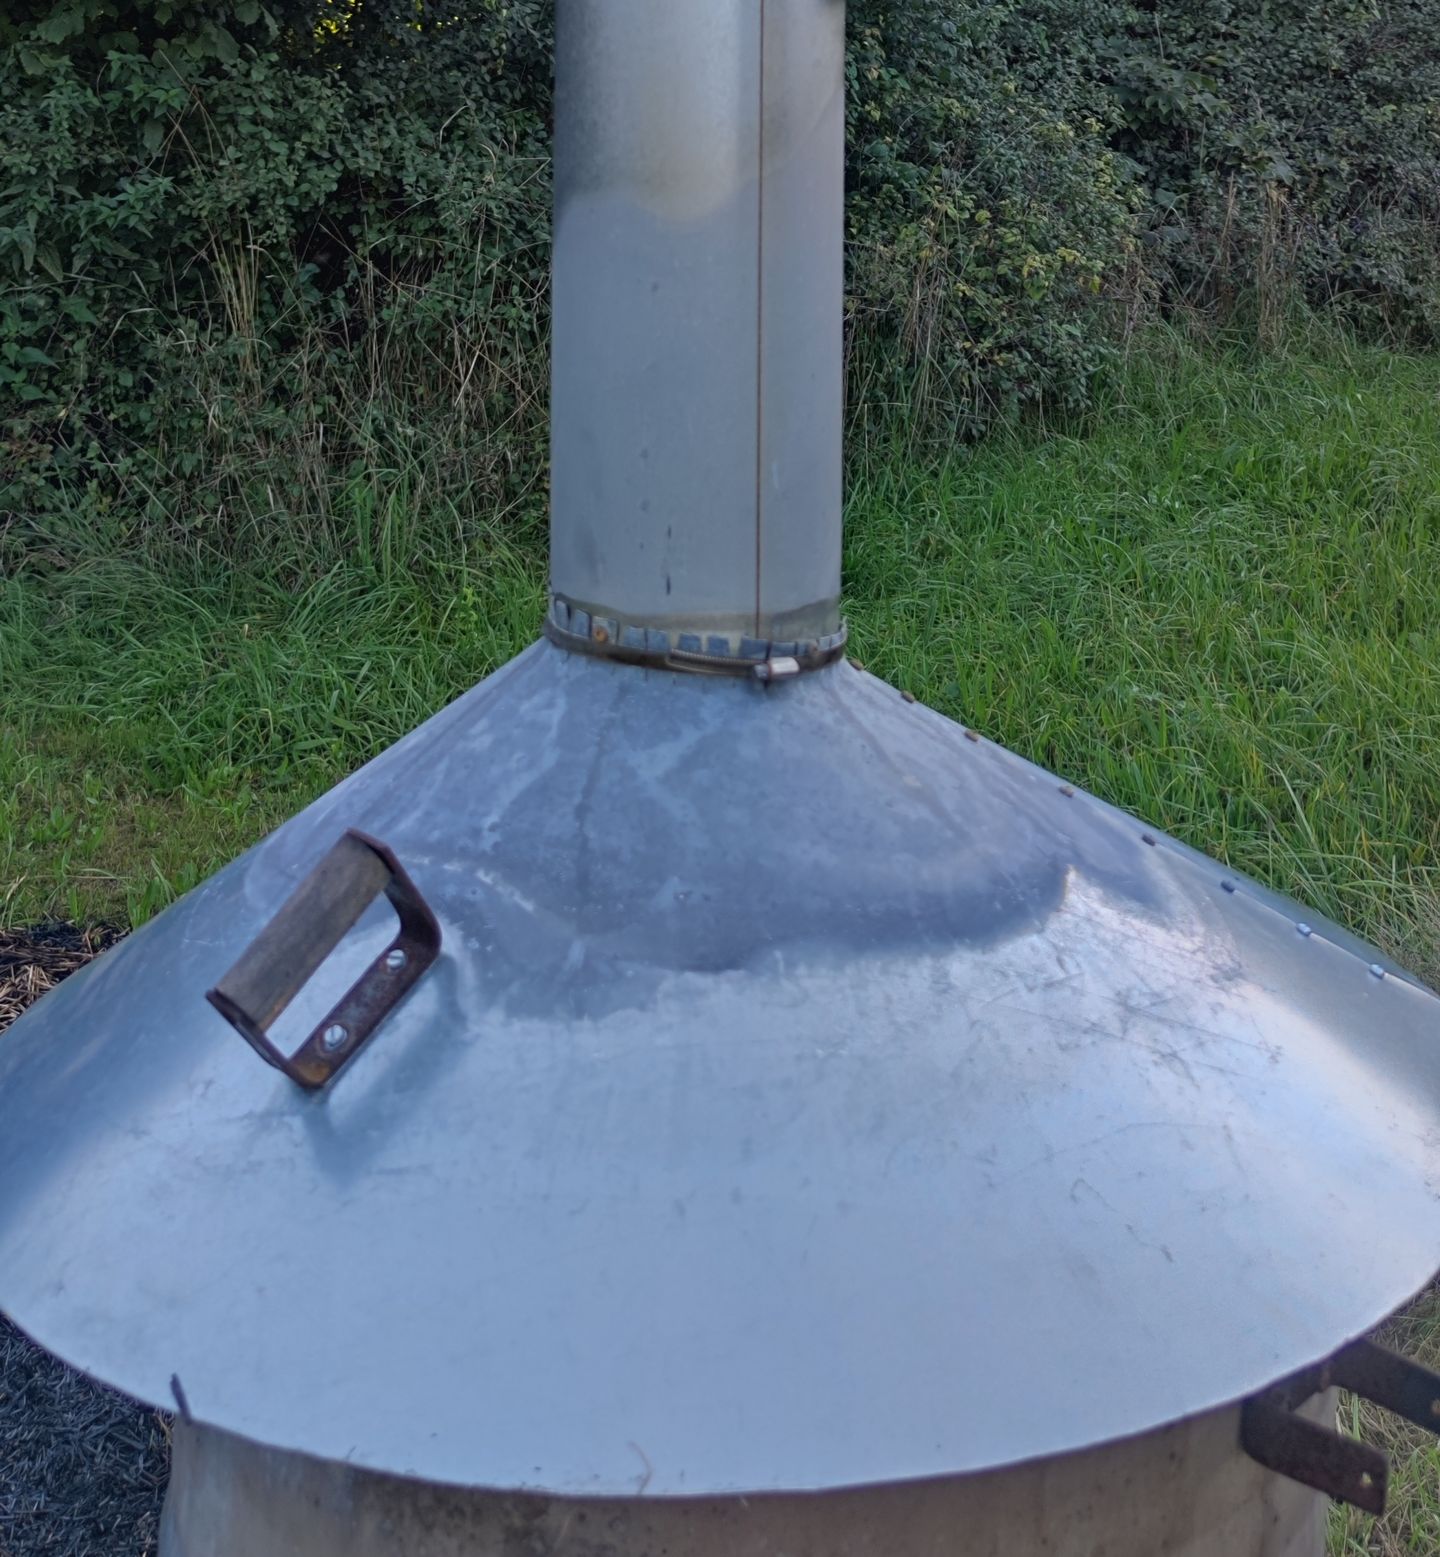
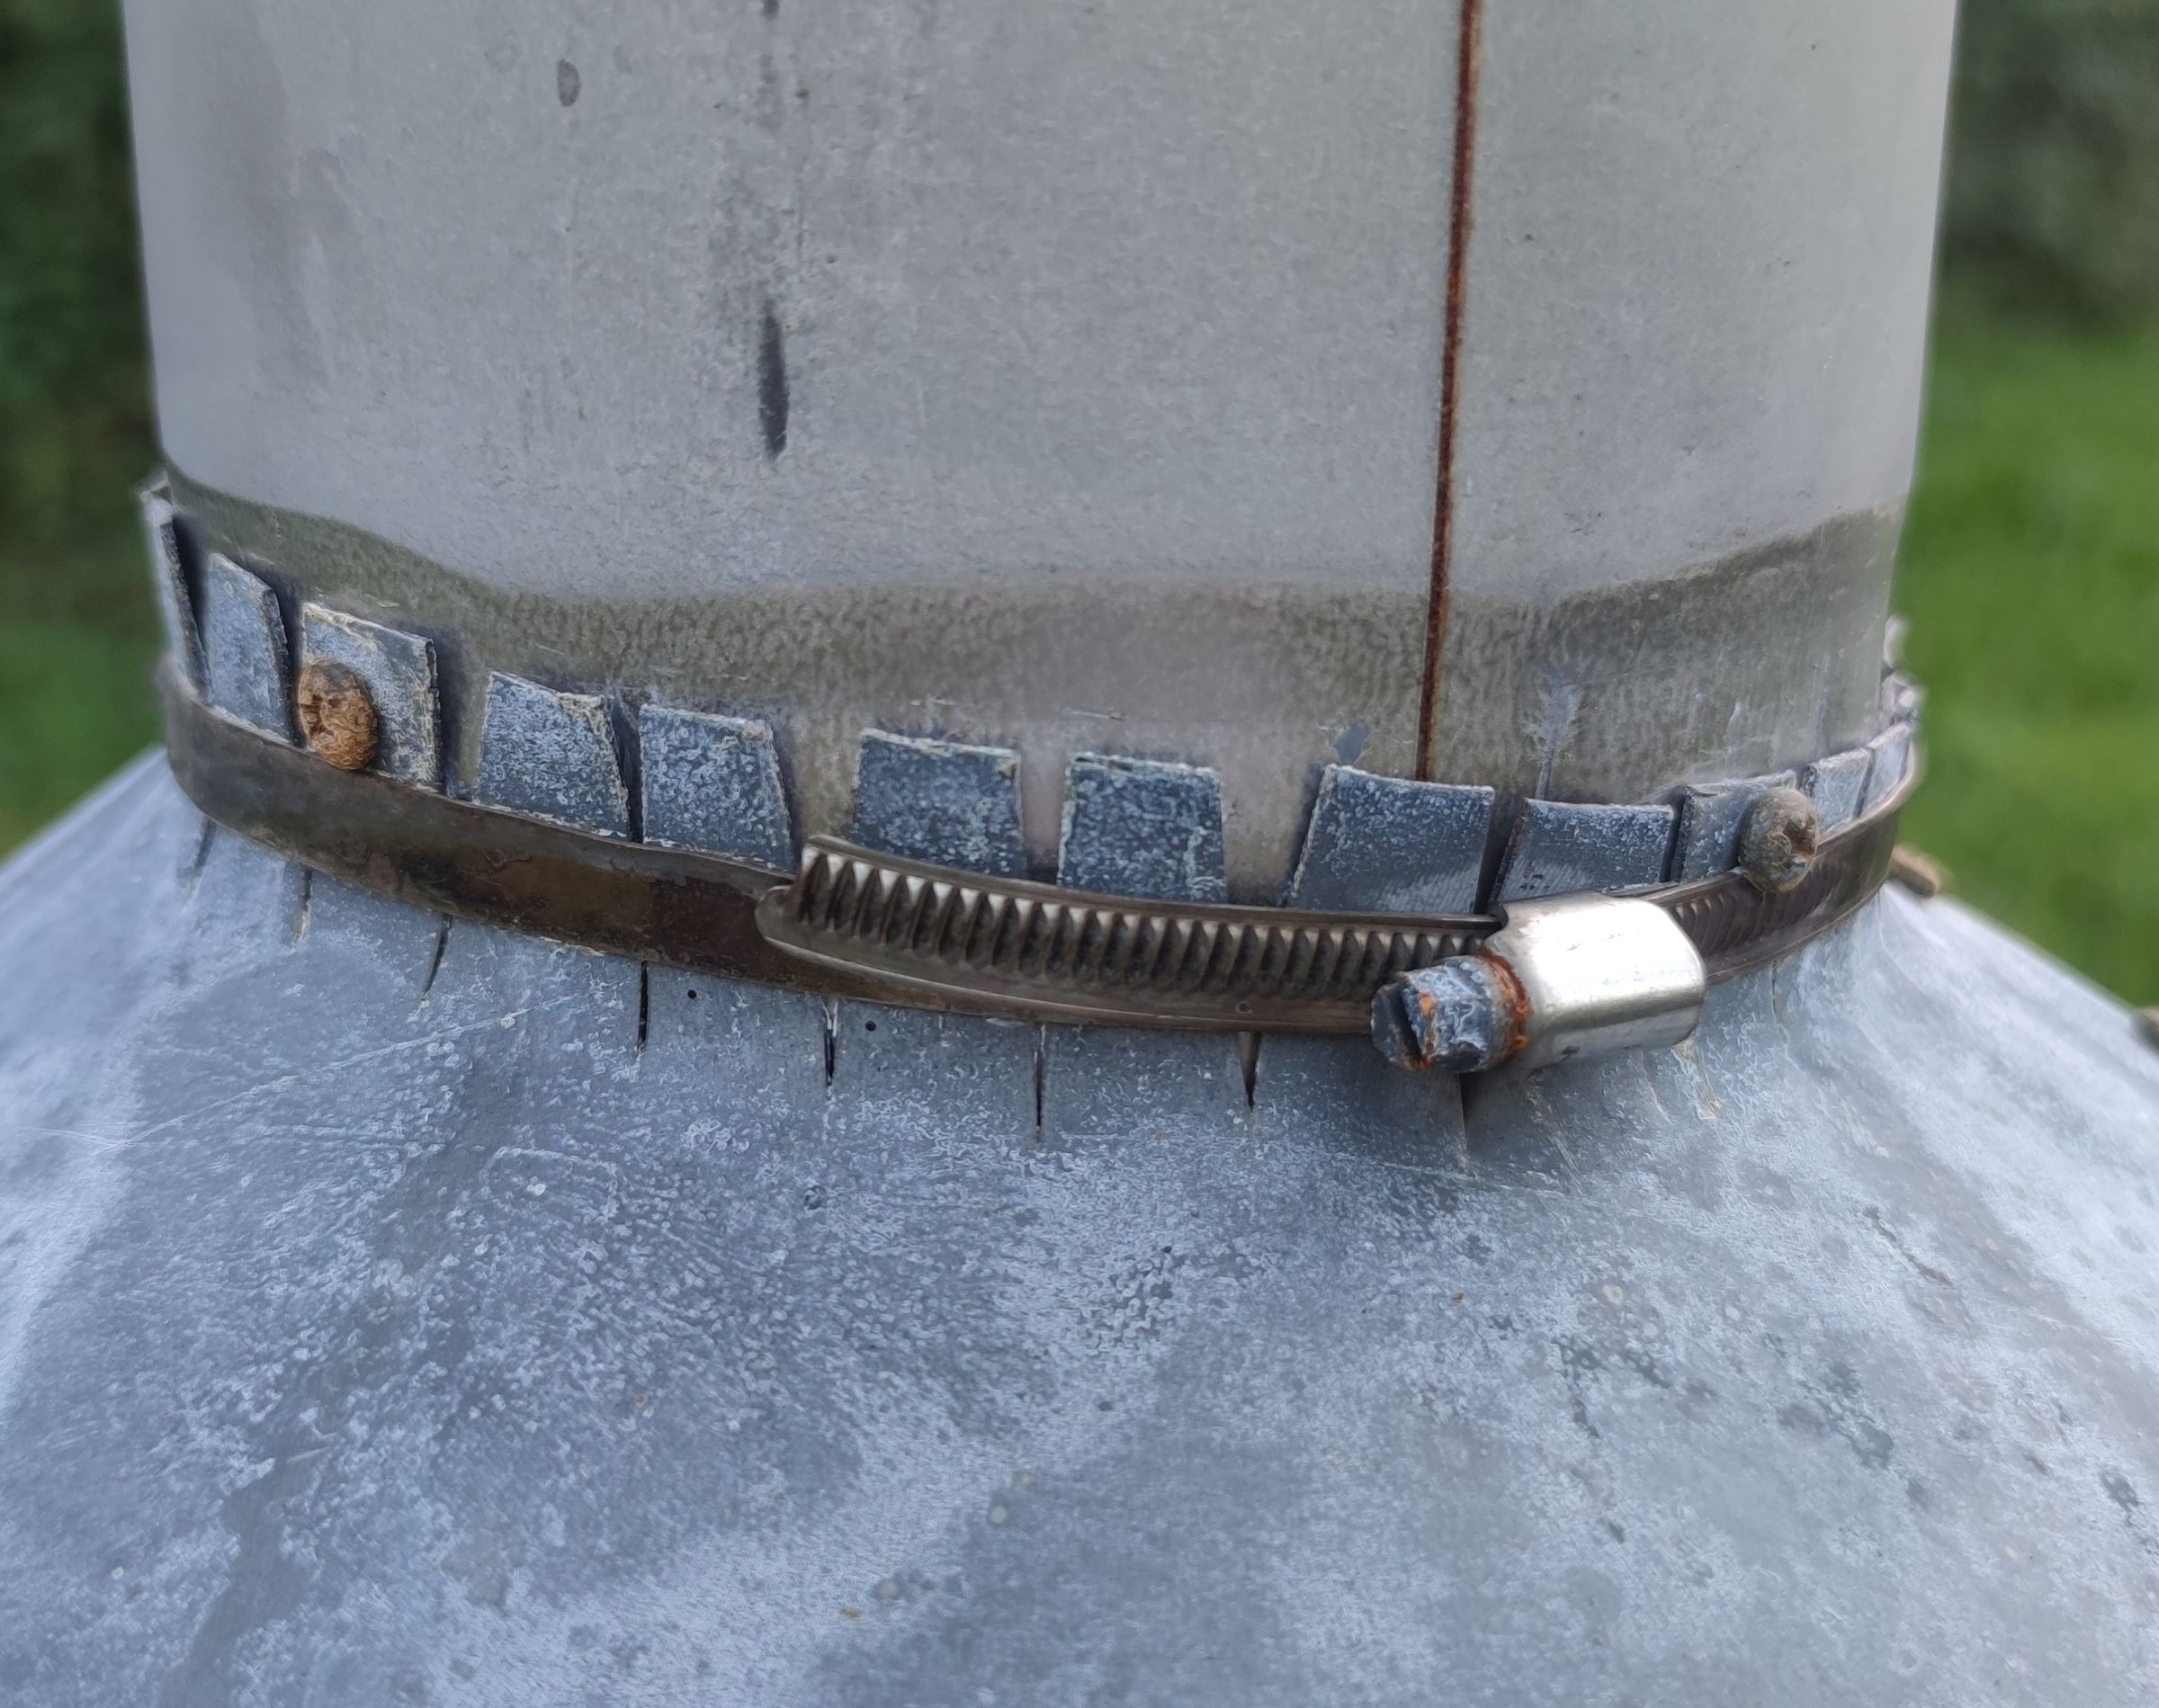
If welding is not possible, you can also cut the sheet upwards into many small pins, push it over the top of the chimney and fix it with a pipe clamp.

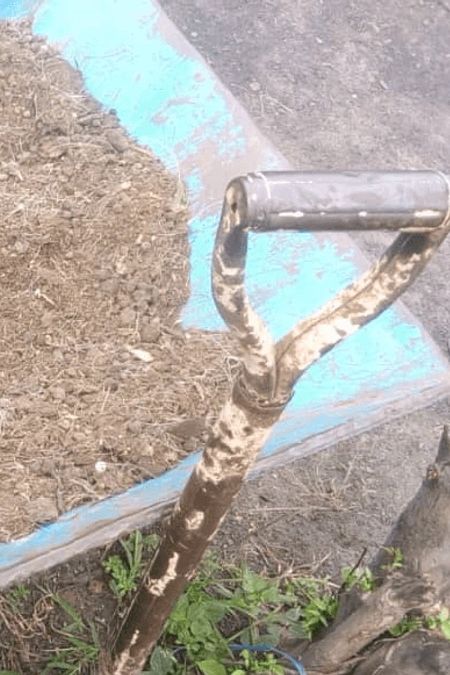
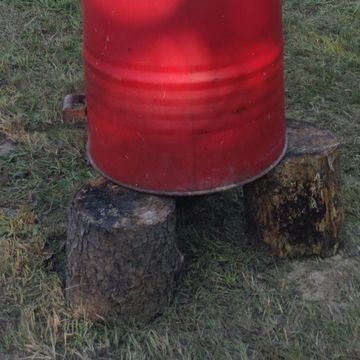
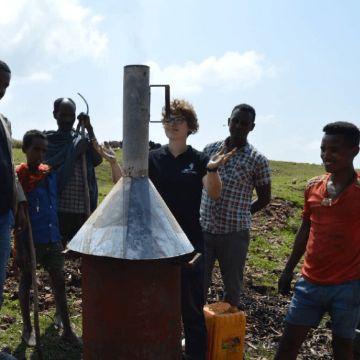
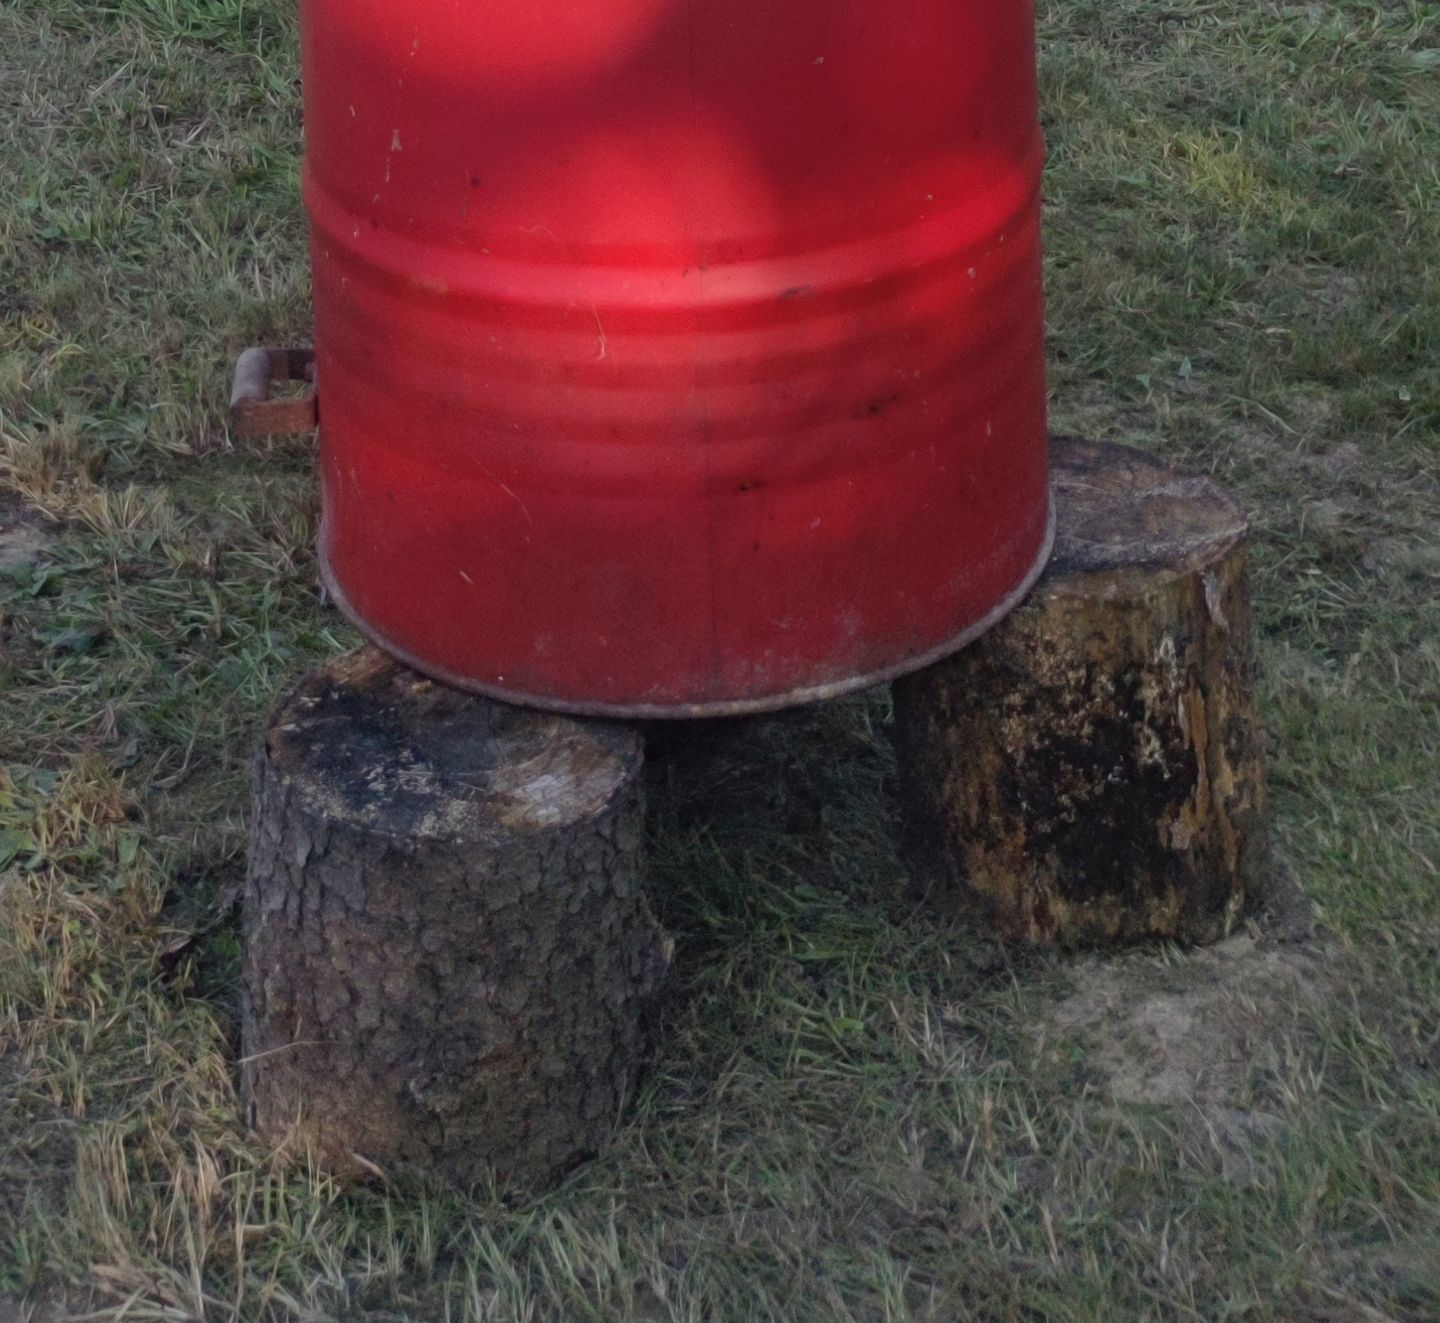
Set up the kiln elevated on three bricks, stones or pieces of wood for proper airflow. Make sure that the kiln stands on a stable base.

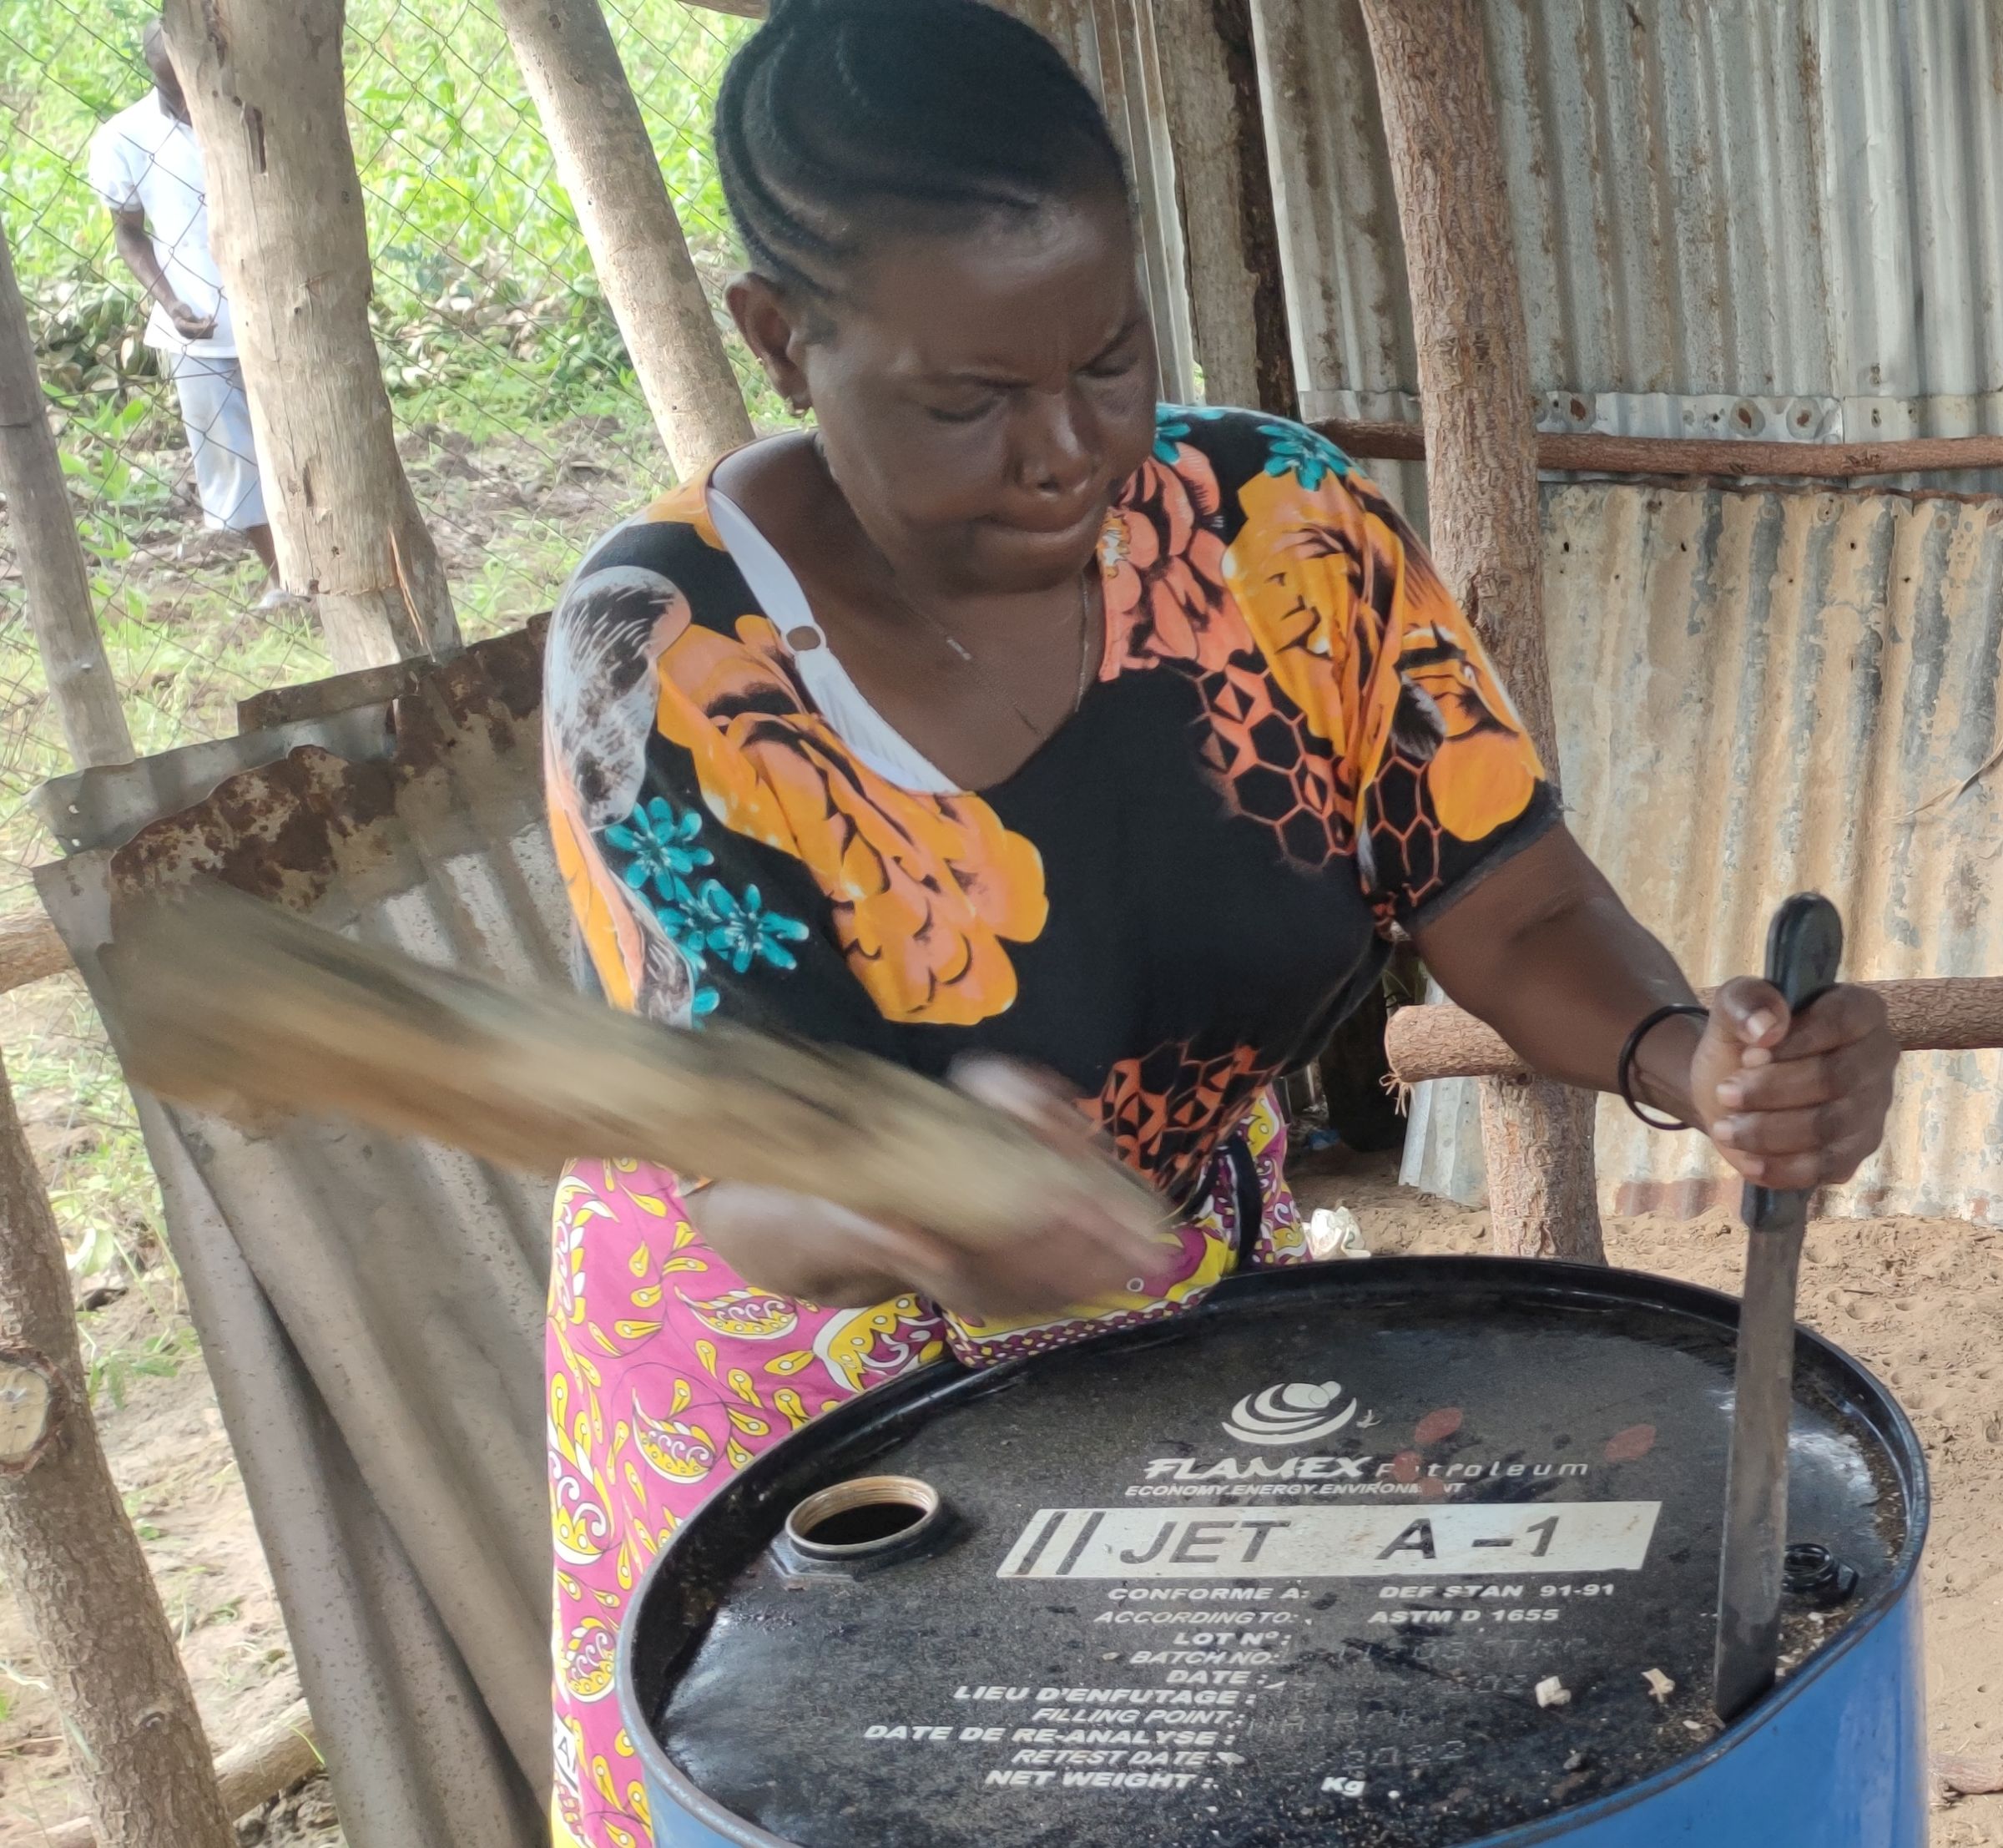
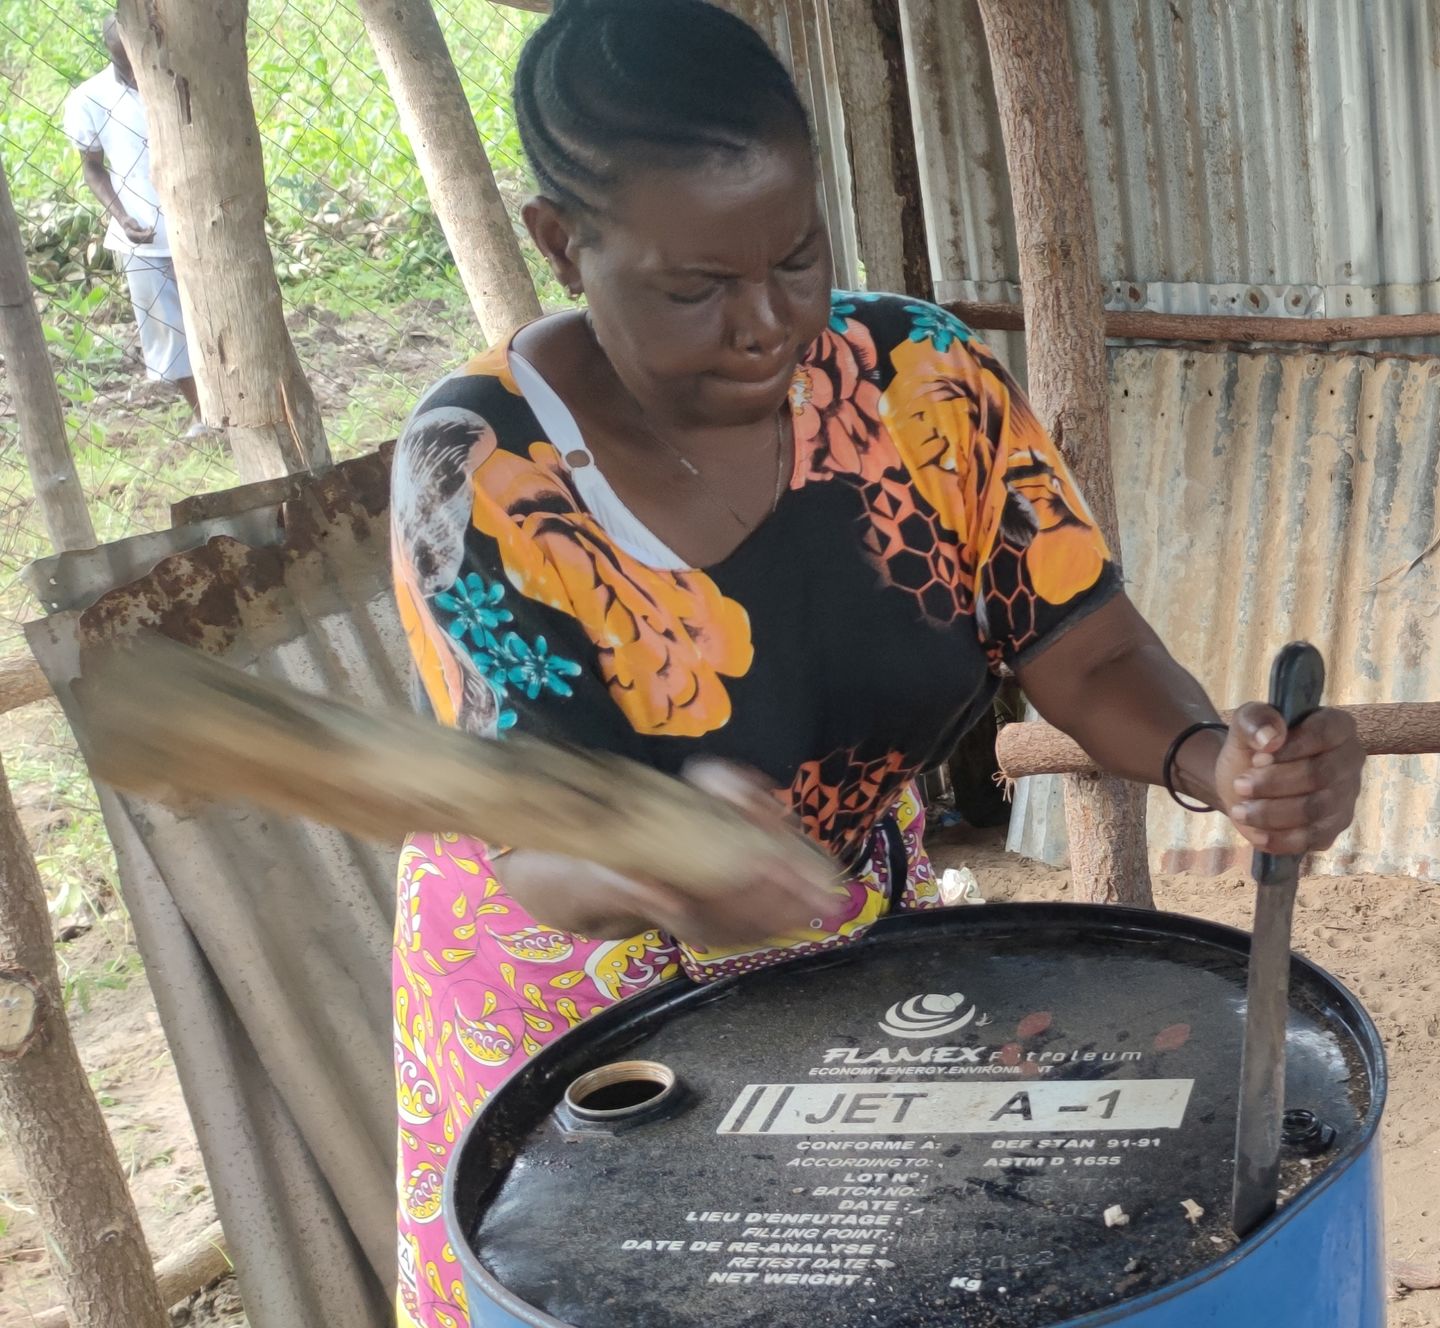
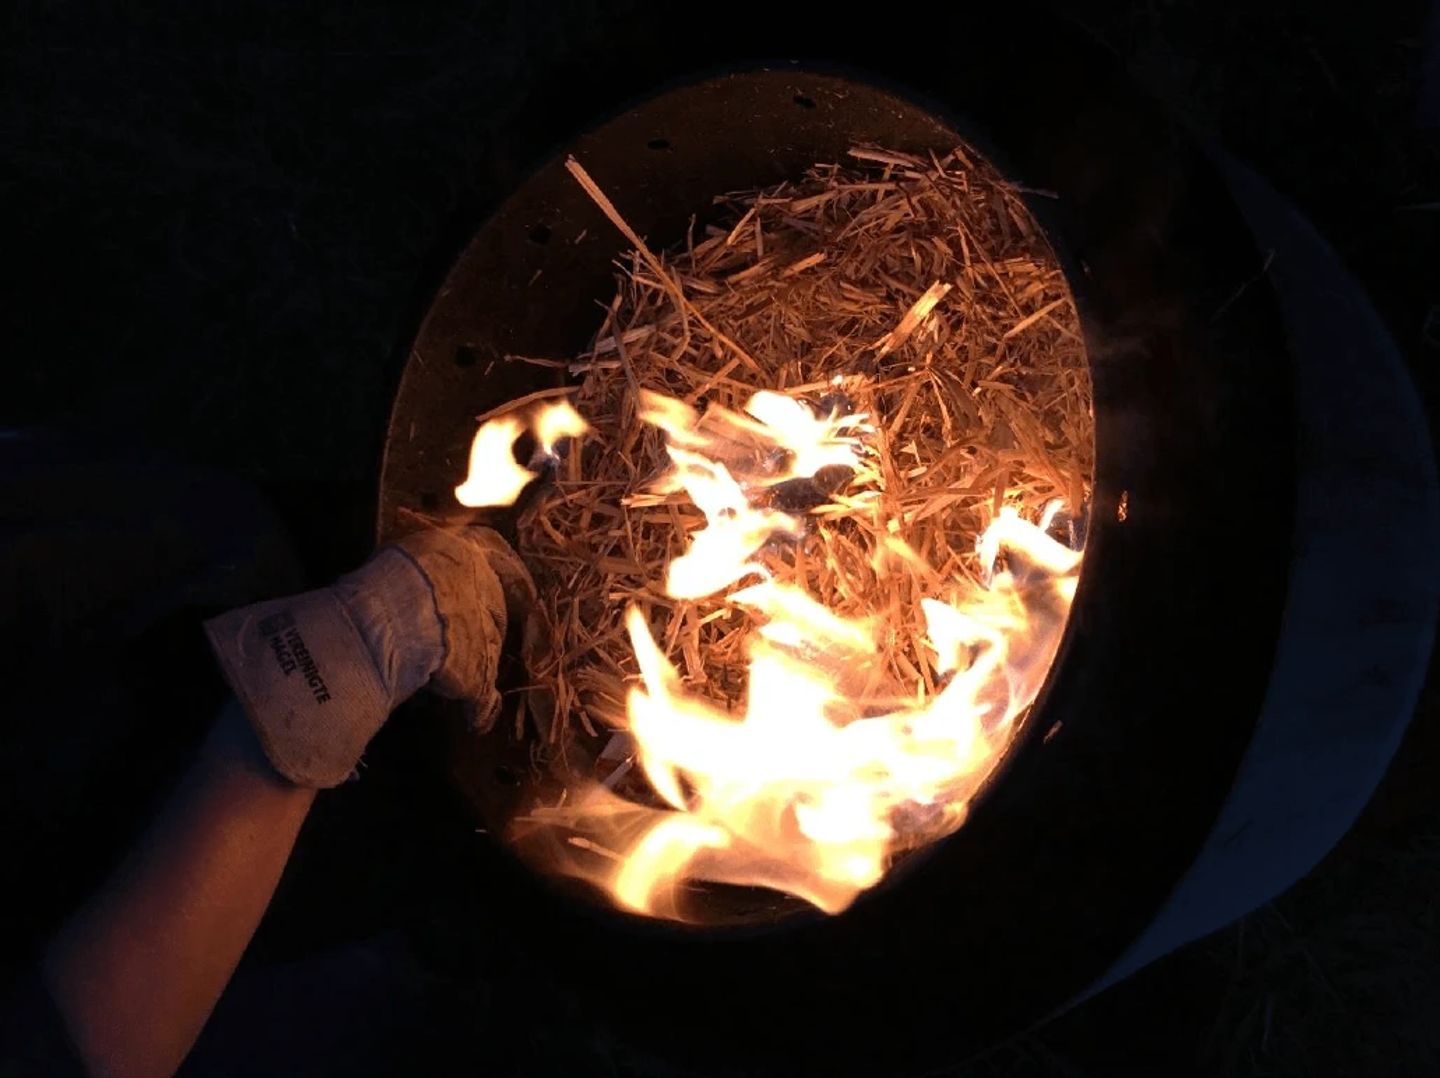
Make the drum 4/5 full with dry biomass. For the best results, use one type and size of biomass only, for example dried water hyacinths or corn cobs. Make sure that the biomass is completely dry or there will be a lot of smoke!
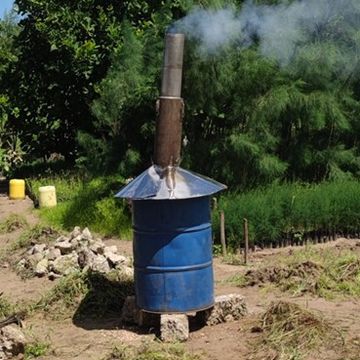
Start a fire using a kerosene-soaked stick and ignite the biomass. Wait for a stable flame. Then put on the chimney to prevent ashing. ⚠ Wear protective gloves!

There will be a lot of smoke in the start because of the 10% residual moisture.
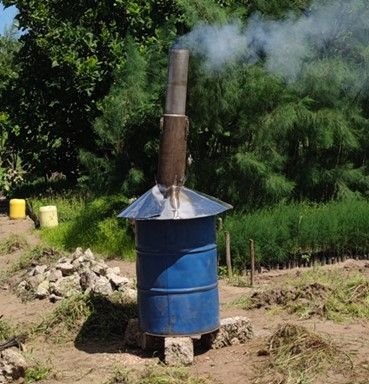


If there is no smoke any more – the Biochar is ready.
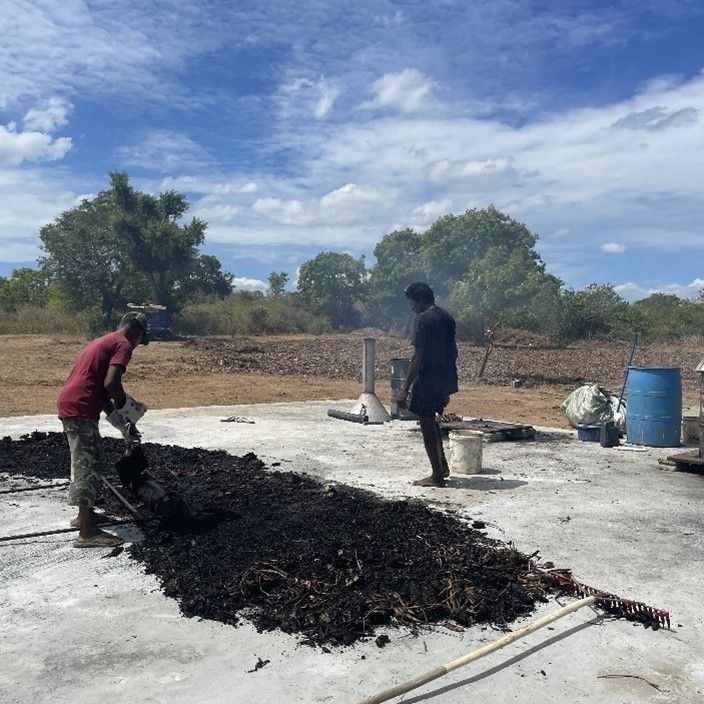
The carbonization is complete when the hottest spot is at the bottom of the biochar-basin. If there was smoke before, it will now be reduced. Lift the cover/chimney and extinguish the biochar with water. By watering the biochar, you prevent combustion and ashes.
⚠ Wear gloves!
Wait until the water has drained out of the kiln through the holes. Turn the kiln over so that the biochar falls out.


If the biochar will be used as a soil enhancer, you can charge it without drying it before. Find the instruction how to make and use biochar fertilizer here.
In many countries, making and selling biochar is a profitable business. If you have constant access to a lot of dried plant rests to carbonize – this might work for you as well. Of course, if no one in your community knows about biochar, then you have to make it known first. For example, by fertilising only one part of your garden with biochar. This way you can show how much better the yields are compared to the other plots. It is also great to start it in a community garden first. If you want to start a biochar business get in touch with Walter from Char2Cool for further advice.
When using and referencing the Char2Cool-KILN, please cite: Char2Cool e.V., char2cool.org. The Char2Cool-KILN is developed by Char2Cool e.V. and is available for free use by everyone.
Biochar has a porous structure and functions as a water and nutrient storage.
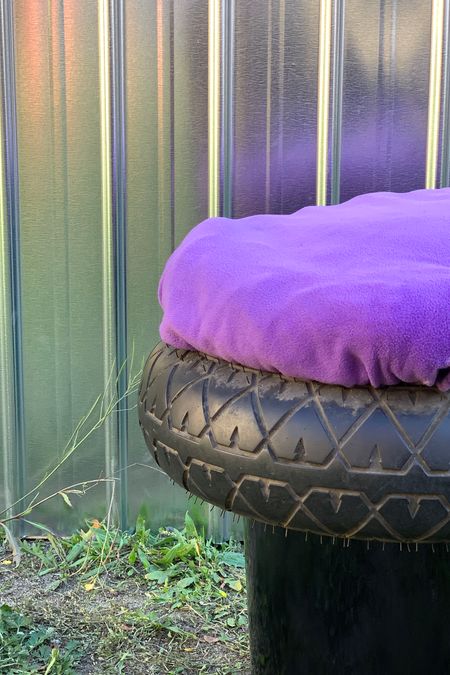
Chair during the day, toilet during the night.
Create a comfortable chair that can additionally be used either as a night...
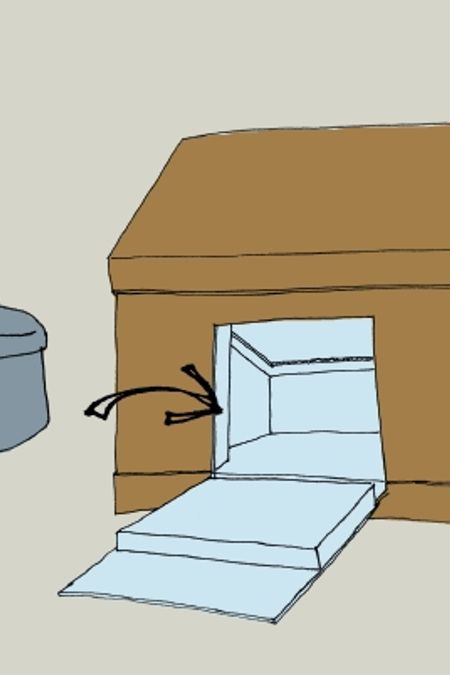
Cook with the power of the sun
With this oven you can cook without using electricity or burning fire wood.
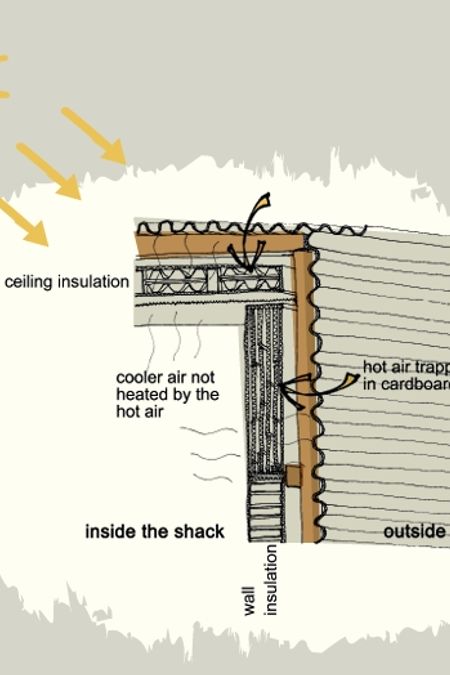
Keep your home cool in summer. Keep your home warm in winter.
On dooiy you find fun and easy hacks that make life easier. Just follow our simple step-by-step guides and create something for your home or community with little materials and tools. Want to start a business? dooiy might be the perfect starting point for you.

from dooiy
You don‘ t have to be an expert to start making with dooiy. Just choose an easy hack and get going. After you made a few, I am sure that you will come up with your own ideas.
dooiy is being developed by passionate people in Germany and South Africa.

To fulfil our vision, we are looking for partners, volunteers, donors and people who spread the word.
Learn moreand become a partner