Guide by Liter of Light
Solar Bottle Bulb
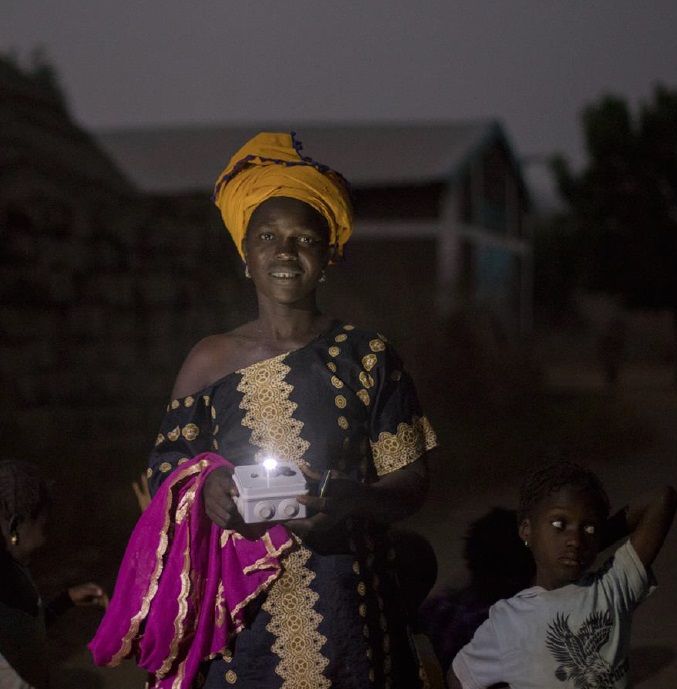
Free daylight for your home
Light up dark areas in your home during daytime using this green and...


Make your own solar light
| Done in | 45 mins |
|---|---|
| Skill level | medium |
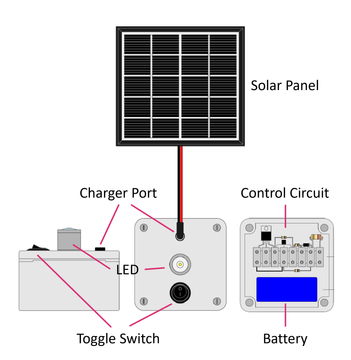
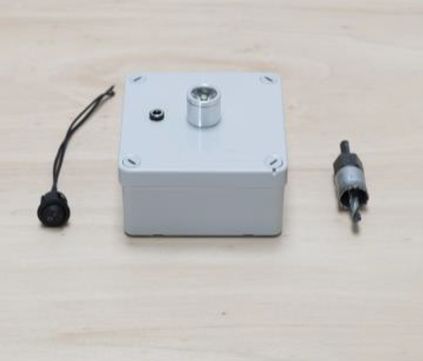
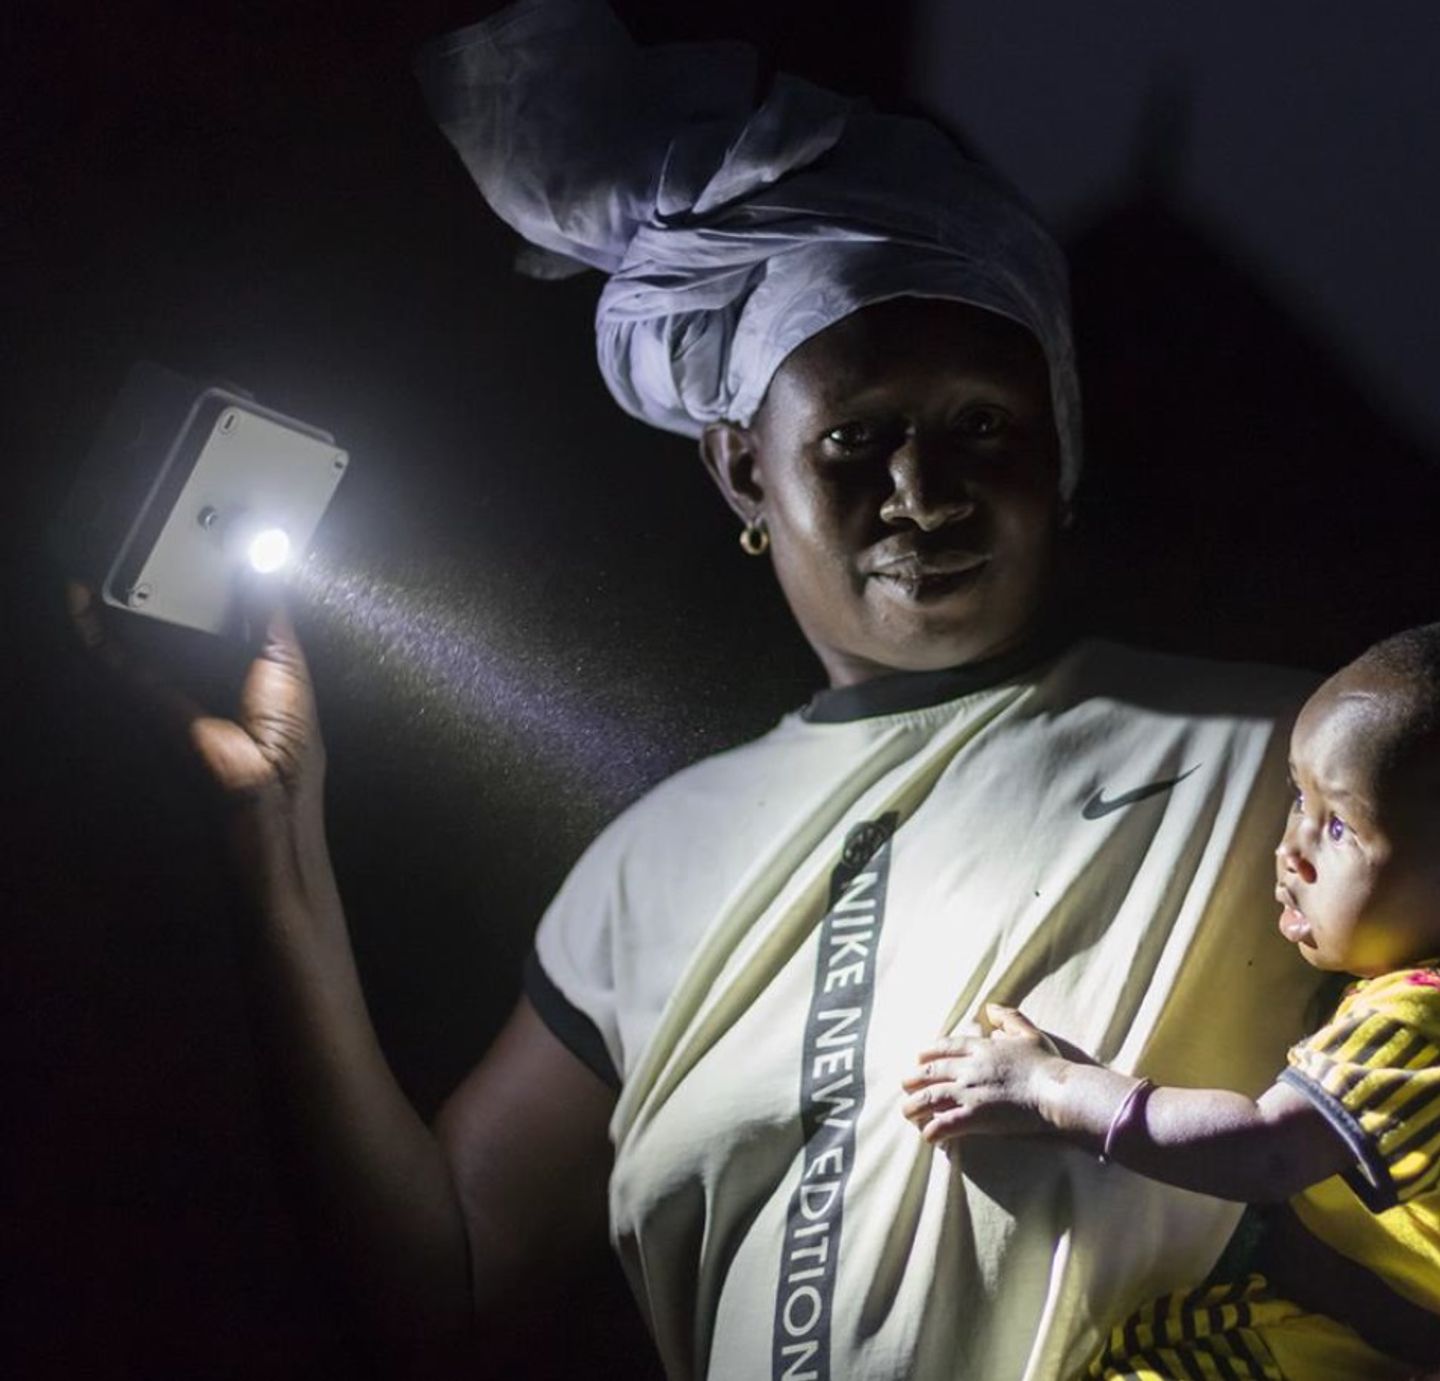
The Light Box is a compact and versatile solution for lighting domestic, urban and rural environments. Its components are carefully selected for their widespread availability, even for the most remote areas. The main components of the Light Box are a solar panel (2W, 5.5V), a battery (3.7V) and an LED (1W, 3.7V).

Published under CC:BY-NC-SA by
Liter of Light ItaliaYou can try to source some parts by recycling, e.g. the USB charger port can be taken from any broken USB device, the battery can be “harvested” from an old notebook battery pack. Any toggle switch will do.
Today, most solar panels come with a USB port, so it makes sense to replace the jack from this instruction with a USB port. That will also give you the chance to charge your light box with a phone charger, when available.
🦊 The other way around works, too: You might also be able to use the solar panel to charge your phone (although the speed of loading will depend very much on the size of your panel).
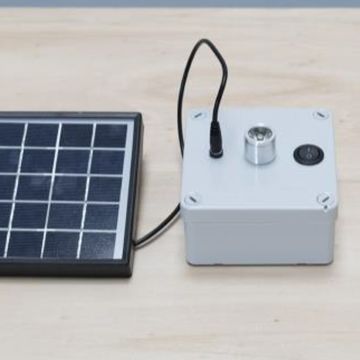
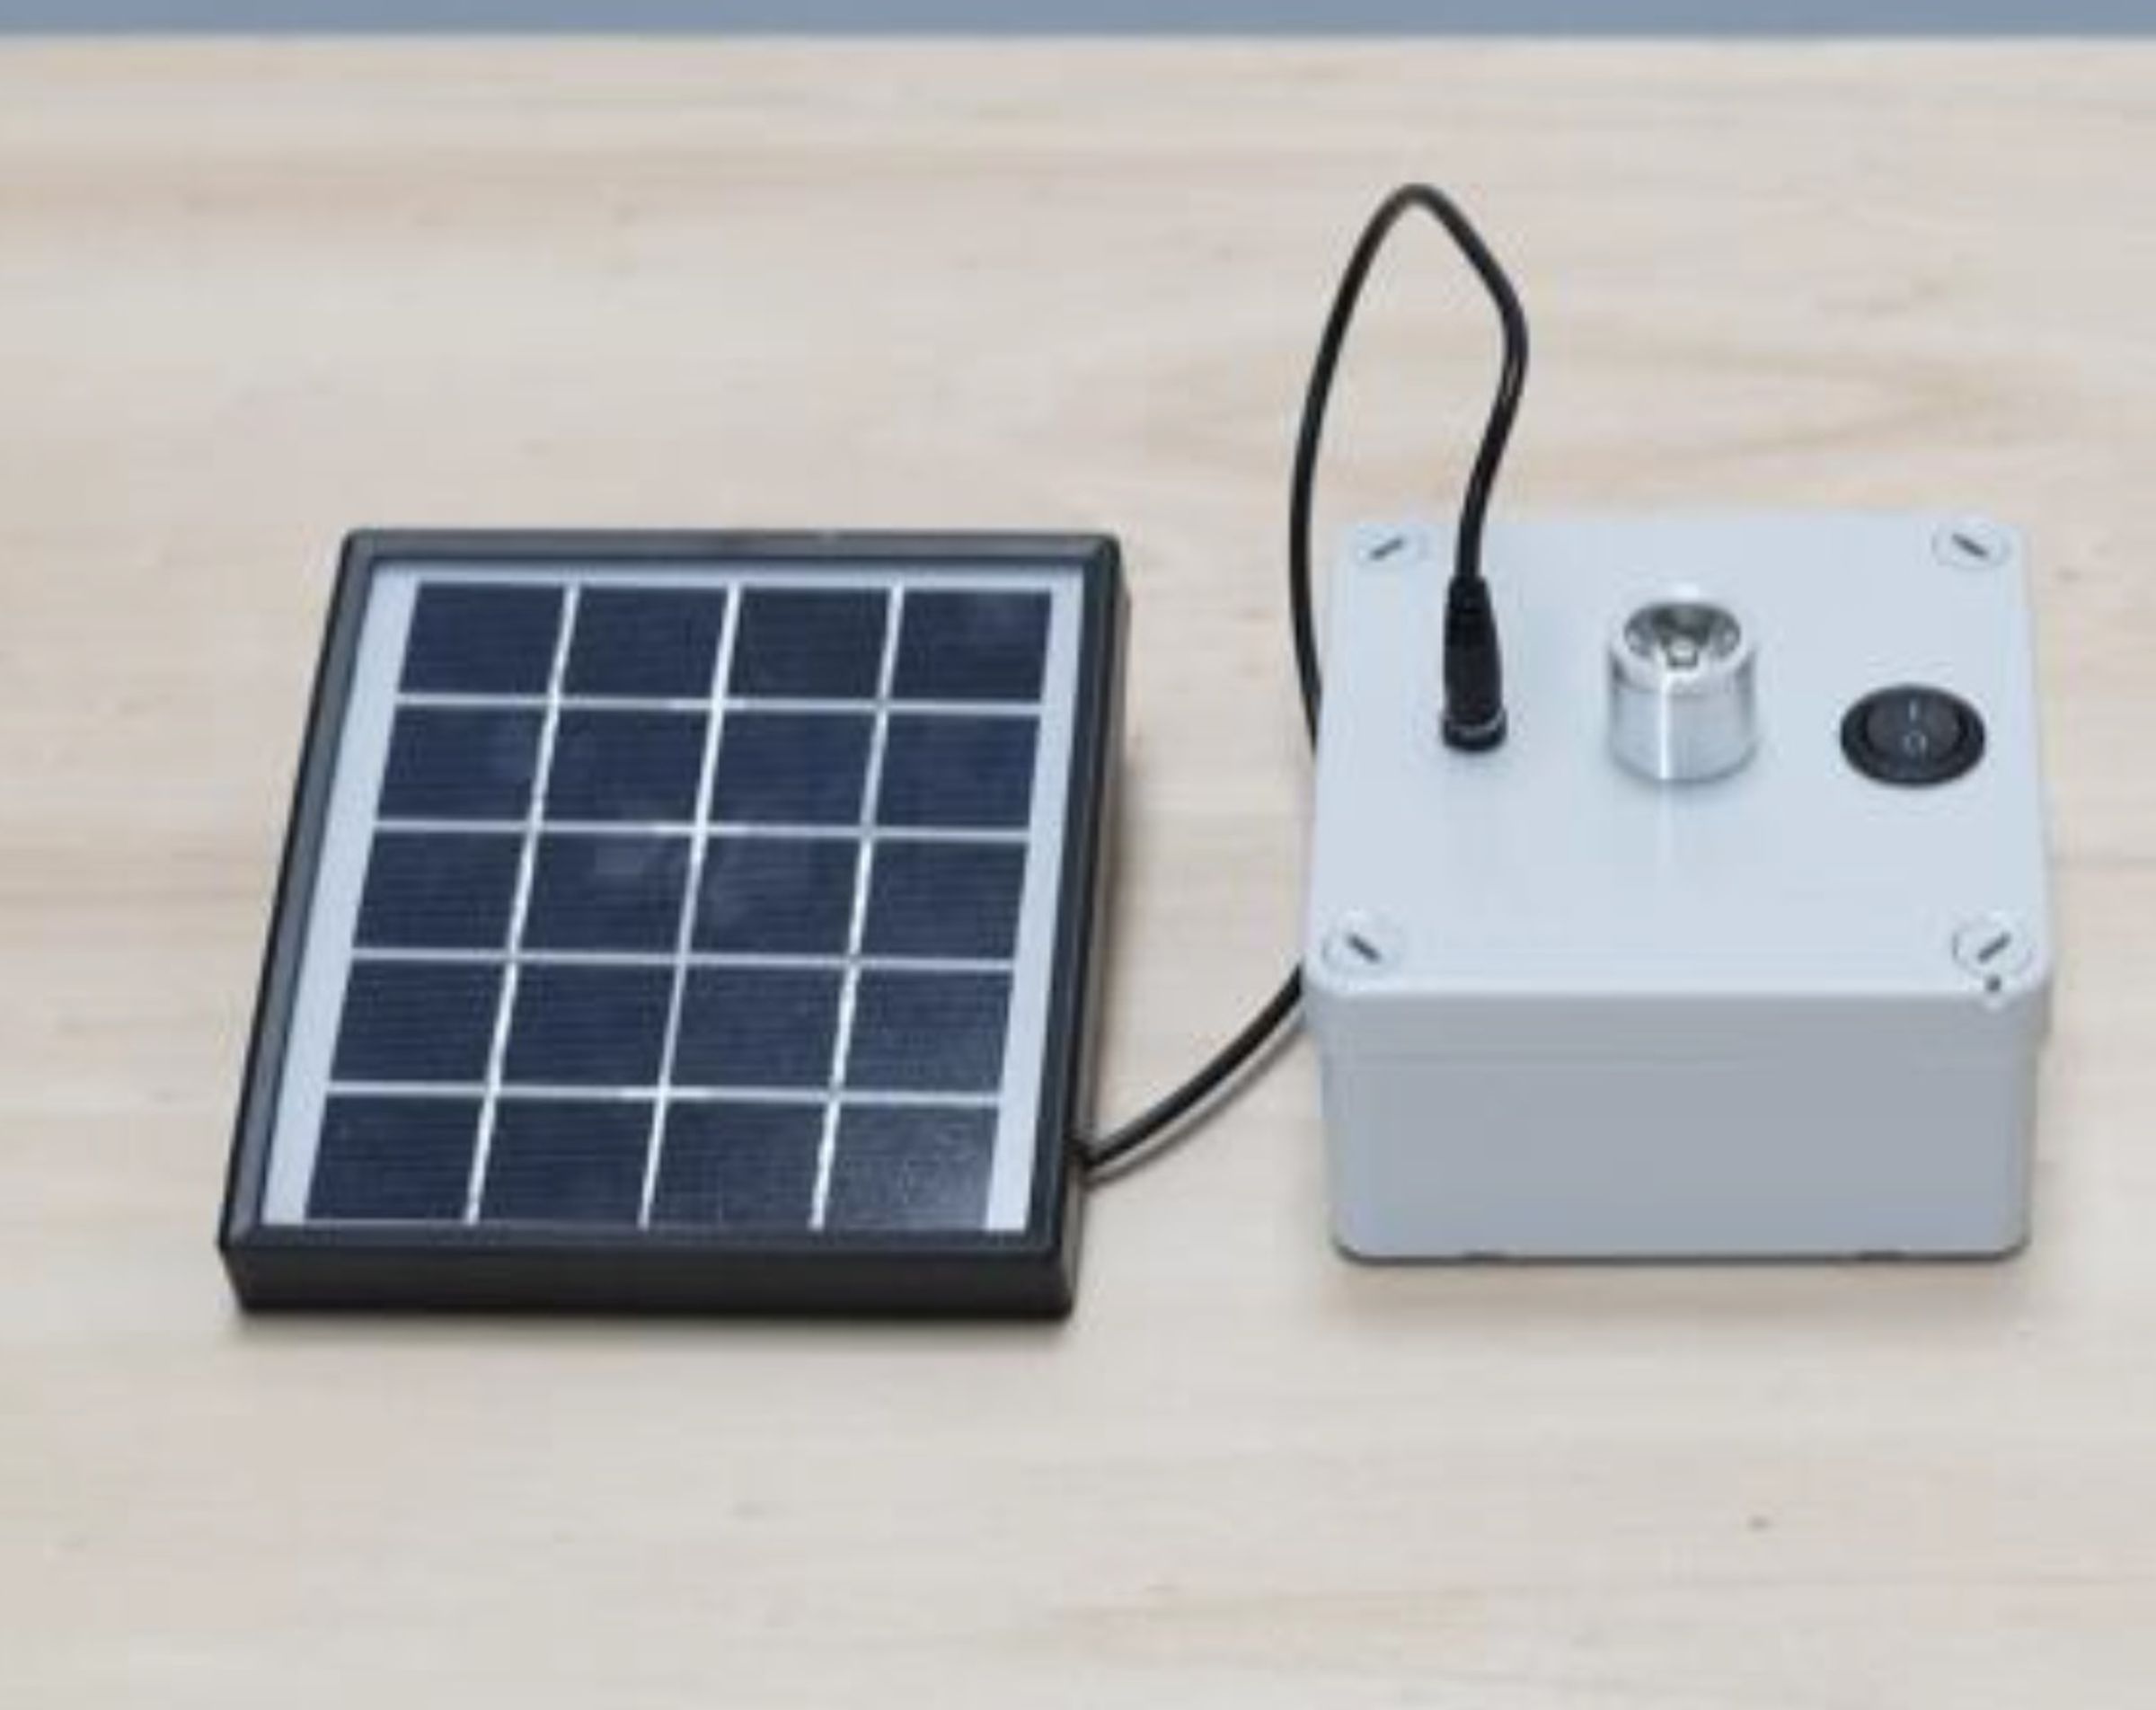
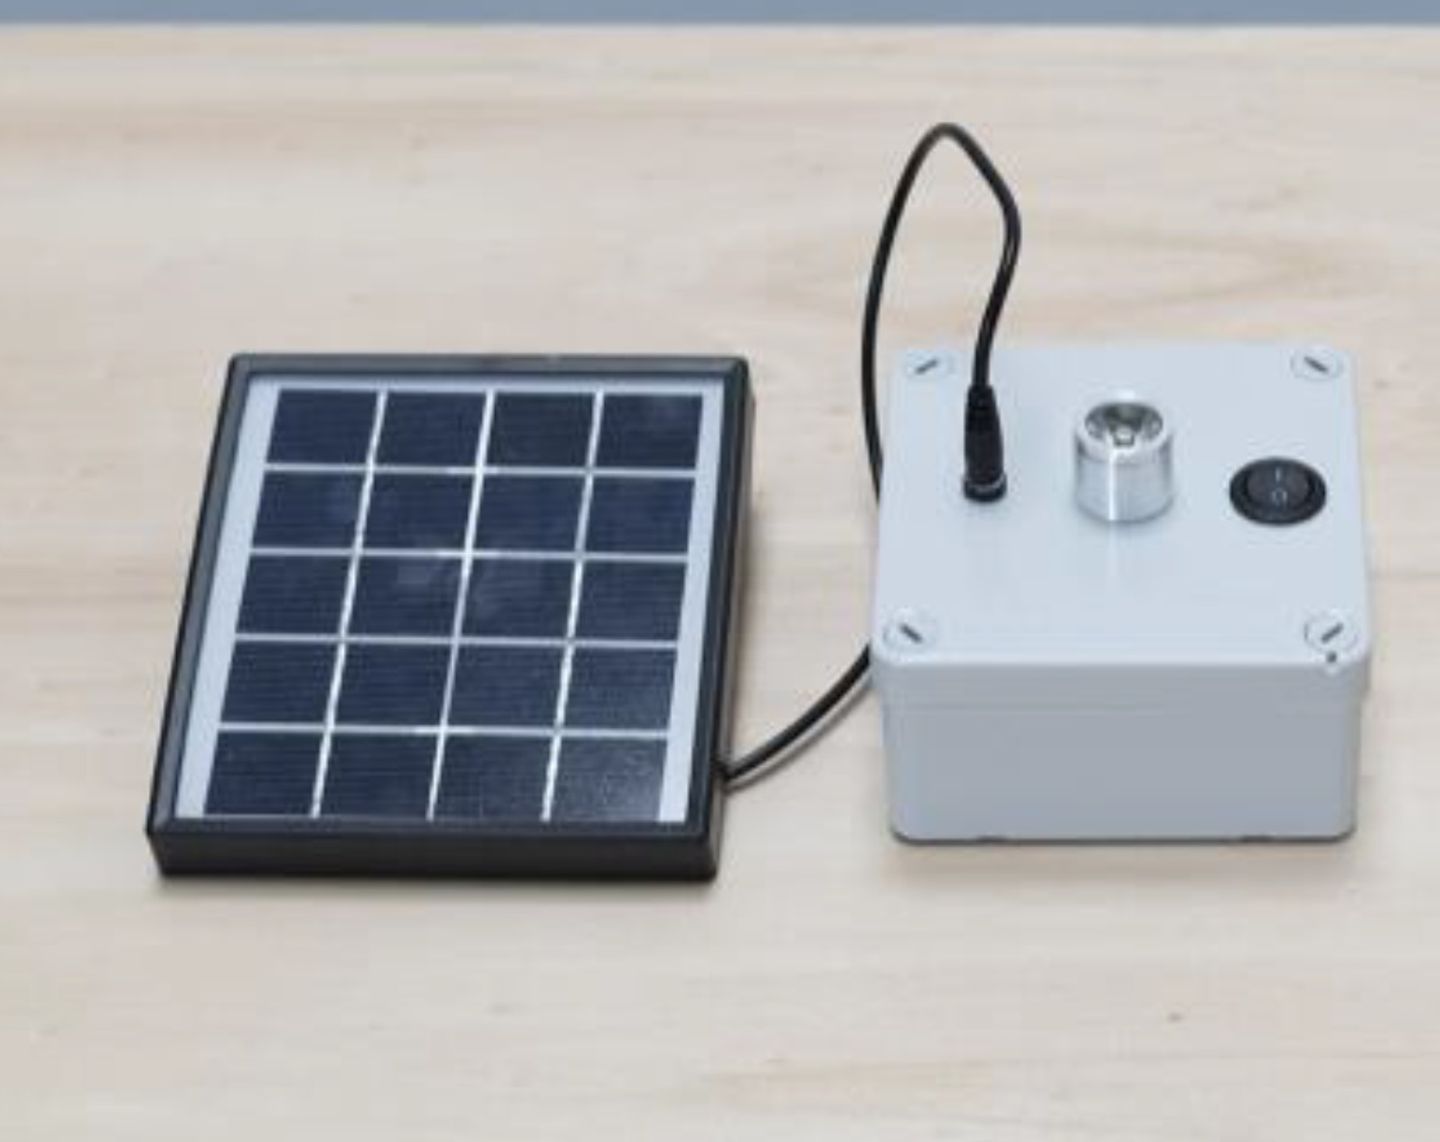
The light box is modular, very easy to make and uses only parts that are easy to get. The solar panel is plugged to the light box for charging during daytime, during nighttime you can unplug the panel.
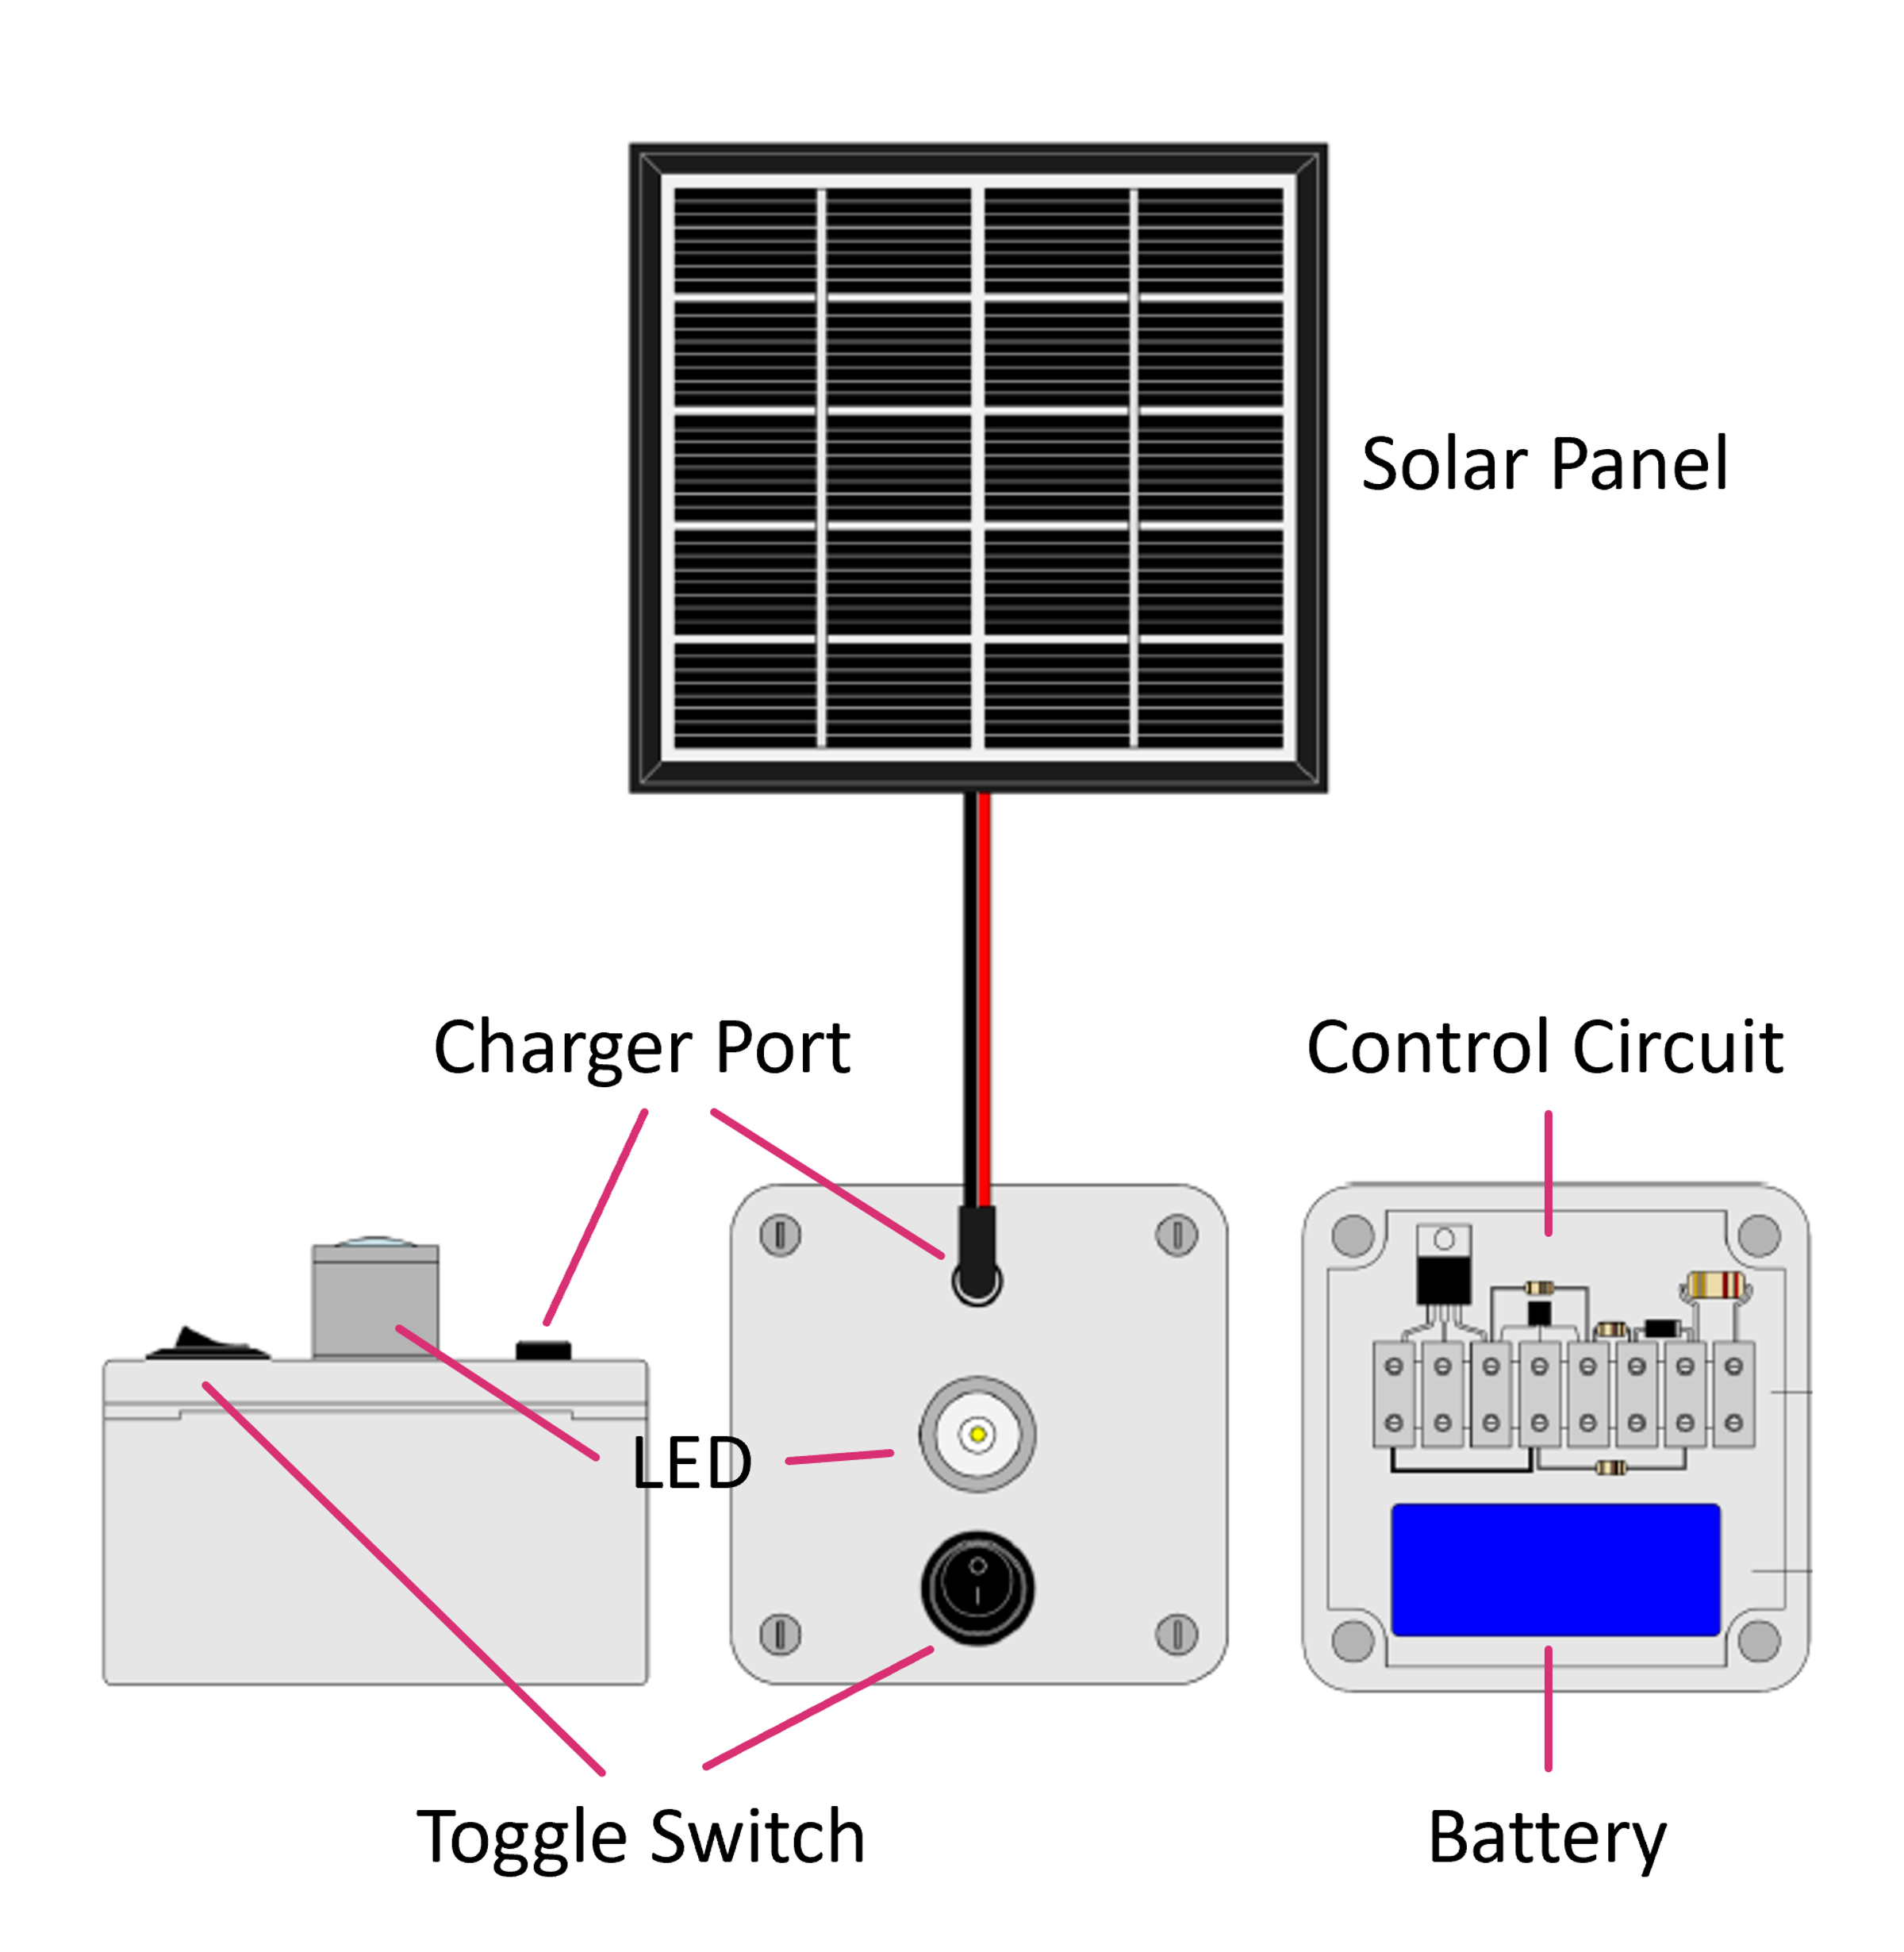

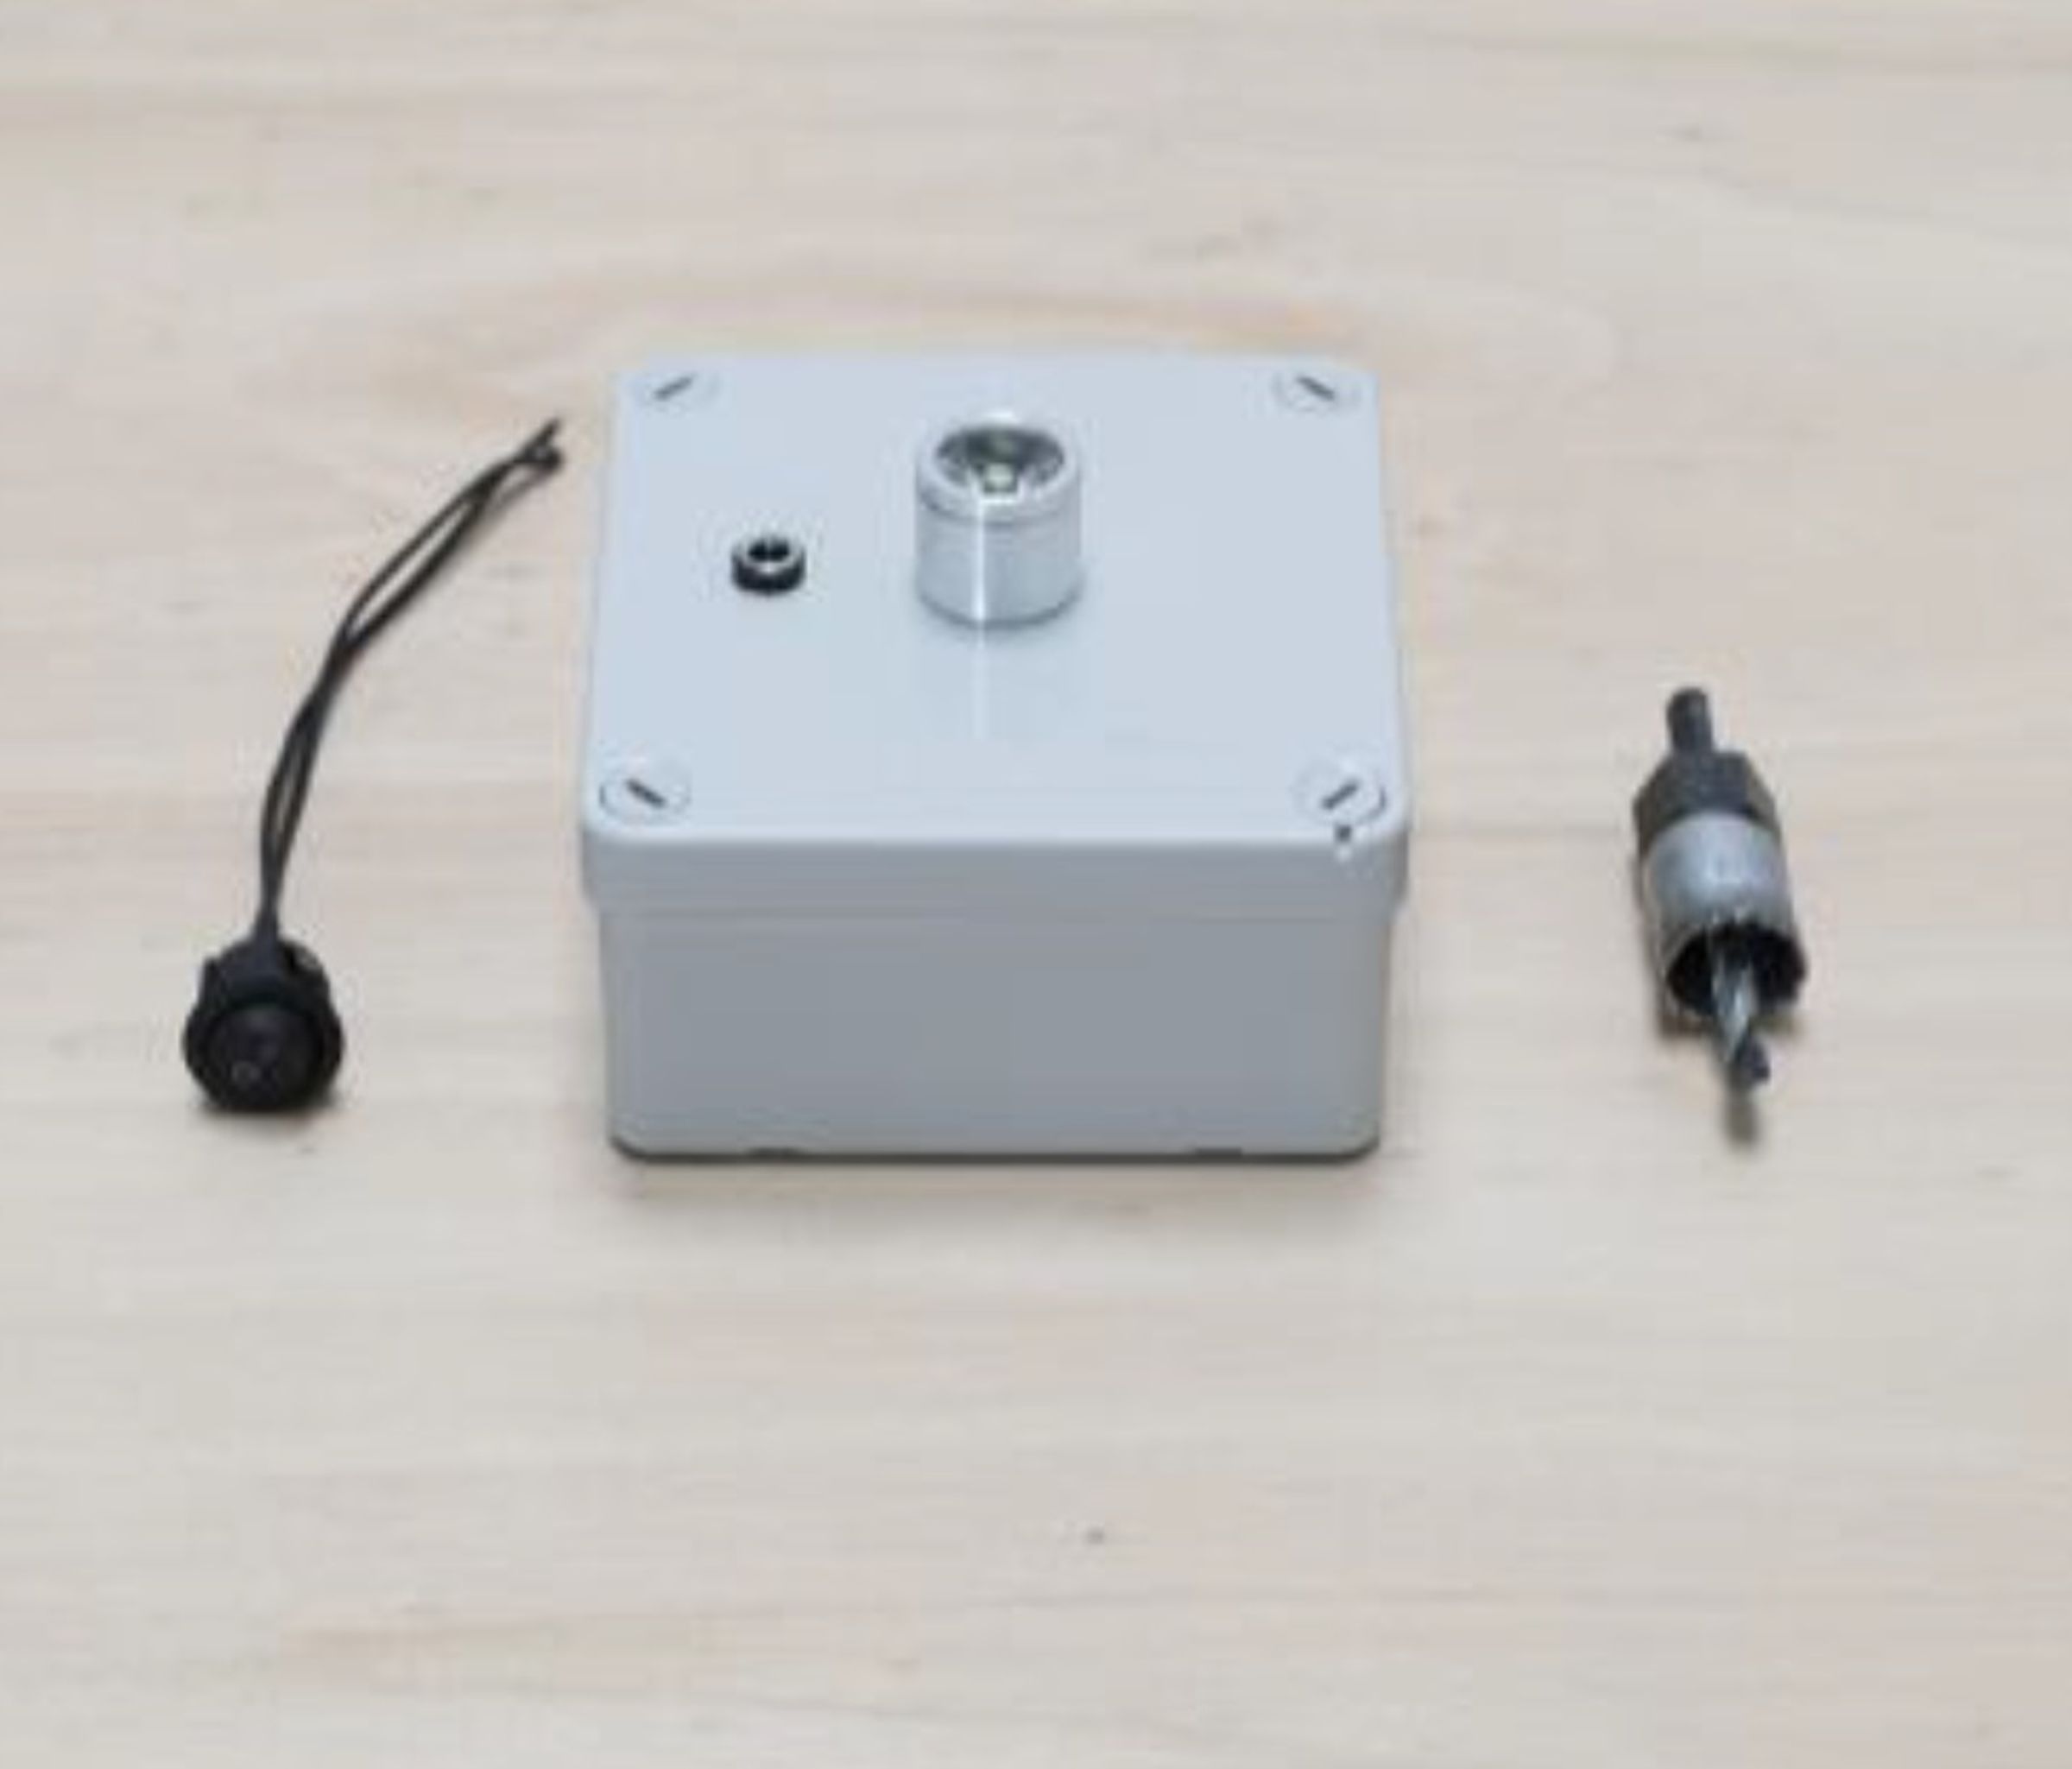
On the outside the box has a toggle switch, the LED and a charger port (jack or USB). It contains the control circuit and a battery.

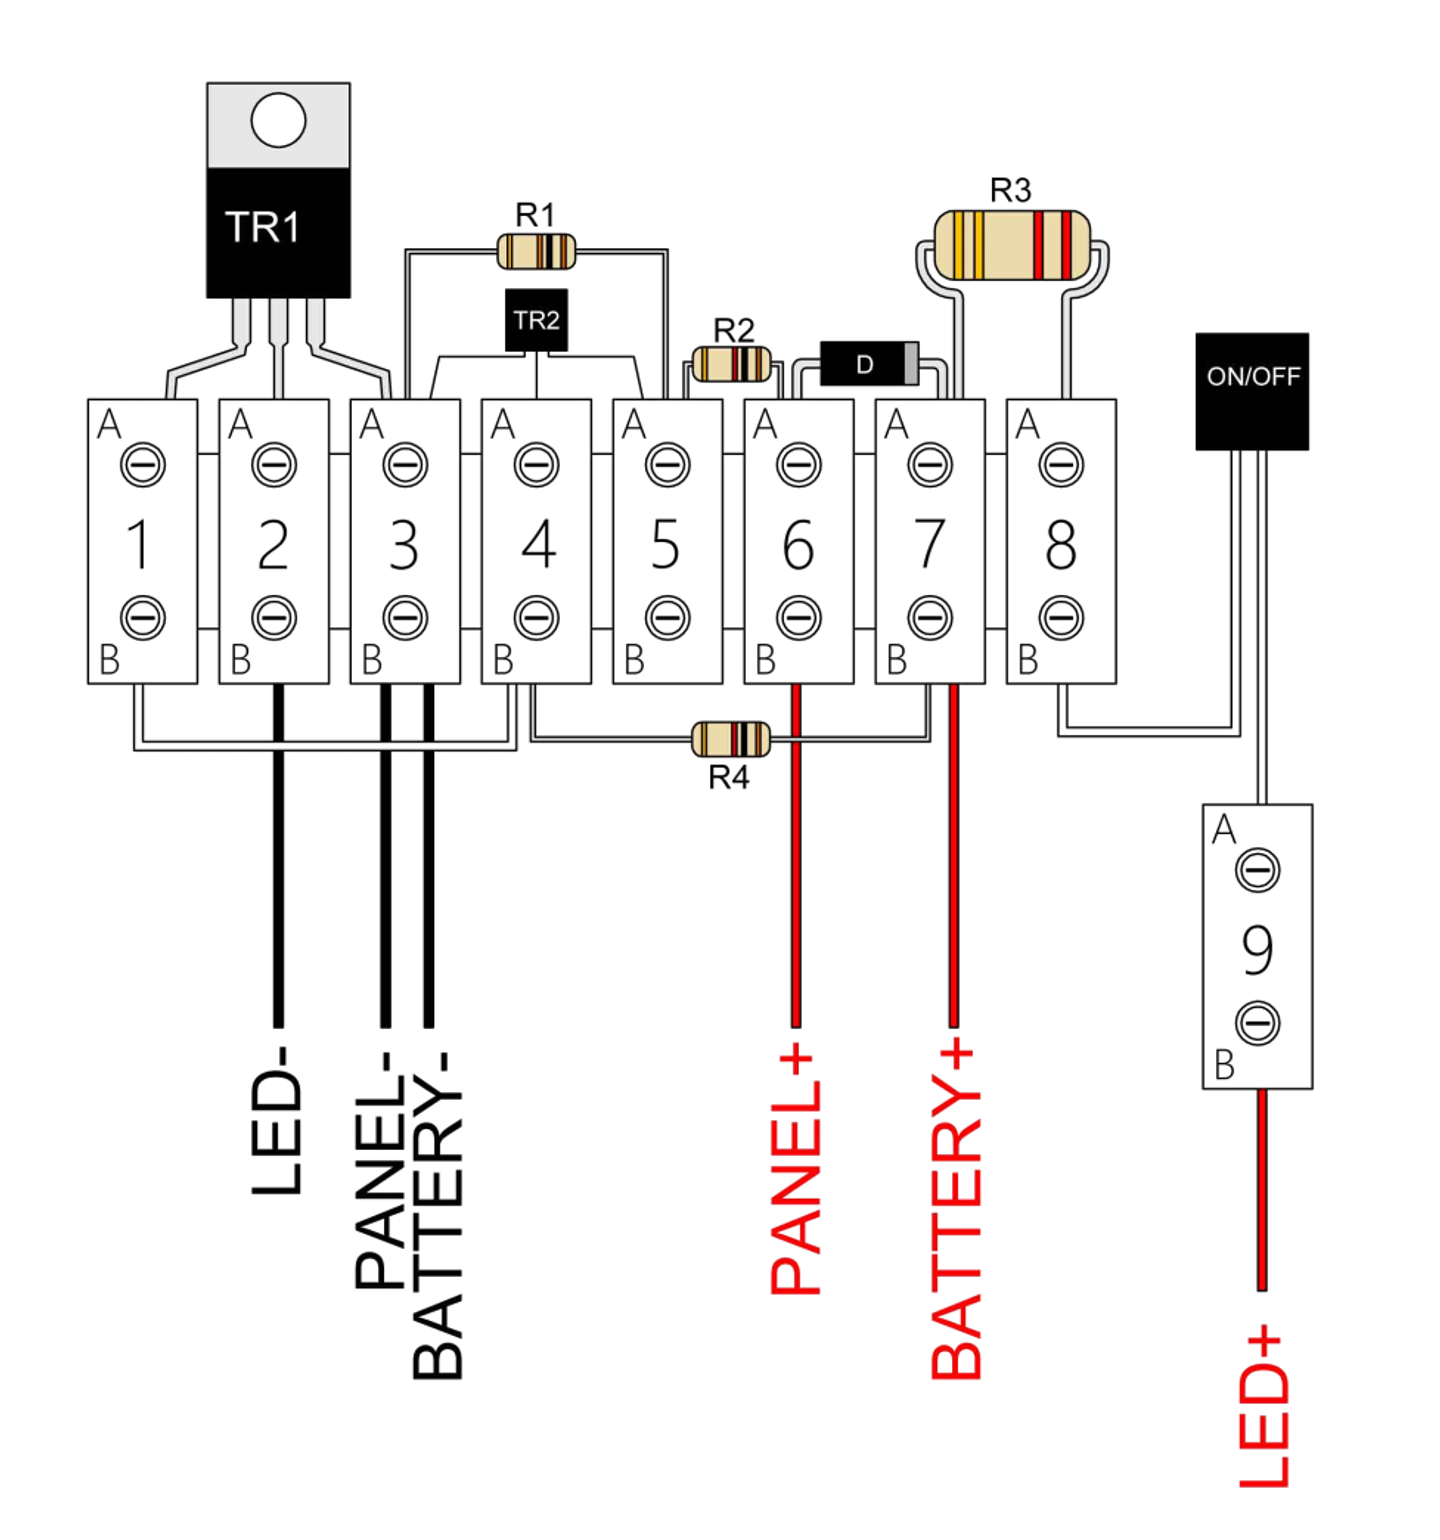

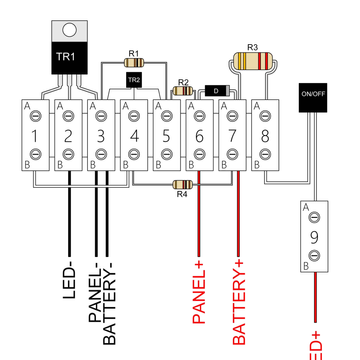
Put together the top row from right to left, starting in joint 8 (leave joint 9 free) with R3, D, R2, TR2, R1 and TR1. On the bottom row, start left to right: bridge joints 1 and 4 with a wire, bridge joints 4 and 7 with resistor R4.
We will wire the LED, the panel (charger port), the battery and the switch in the next step when we put together the box.
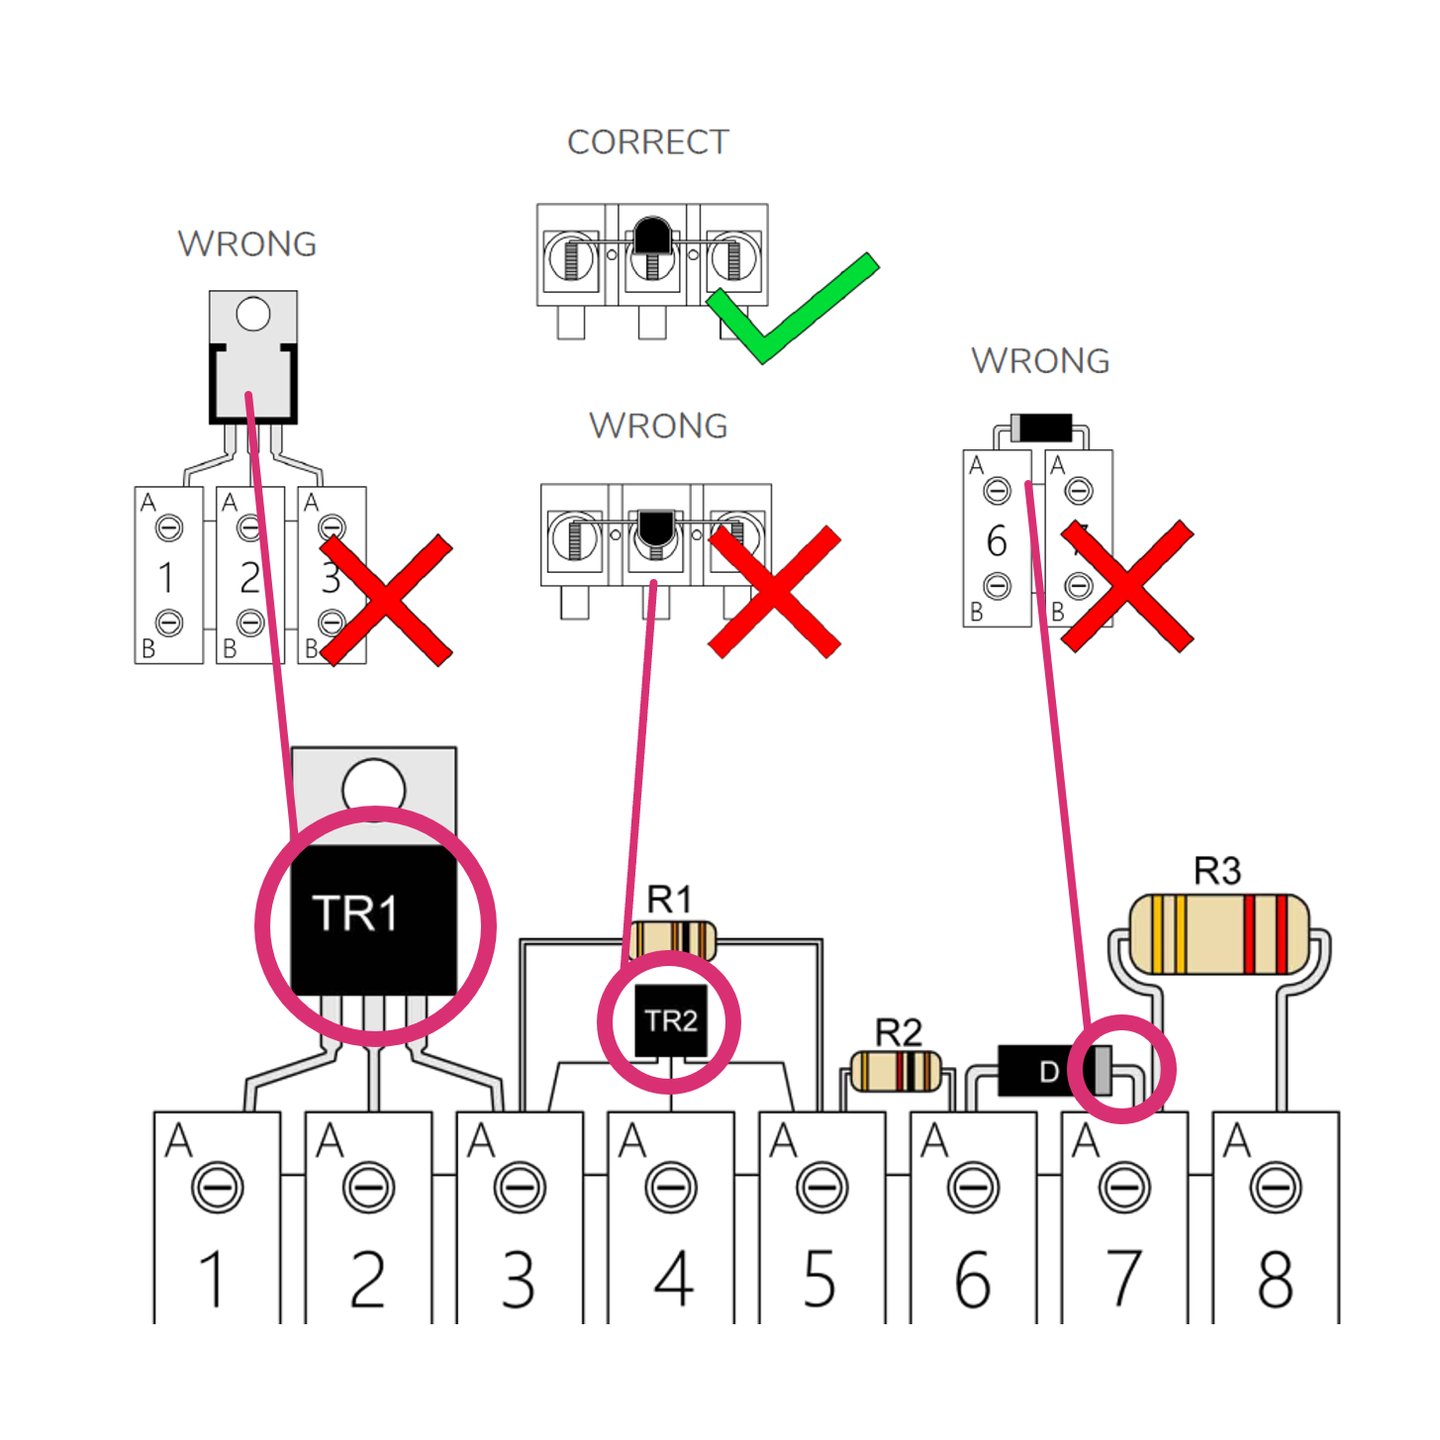
Make sure, you get the directions for the diode D and both transistors TR2 and TR1 right. For the other parts, direction does not matter.
When done, check that all screws of the joints are tightened.
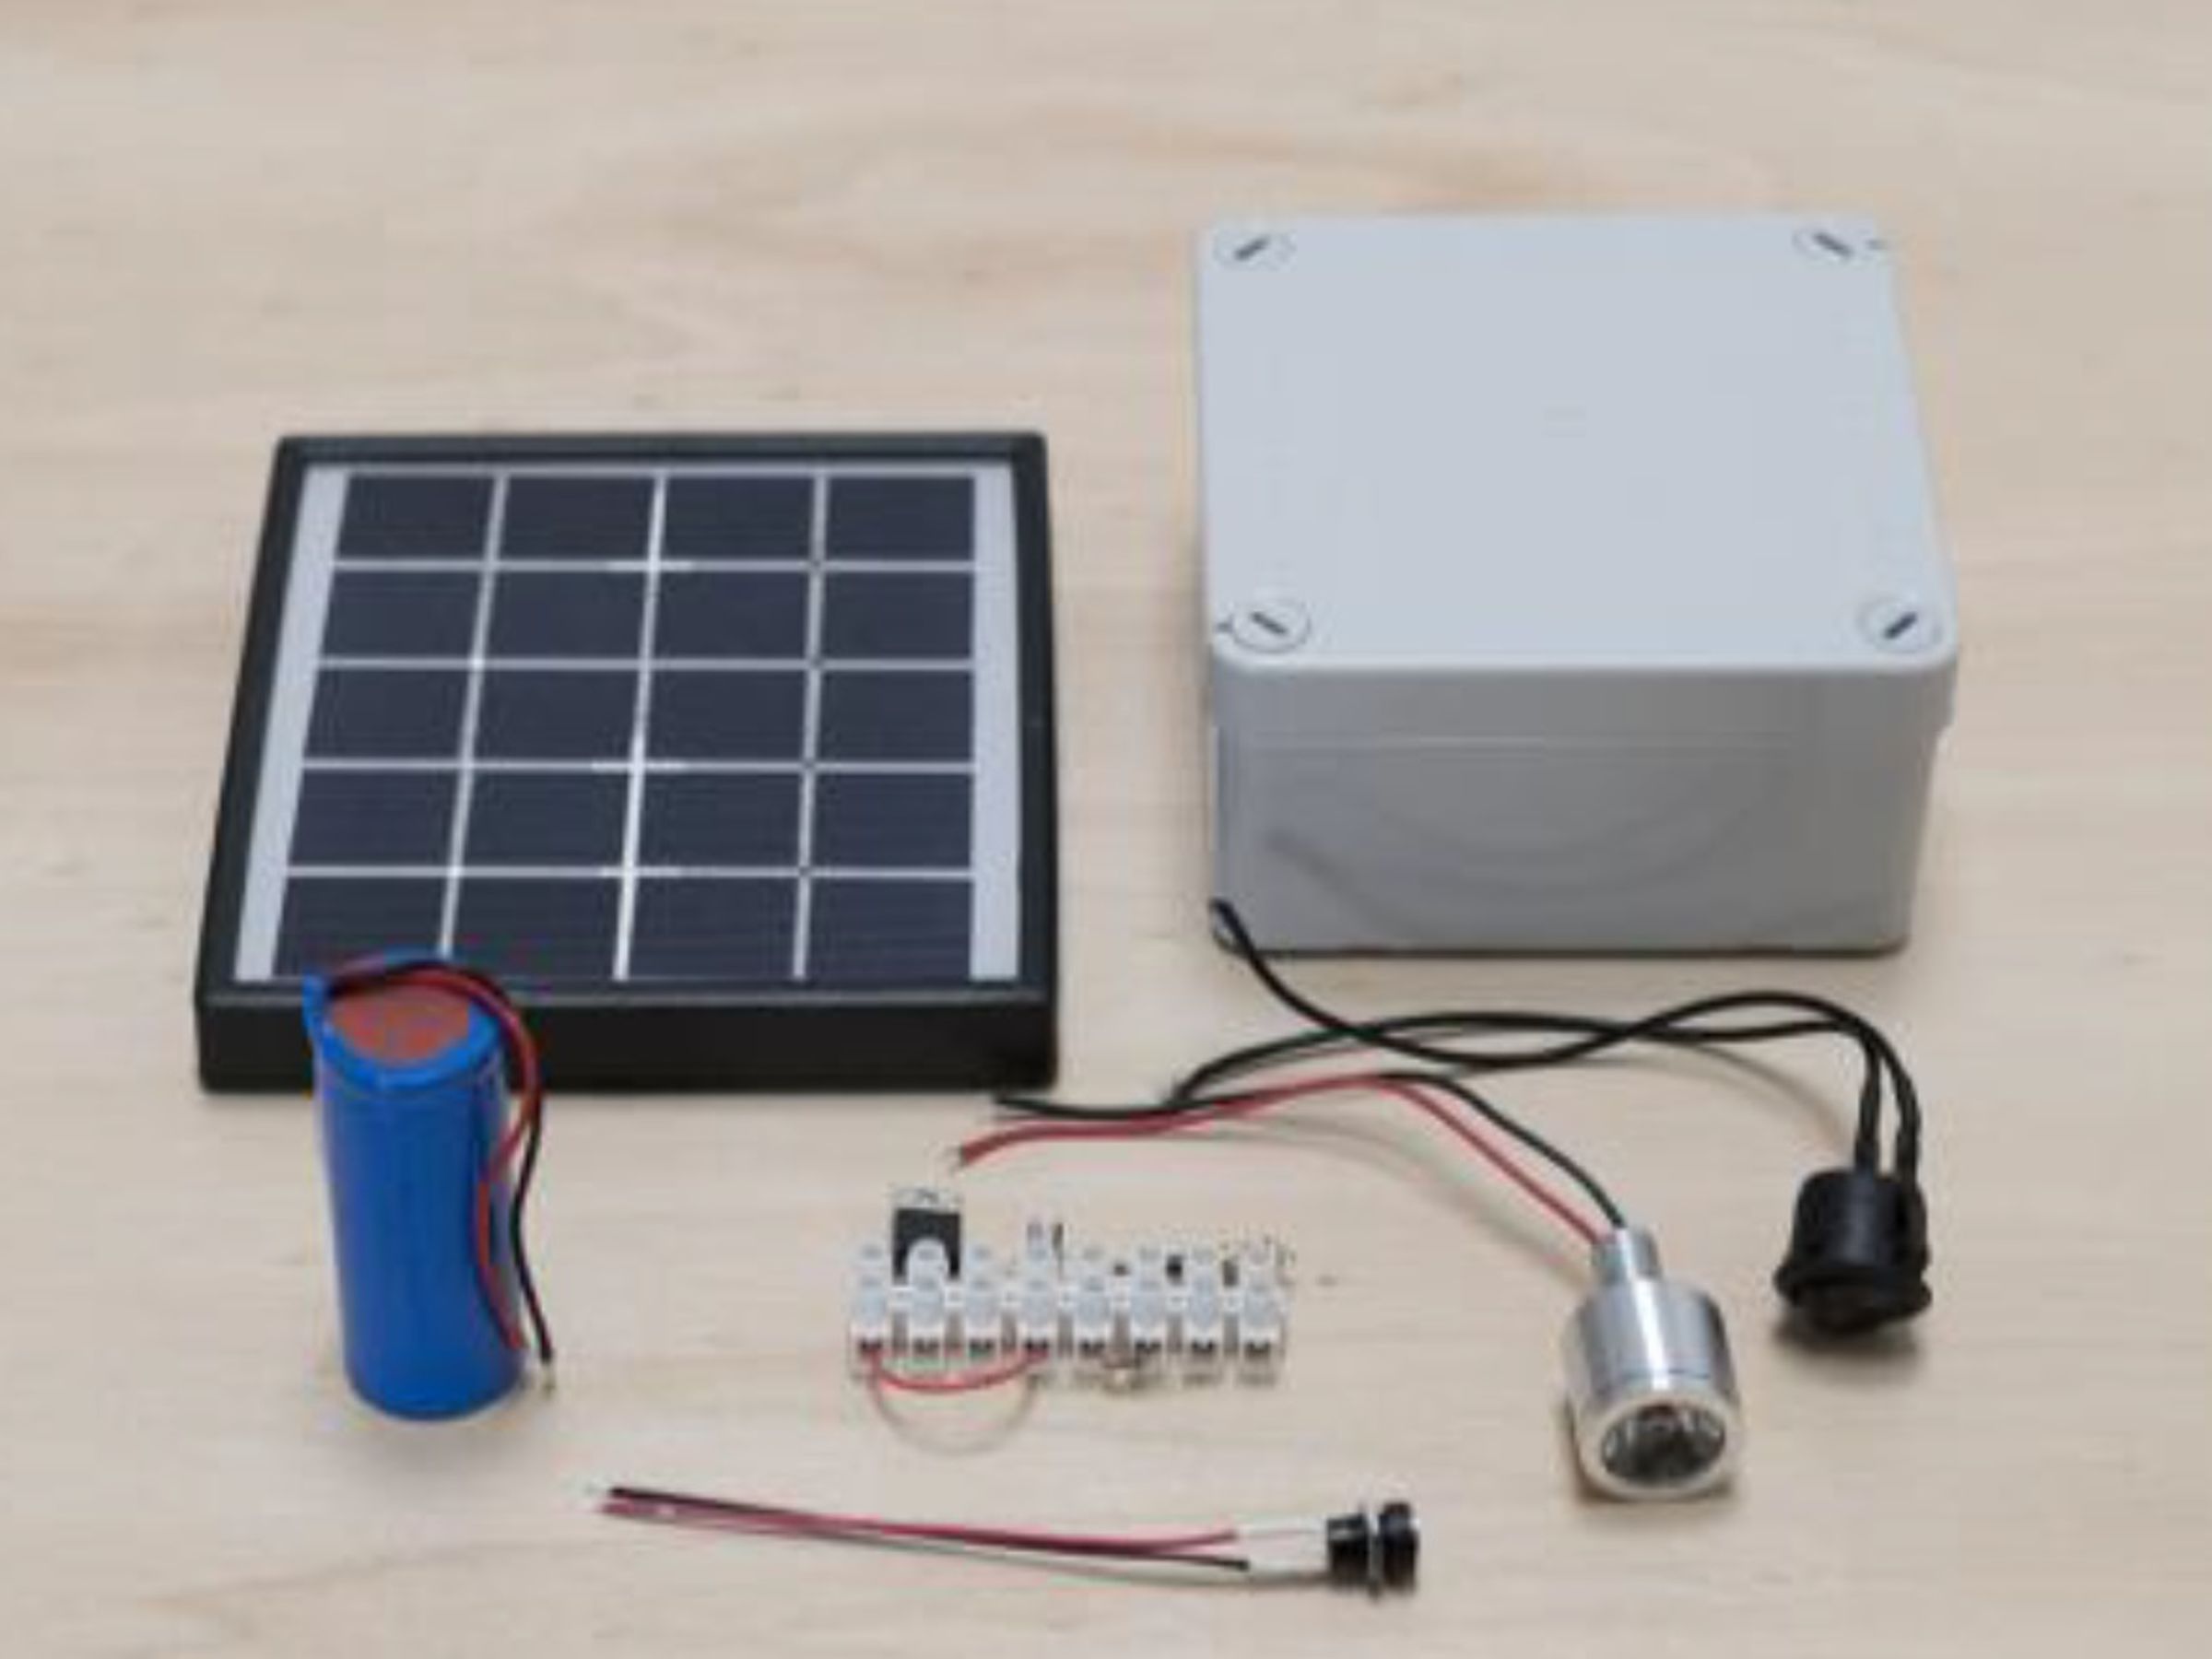
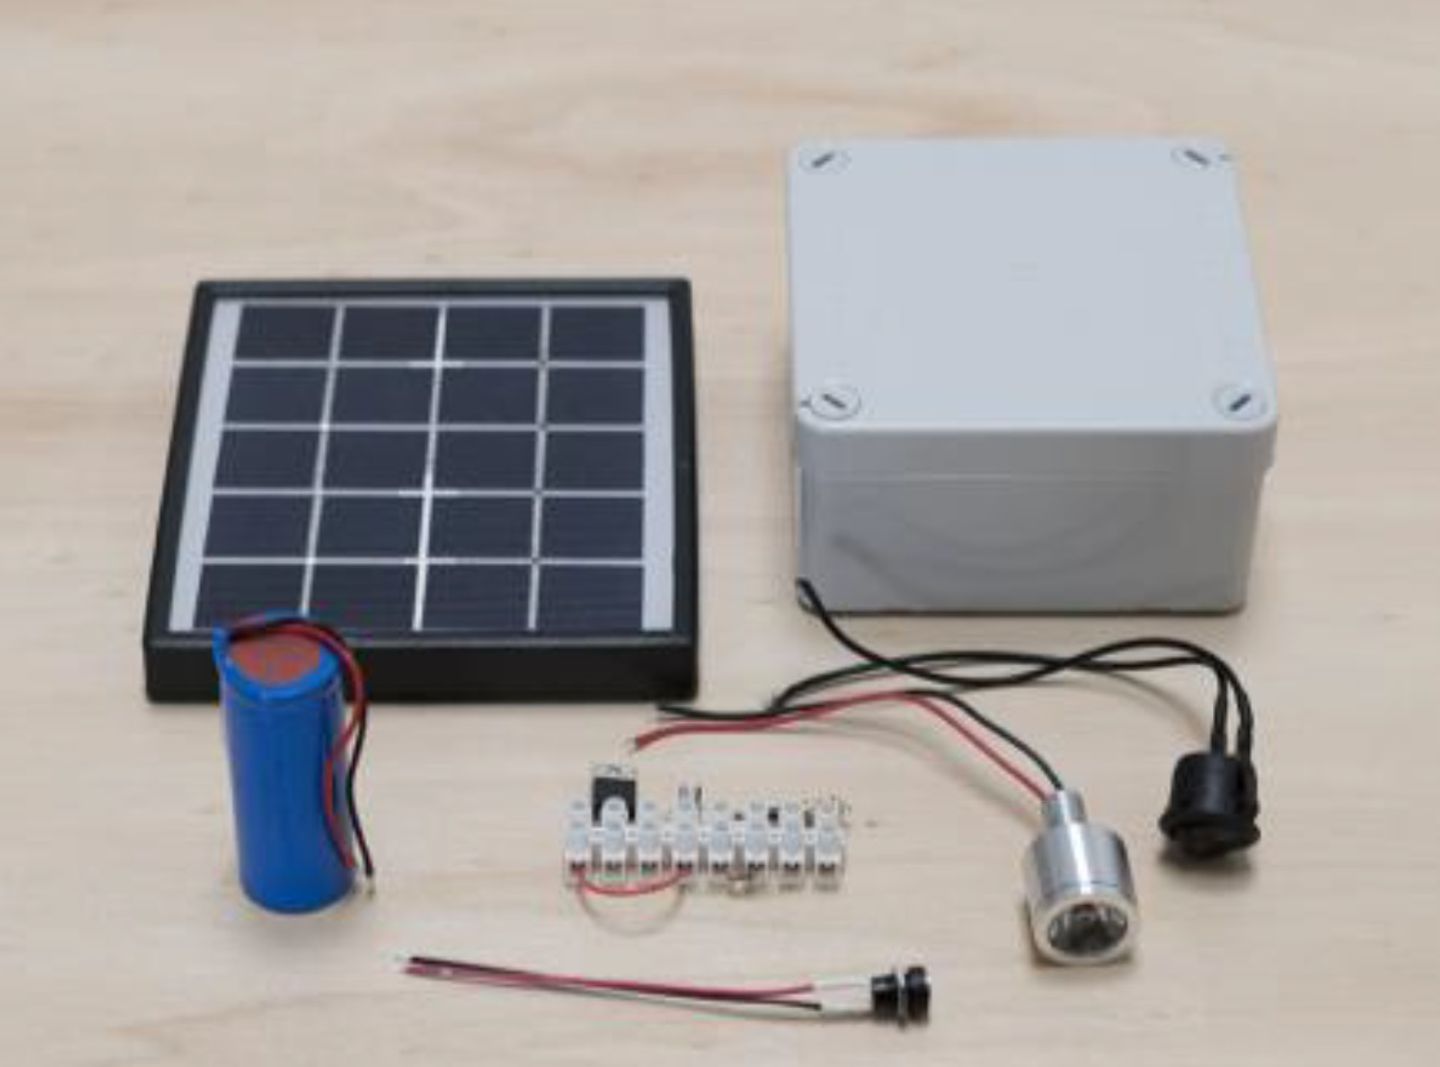

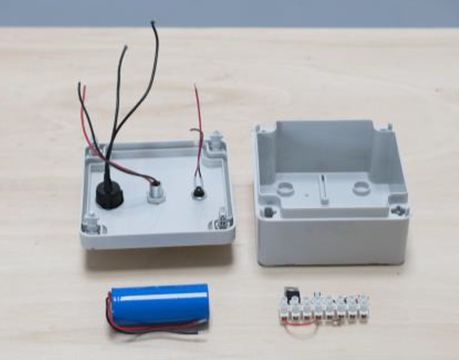
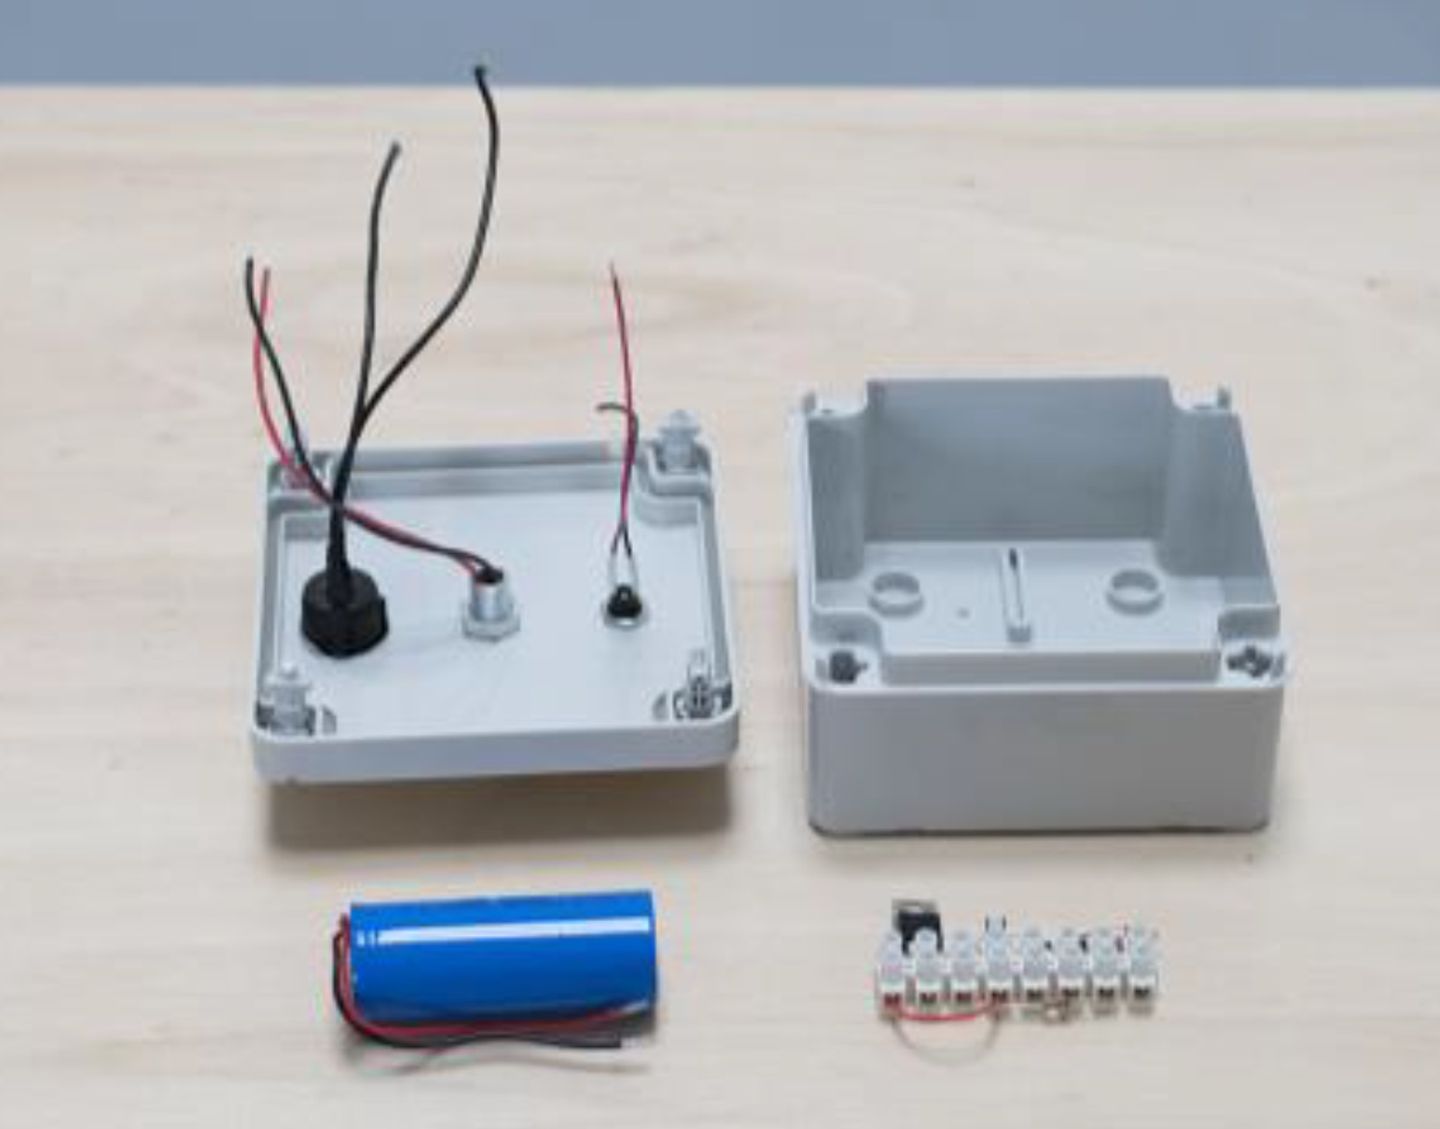
All the parts we put together now: solar panel, battery, charger port, control circuit, LED, switch and the box.
The holes for the LED and a jack charger port can be drilled with normal drills (6mm and 10mm resp.), for a USB port you will need to work through the plastic with a cutter knife, for the toggle switch we need a special drill with ~15mm diameter.

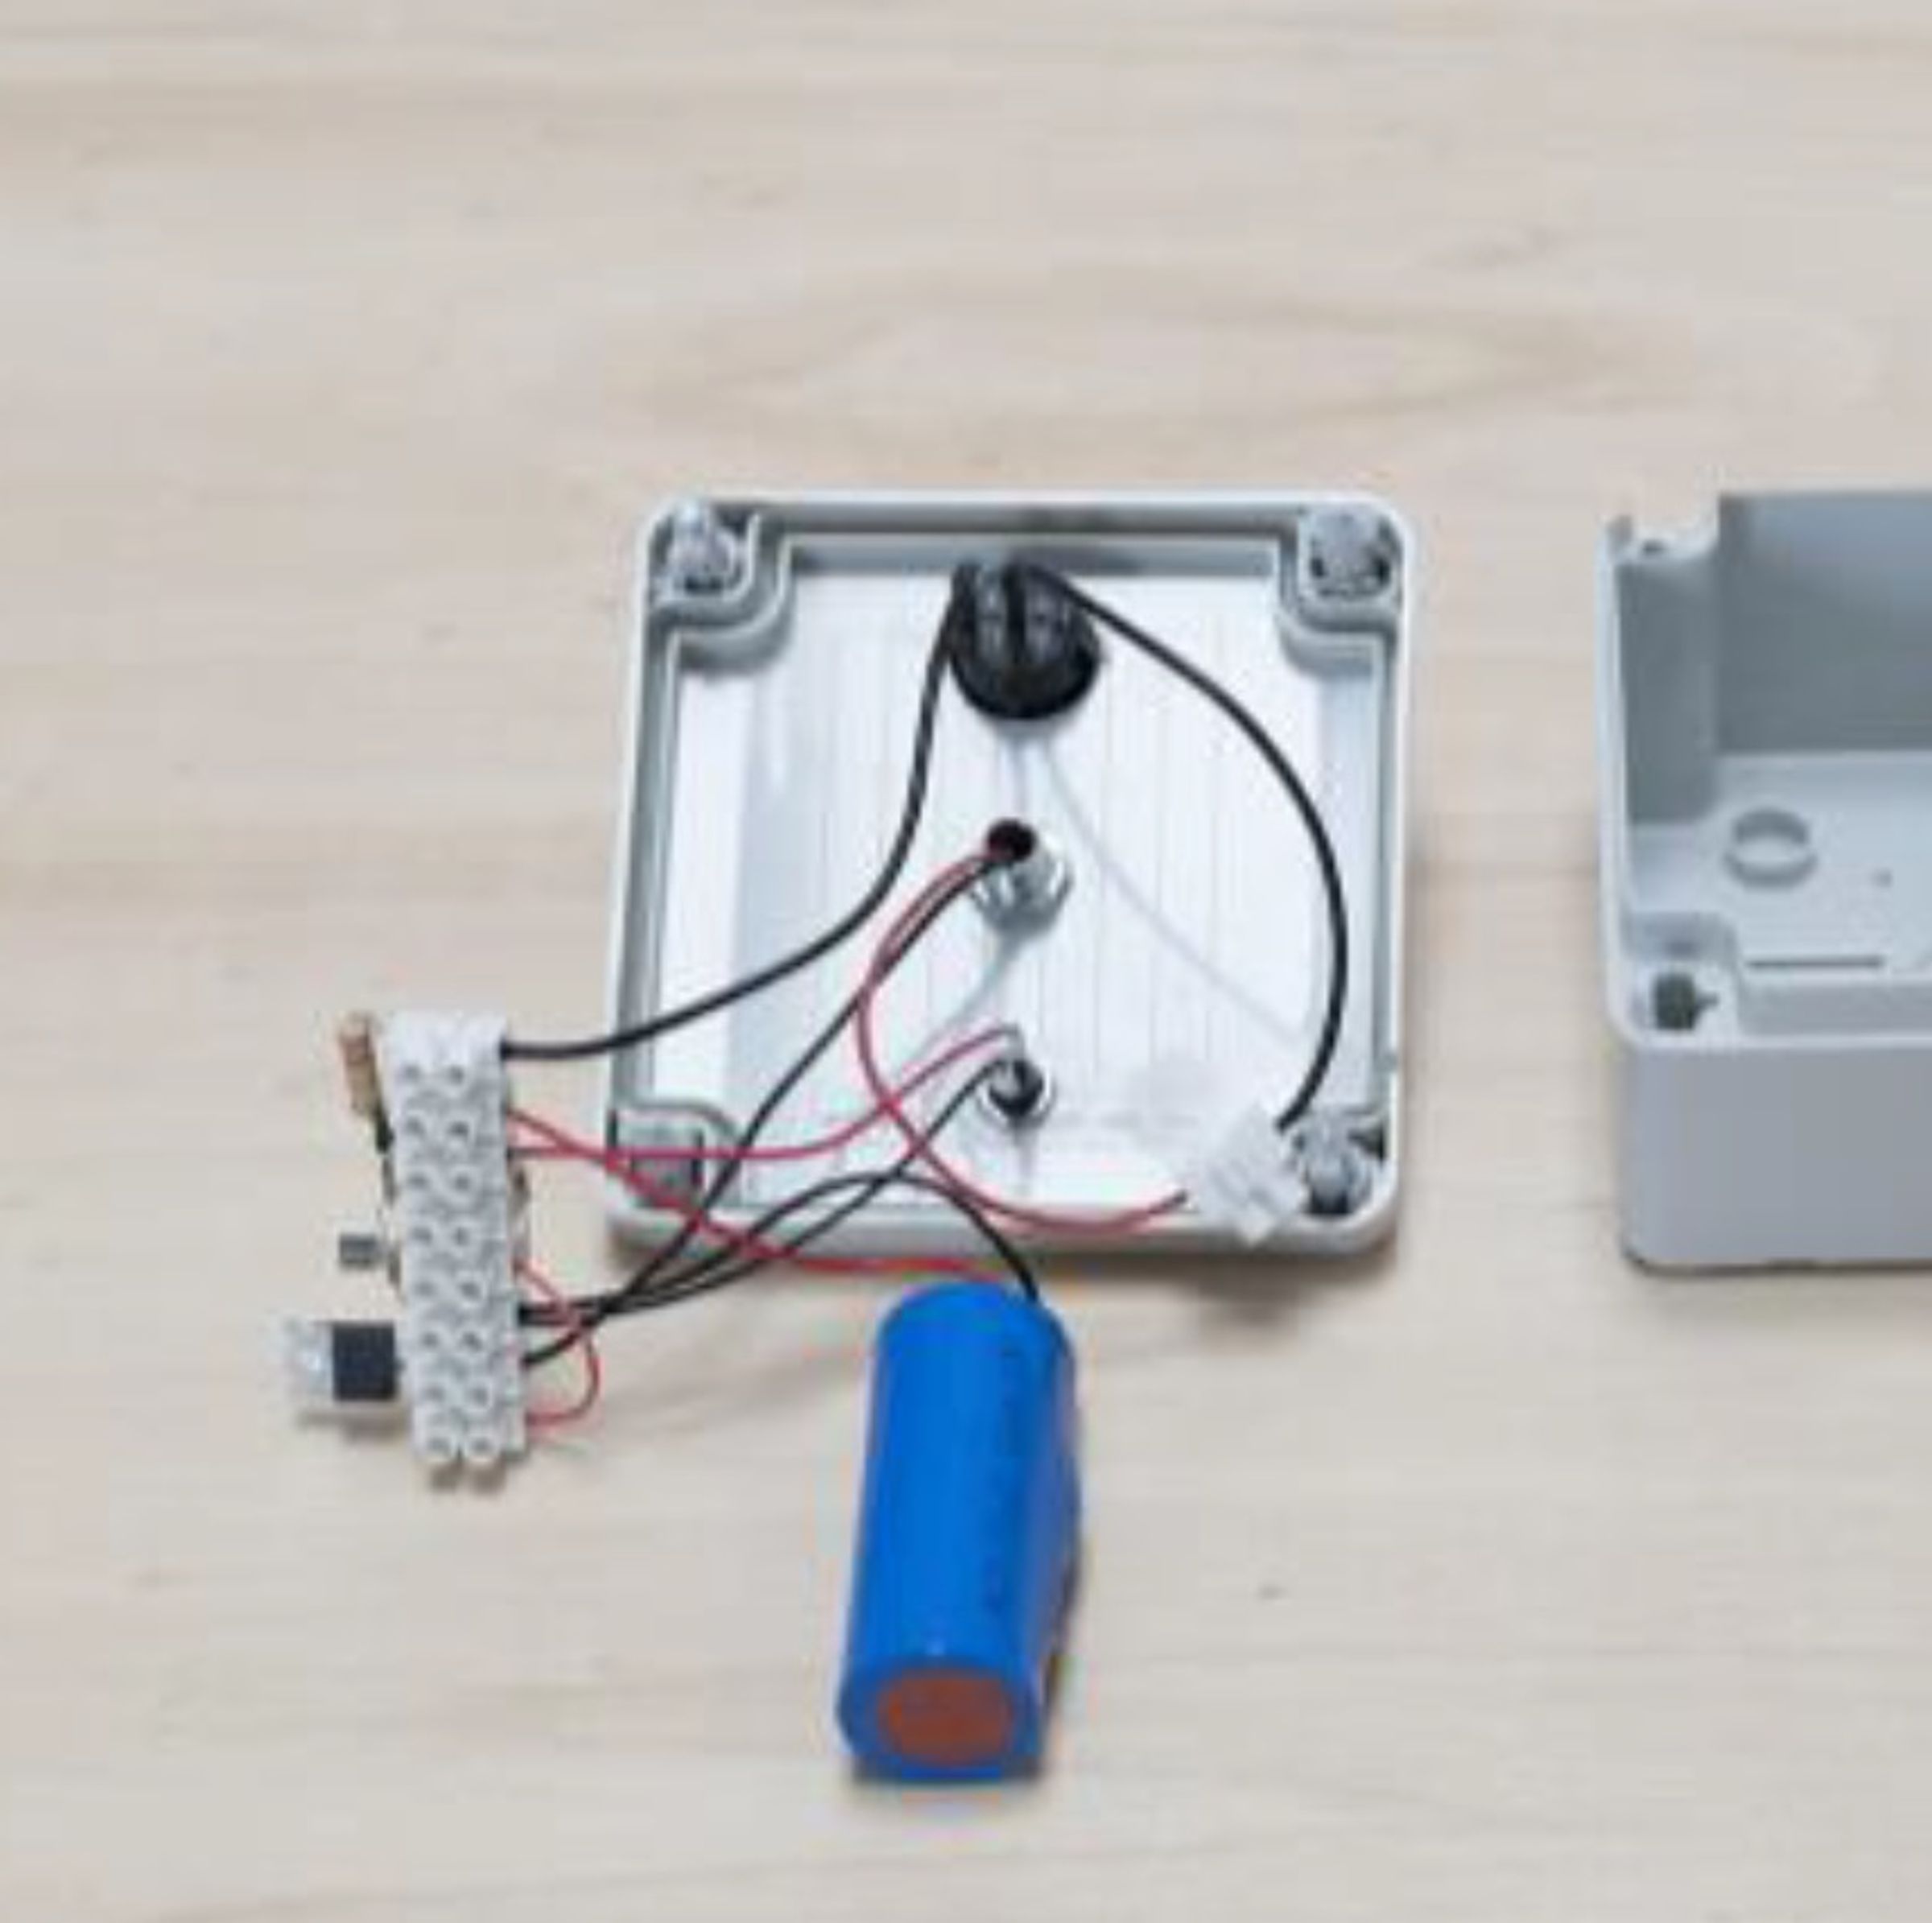
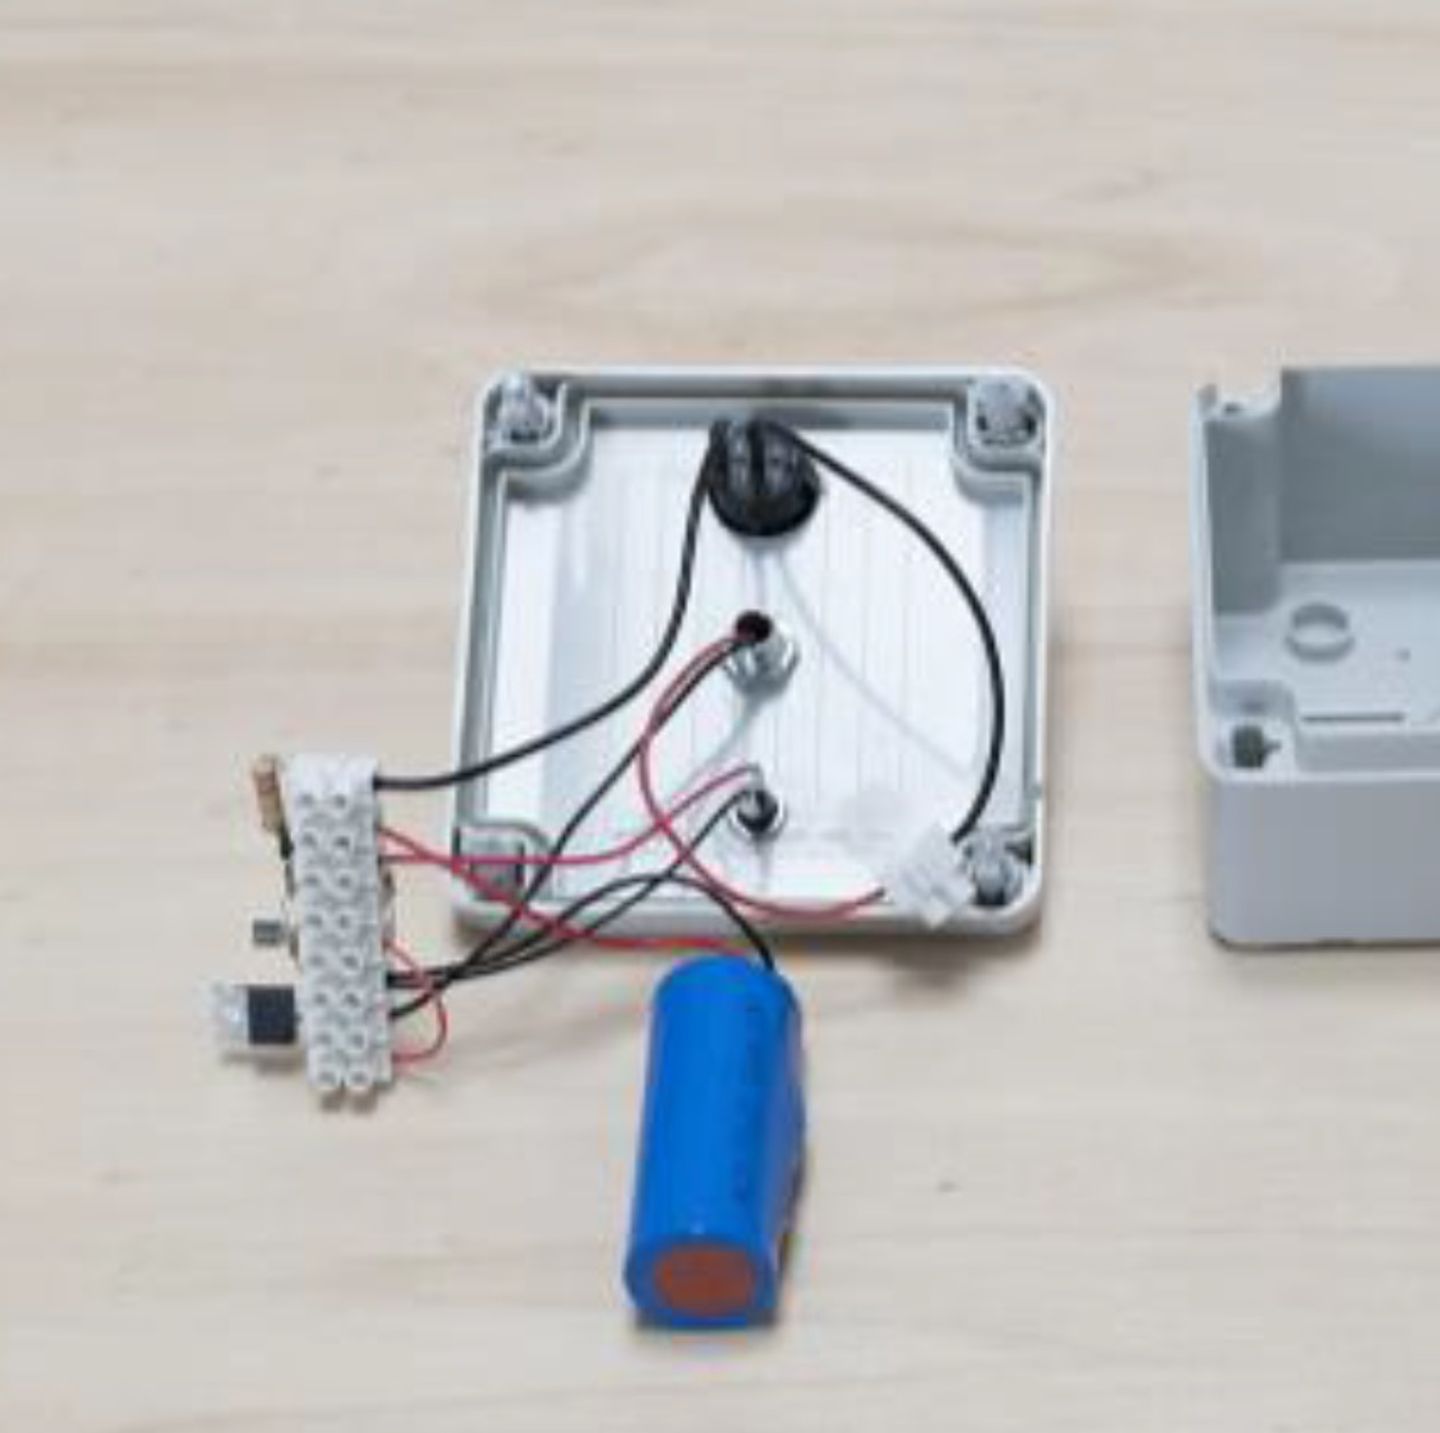
Switch, LED and charger port are all mounted to the lid, their leads stick out on the inner side, now we can connect everything according to our circuit plan.
Connect as follows: LED- (black) to joint 2, LED+ (red) to joint 9 (switch), switch to joint 9 and 8, charger port+ (red) to joint 6, charger port- (black) to joint 3, together with battery-, battery+ to joint 7. Try it out by toggling the switch (hopefully your battery is charged enough).

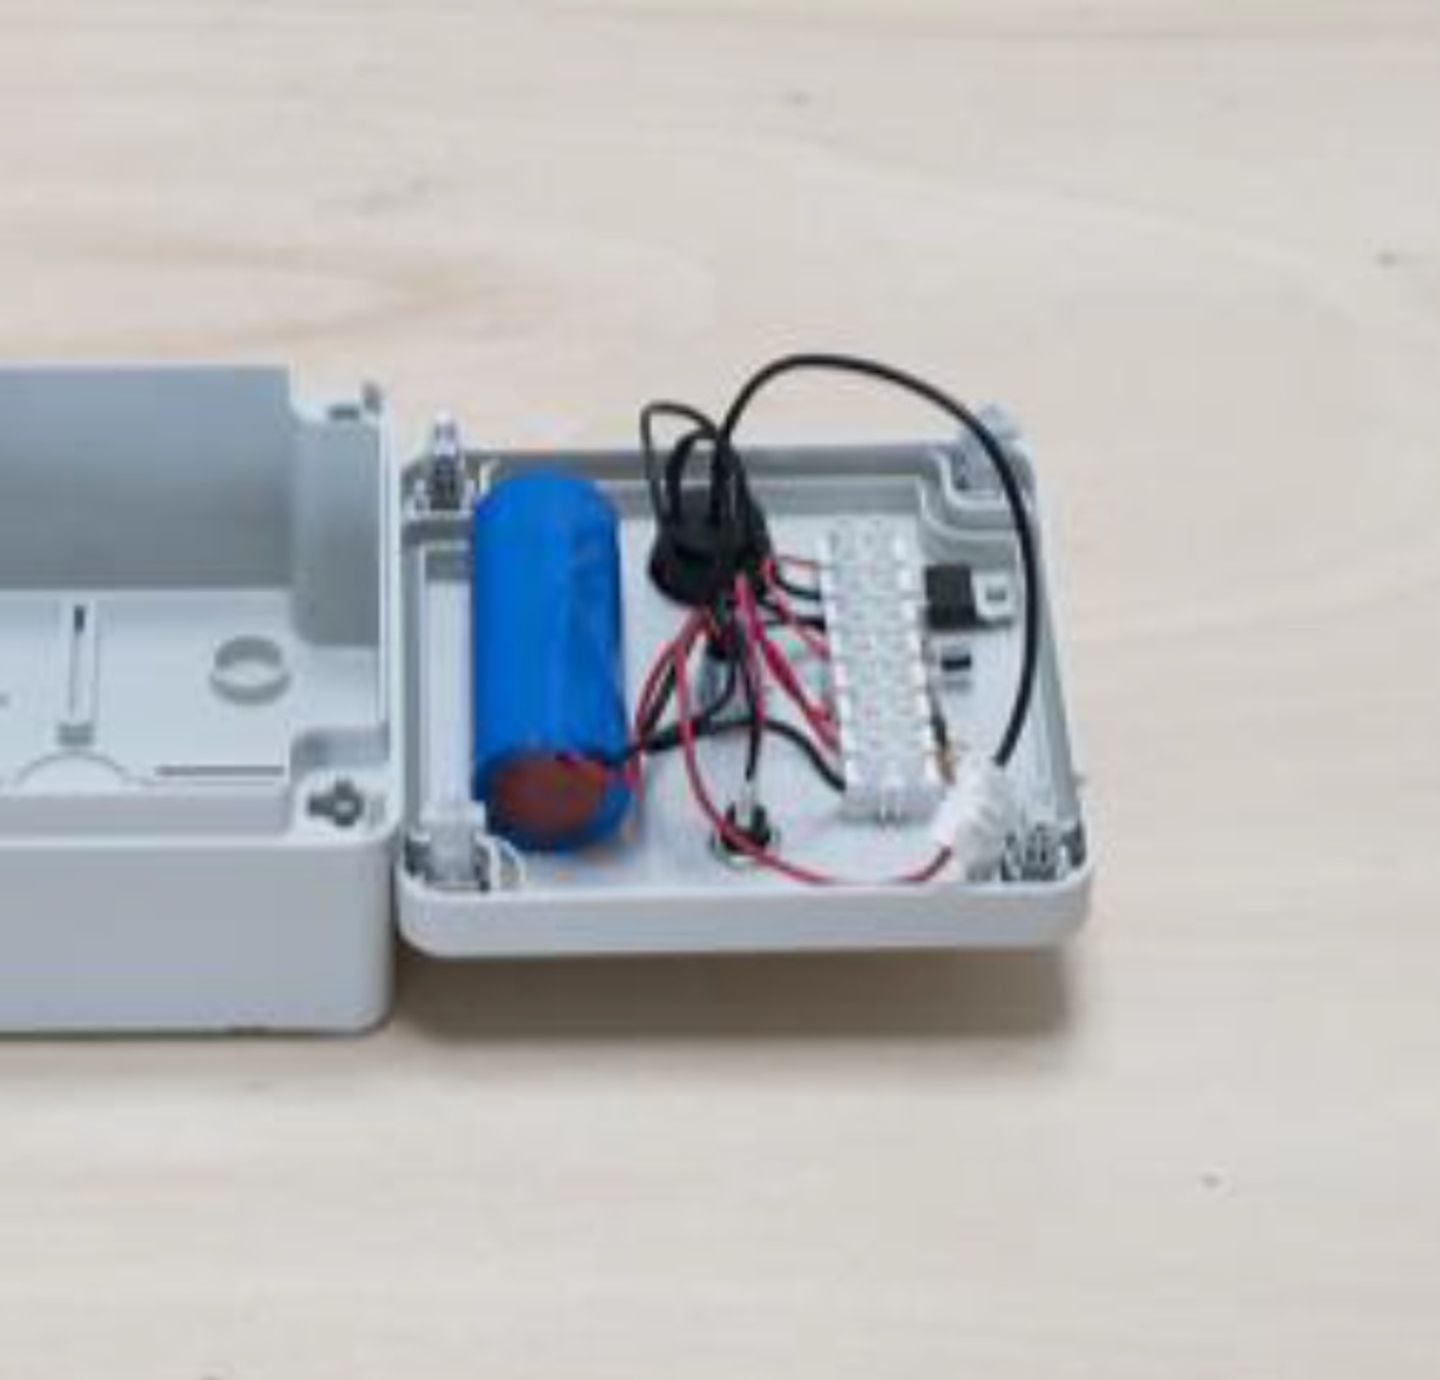
Glue everything to the lid with hot glue. Good job.
Connect the solar panel and charge the battery for the first night with your self-made light-box.
🦊 Any box will do, but the grey electric installation box will give your lamp robust protection.

Free daylight for your home
Light up dark areas in your home during daytime using this green and...
Safe money and the environment
Vinegar and bicarb are really great products for cleaning. They are...
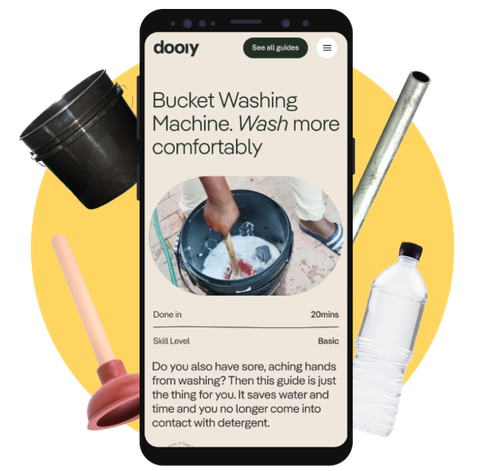
Easy recipe, saving 45 min. of gas/electricity
Utilize your smart cooker box , smart cooker from blankets, or wonderbag for...

Biochar has a porous structure and functions as a water and nutrient storage.
On dooiy you find fun and easy hacks that make life easier. Just follow our simple step-by-step guides and create something for your home or community with little materials and tools. Want to start a business? dooiy might be the perfect starting point for you.

from dooiy
You don‘ t have to be an expert to start making with dooiy. Just choose an easy hack and get going. After you made a few, I am sure that you will come up with your own ideas.
dooiy is being developed by passionate people in Germany and South Africa.
To fulfil our vision, we are looking for partners, volunteers, donors and people who spread the word.
Learn moreand become a partner