Guide by RWTH Aachen University - Institute of Landscape Architecture
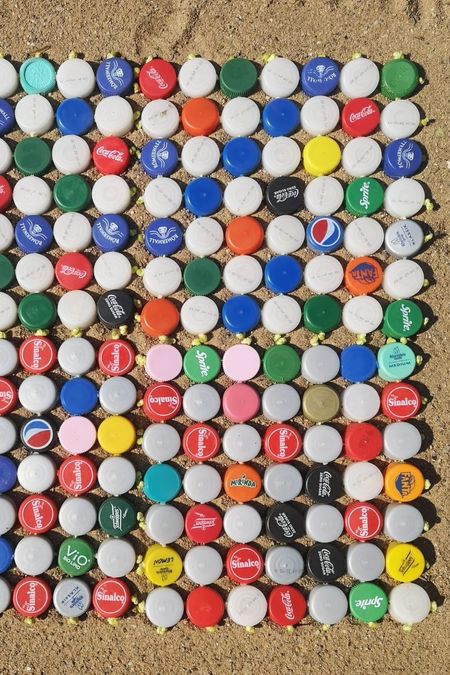
Flooring from Bottle Lids - Sand Version
Create colourful flooring from waste
By repurposing bottle lids, you can give your floor a vibrant and unique...


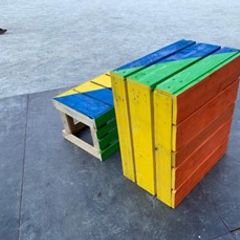
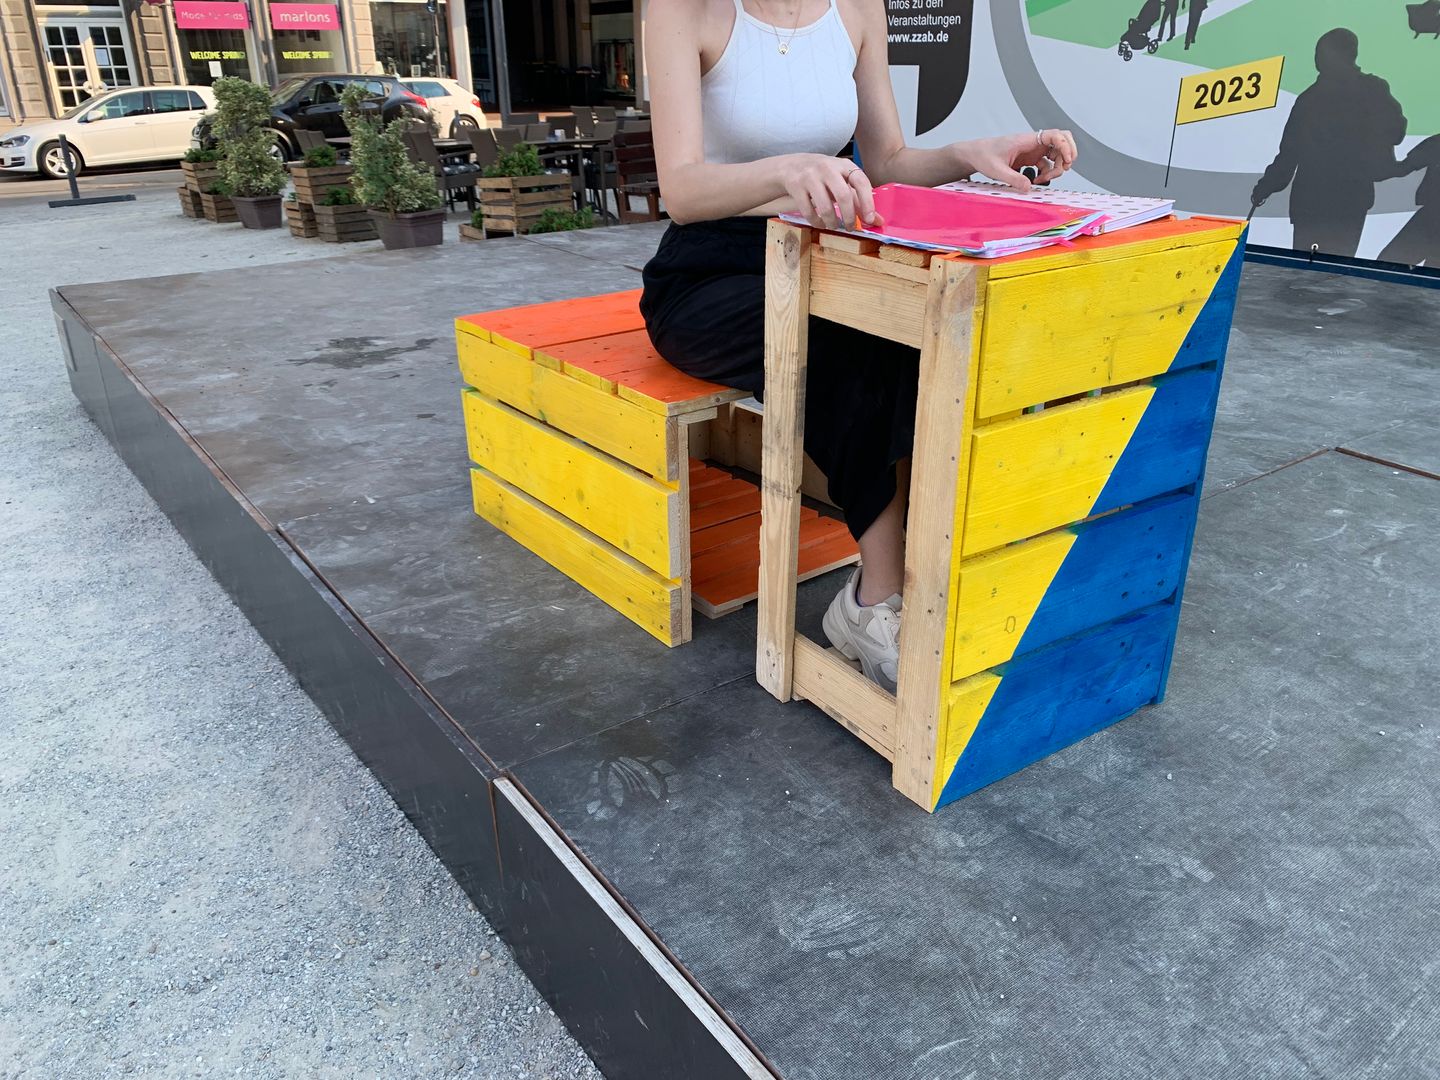
Upgrade your study space with this versatile Chair, Table and Storage solution.
| Done in | 8 hours |
|---|---|
| Skill level | medium |

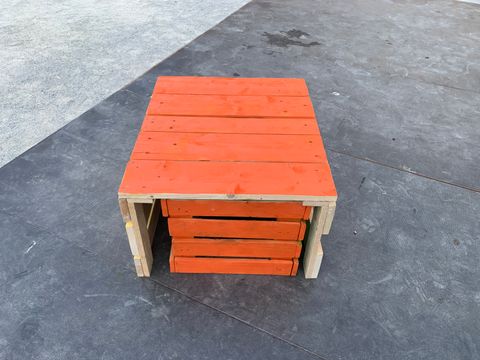
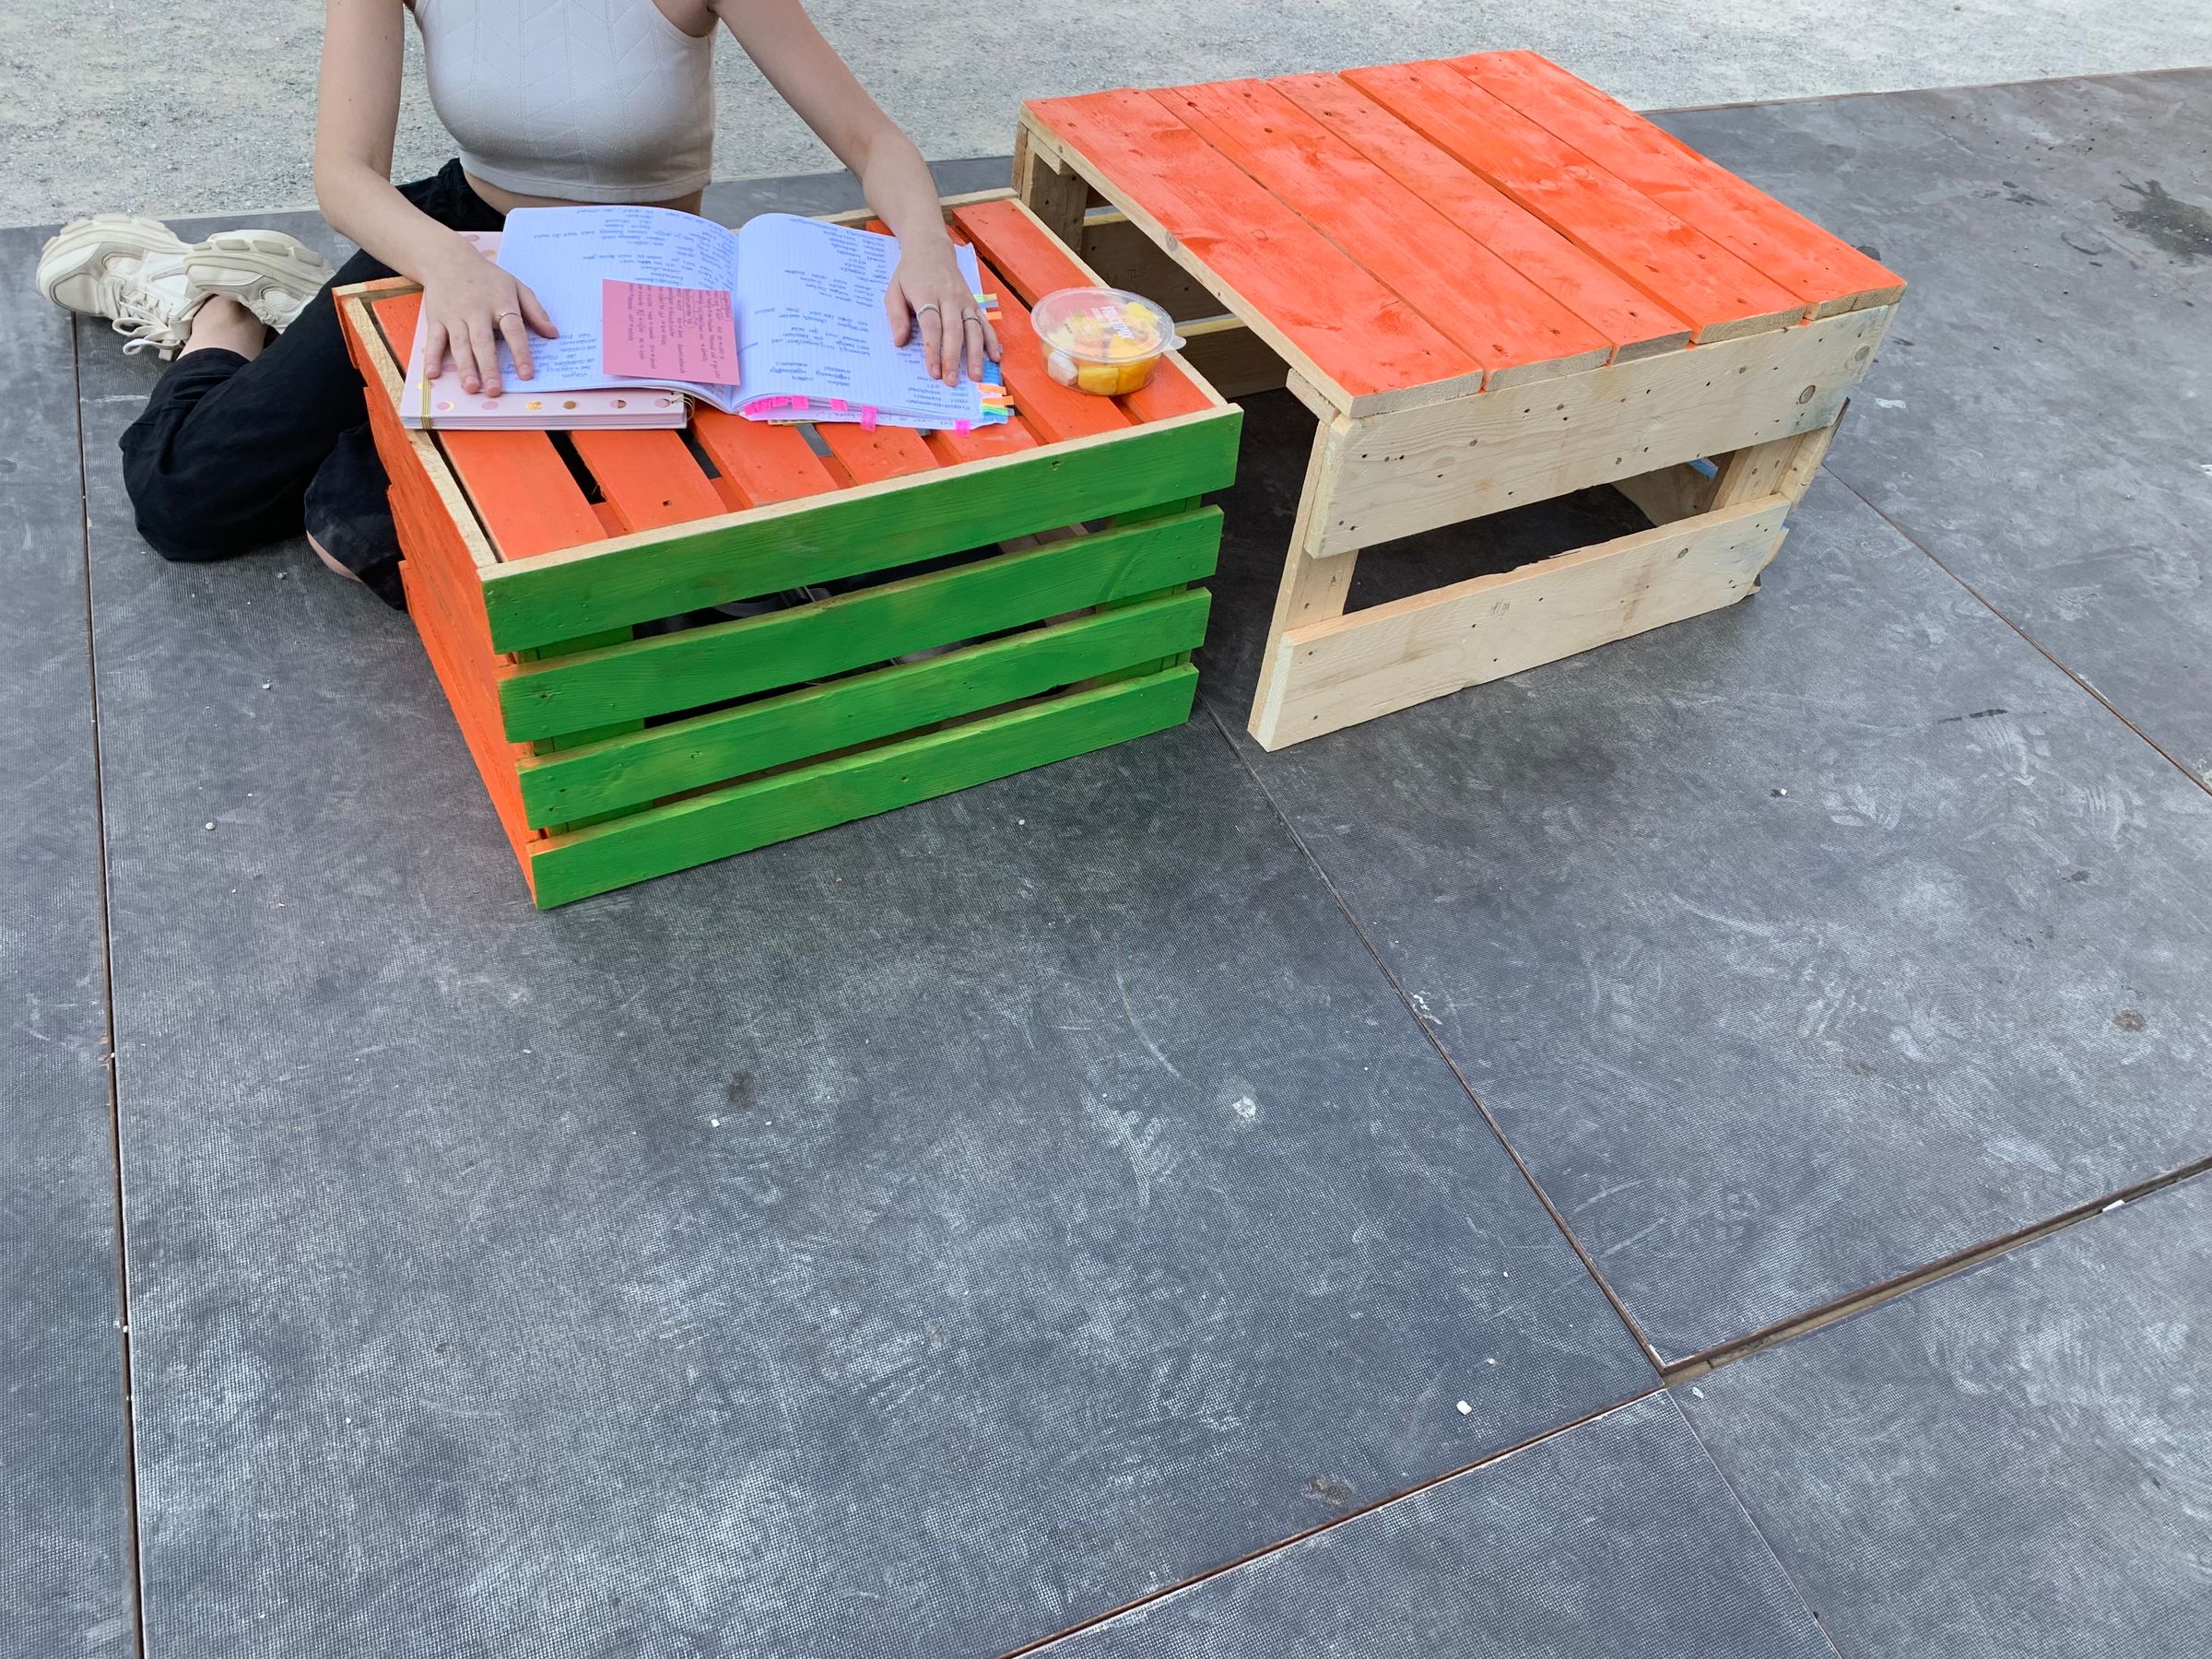
This multi-functional piece of furniture is a wonderful way to make study-time more enjoyable and organized. The chair has a secret storage box, allowing kids to keep their bags and books neatly organized. The desk is just the right size, ensuring a comfortable and ergonomic study space. With bright colours, it adds a touch of cheerfulness. If not in use for studying, it serves as a low dining table or couch table.
Published under CC:BY-SA by
RWTH Aachen University - Institute of Landscape Architecture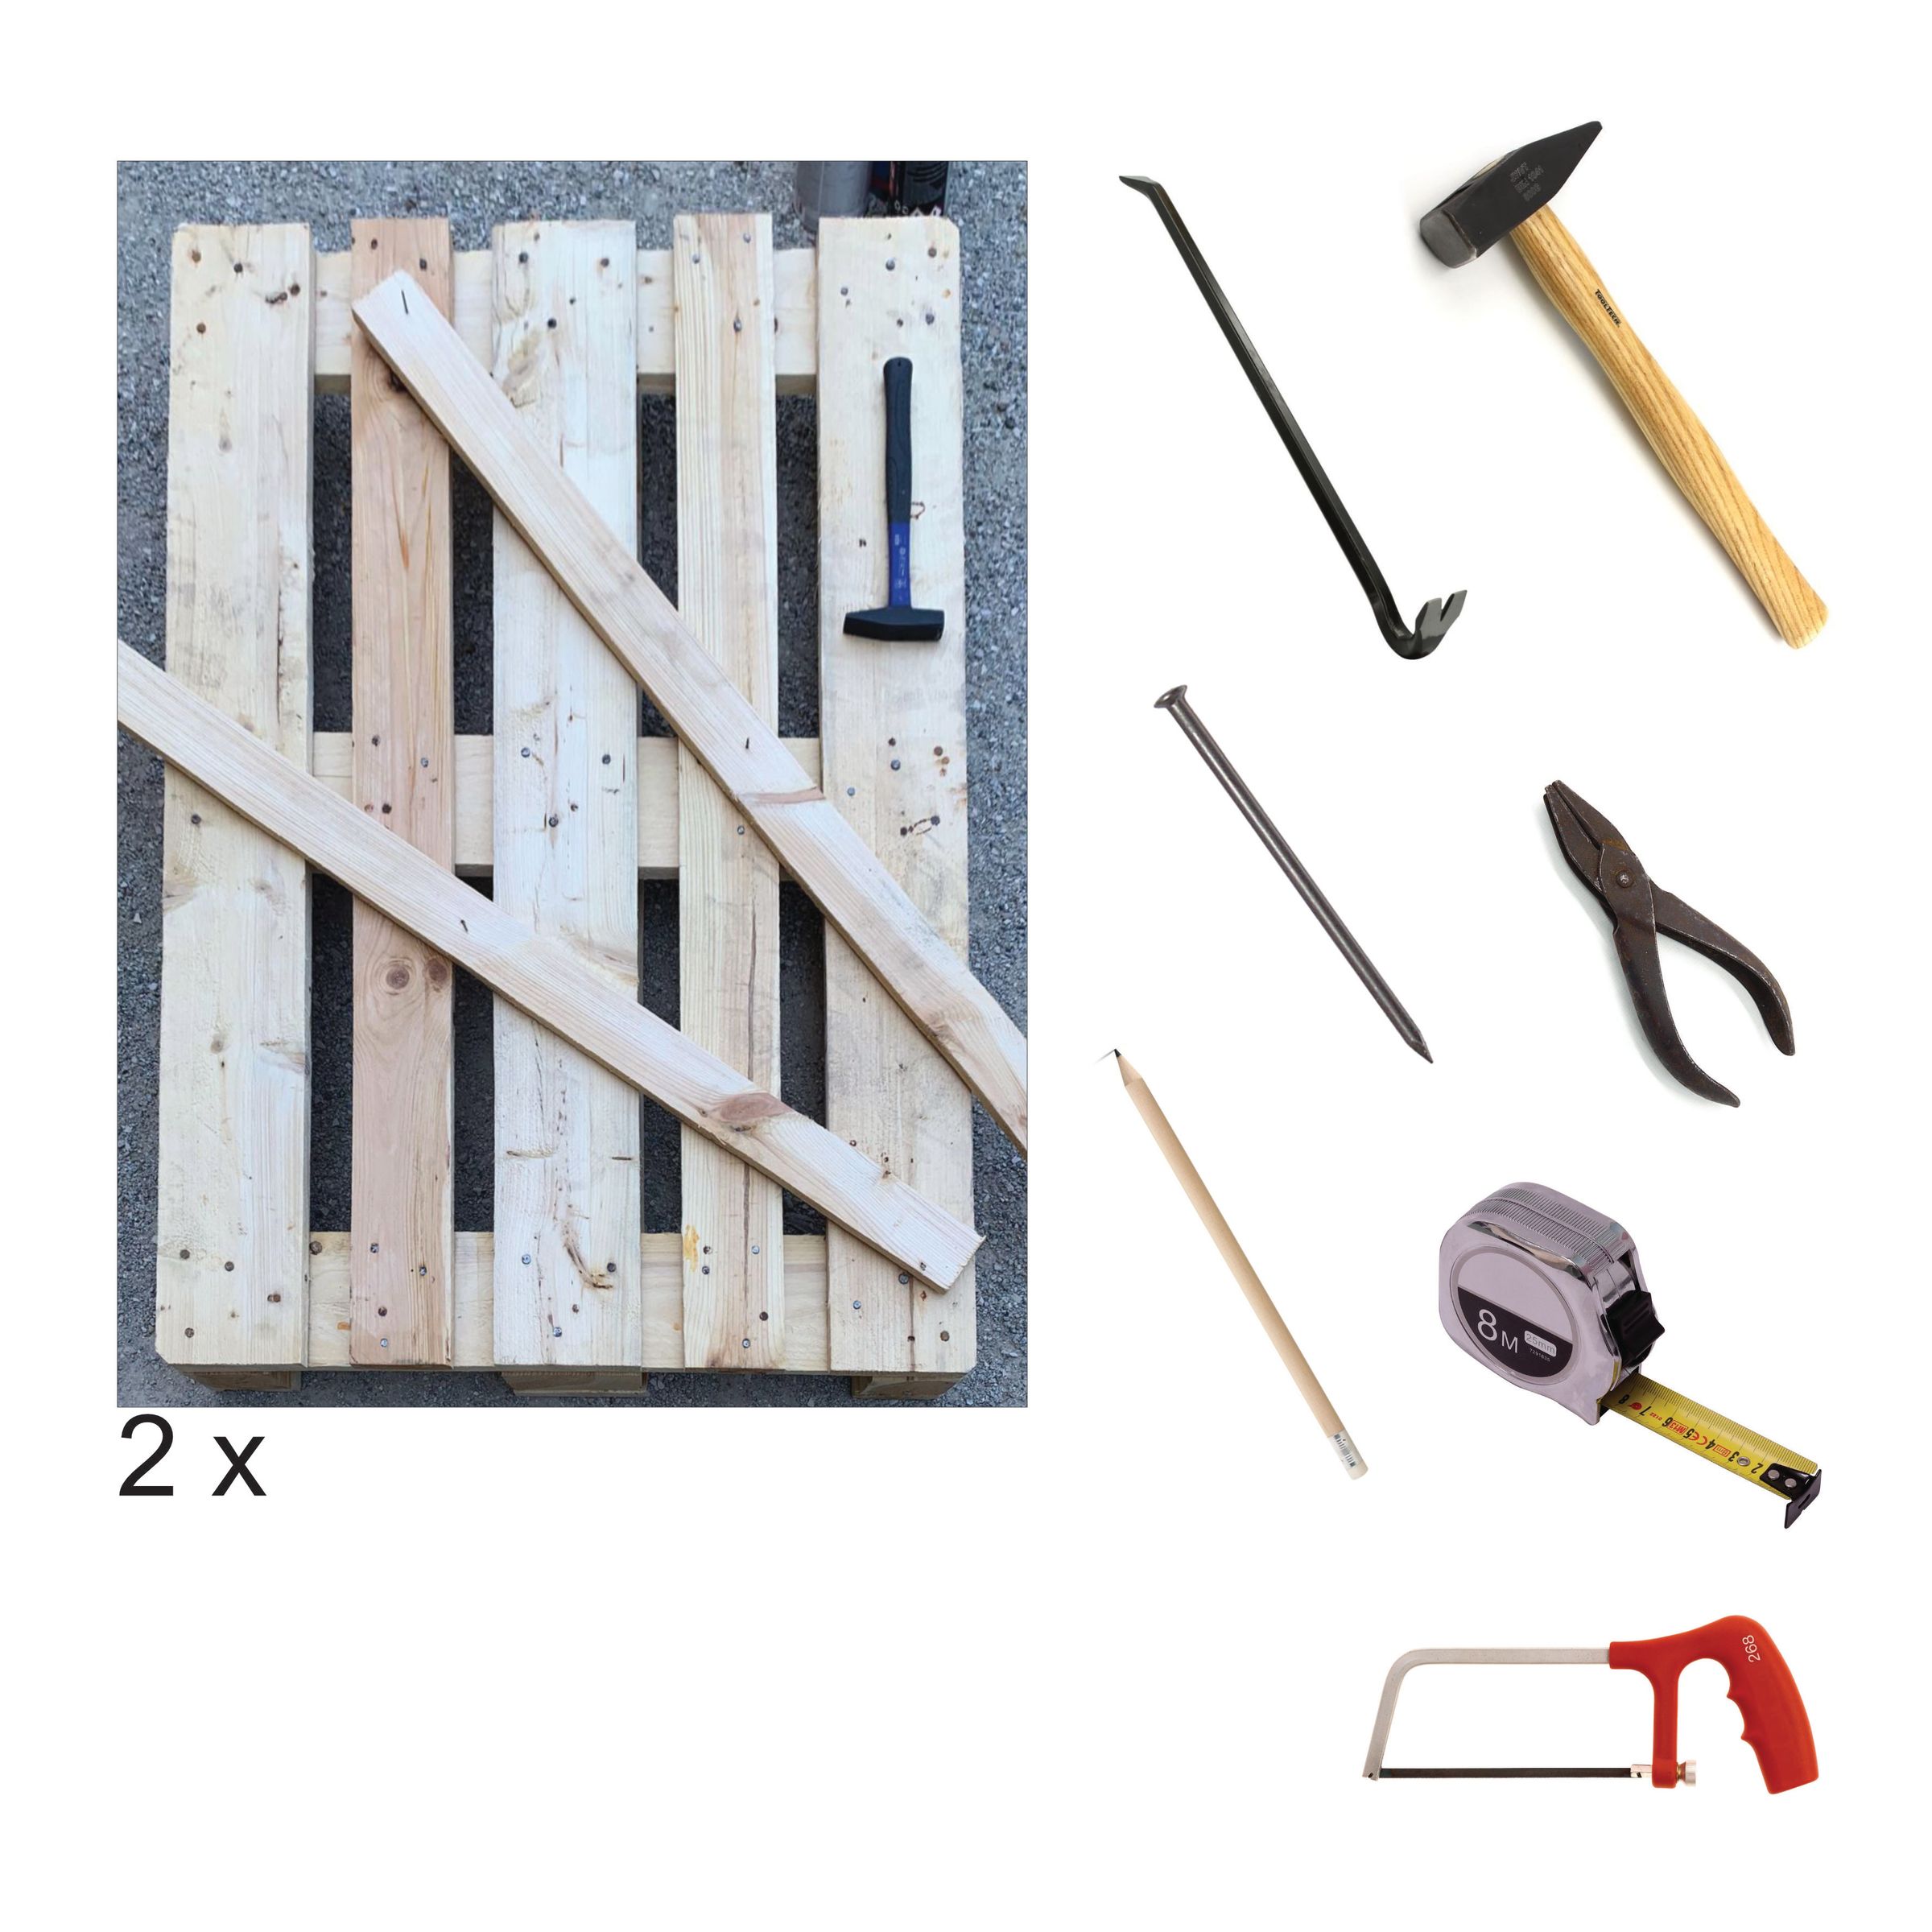


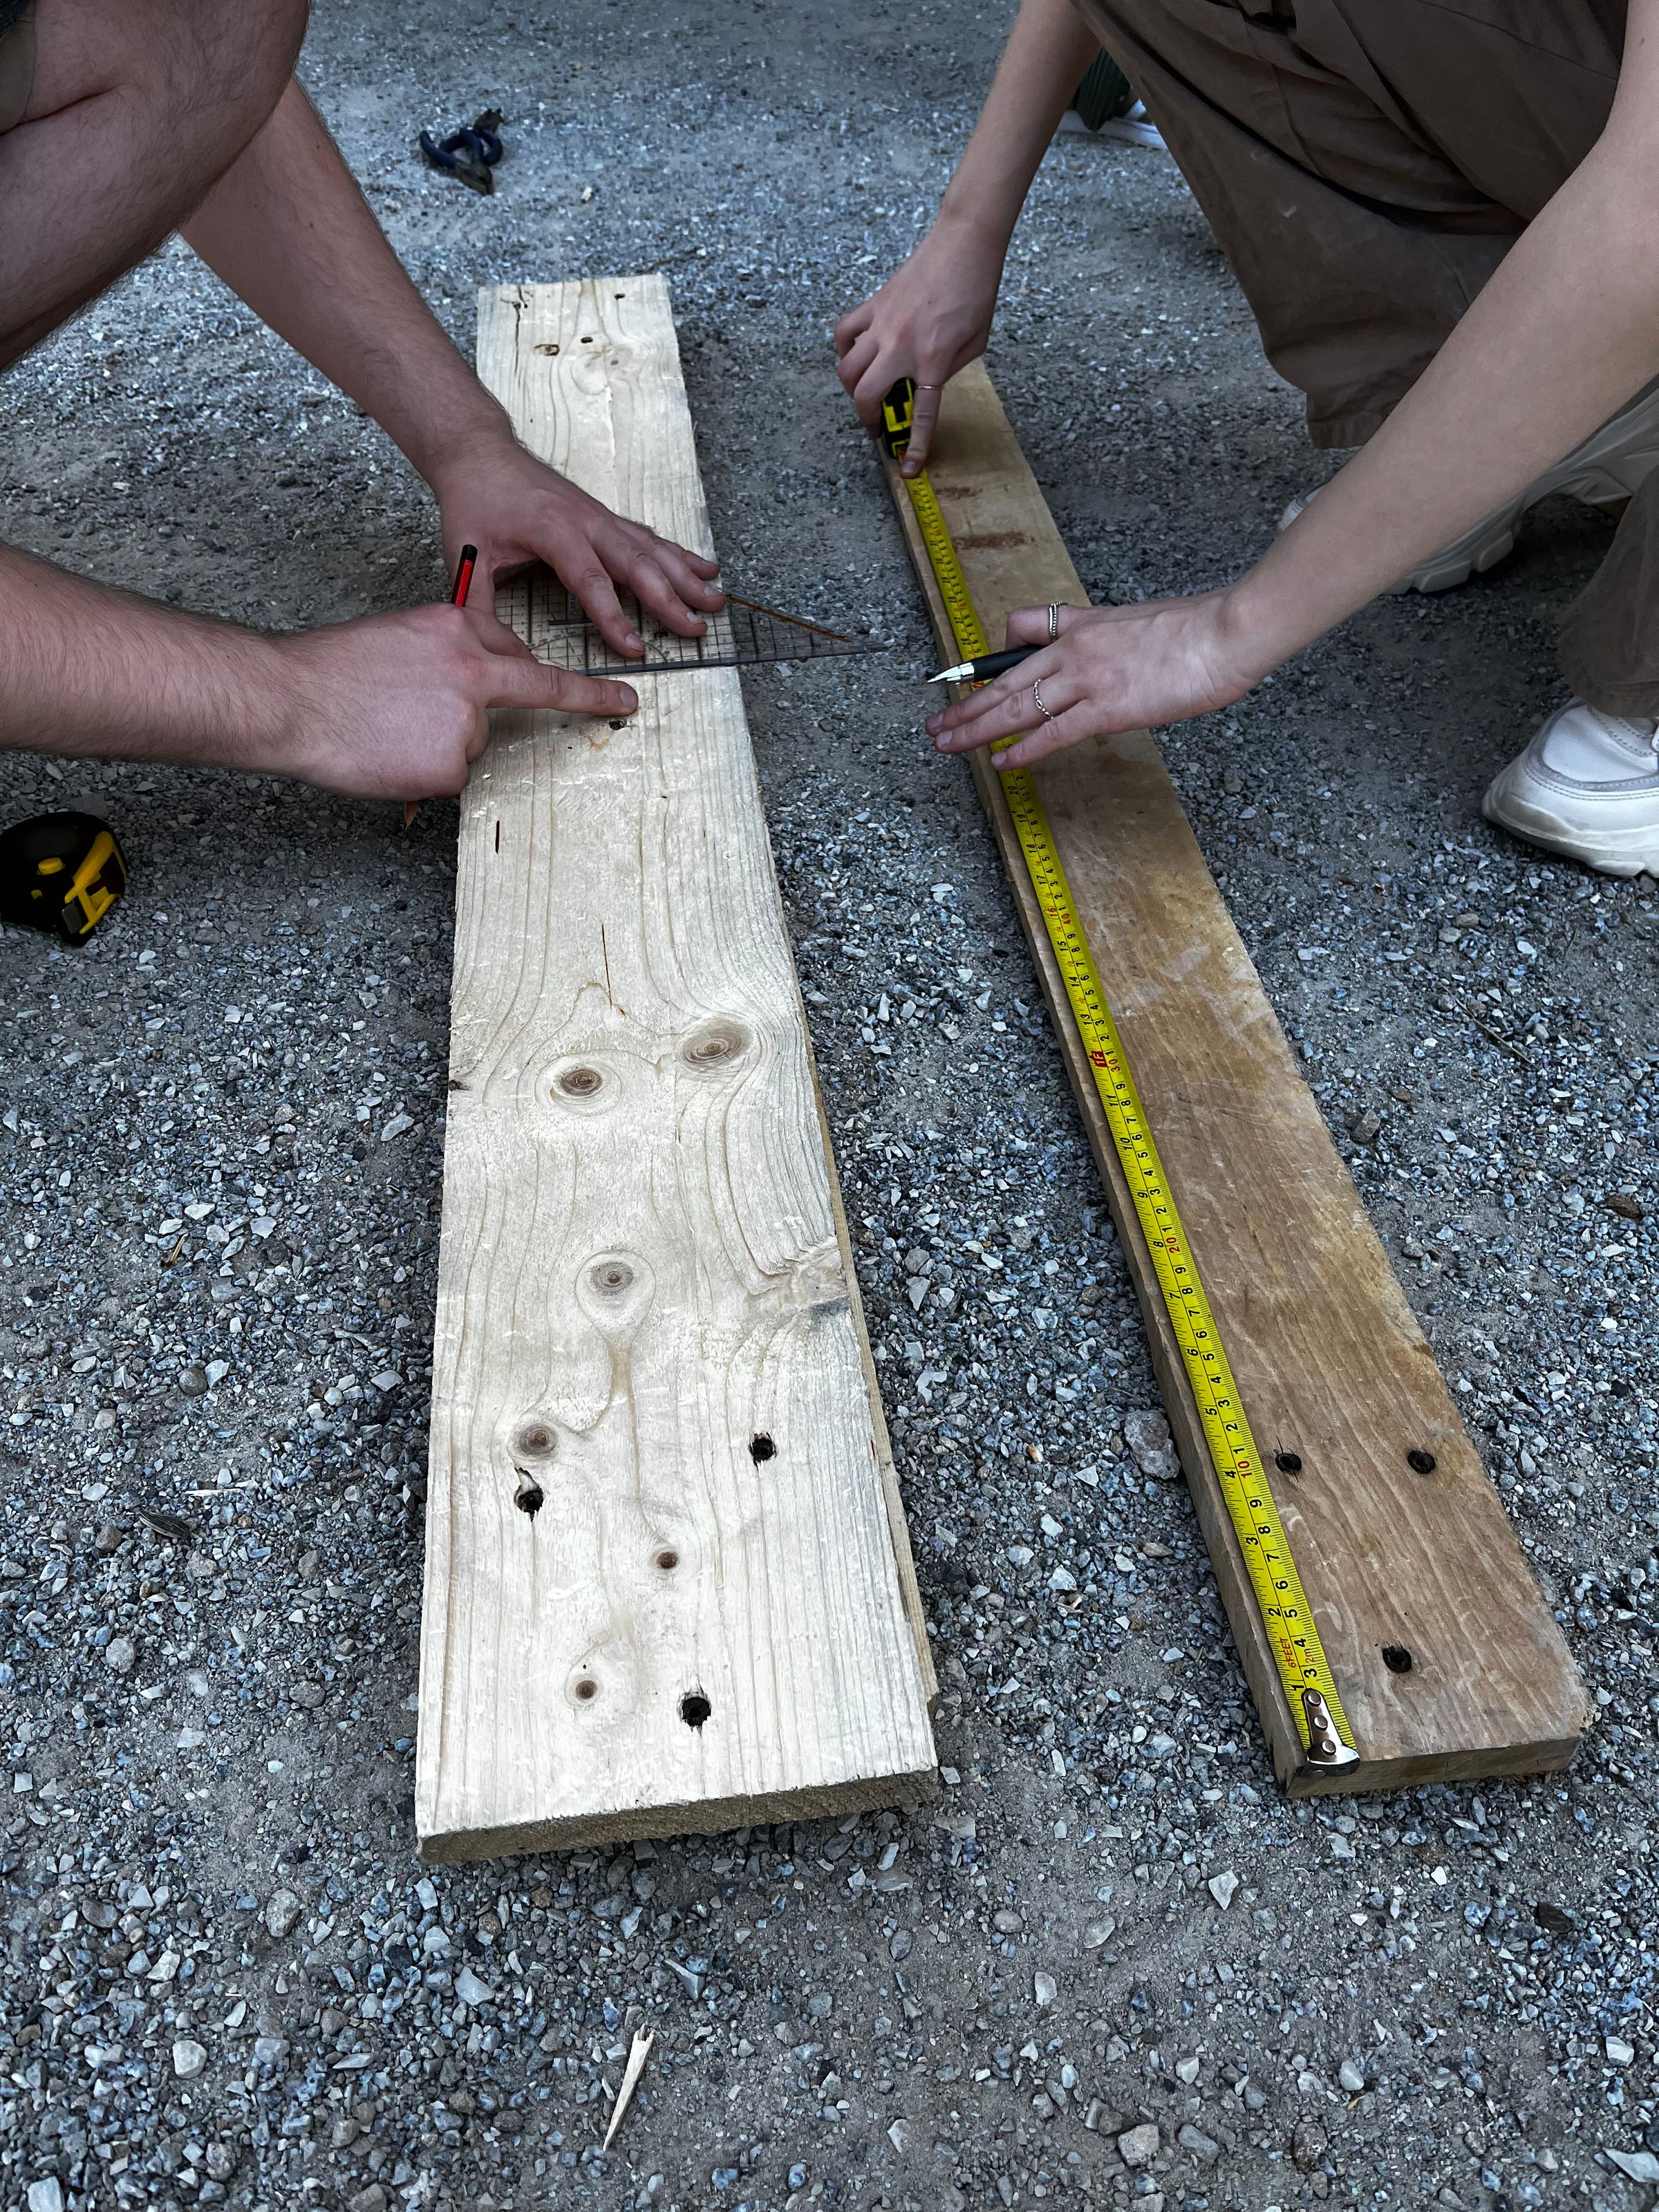

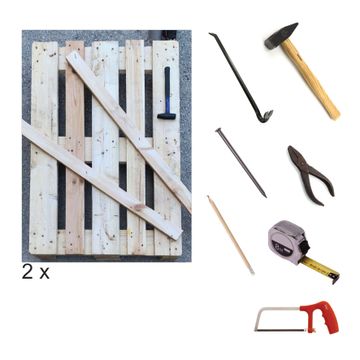
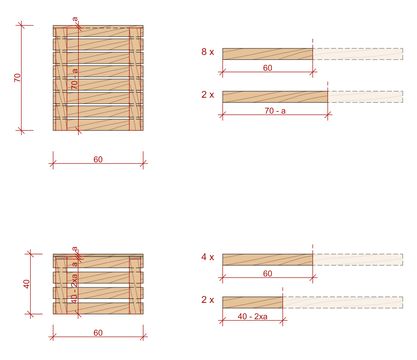
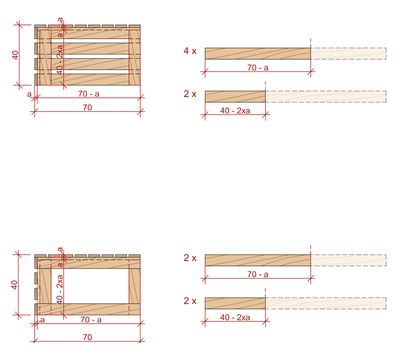
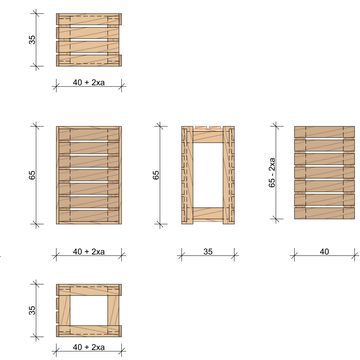
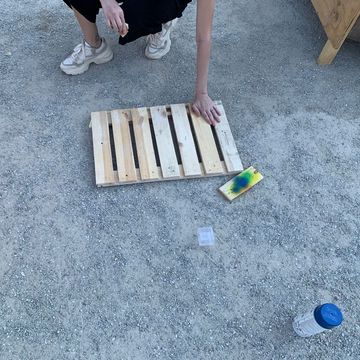
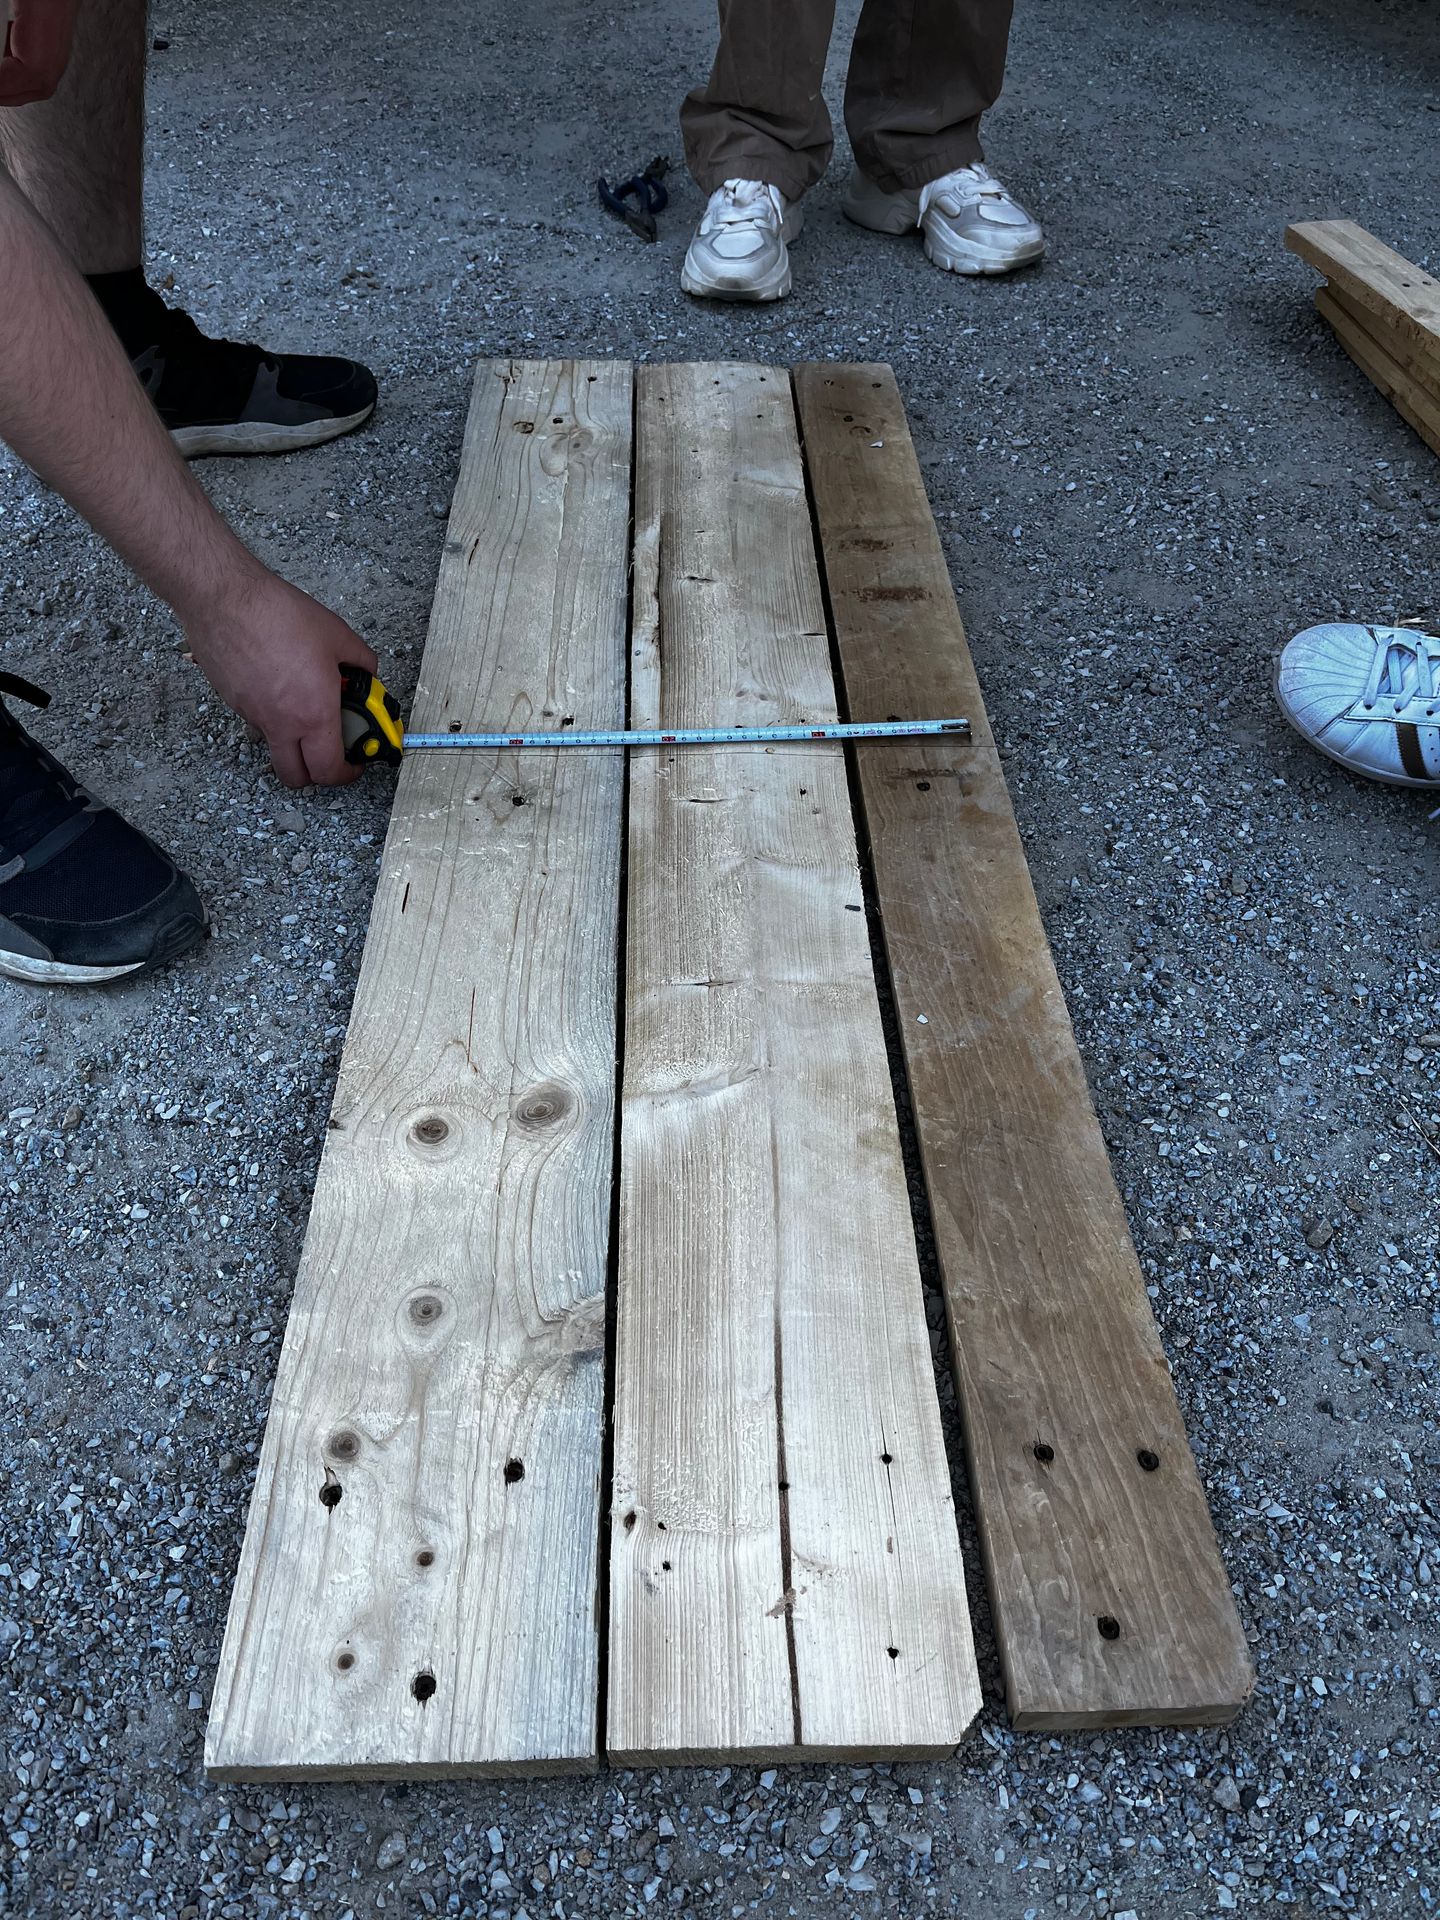
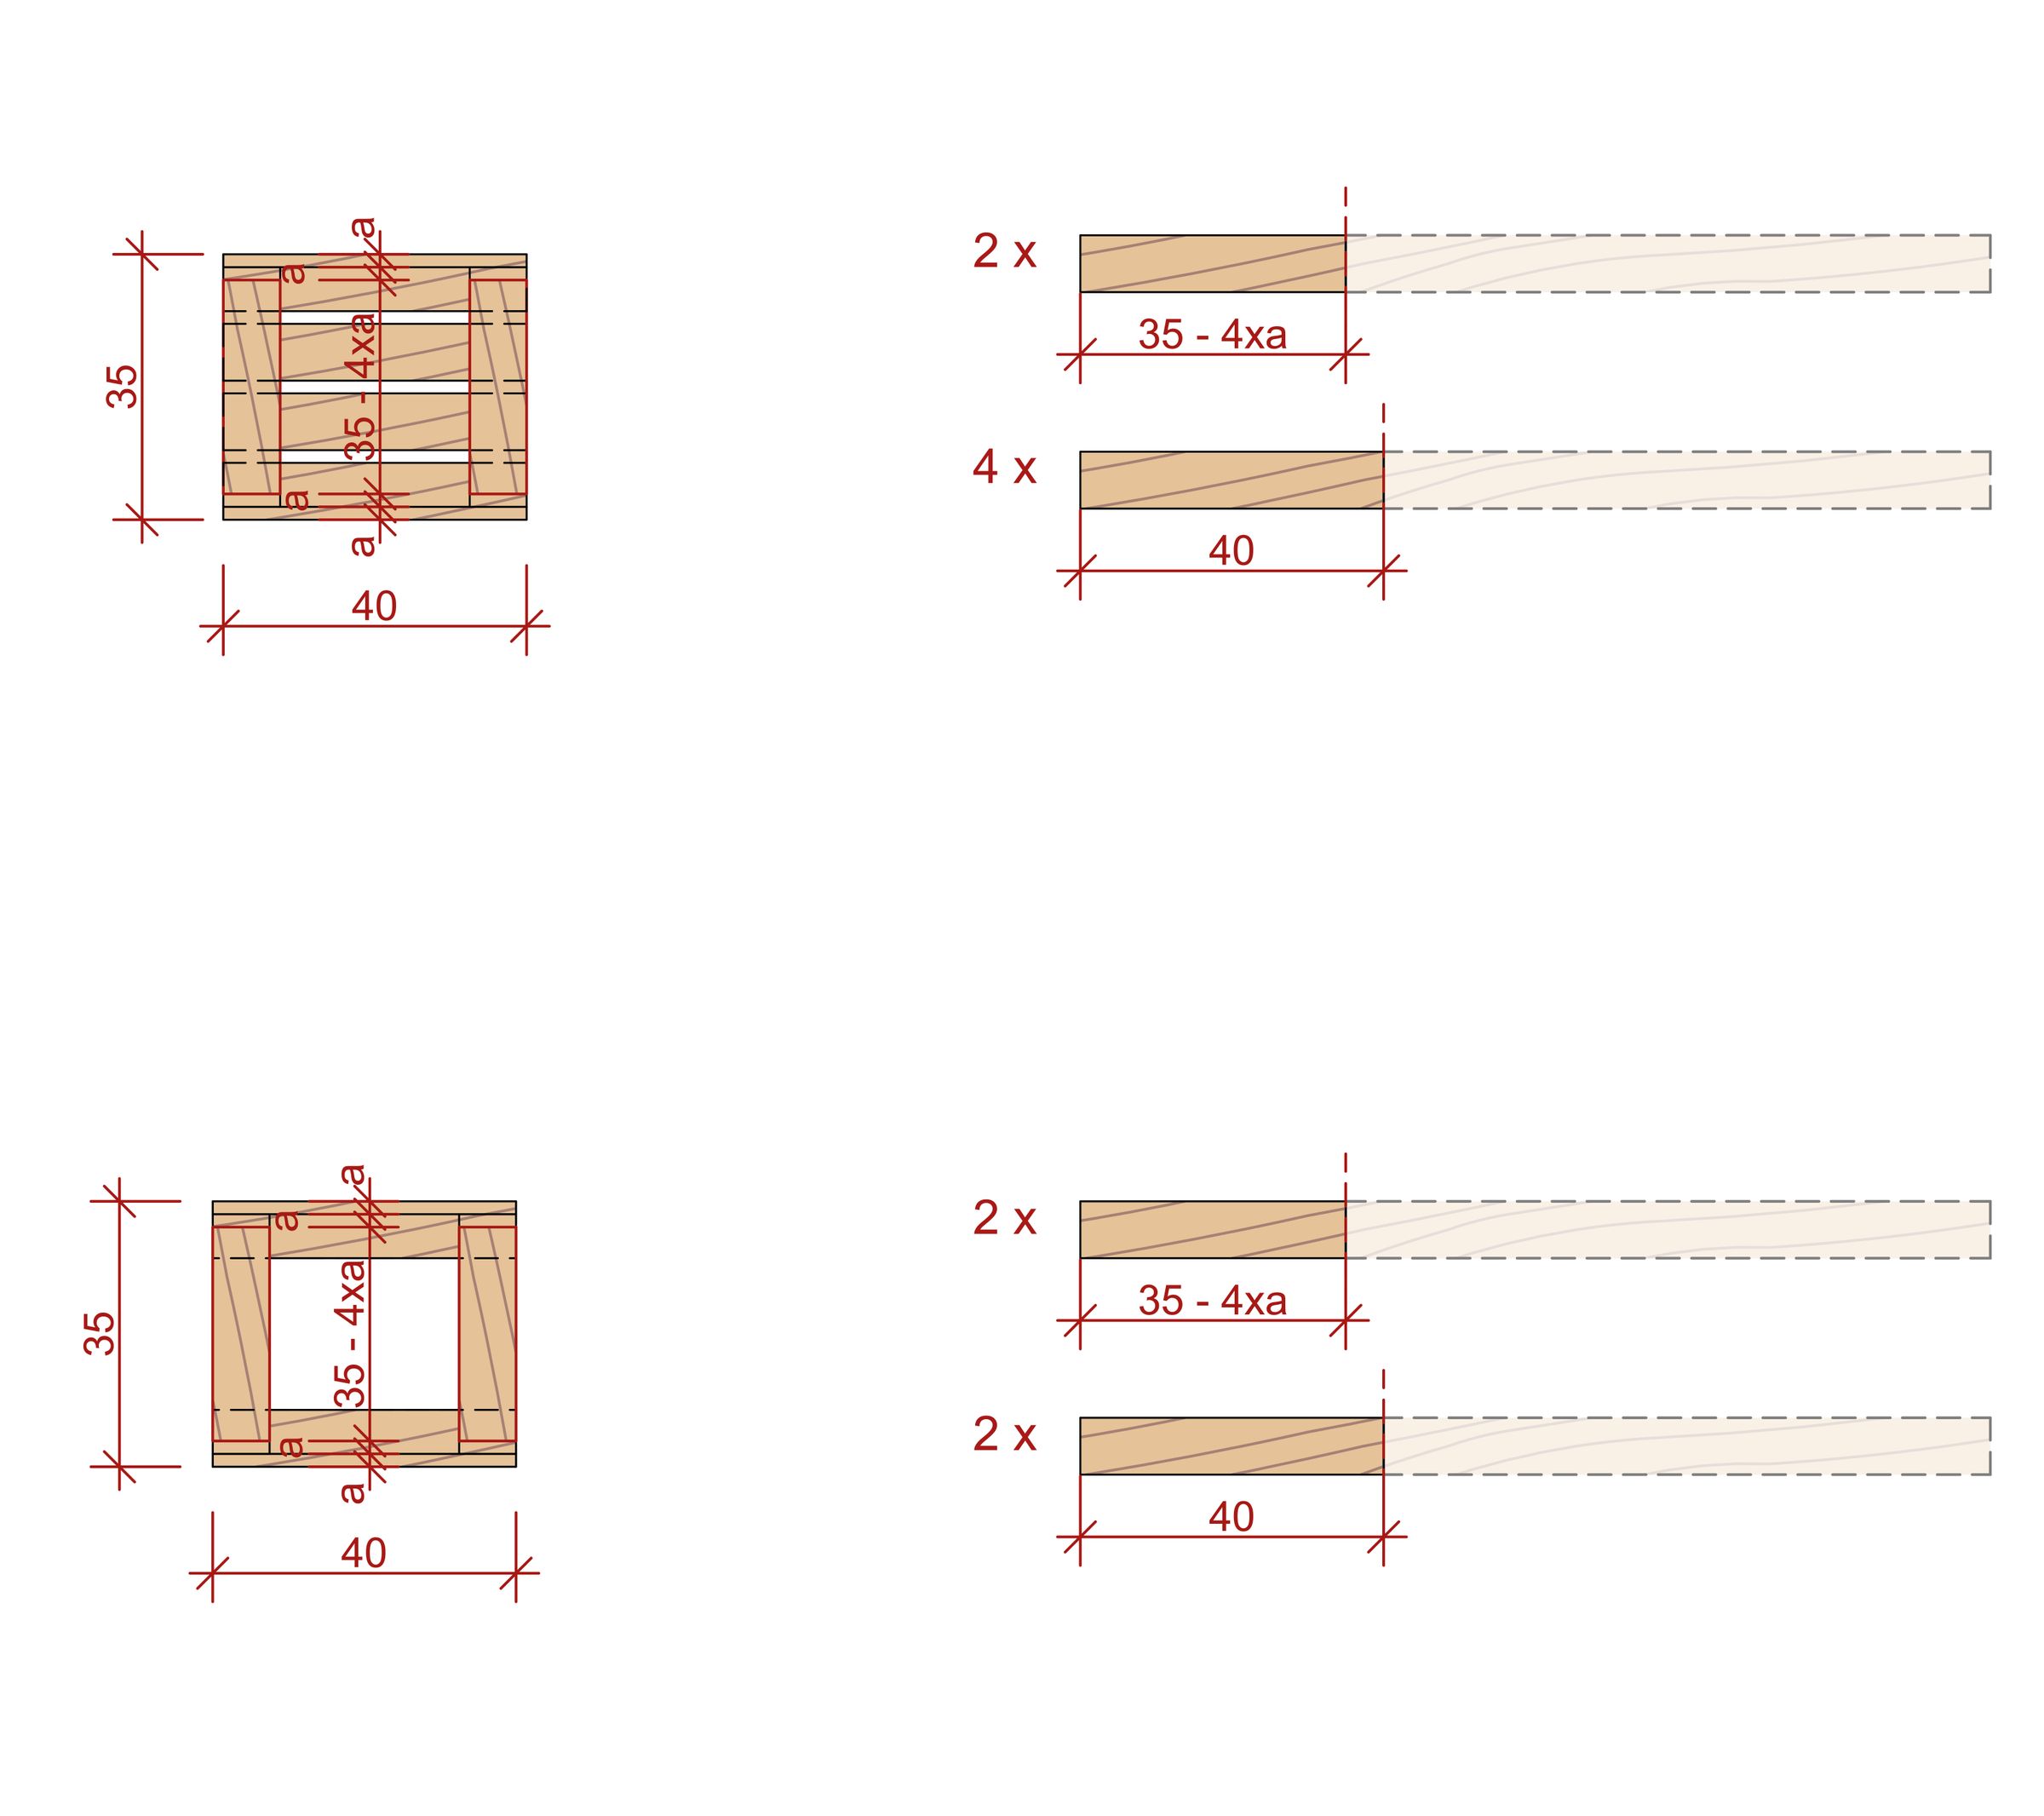
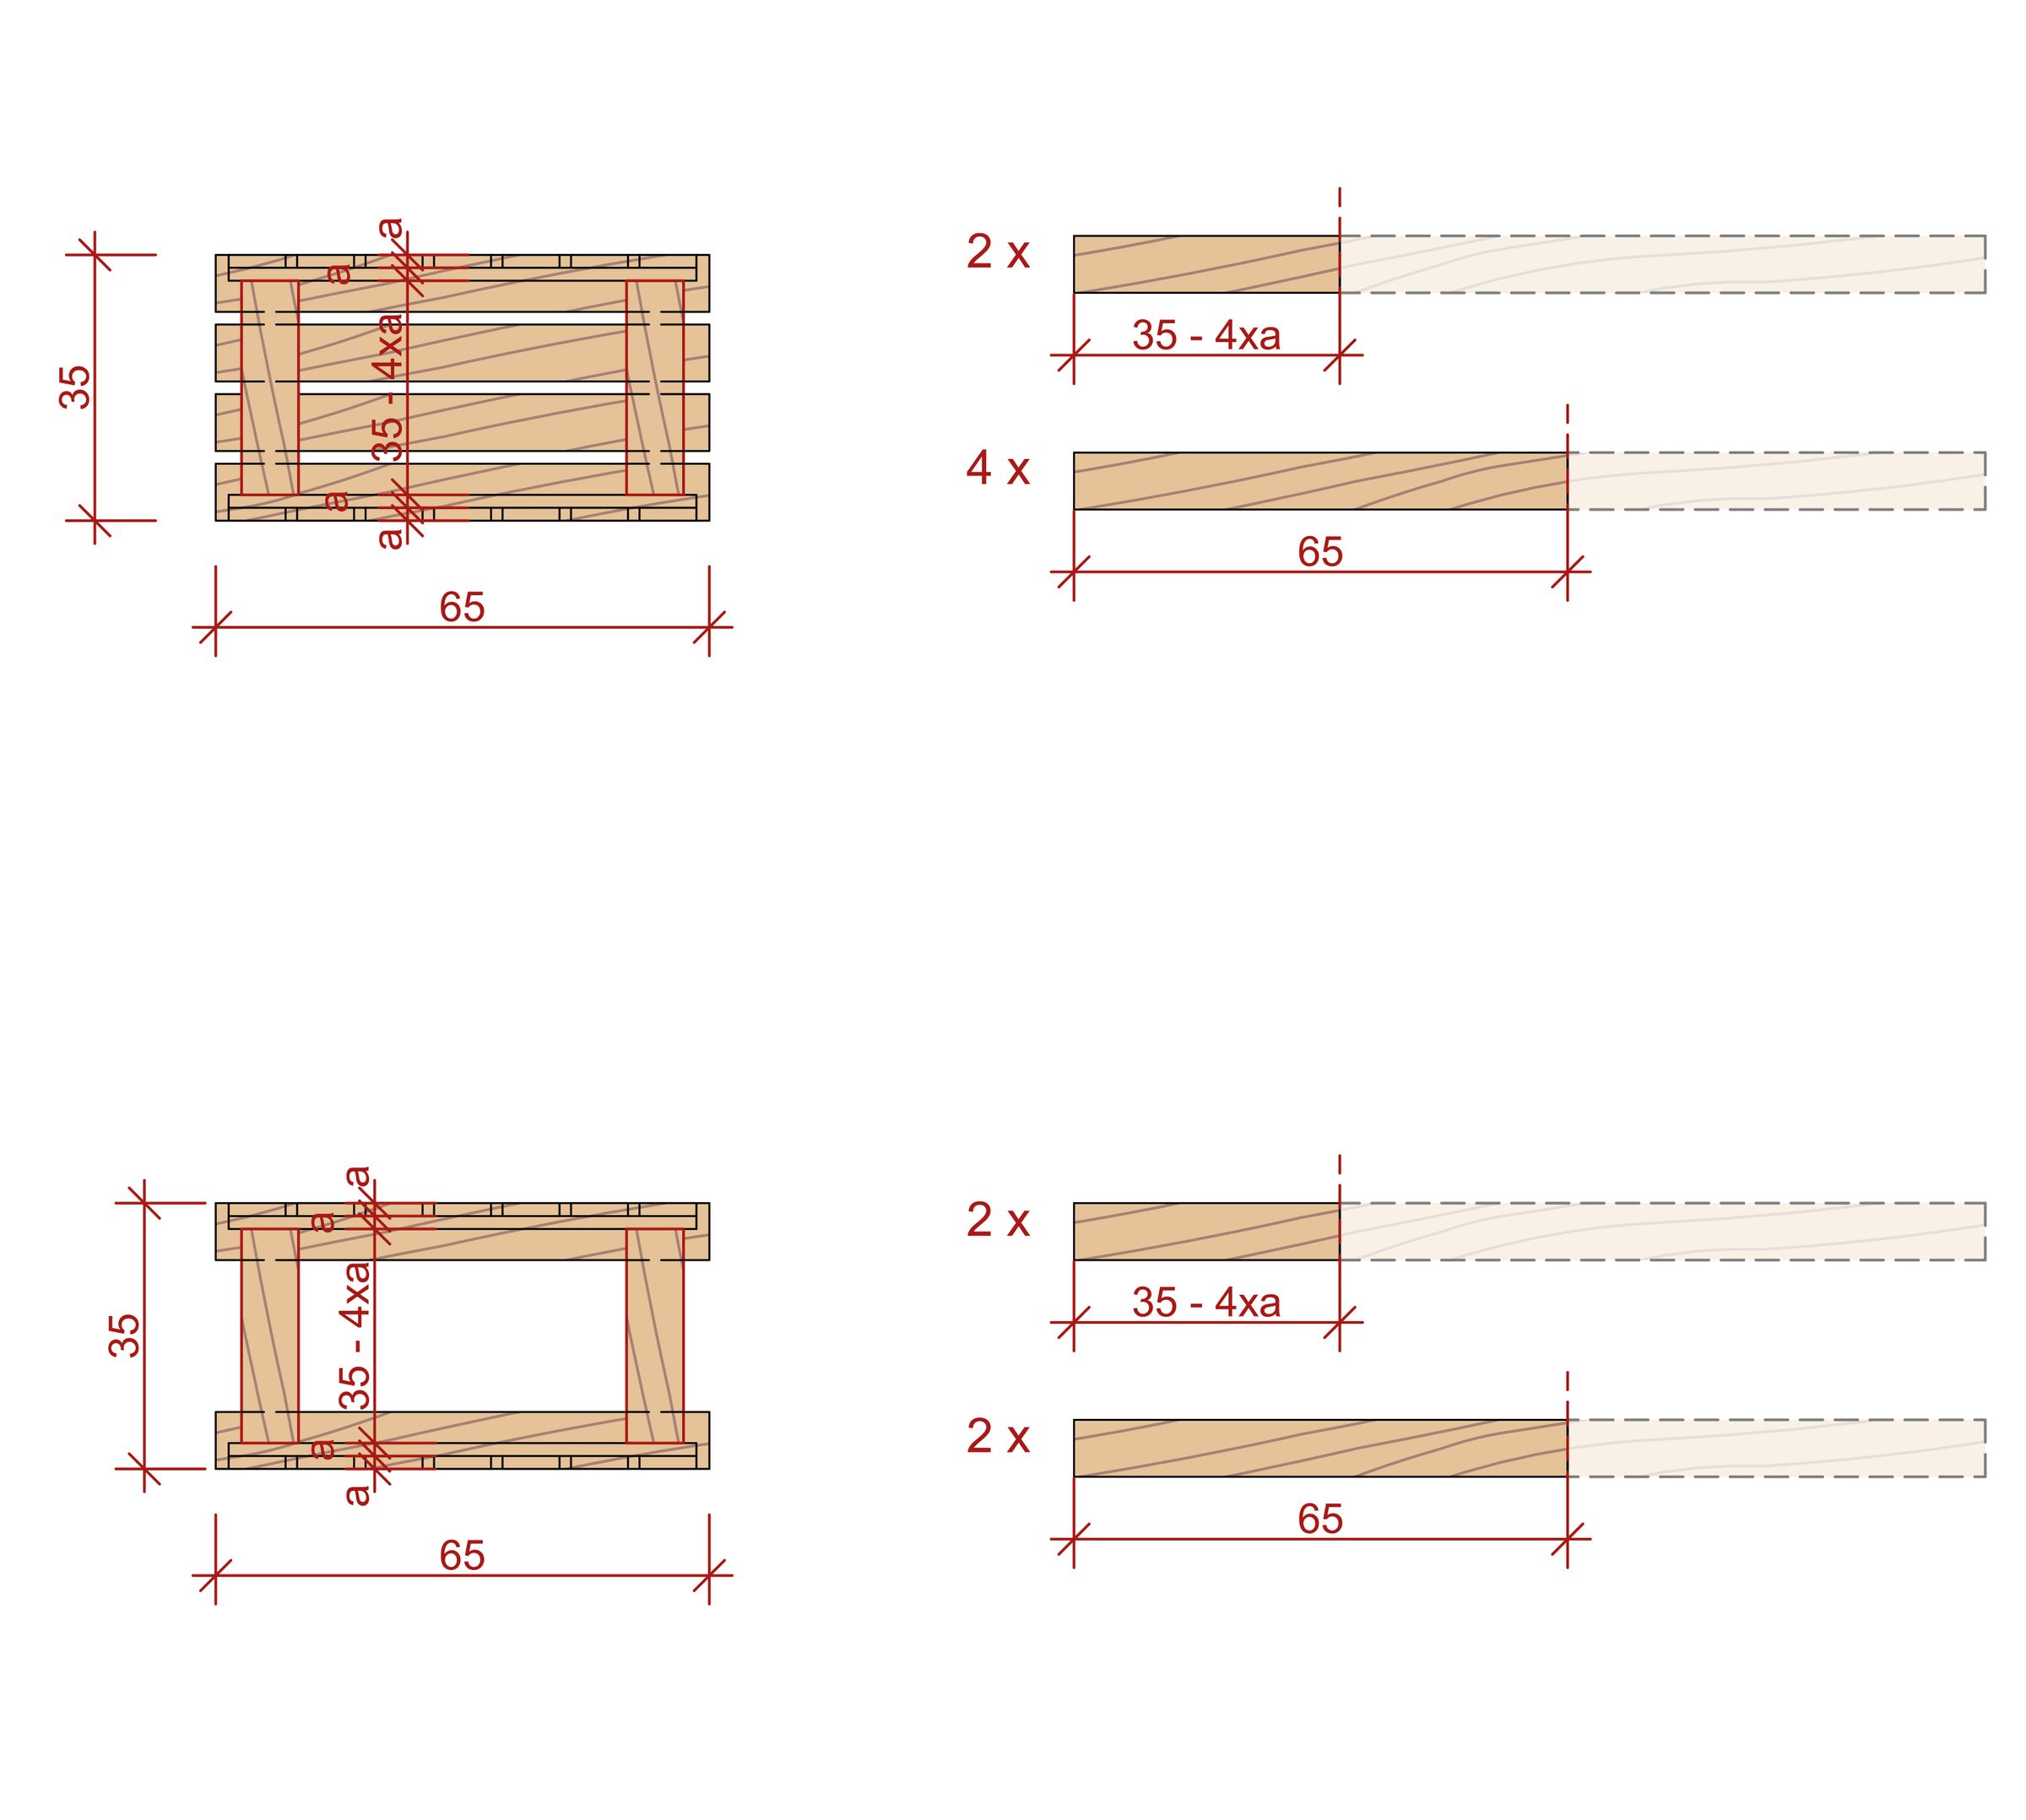
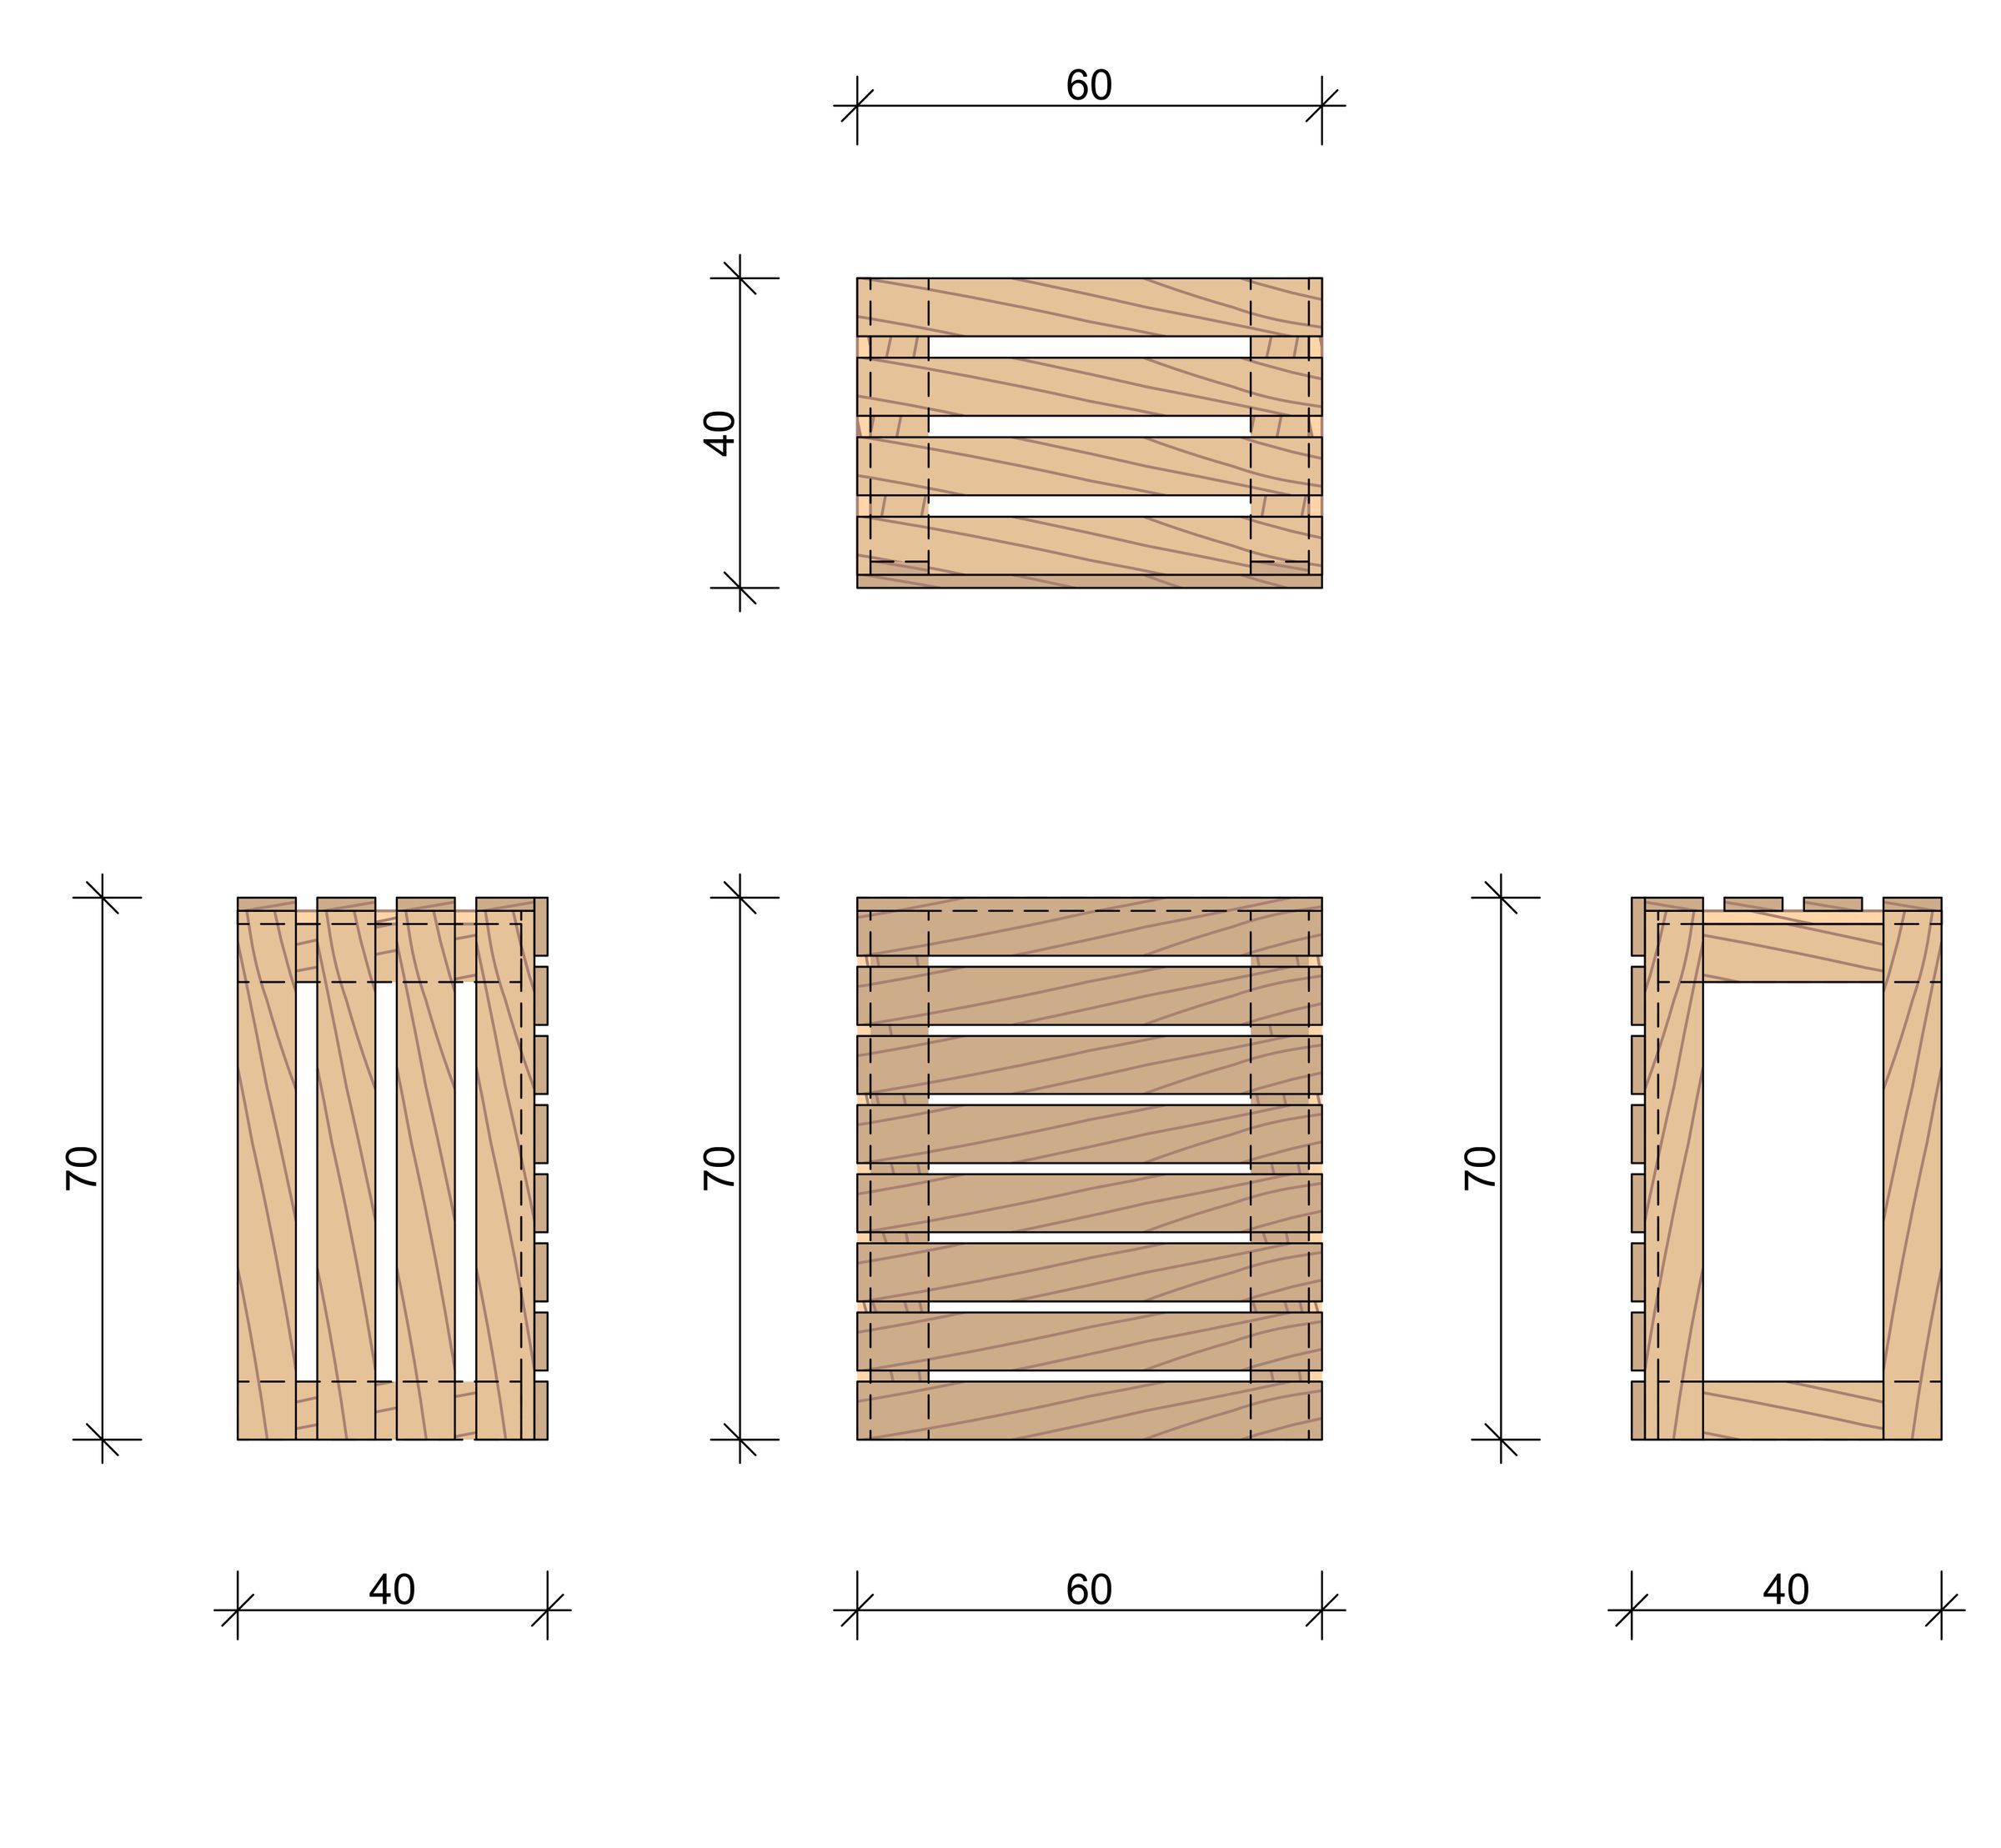
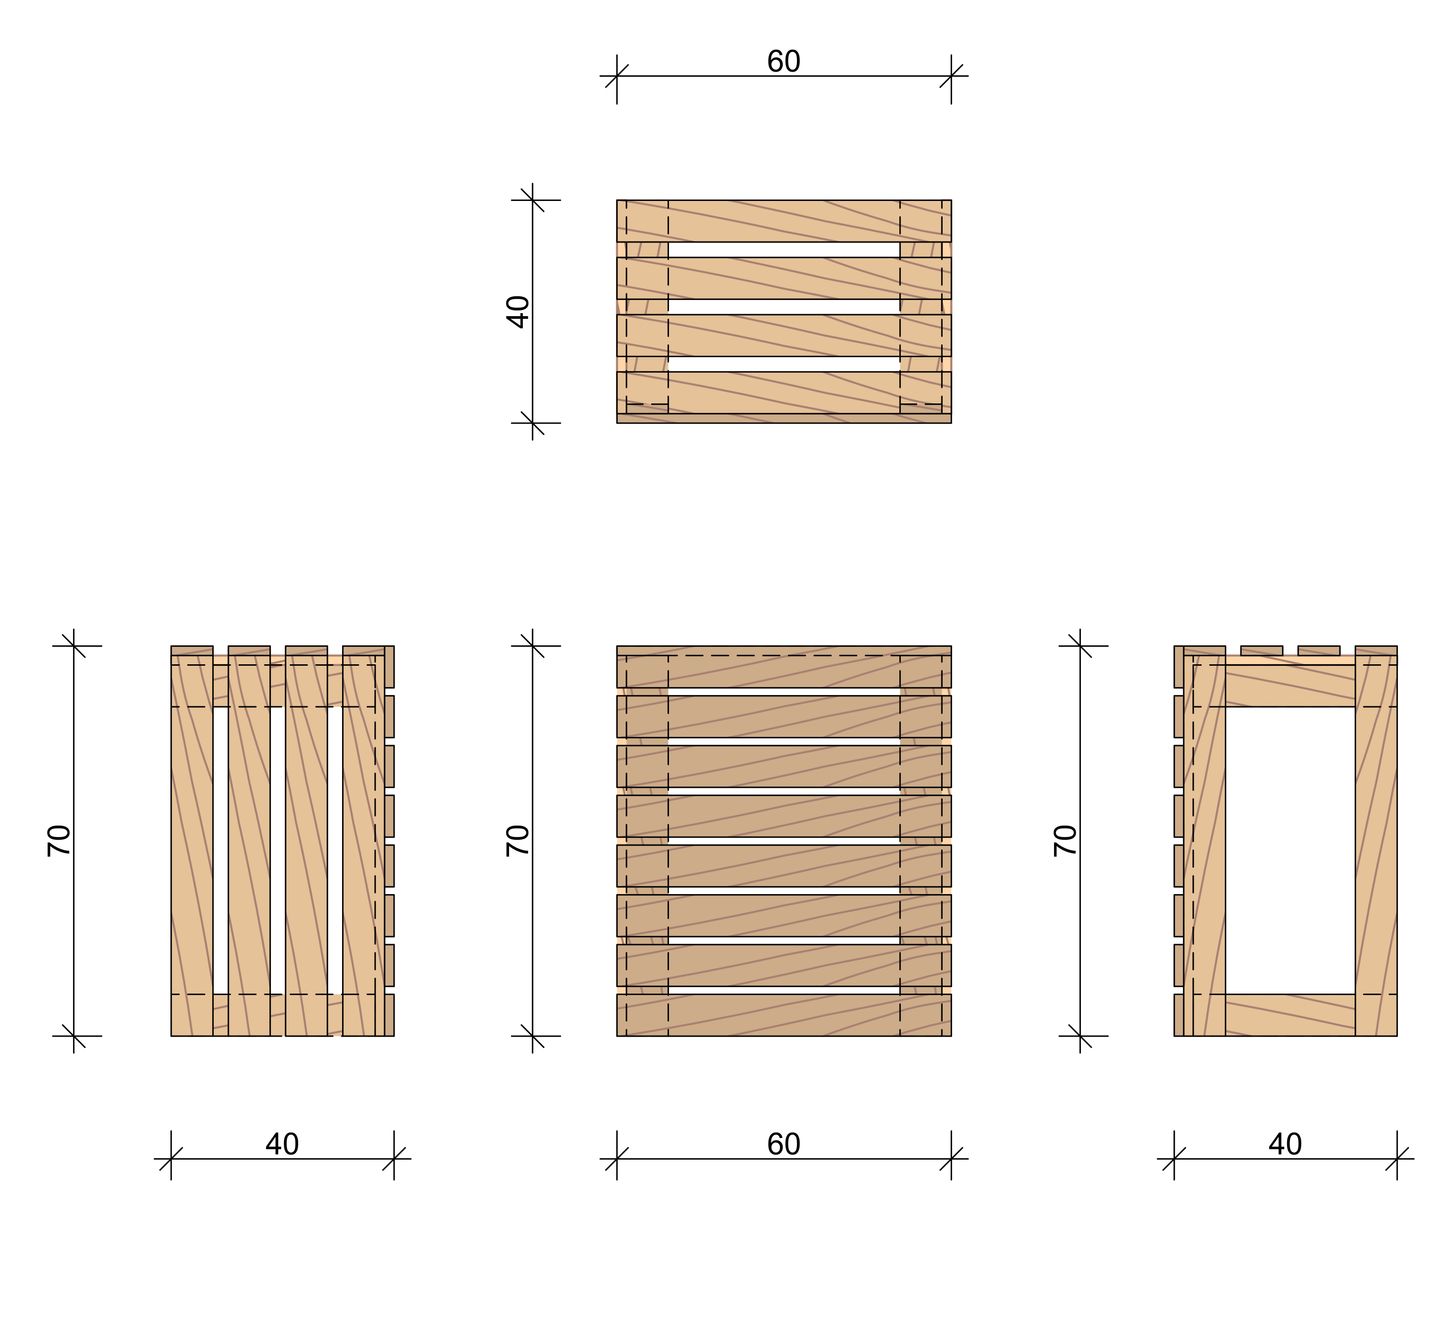
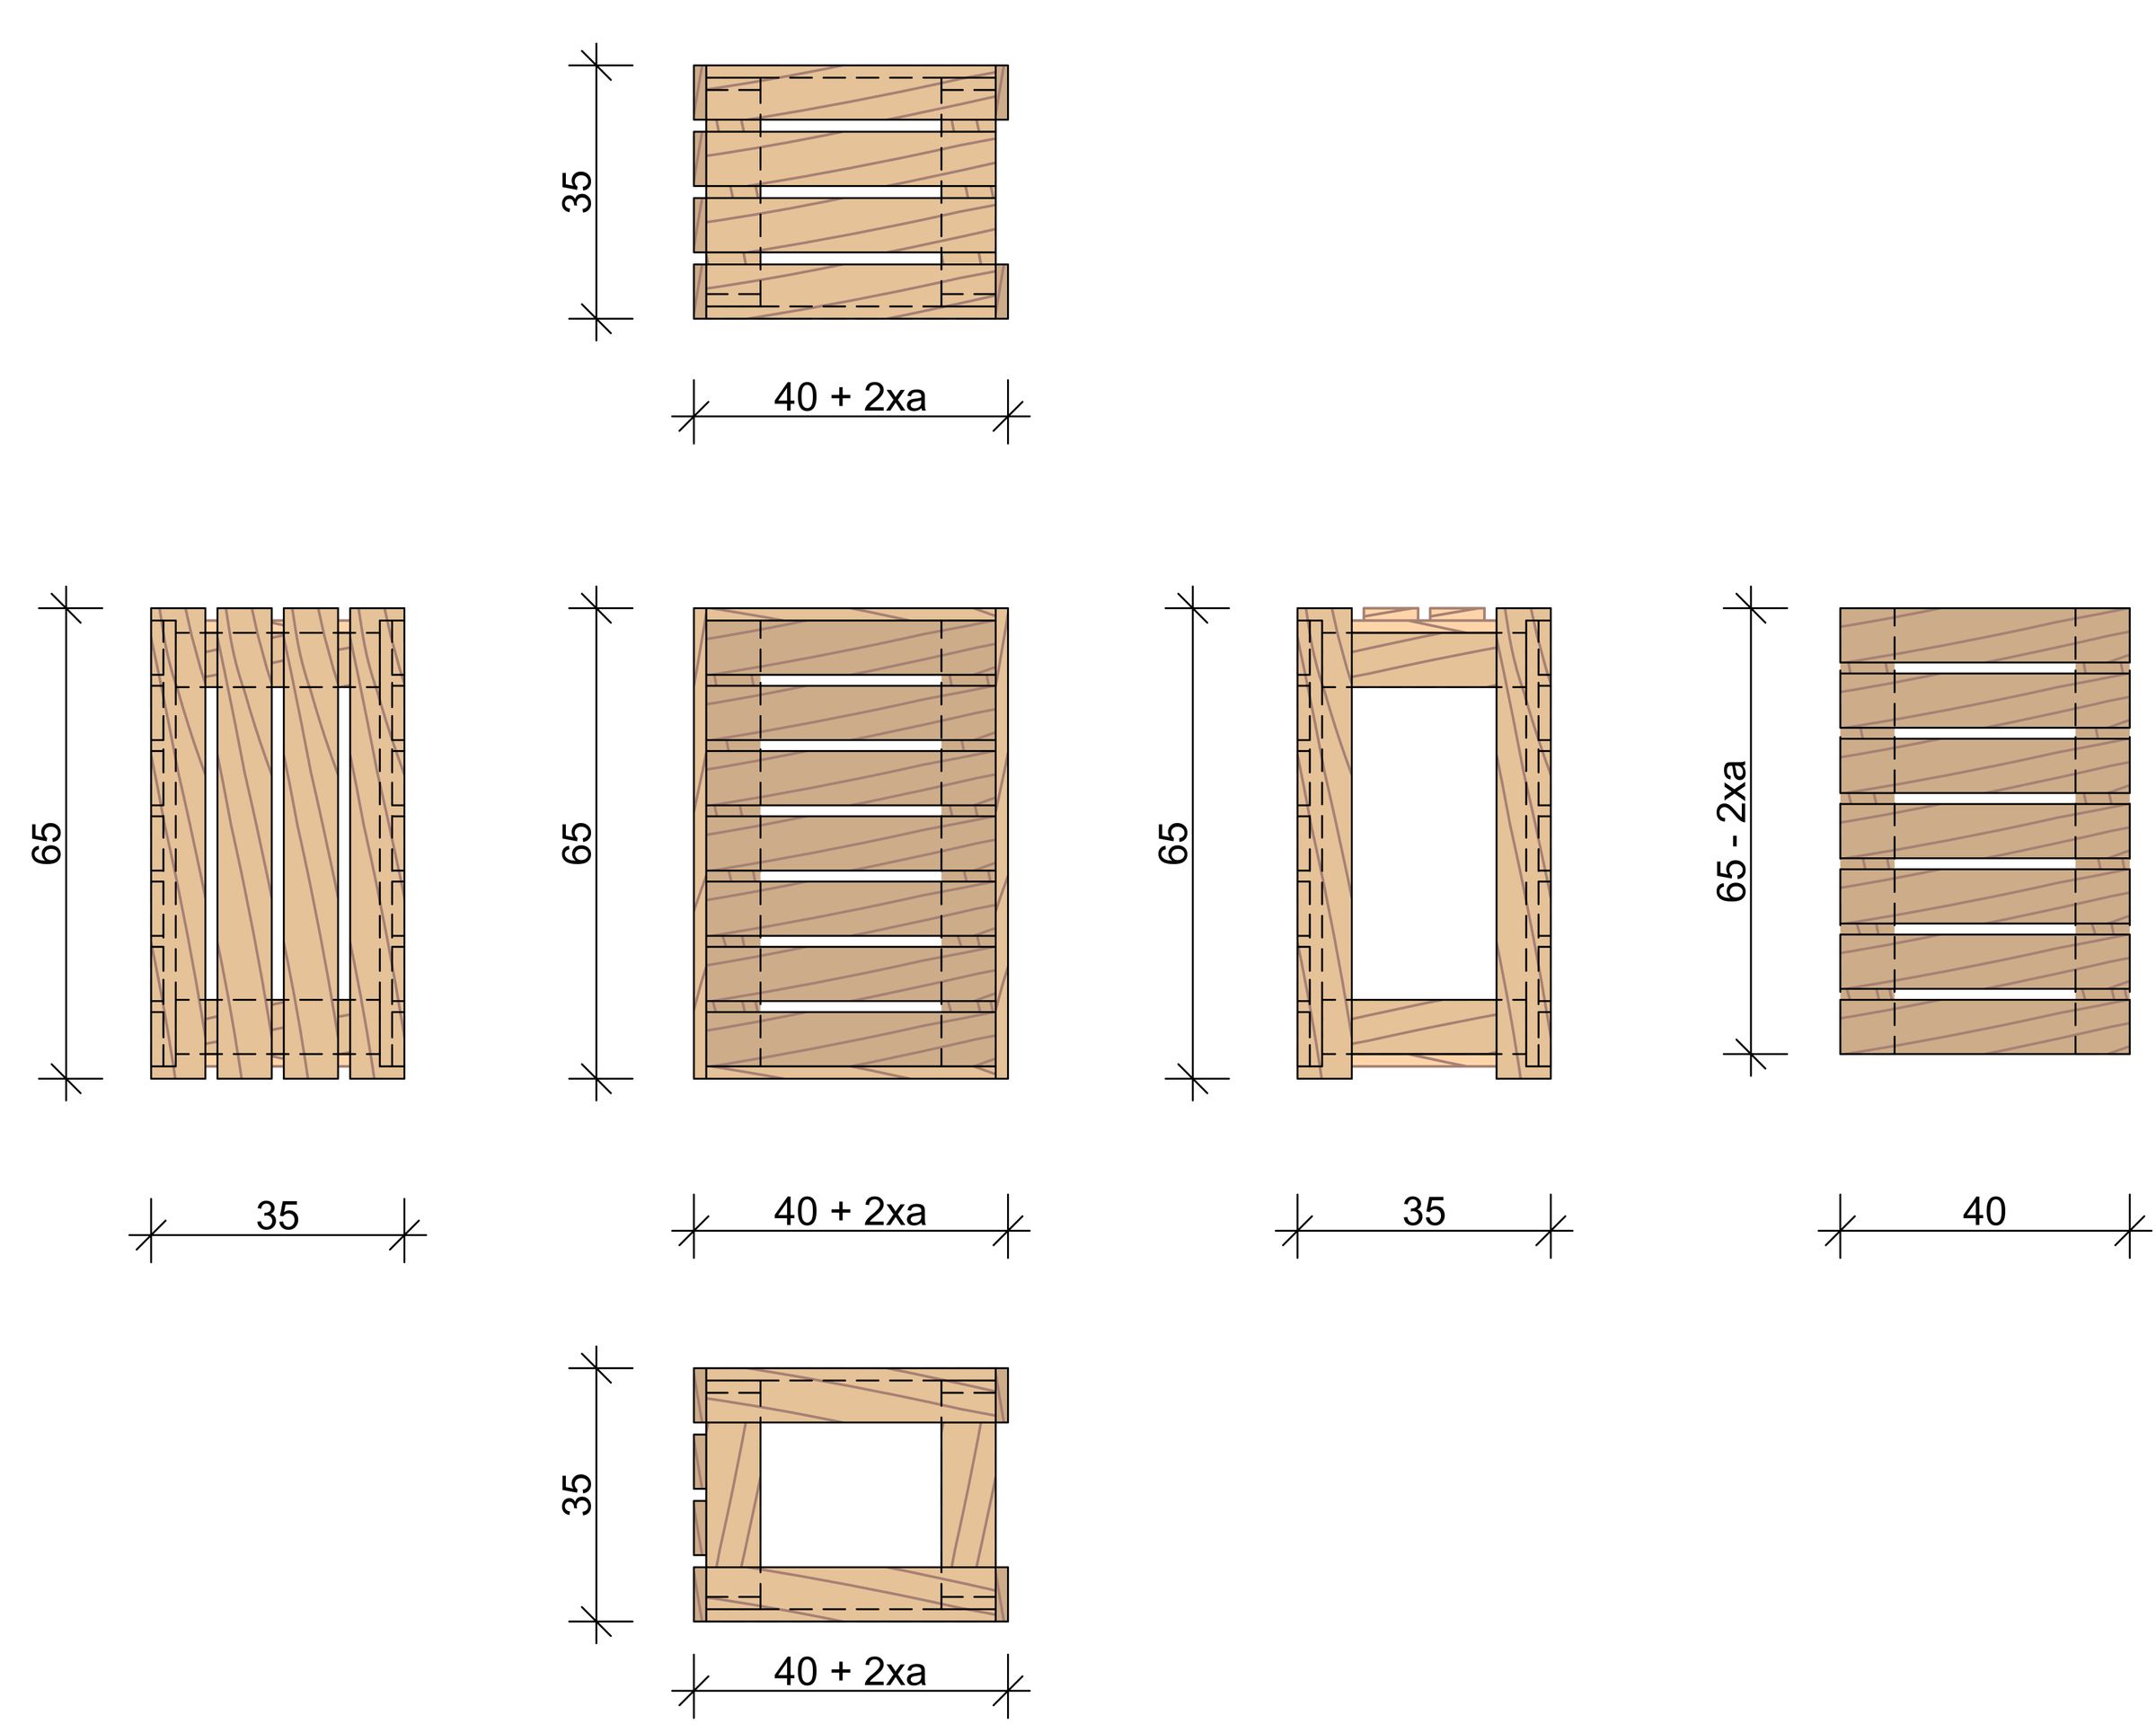
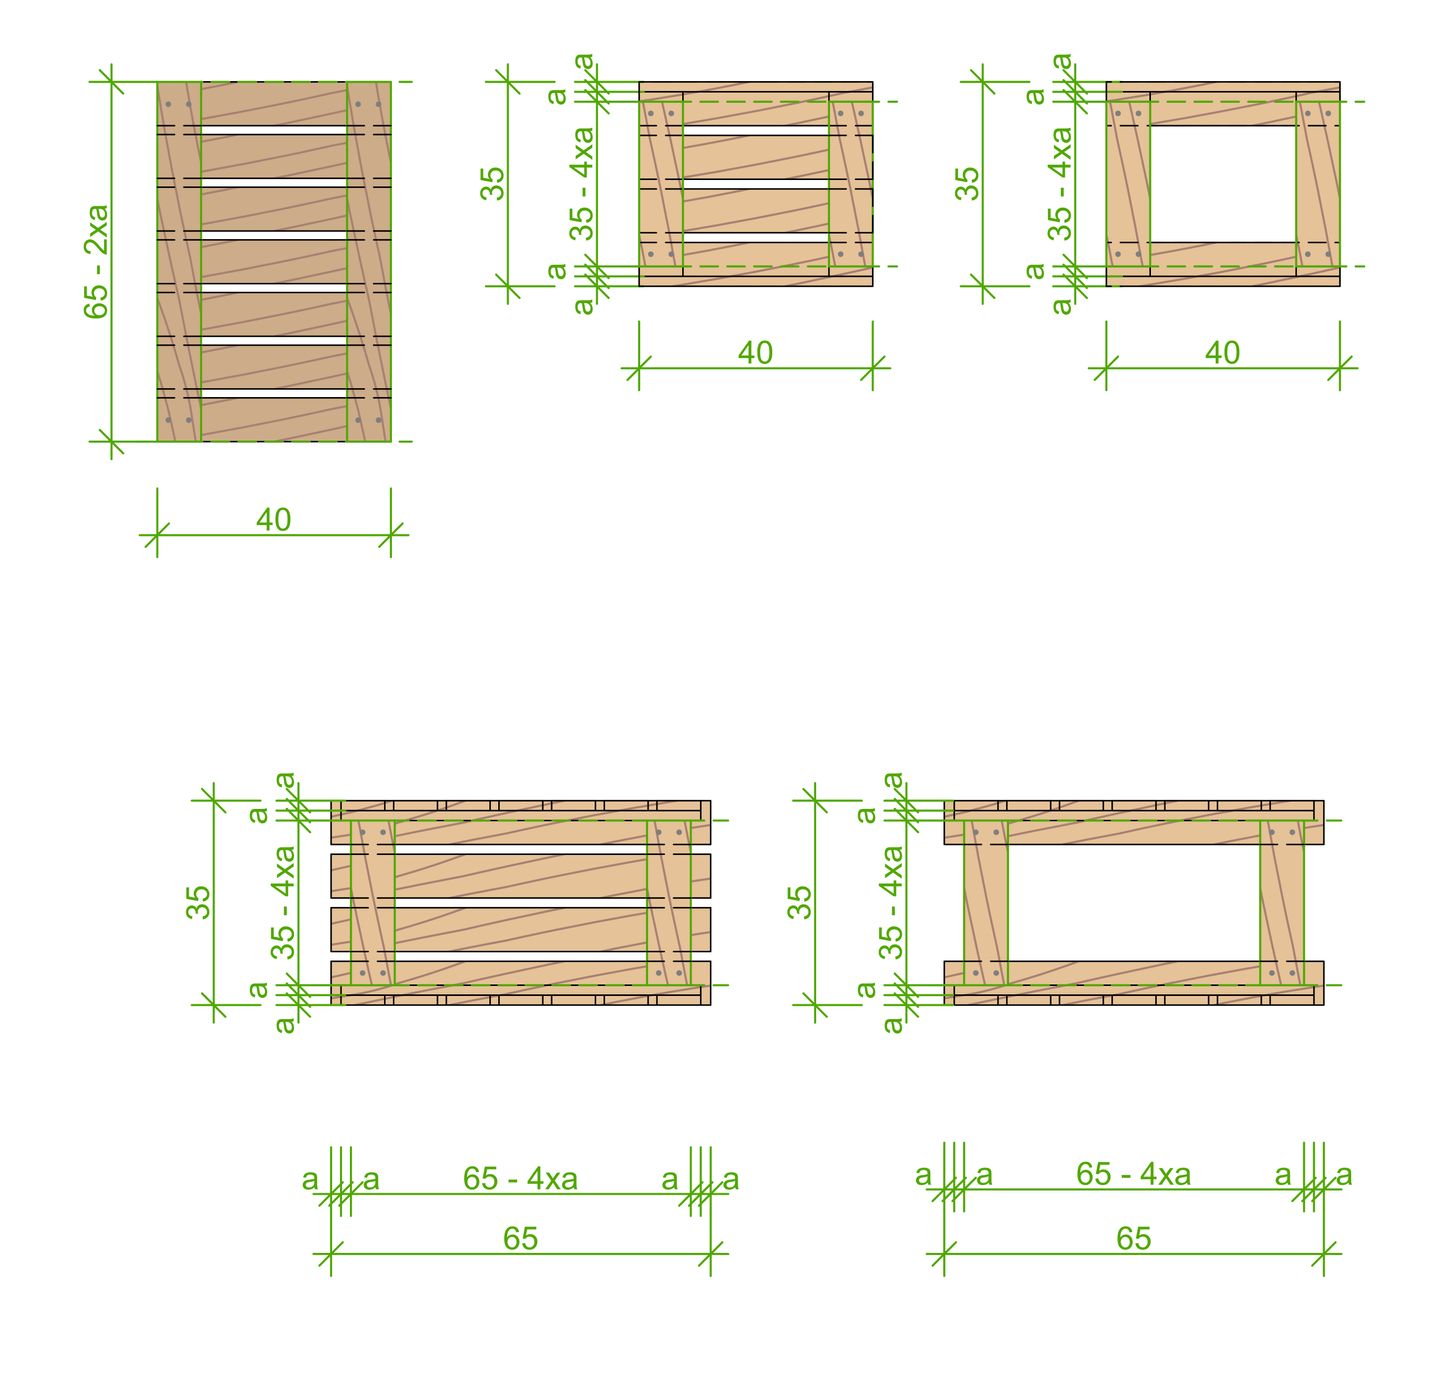
Take the dimensions from the following drawings and measure and mark step by step the different sizes on the wood. Label them with some letters or numbers, so that you have a better overview which piece of wood is for which part of the furniture. This makes it much easier to put all things together in the end.


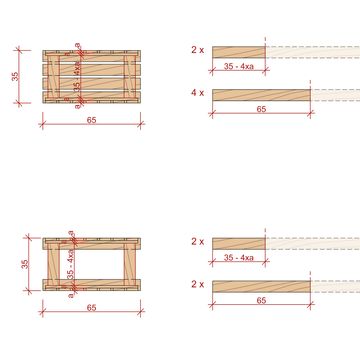
For the table top meaure the pieces shown on the top right side of the picture: 4 x 60 cm 2 x (40 cm - 2xa) a is the thickness of your pallet wood.
For the short side of the table measure the pieces shown on the bottom right side of the picture: 2 x (70 cm - a) 2 x (40 cm -2xa) a is the thickness of your pallet wood.
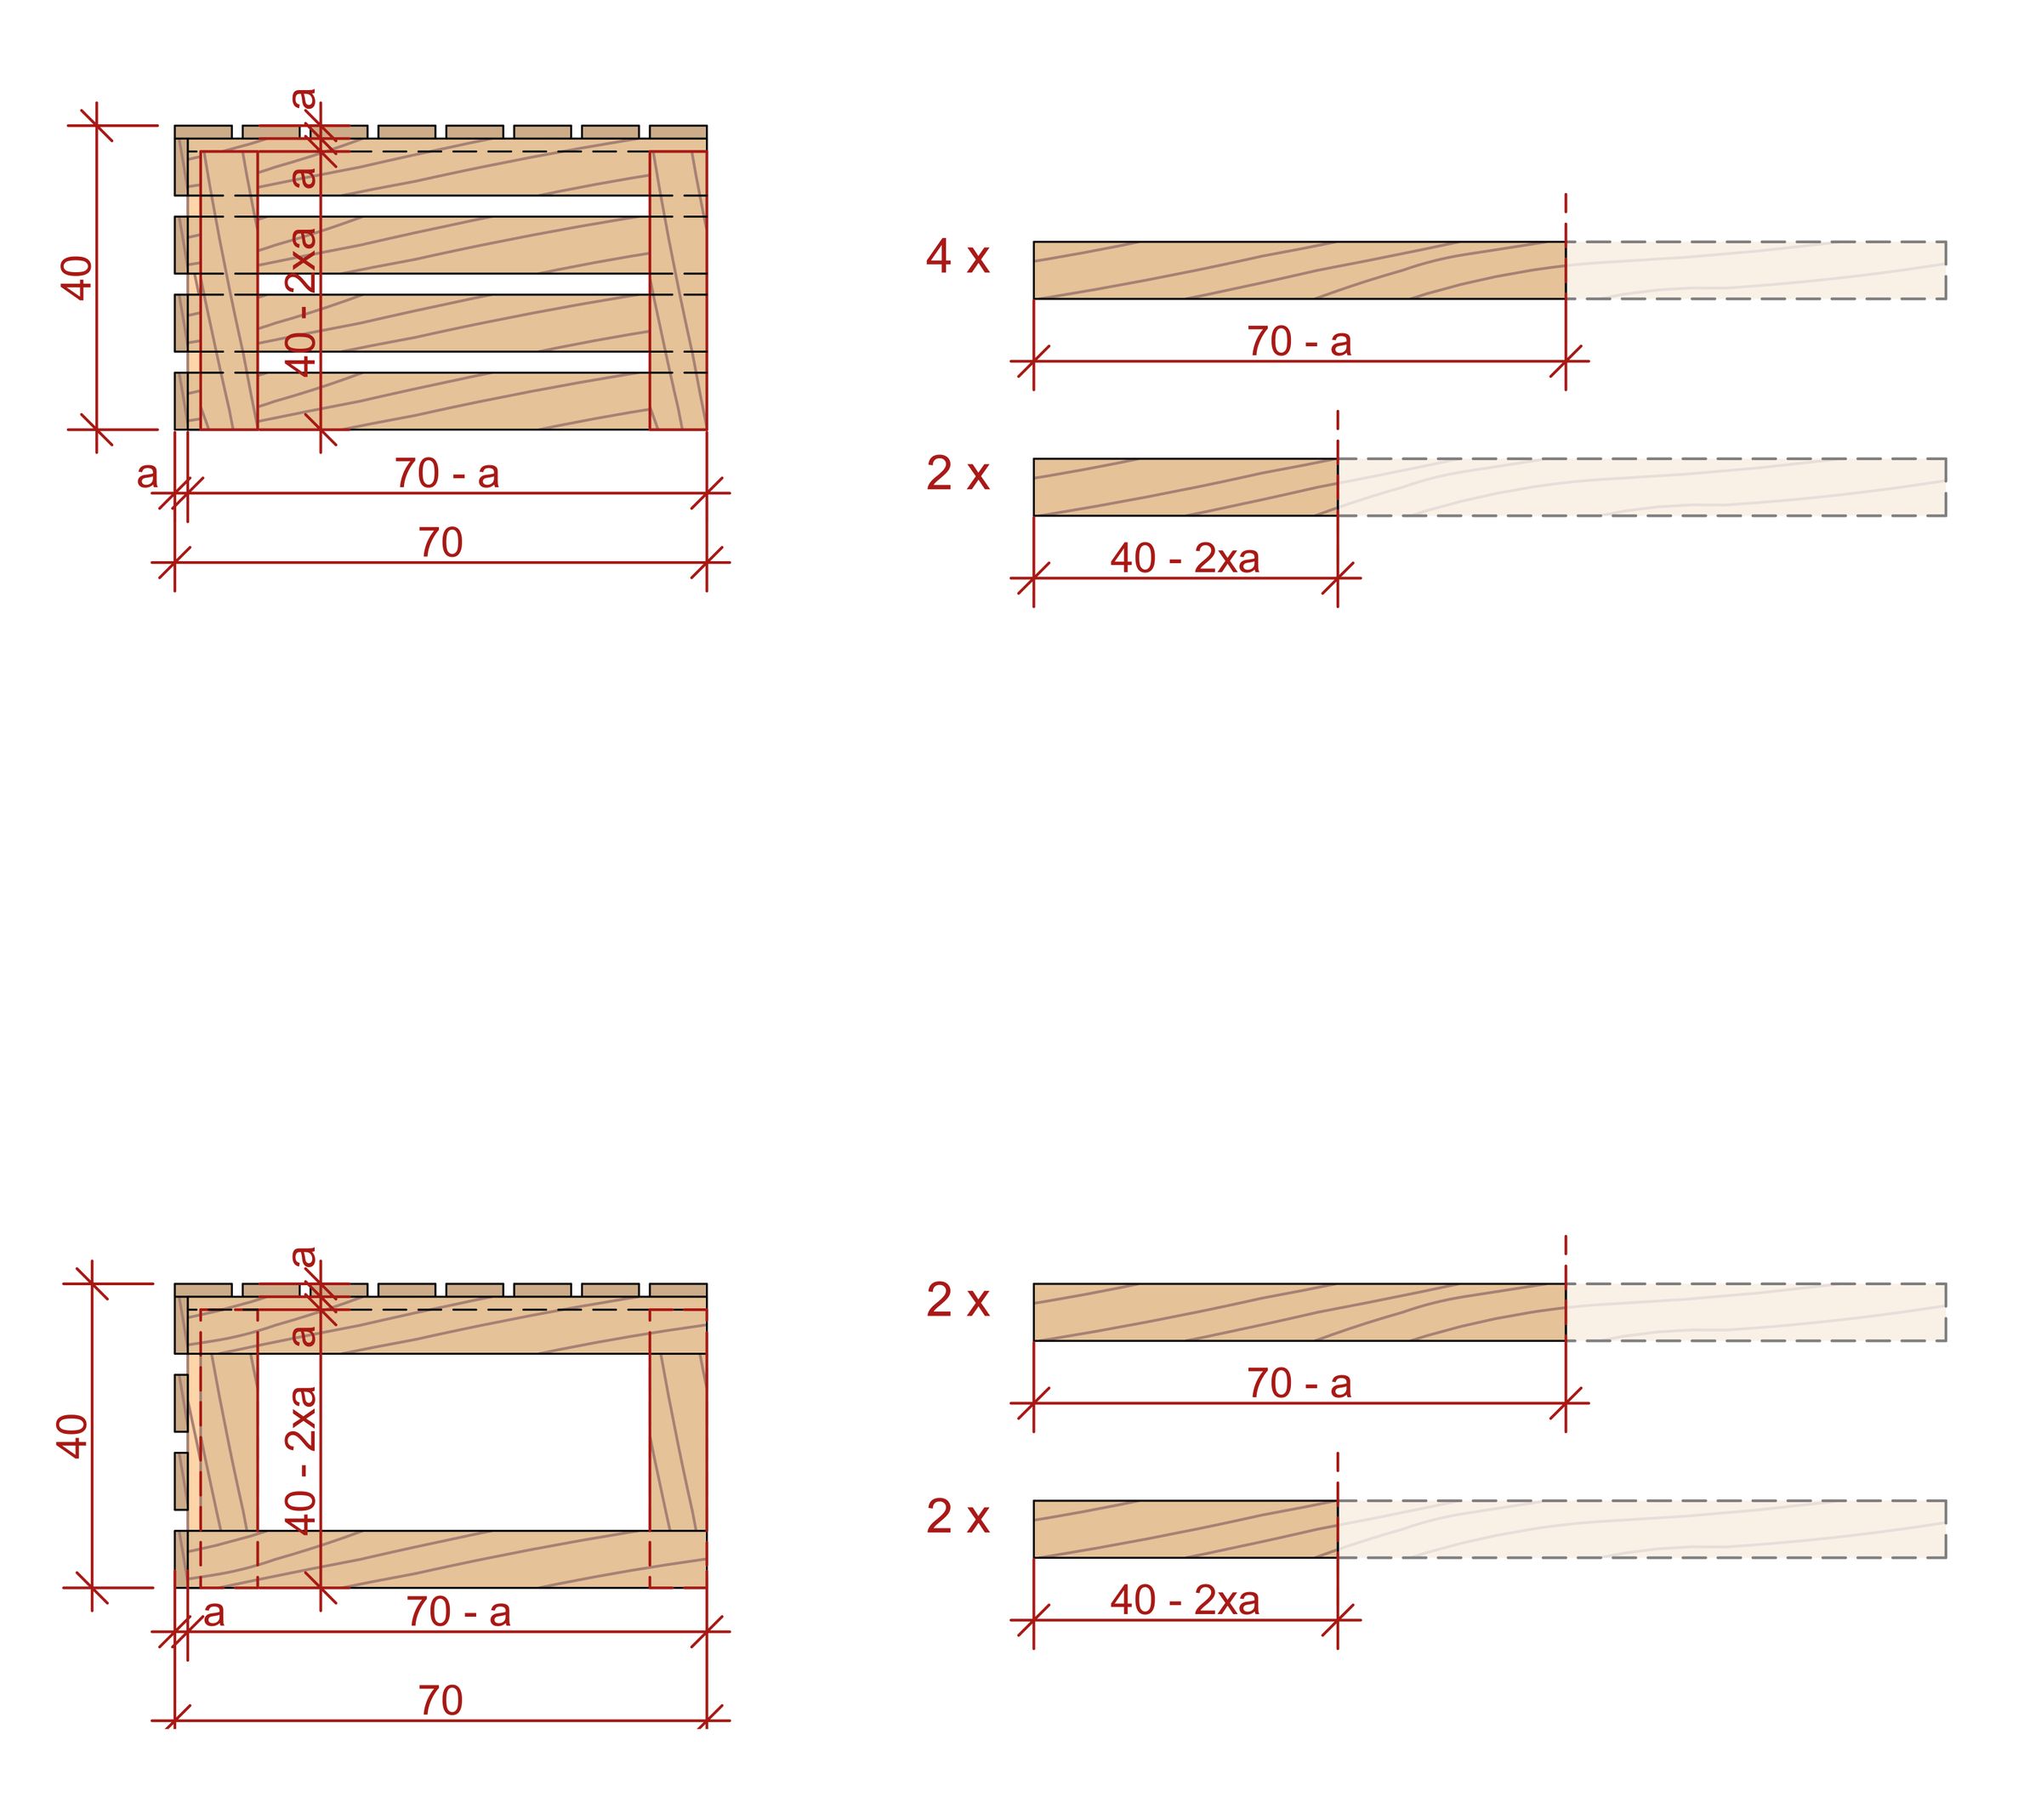

For the long sides of the table measure your wood pieces as shown on the right a is for the thickness of your pallet wood.
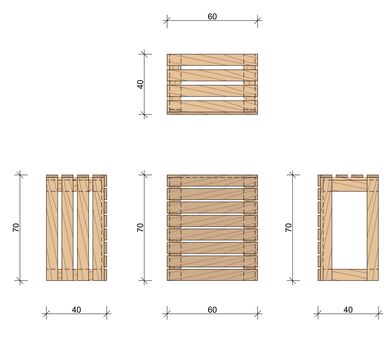
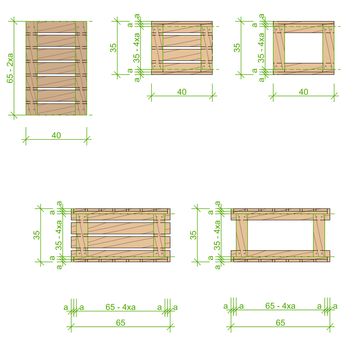
For the bottom of the box/chair you need the pieces shown on the right side of the picture. a is for the thickness of your pallet wood.
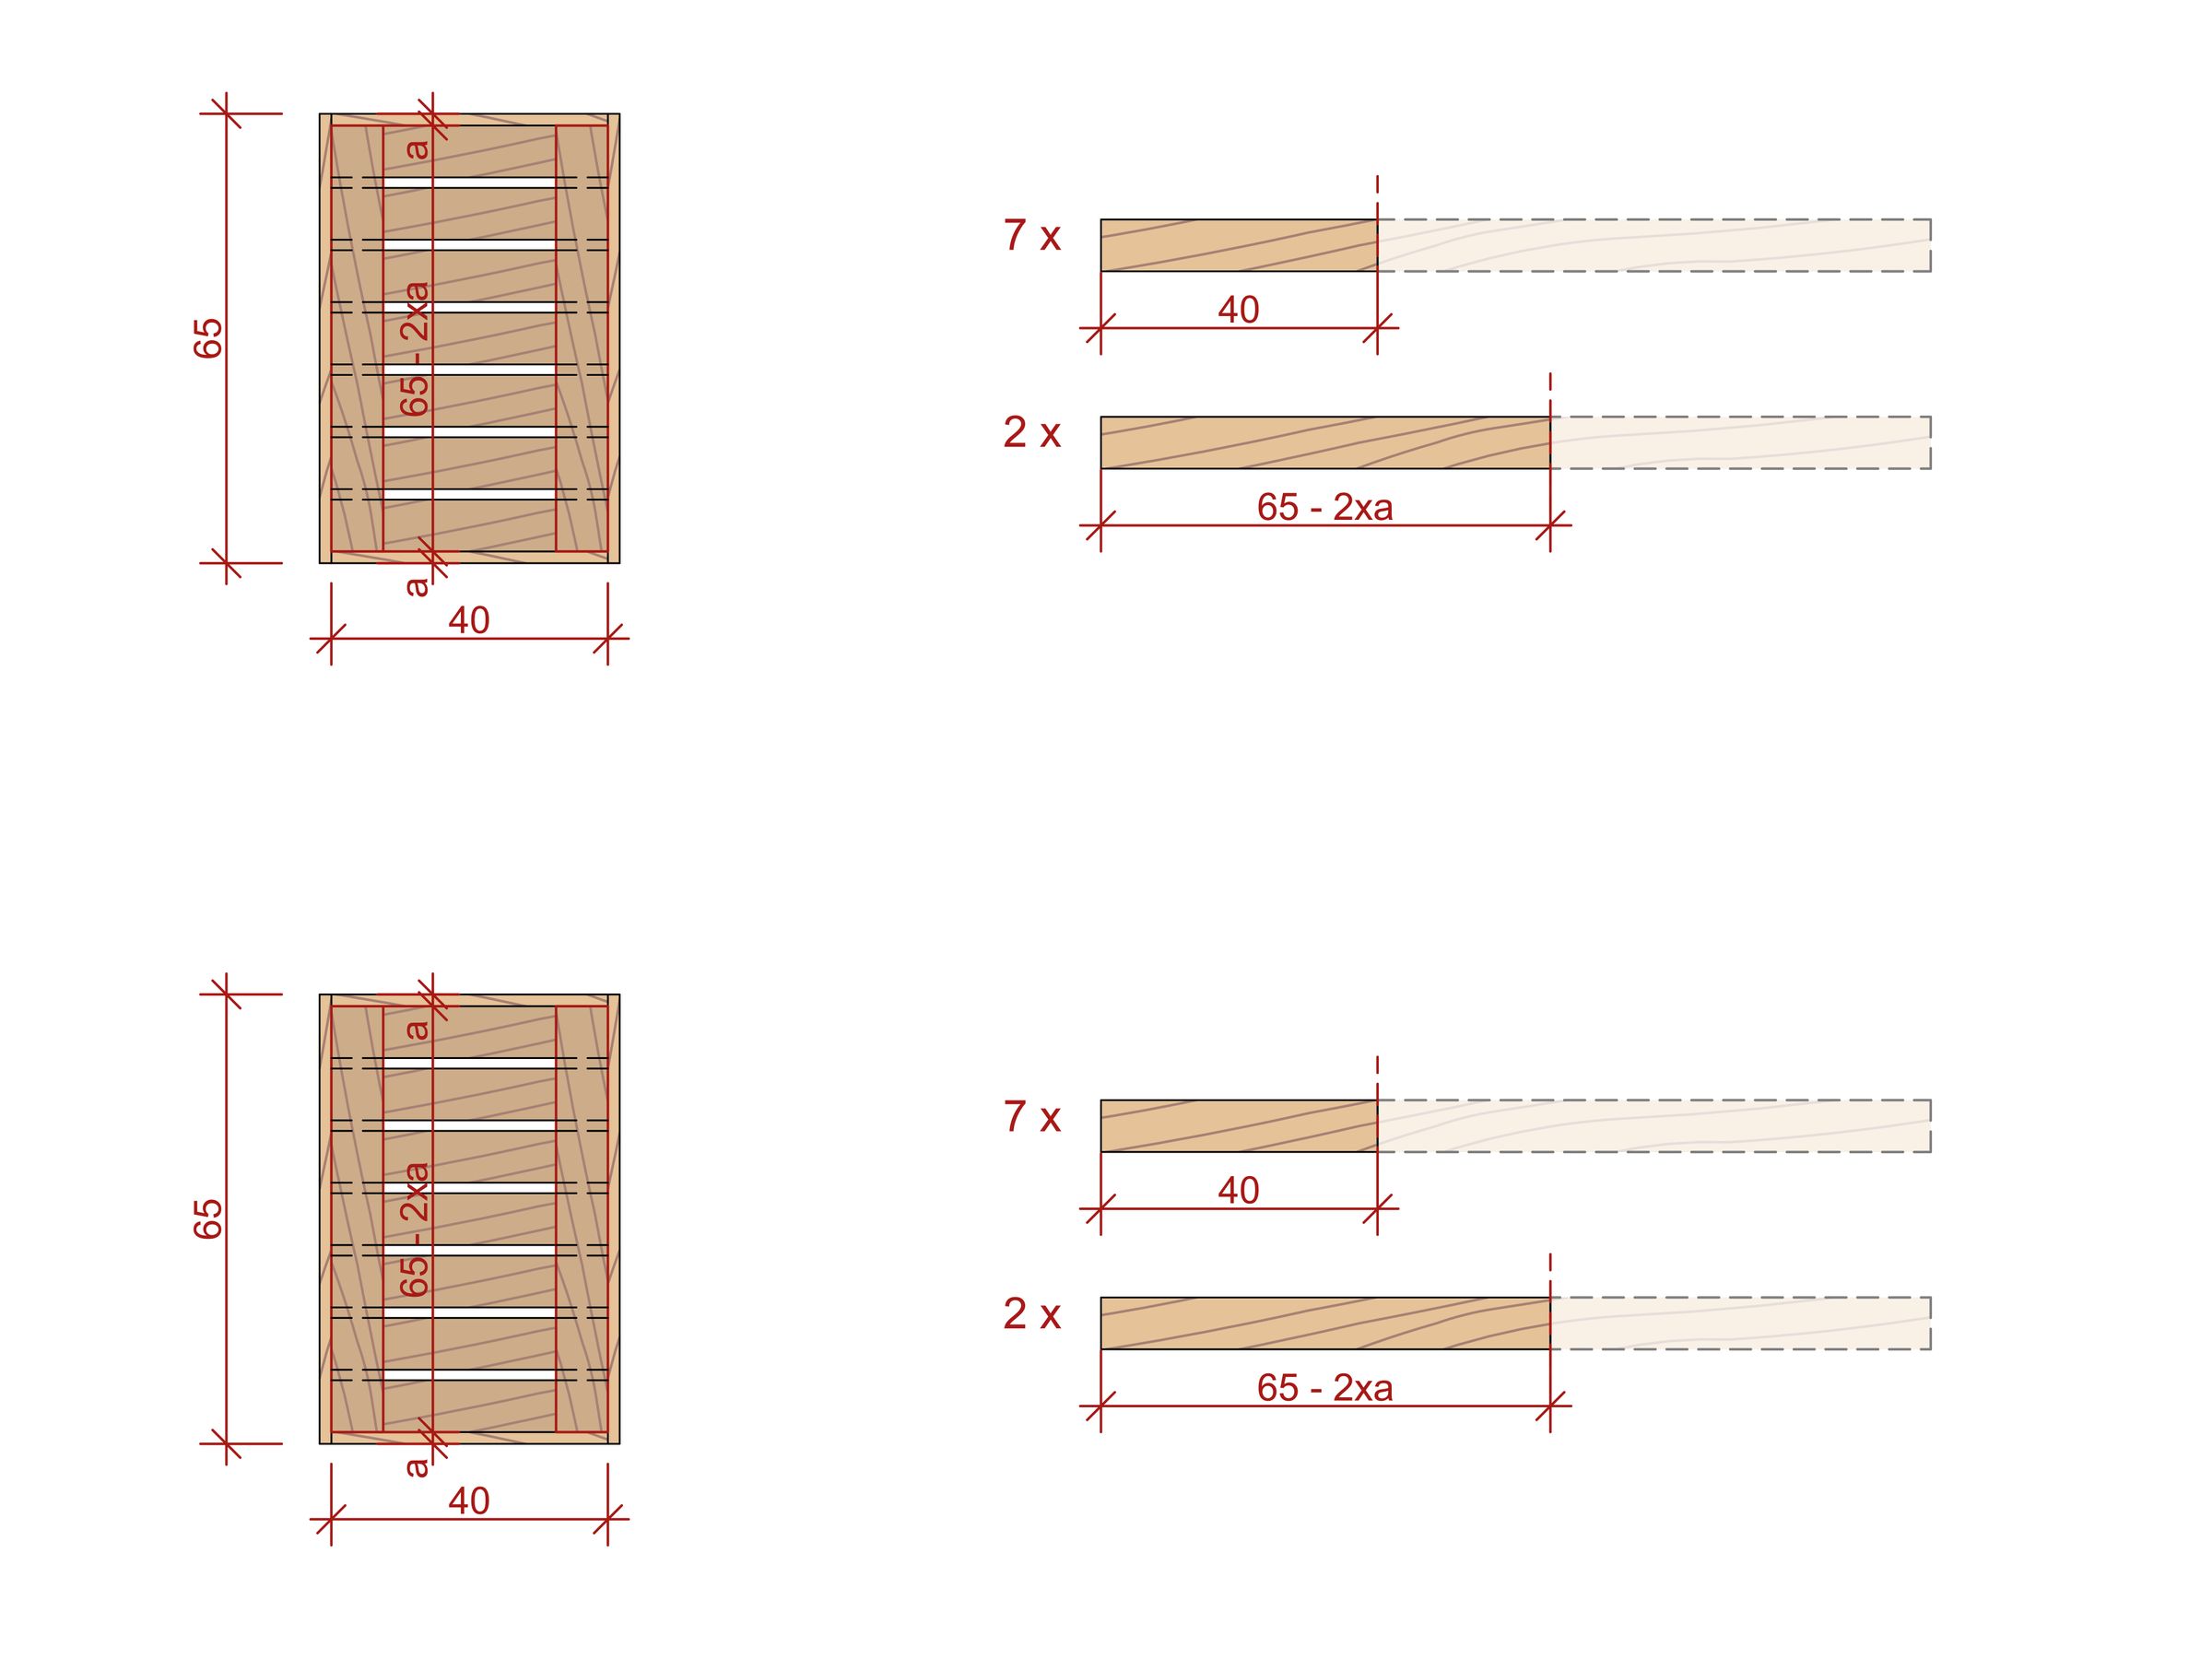
Repeat the same process for the lid.

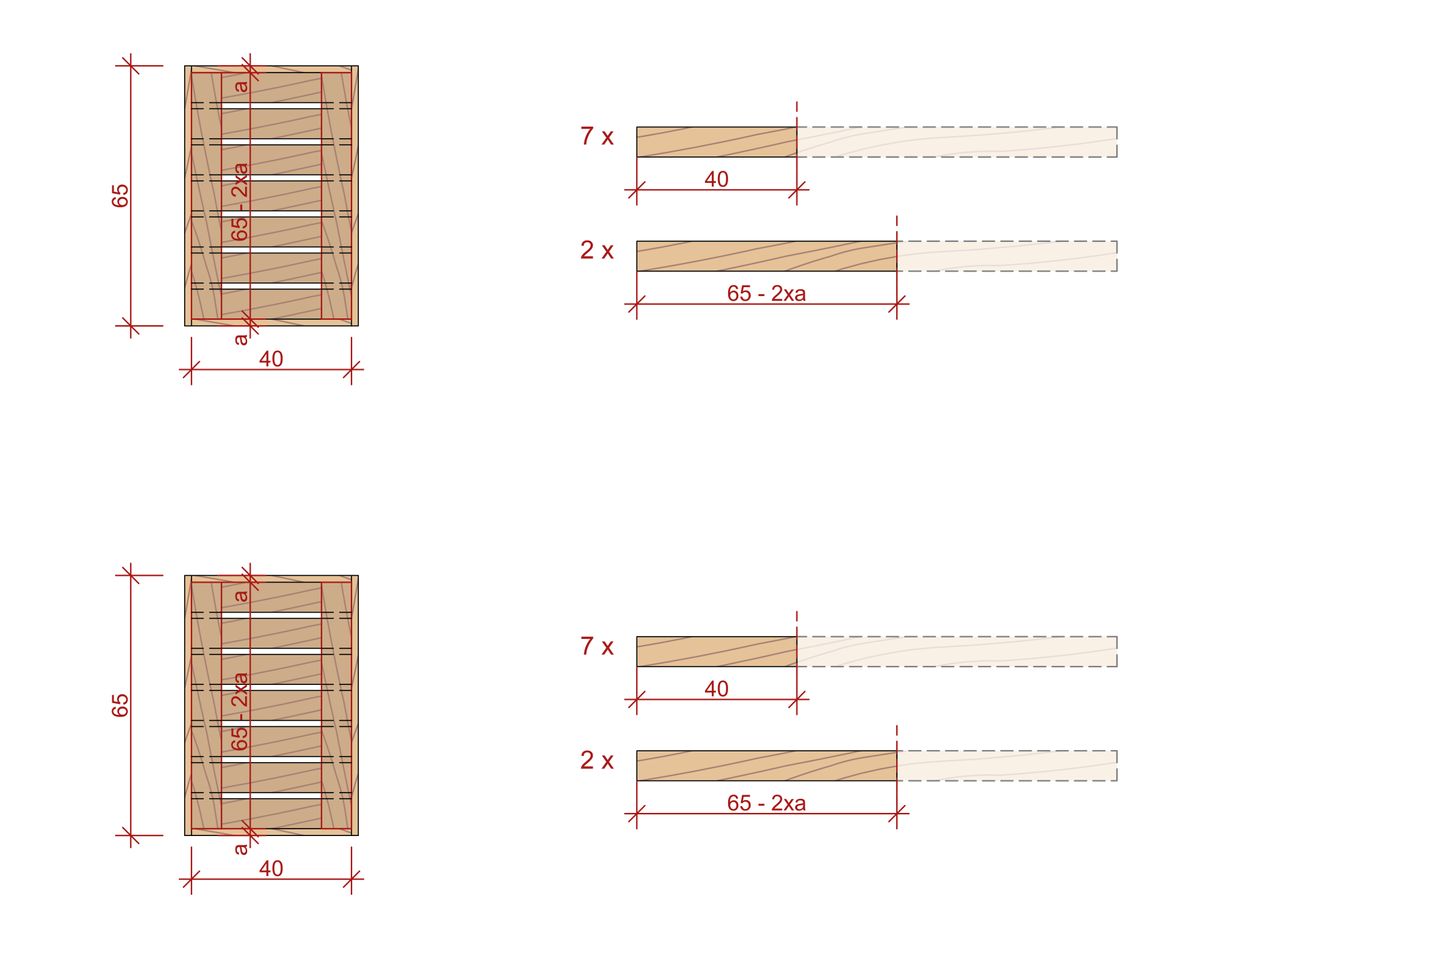
For the small sides of the box, measure your wood pieces as shown on the right.Optionally you can also close up the one side of the box with a nice fabric.
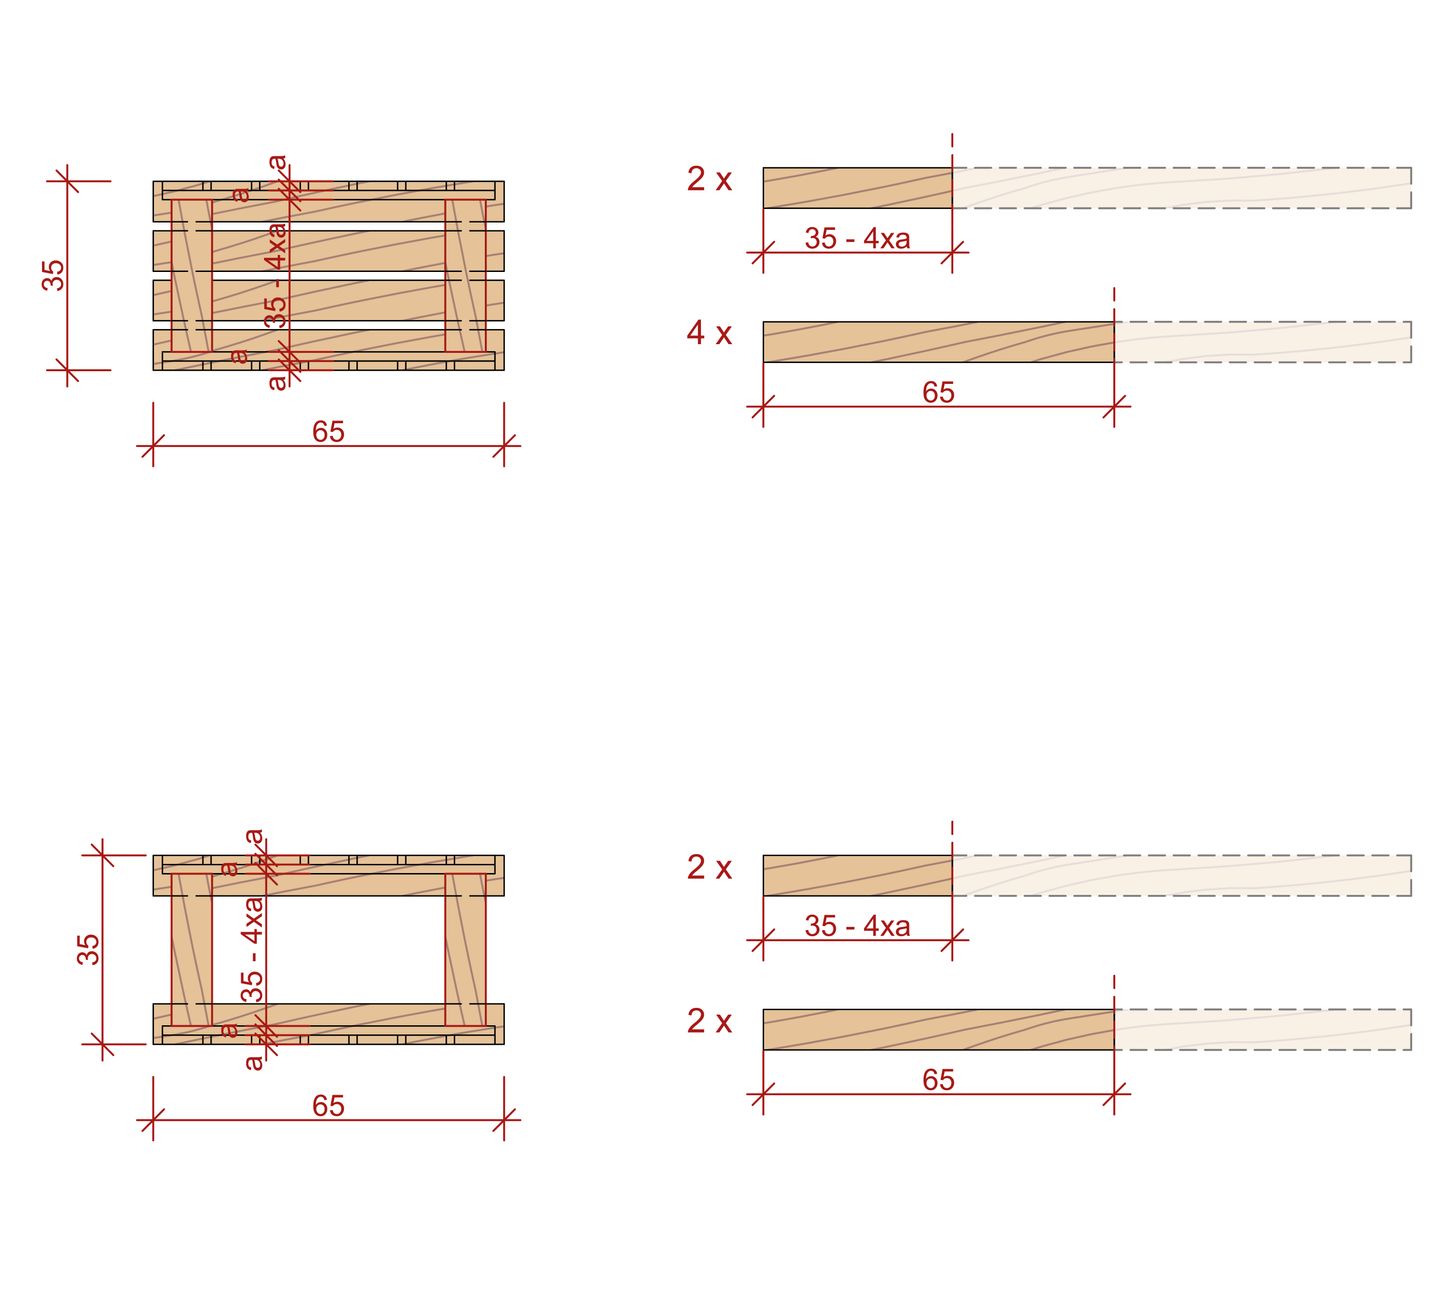
For the large sides of the box, measure your wood pieces as shown on the right.
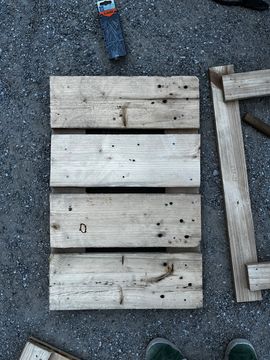
Wood for the table
![]()

Wood for the box/chair

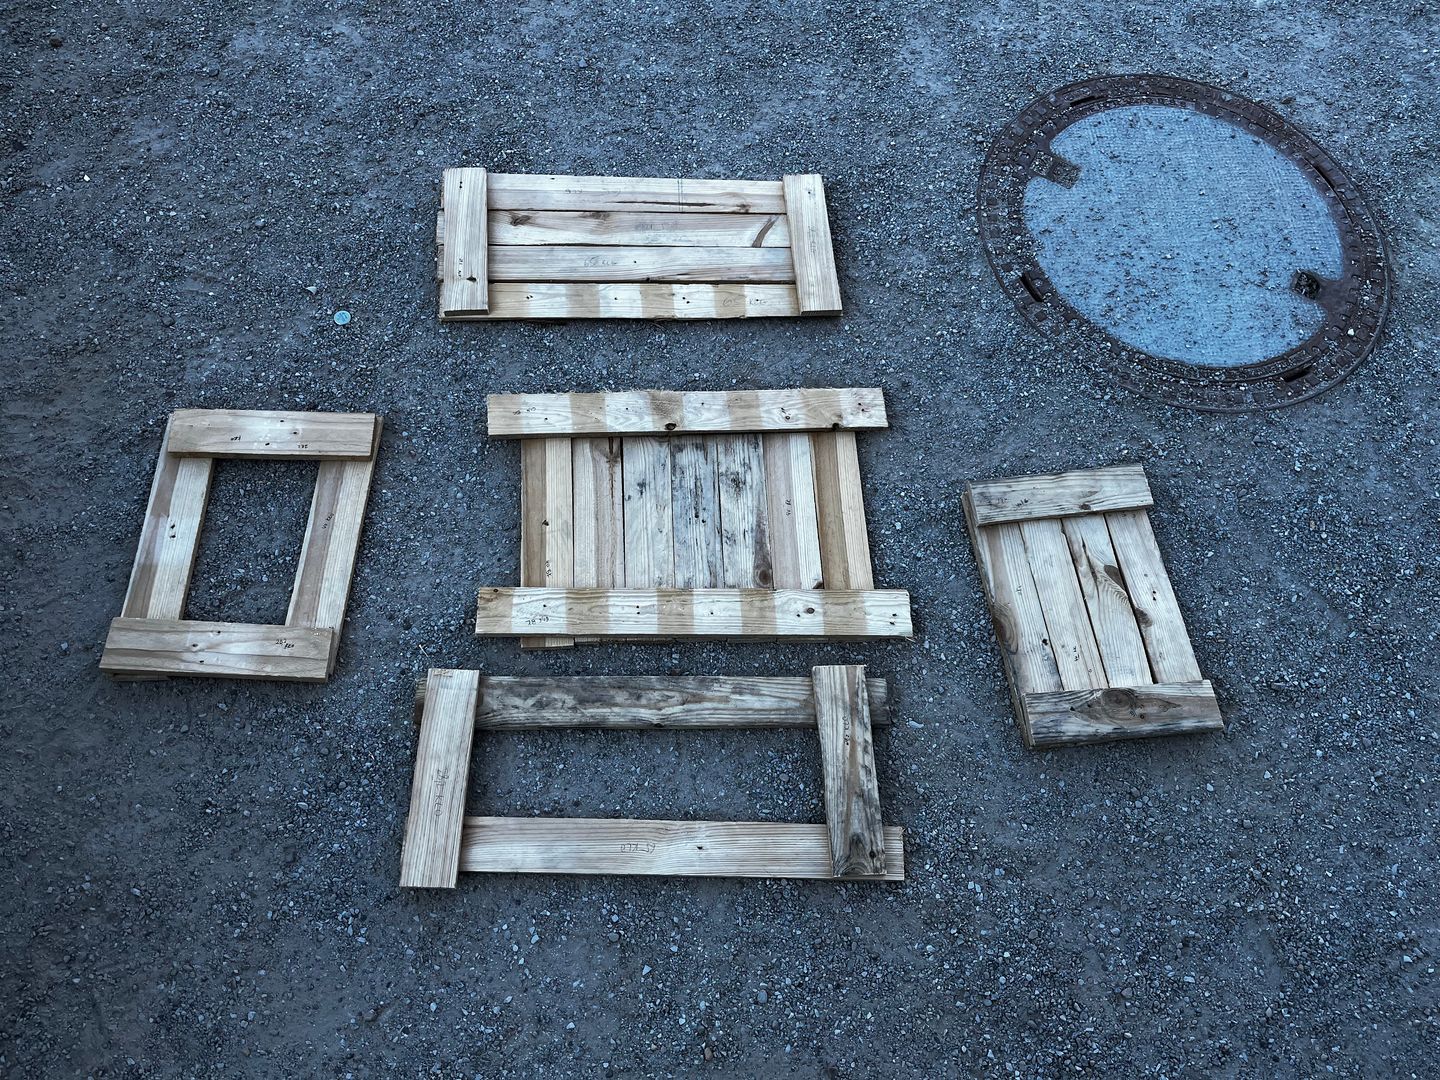
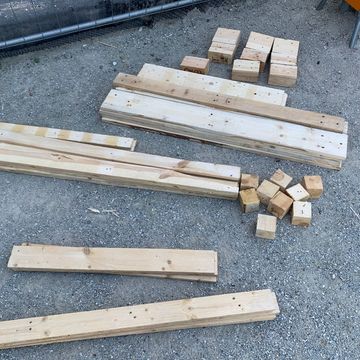
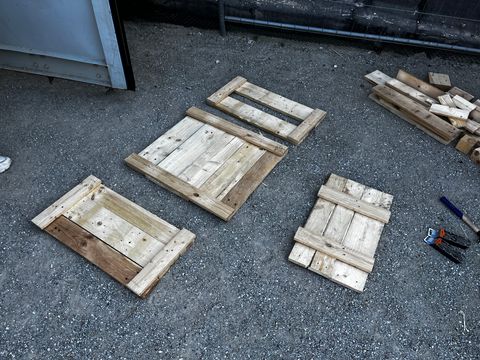
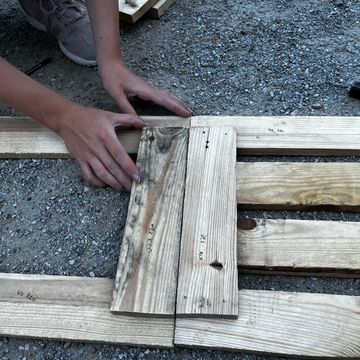
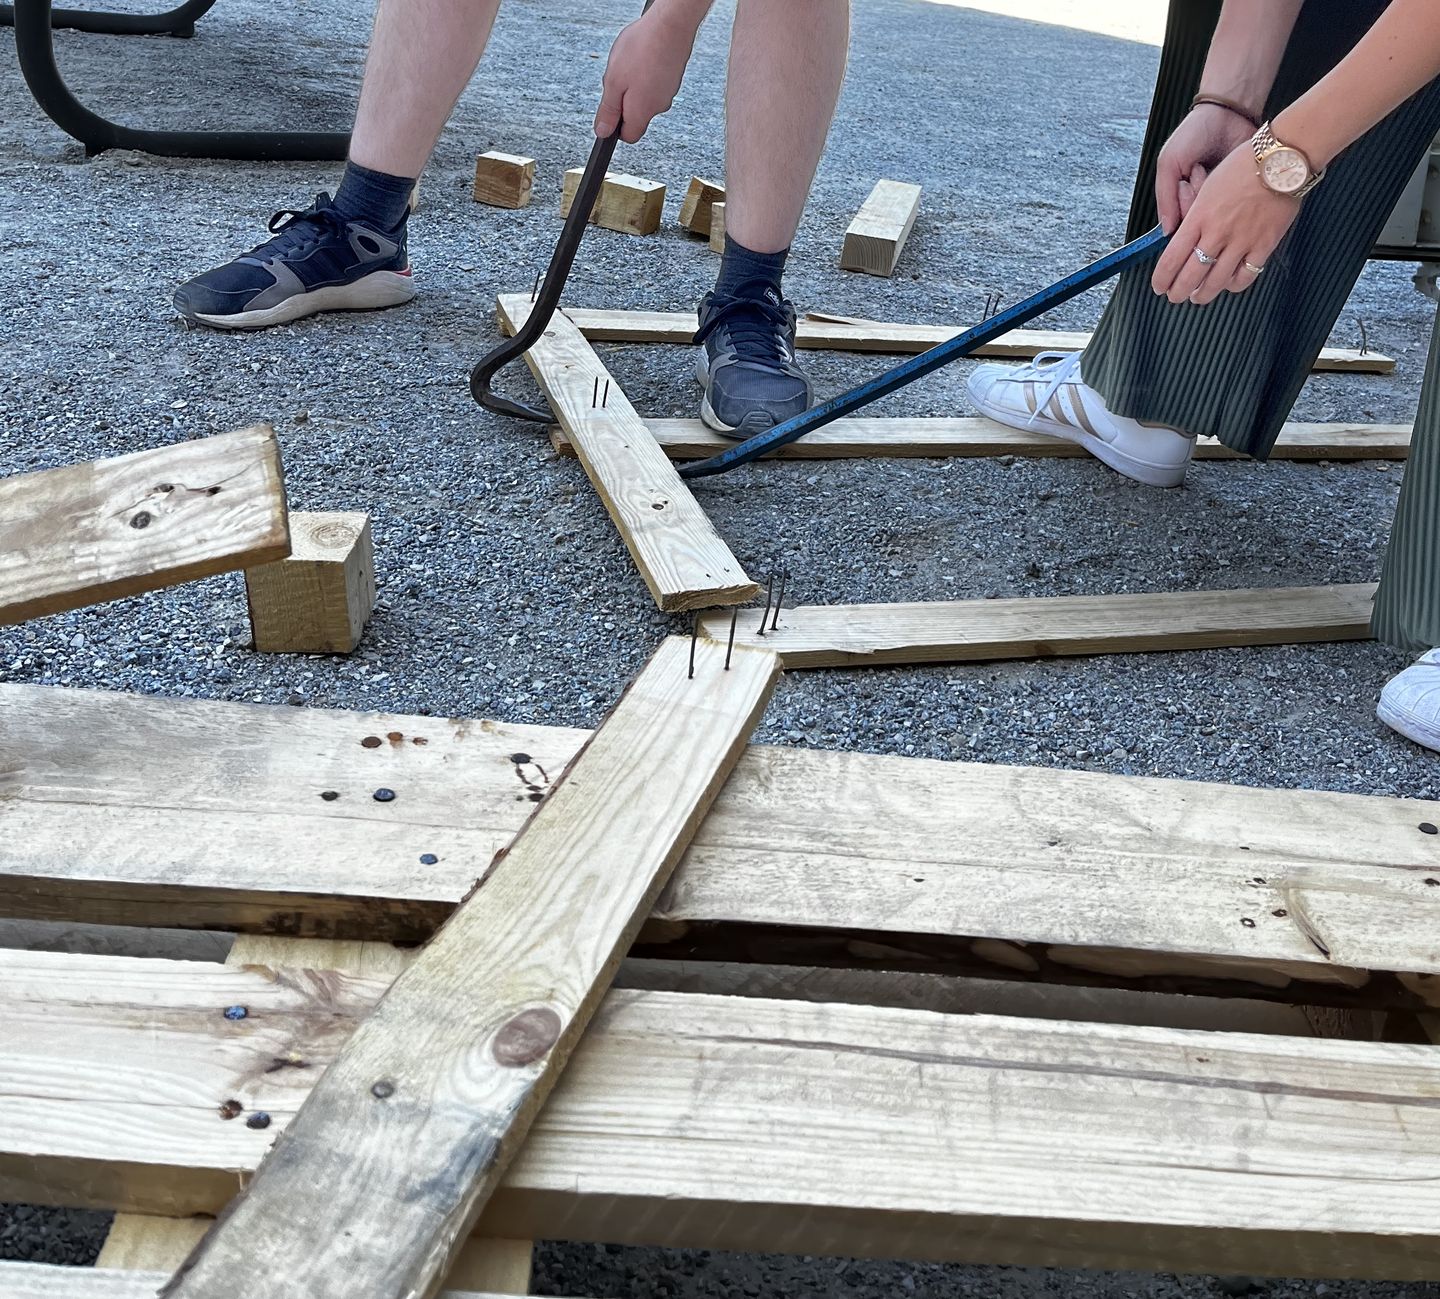
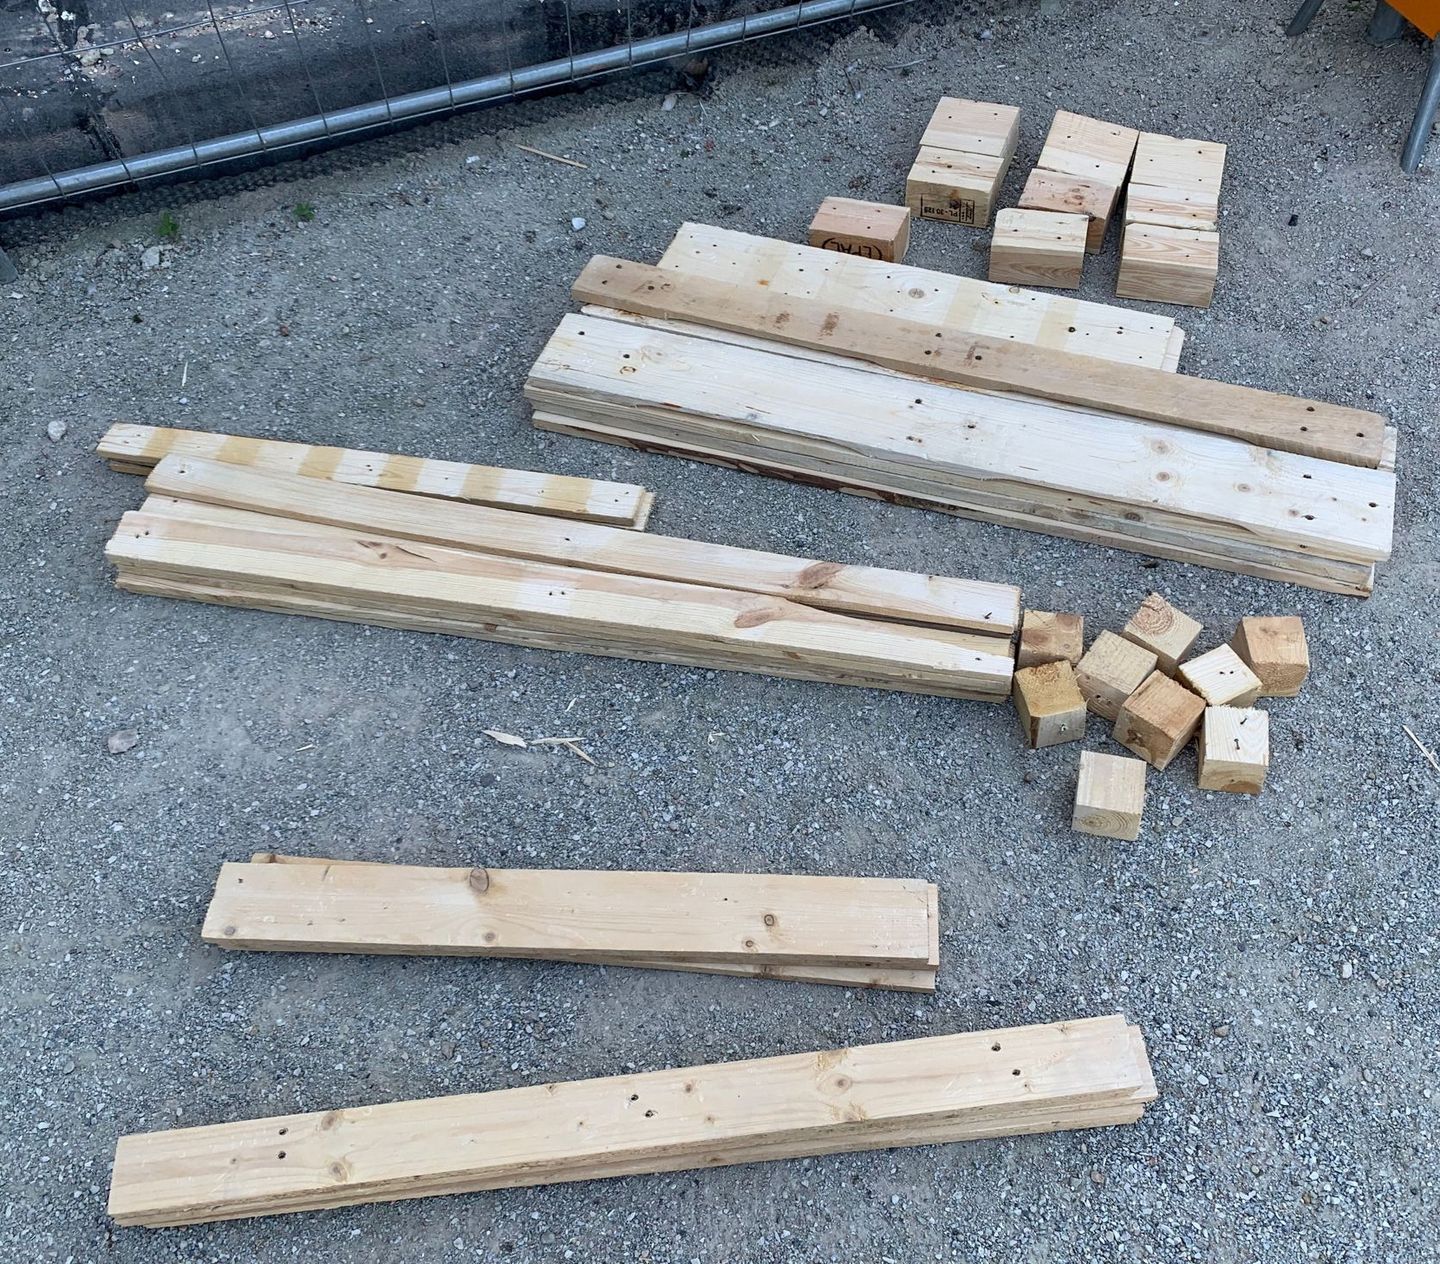
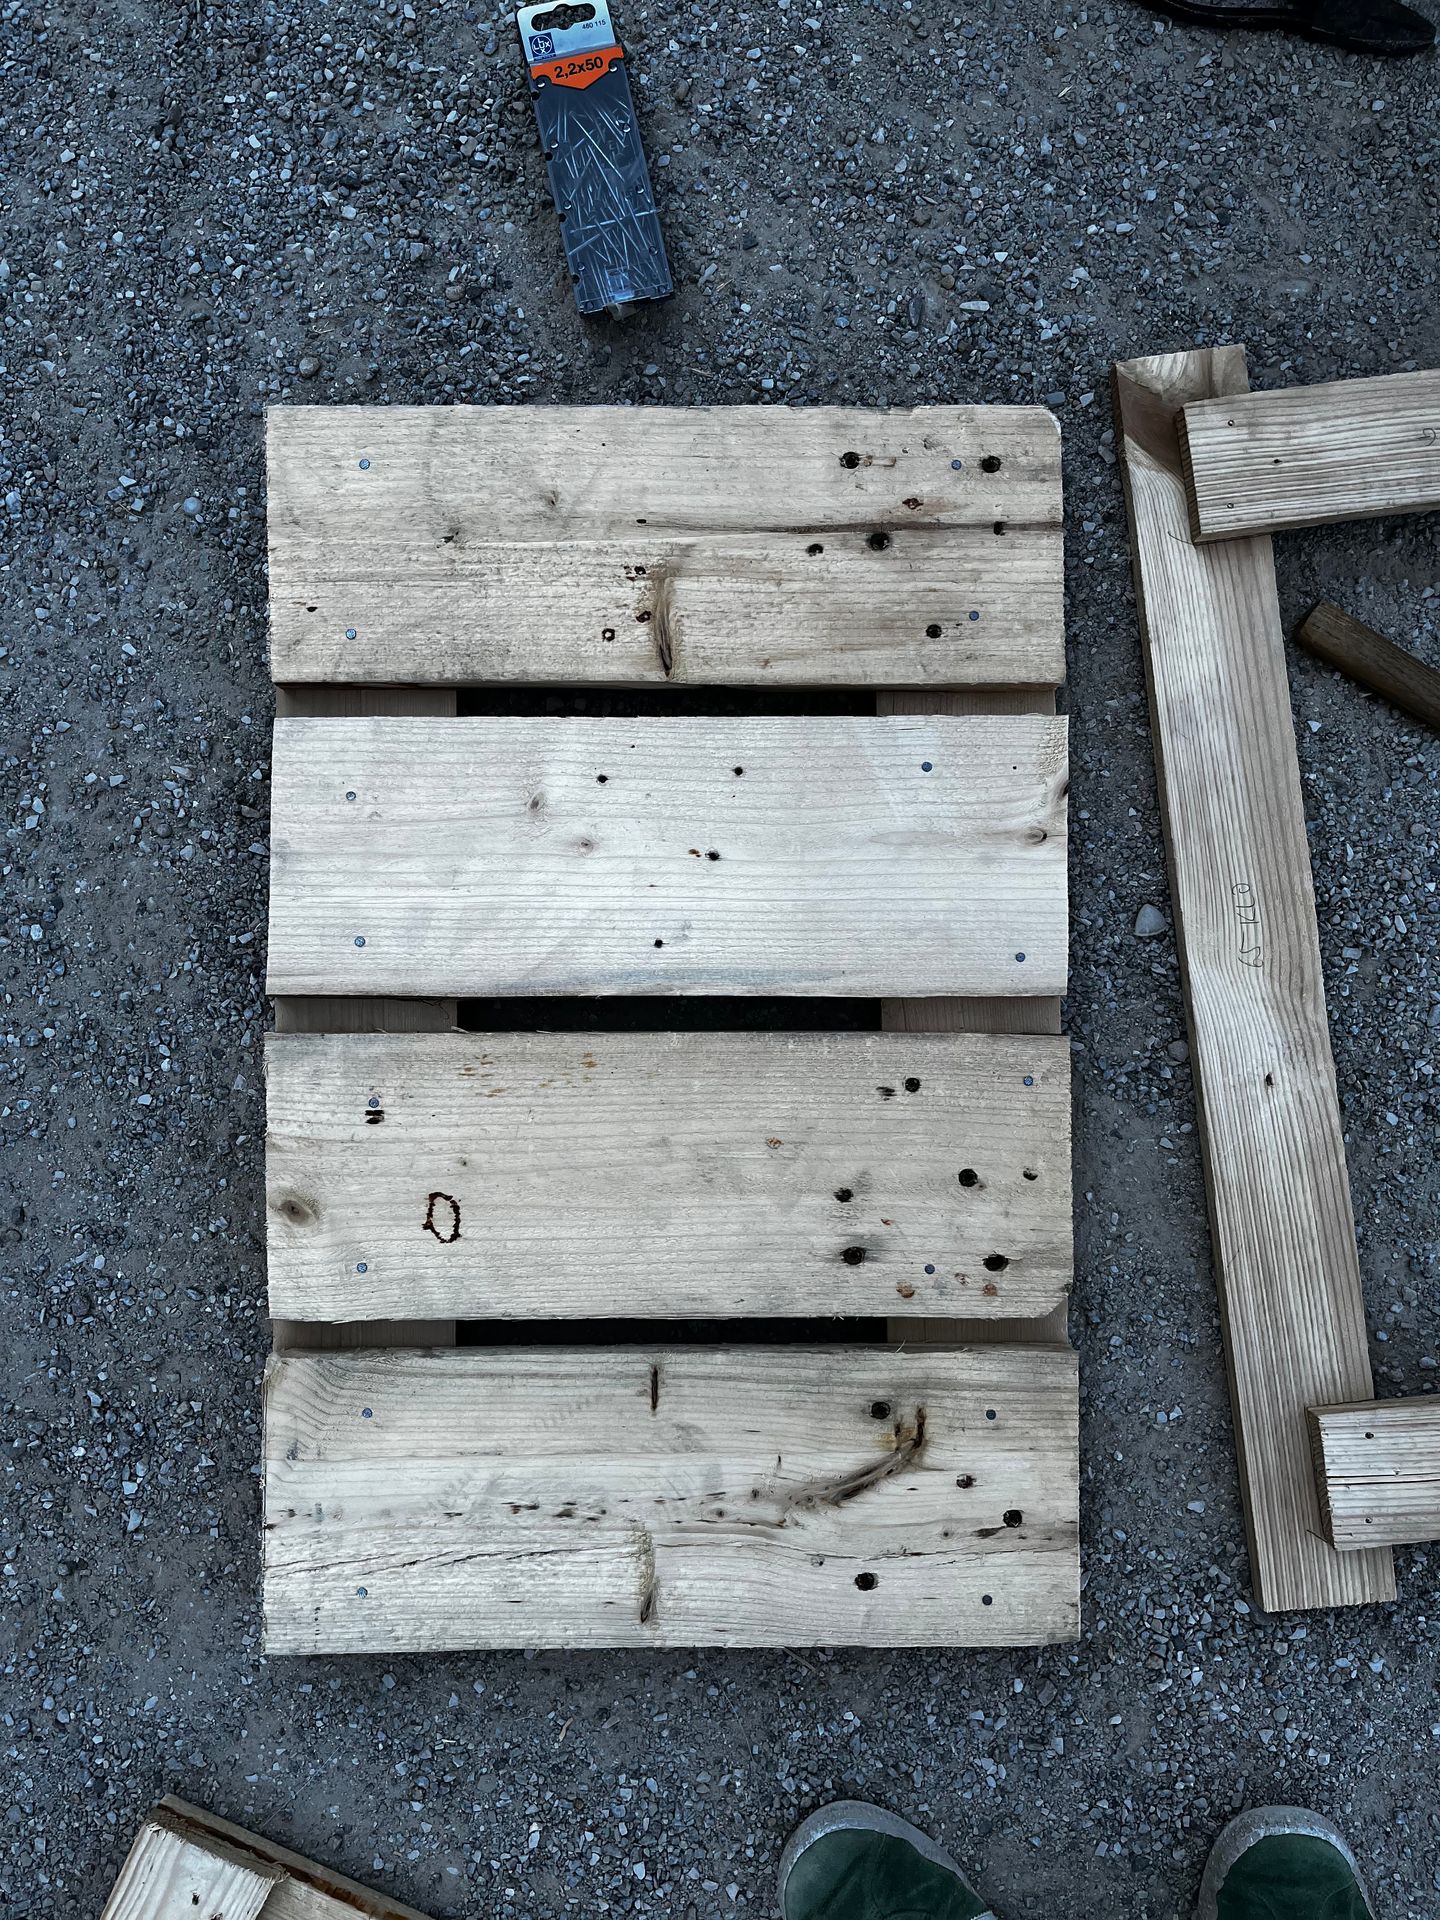
Cut the wood along the marks into pieces with a saw. After you cut all the pieces, place them how they should be connected. Use the pictures above as a guide.
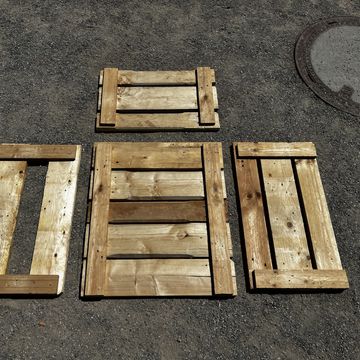
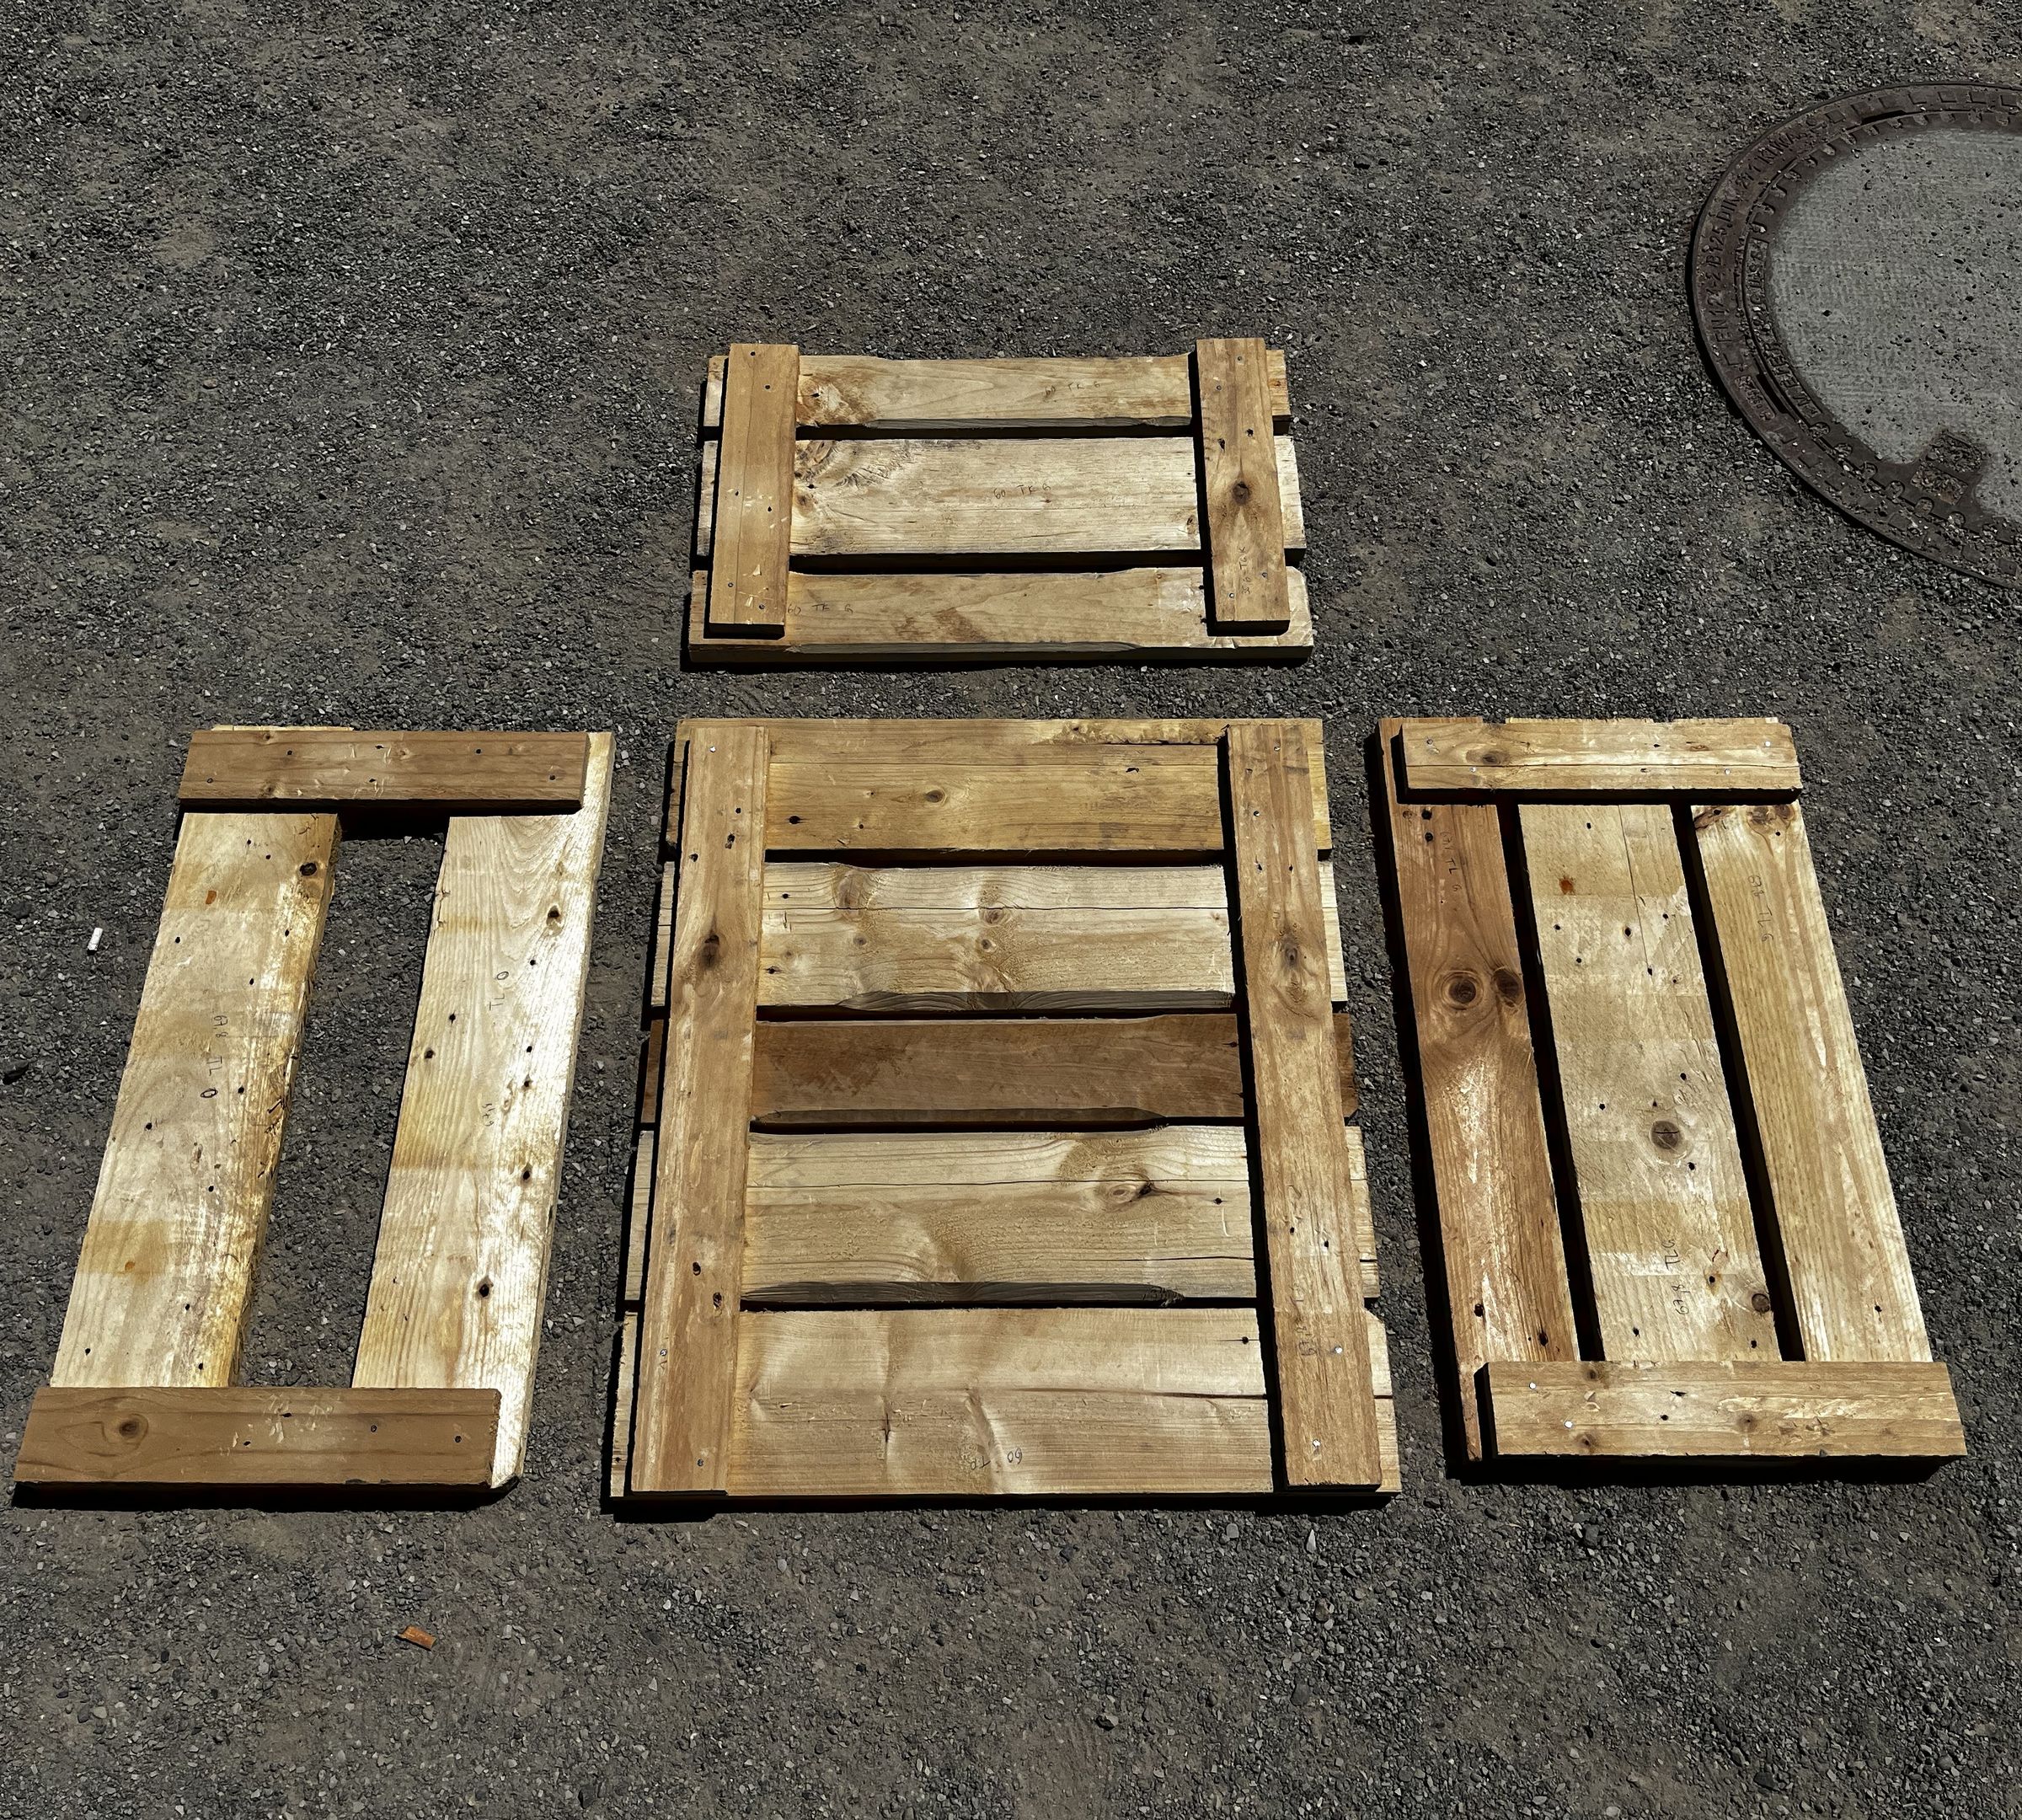
Here you can see all the parts that you need to assemble the table. (The way the pieces are arranged shows the correct way to attached them.)


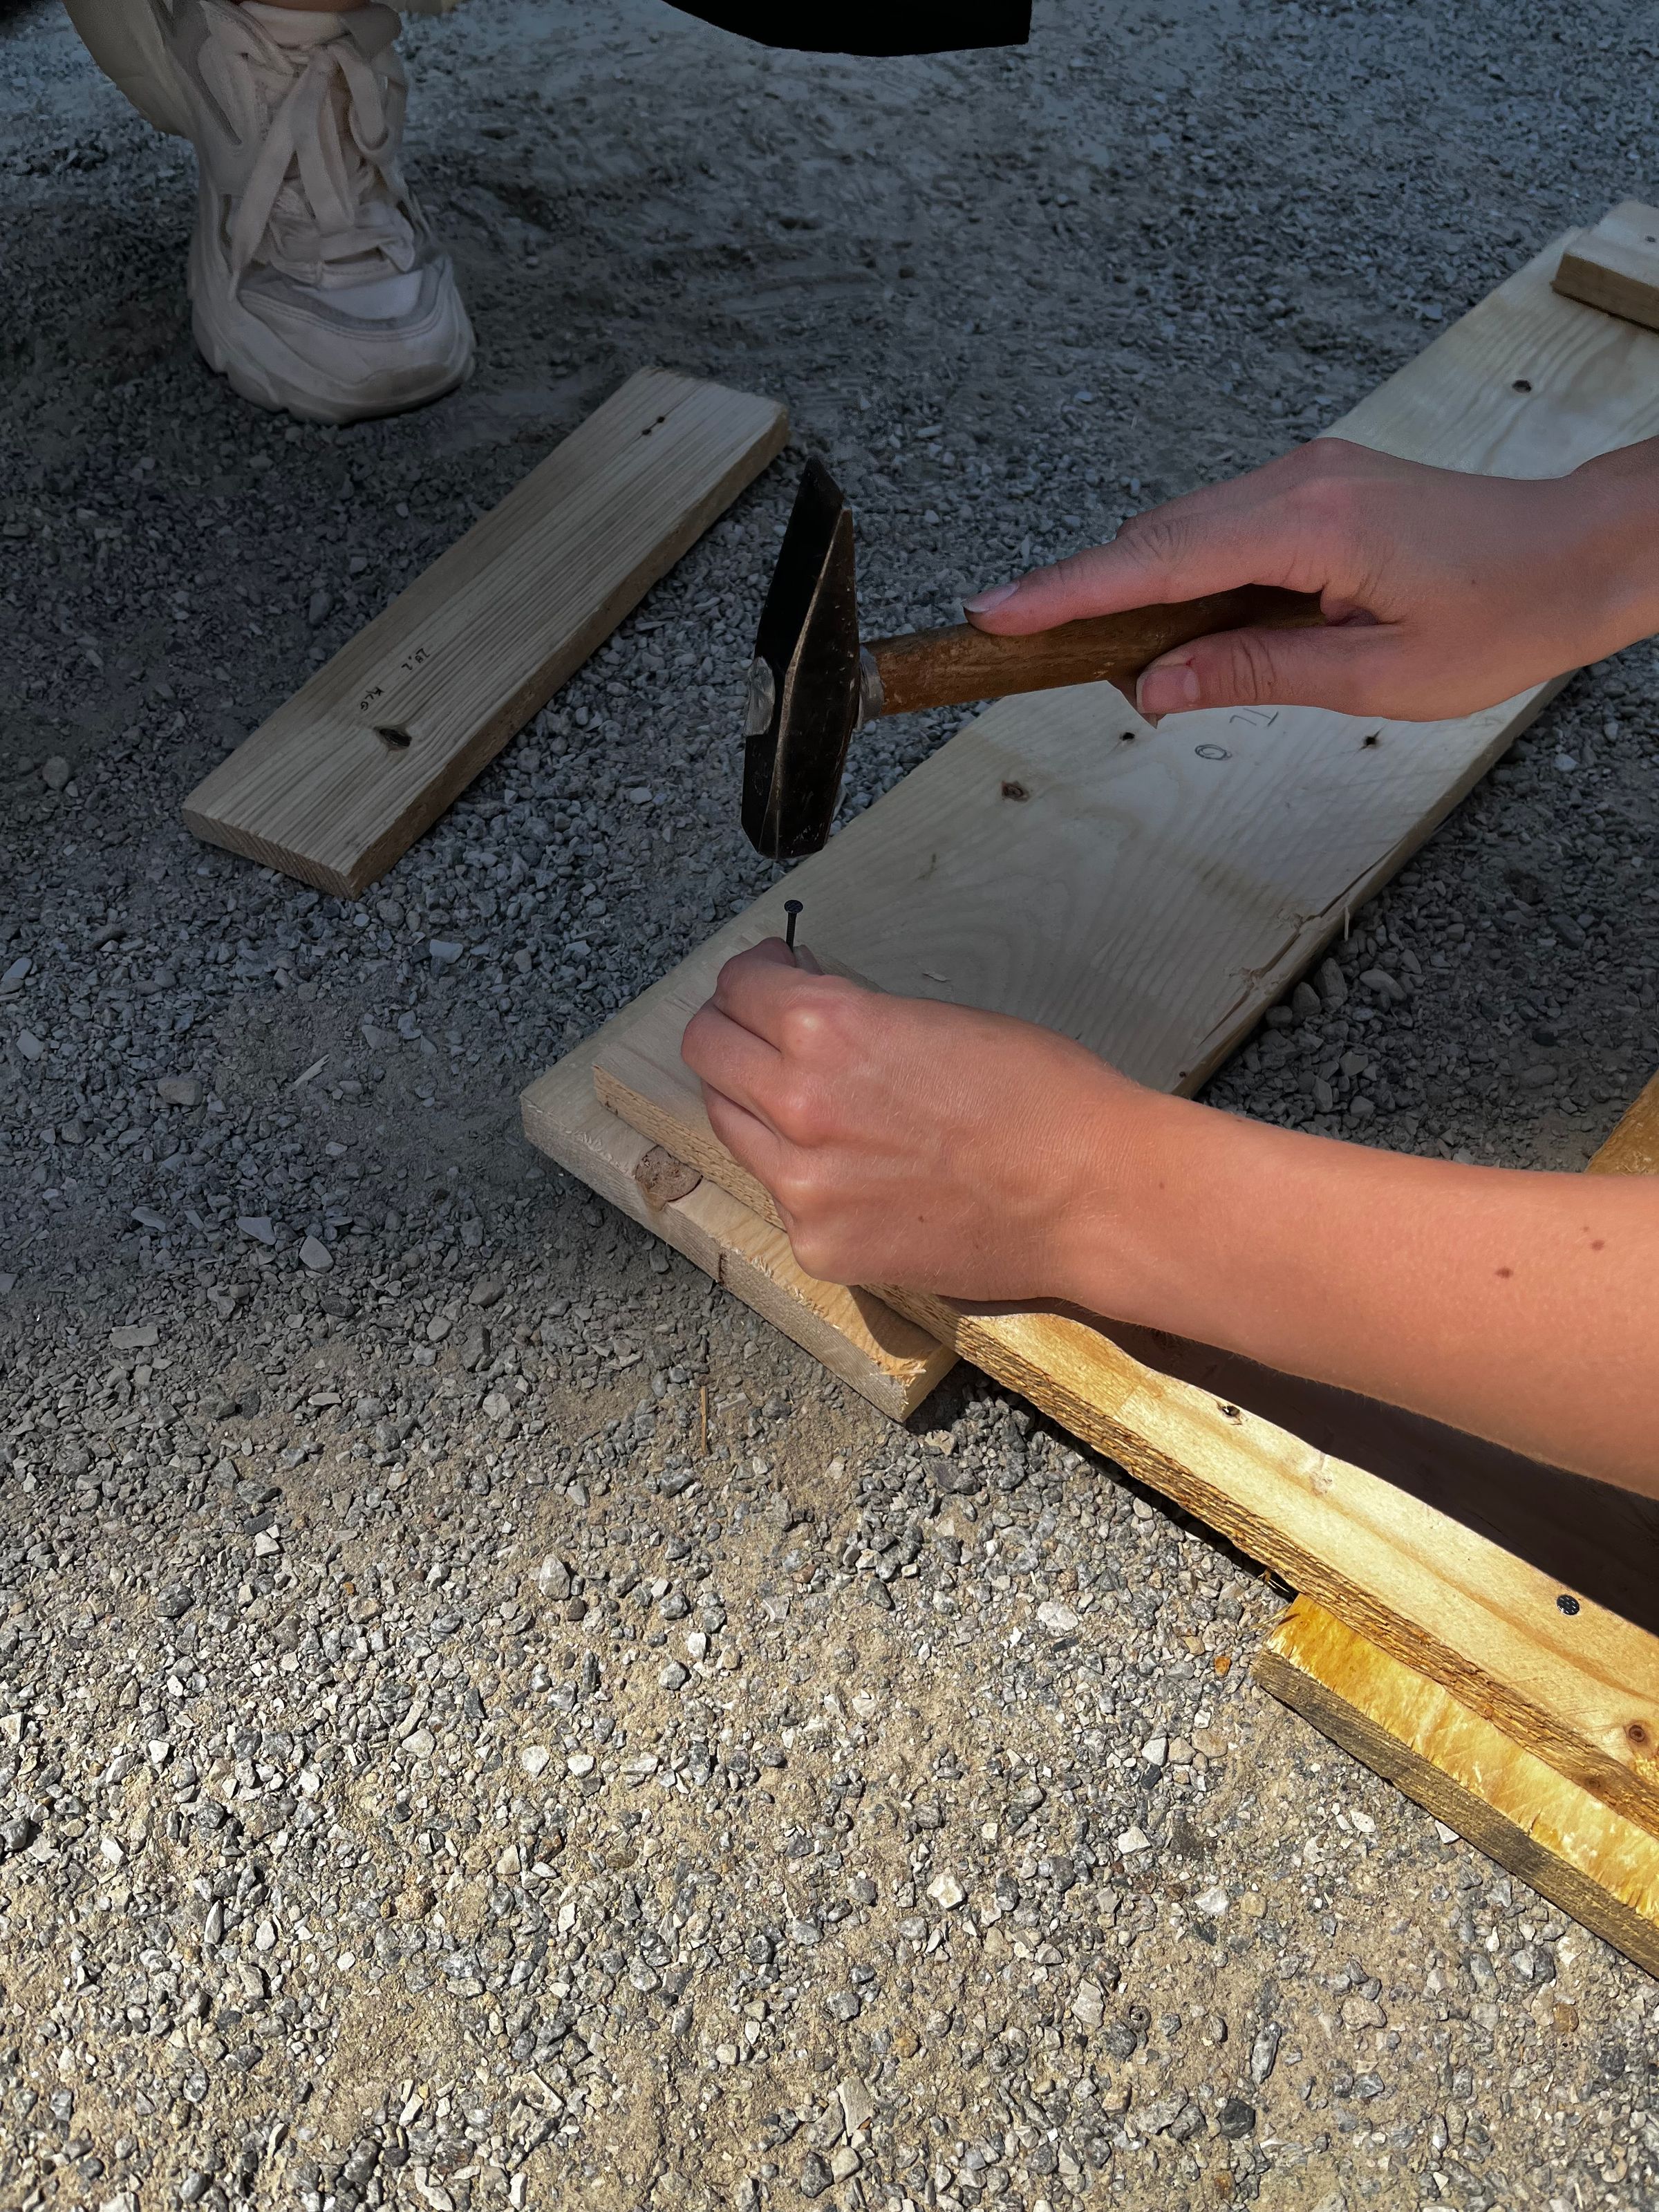

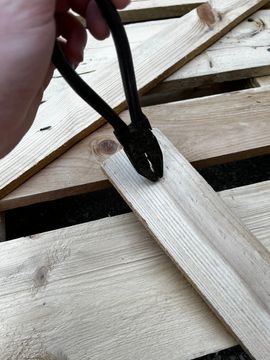
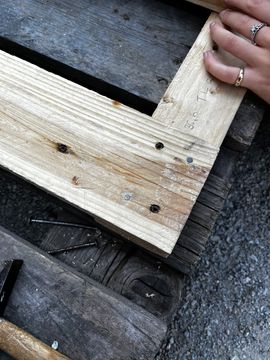
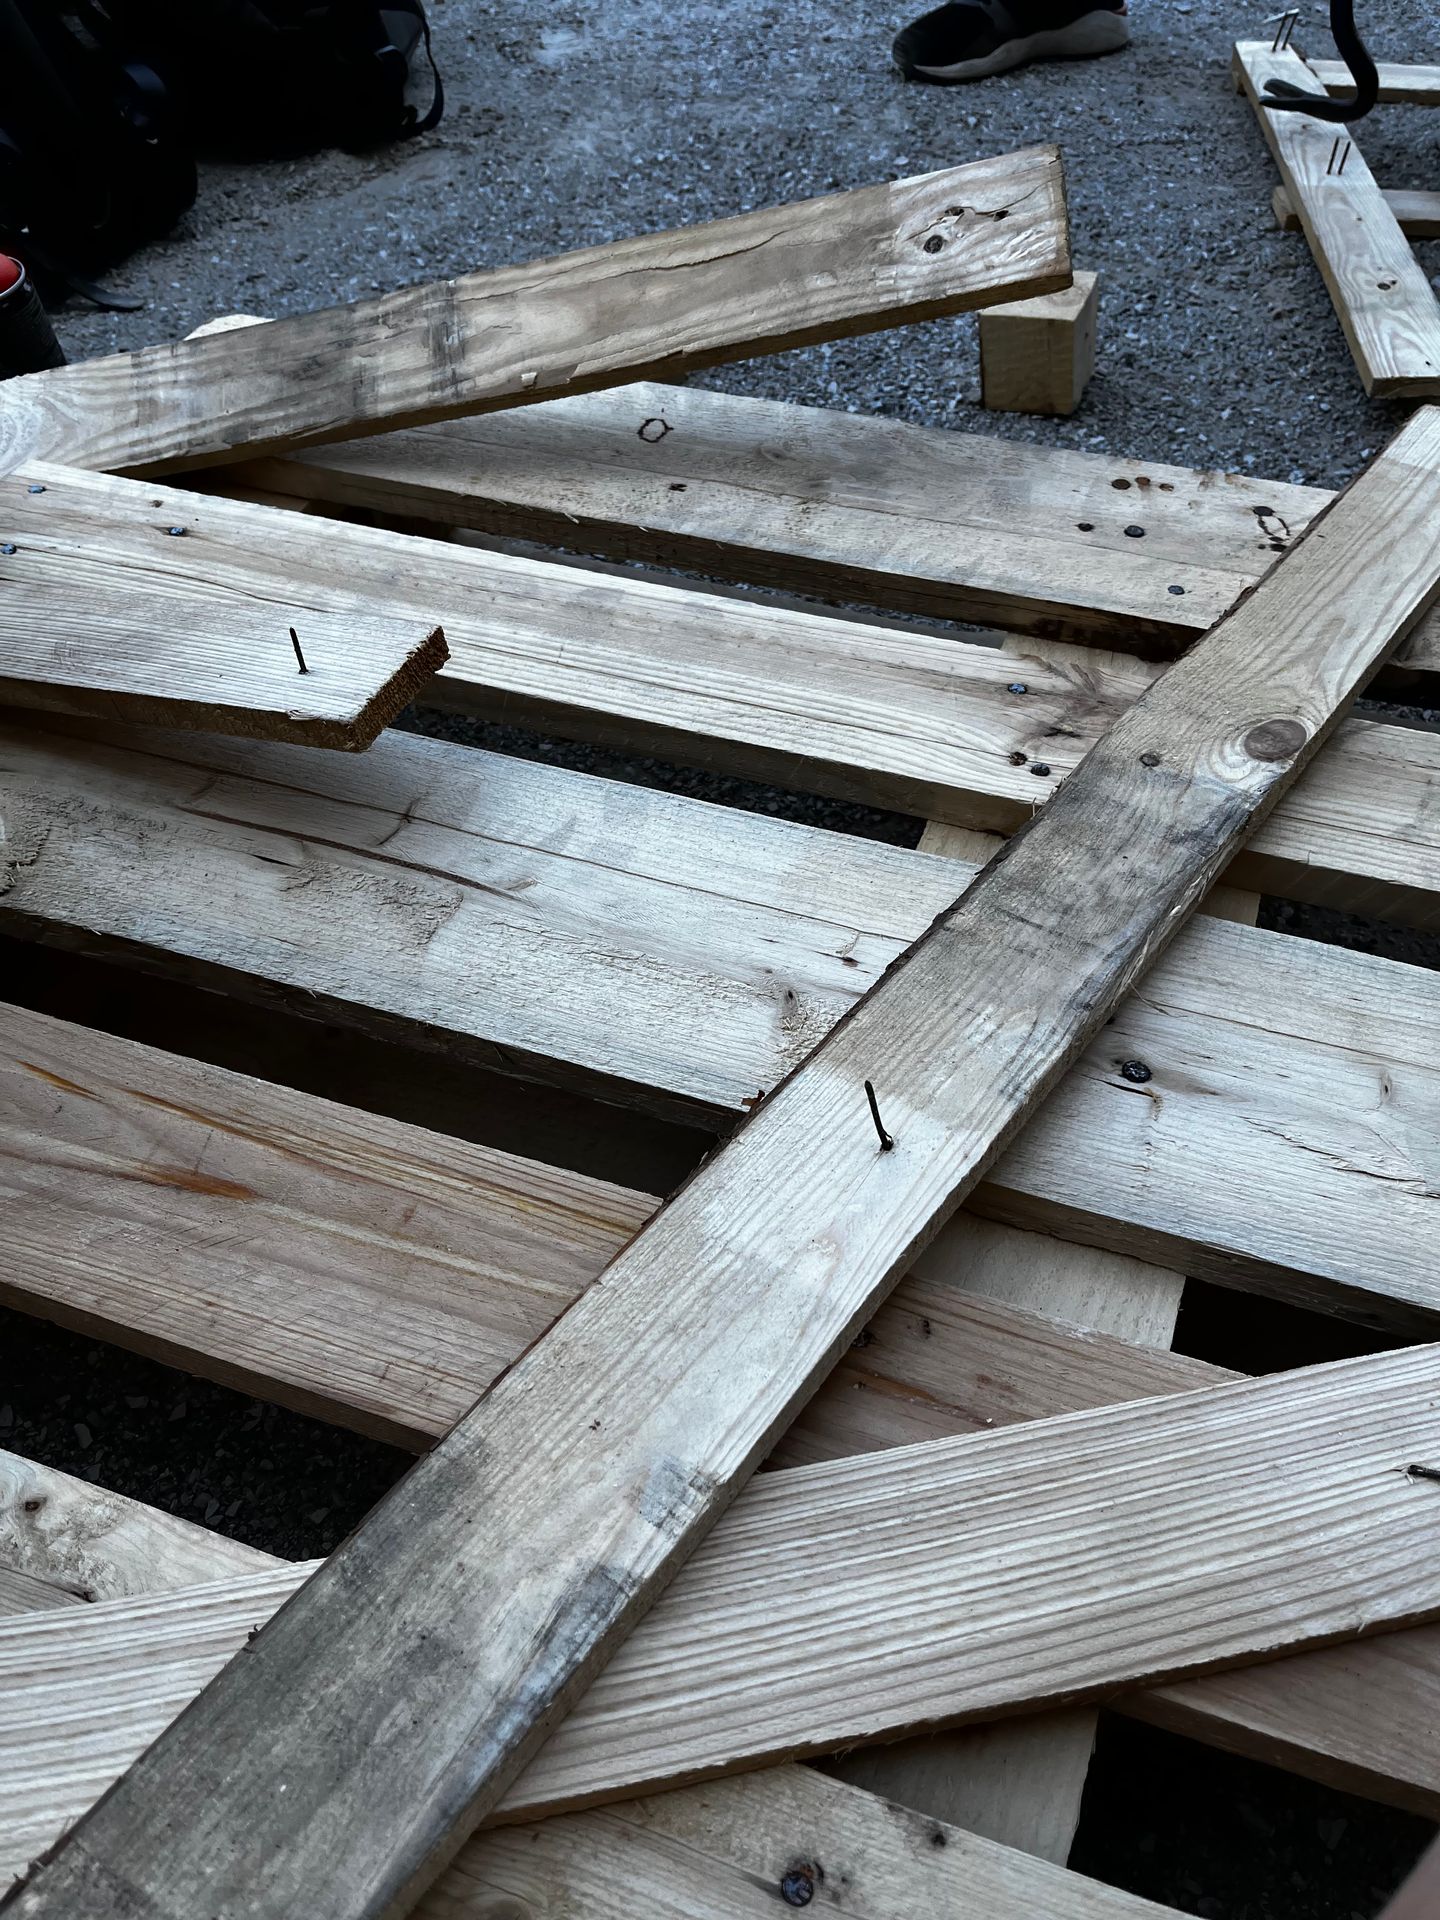
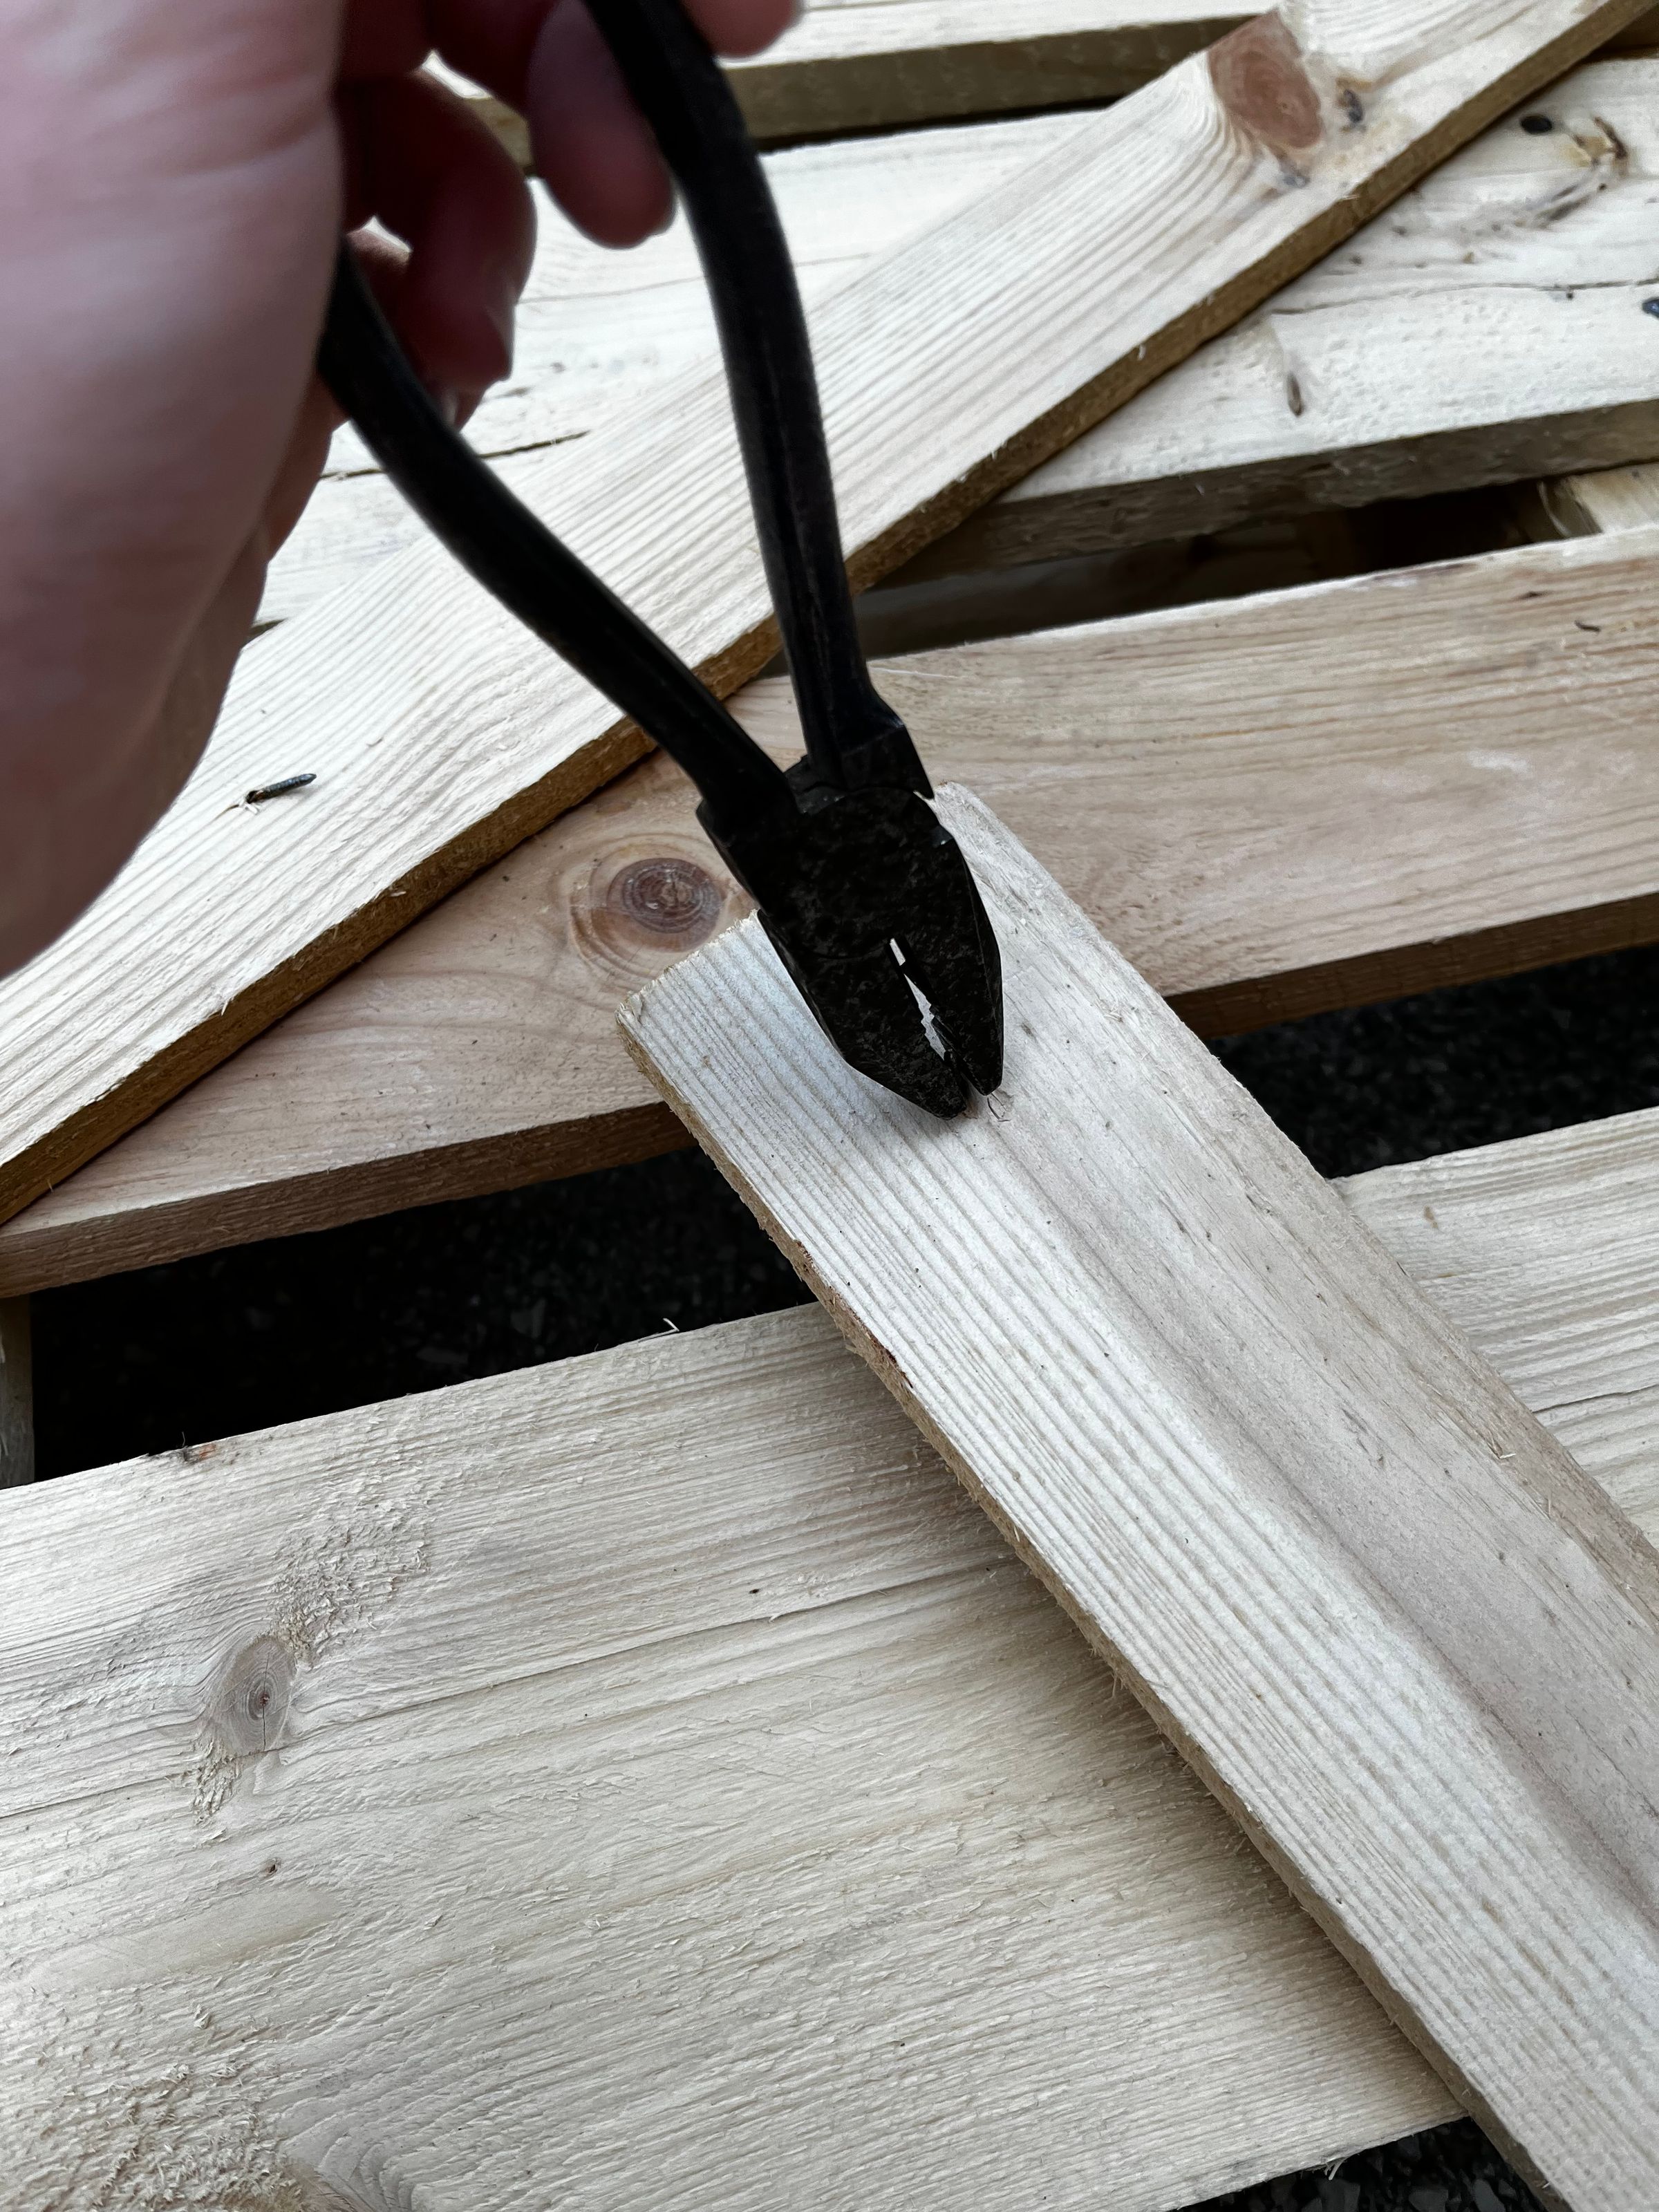
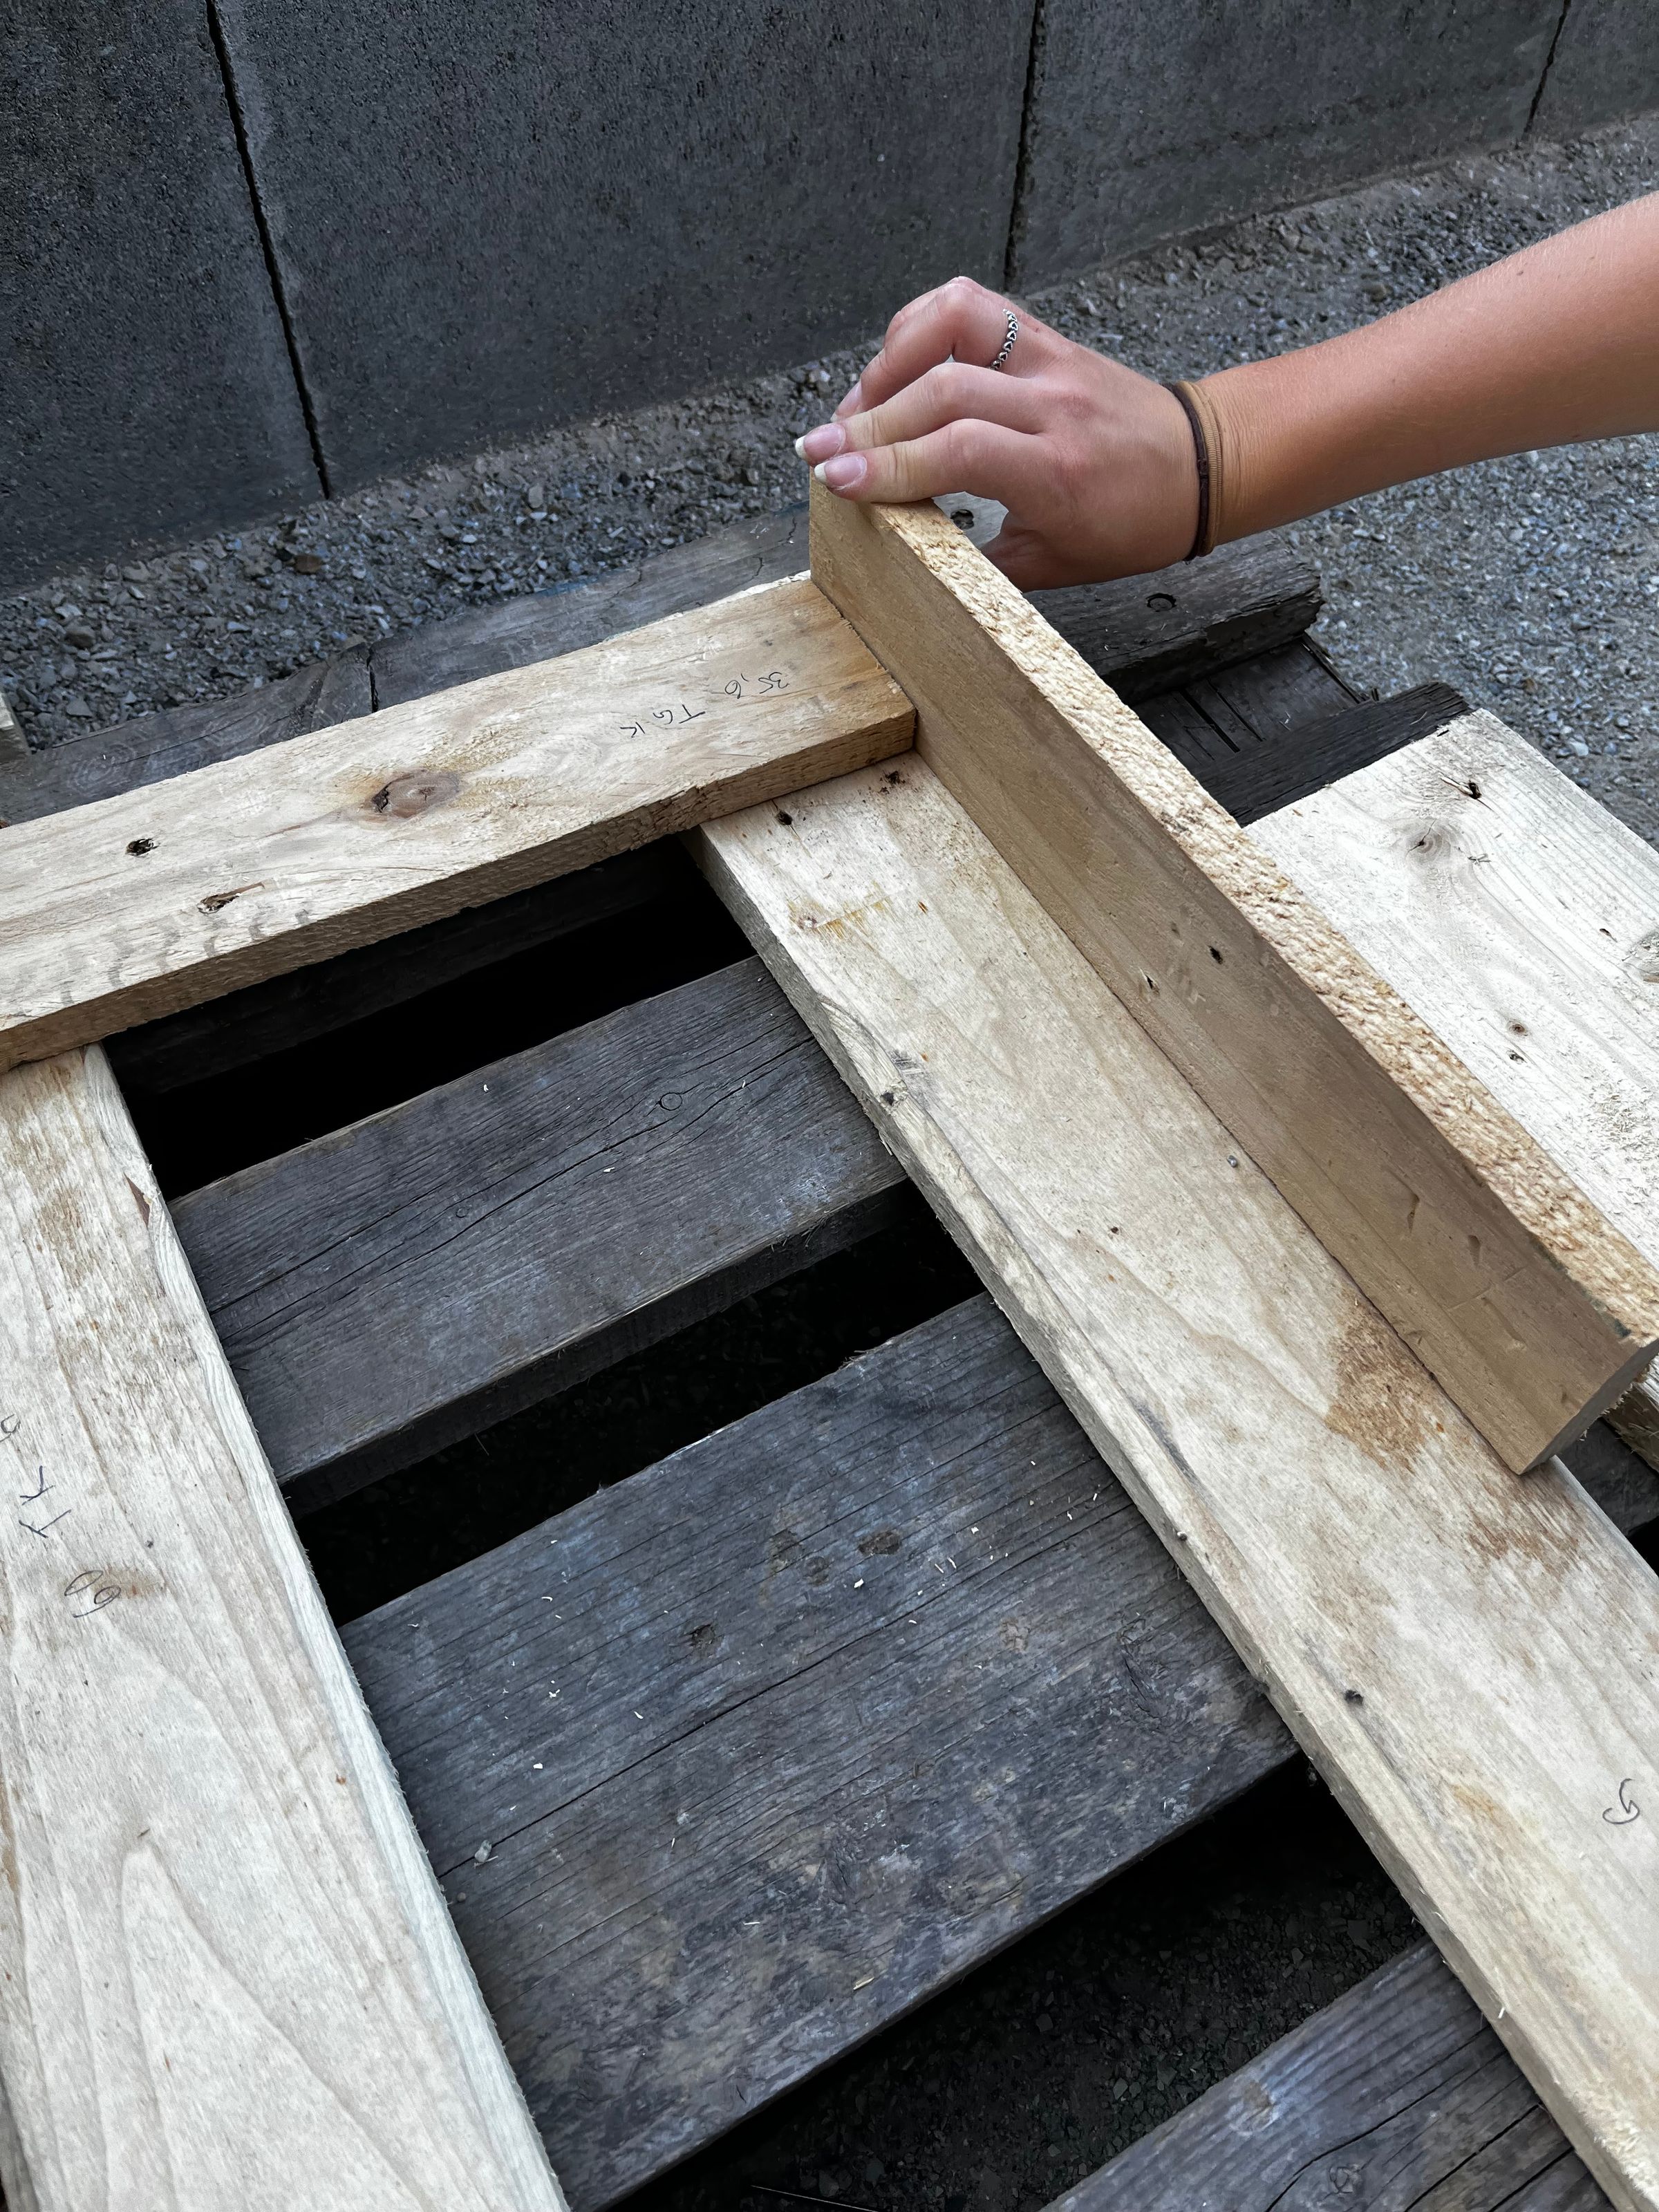
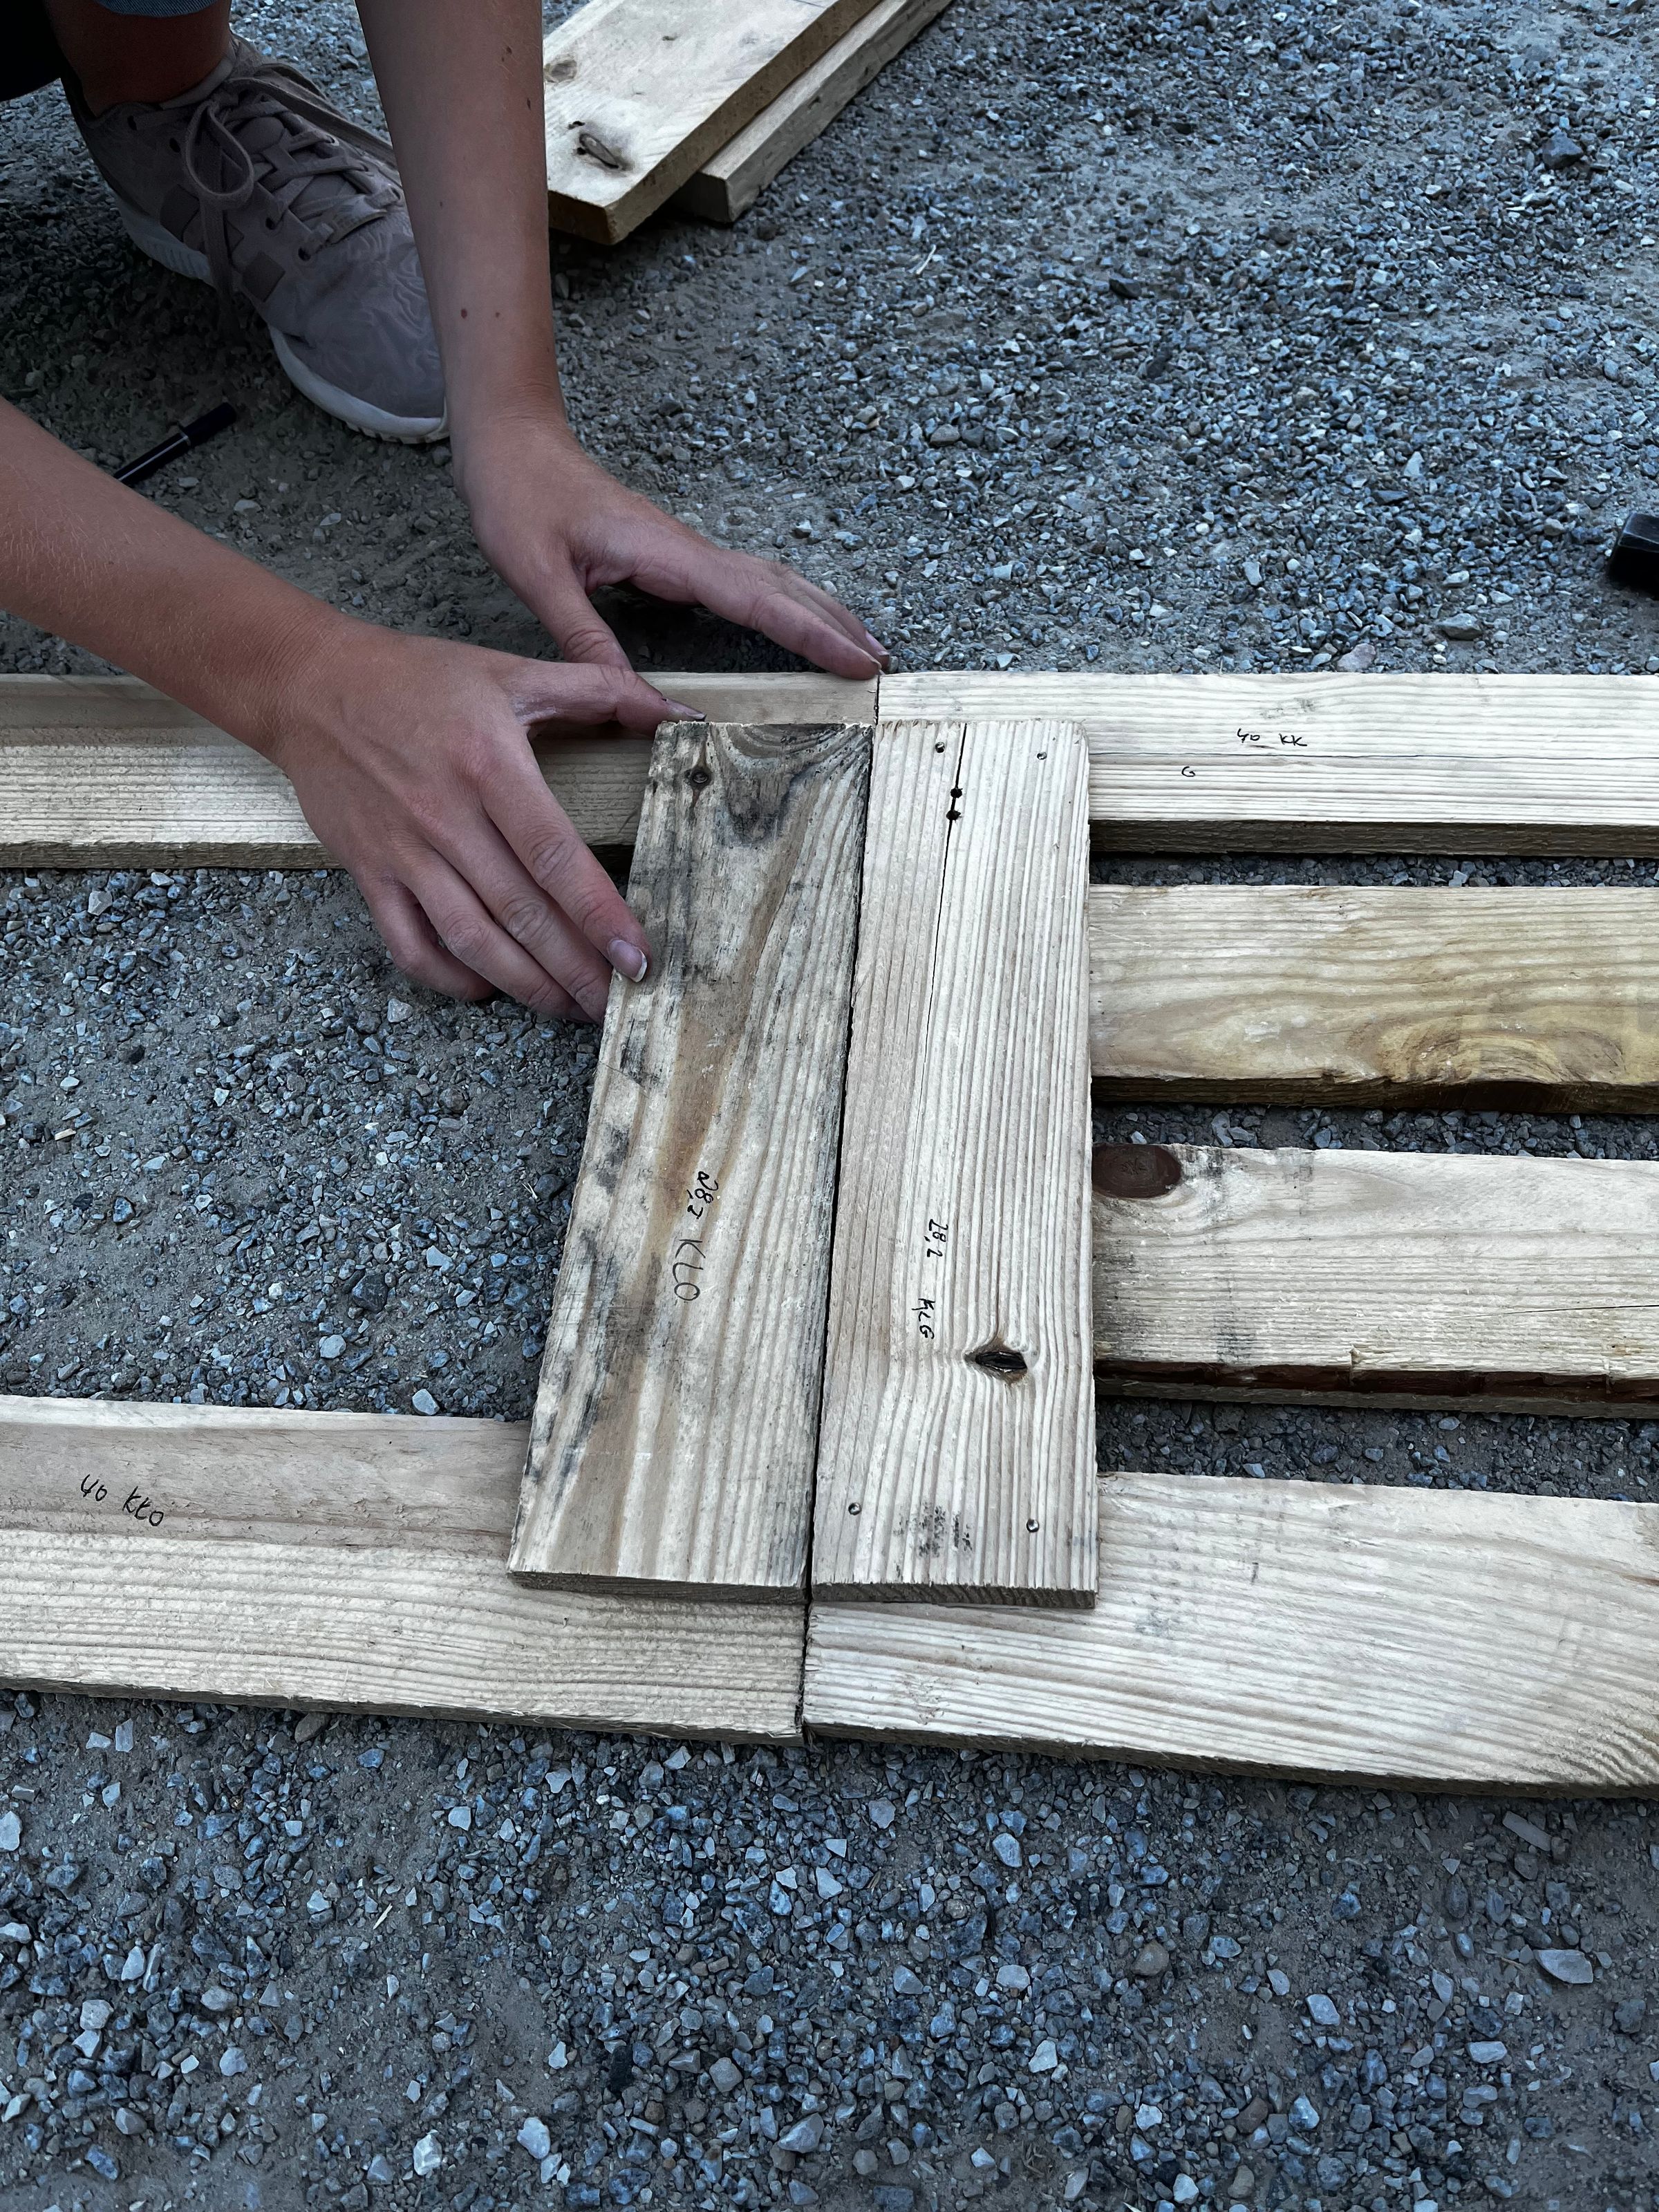
Hit the nails with a hammer into the wood pieces. The drawing shows you how you must connect them. Watch your fingers and pay attention on the overhangs at some places. As you can see in the next photo you can use another piece of wood to measure the overhangs.

Always take two nails to connect two boards for a better stability.


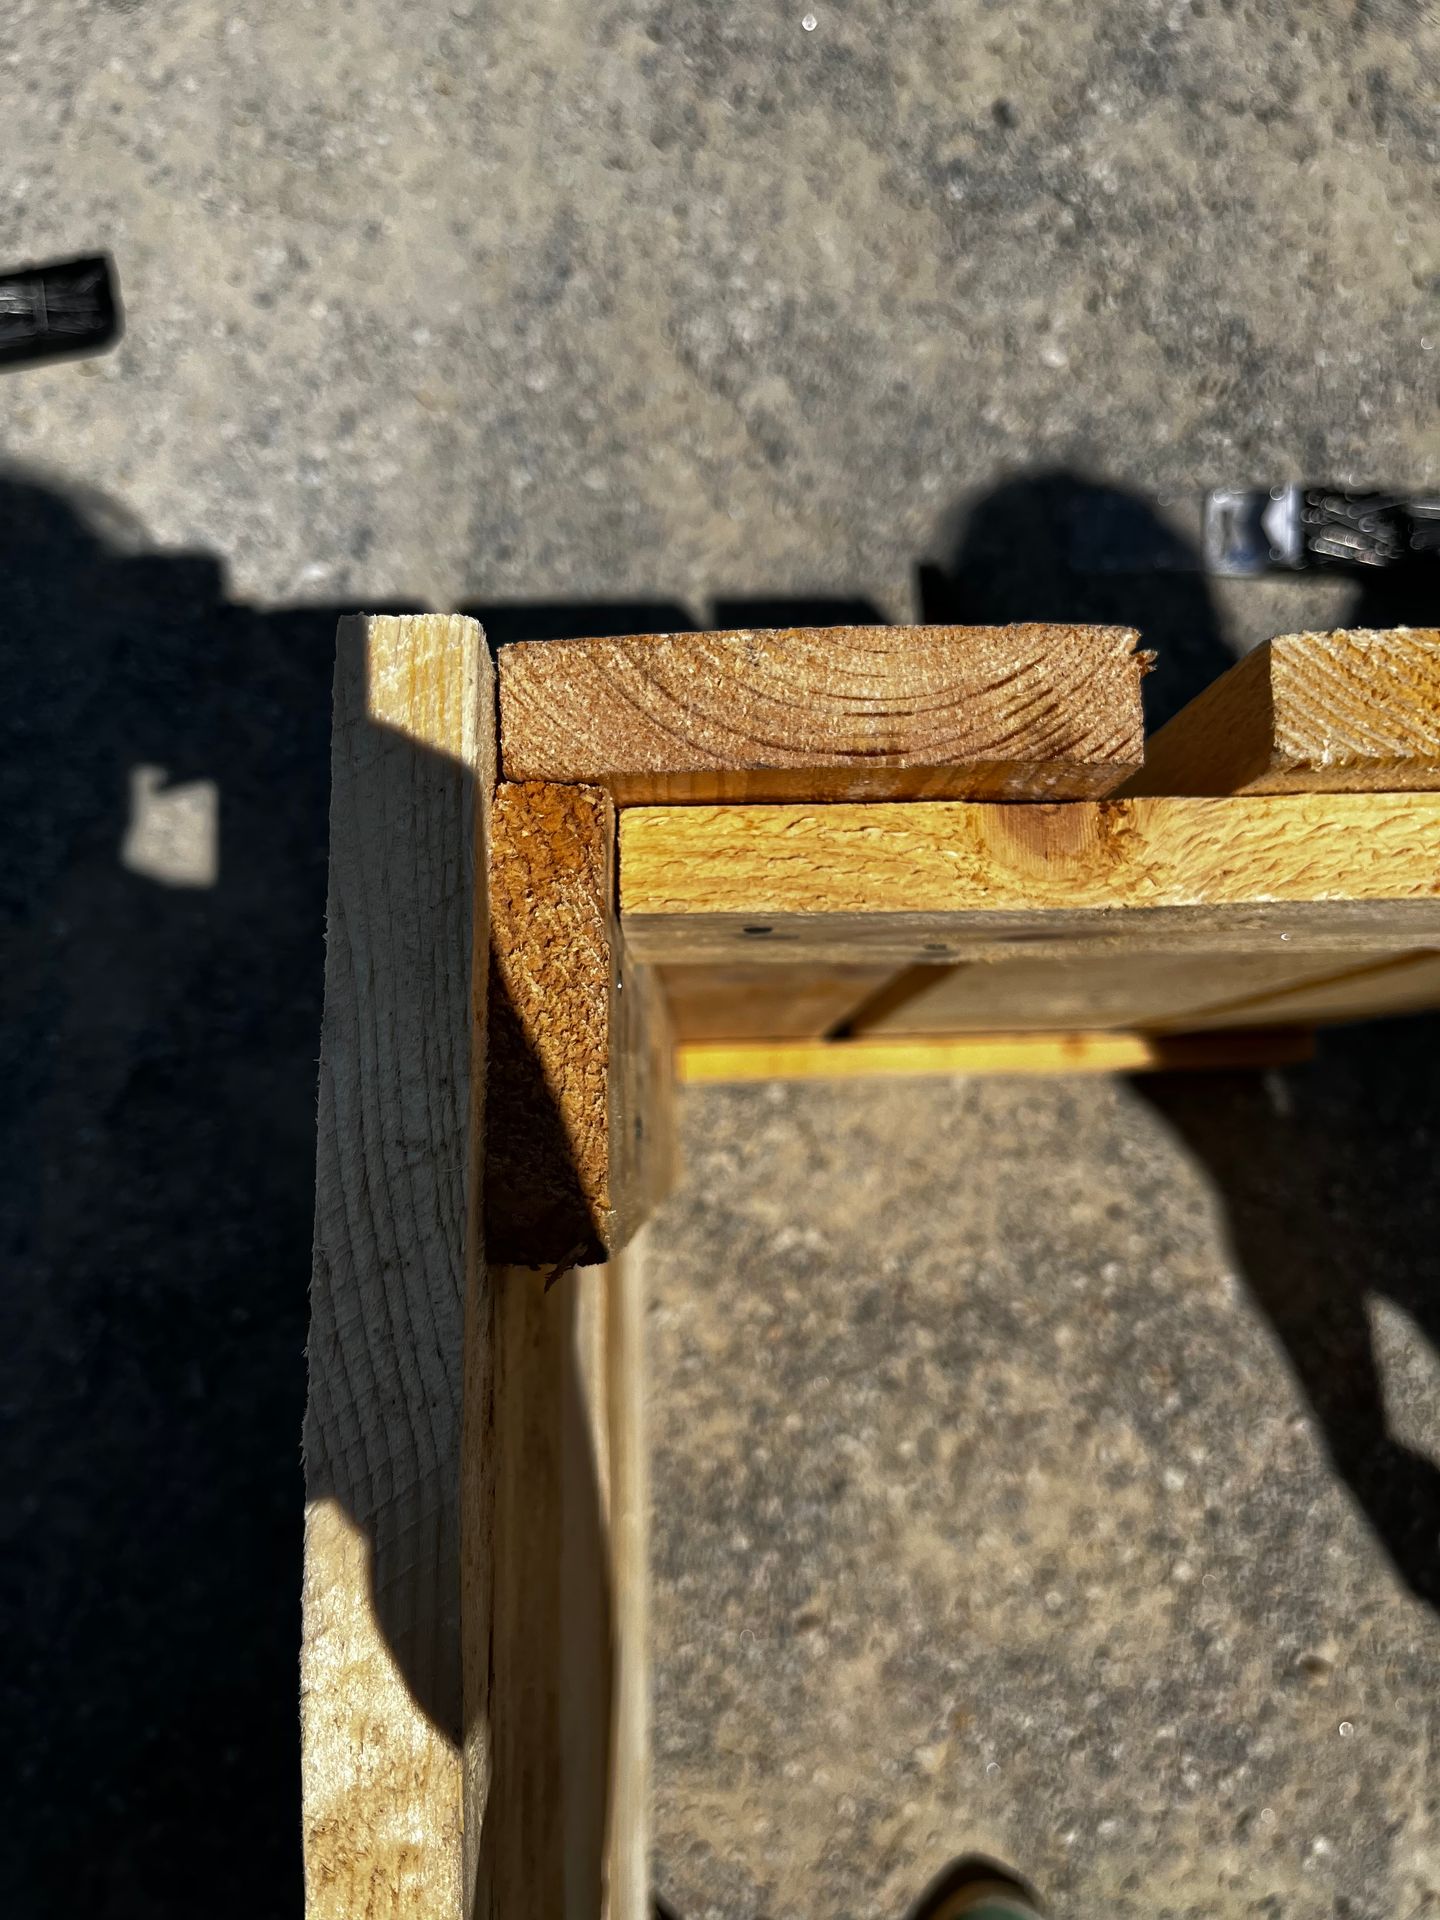
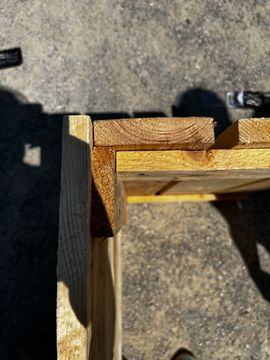
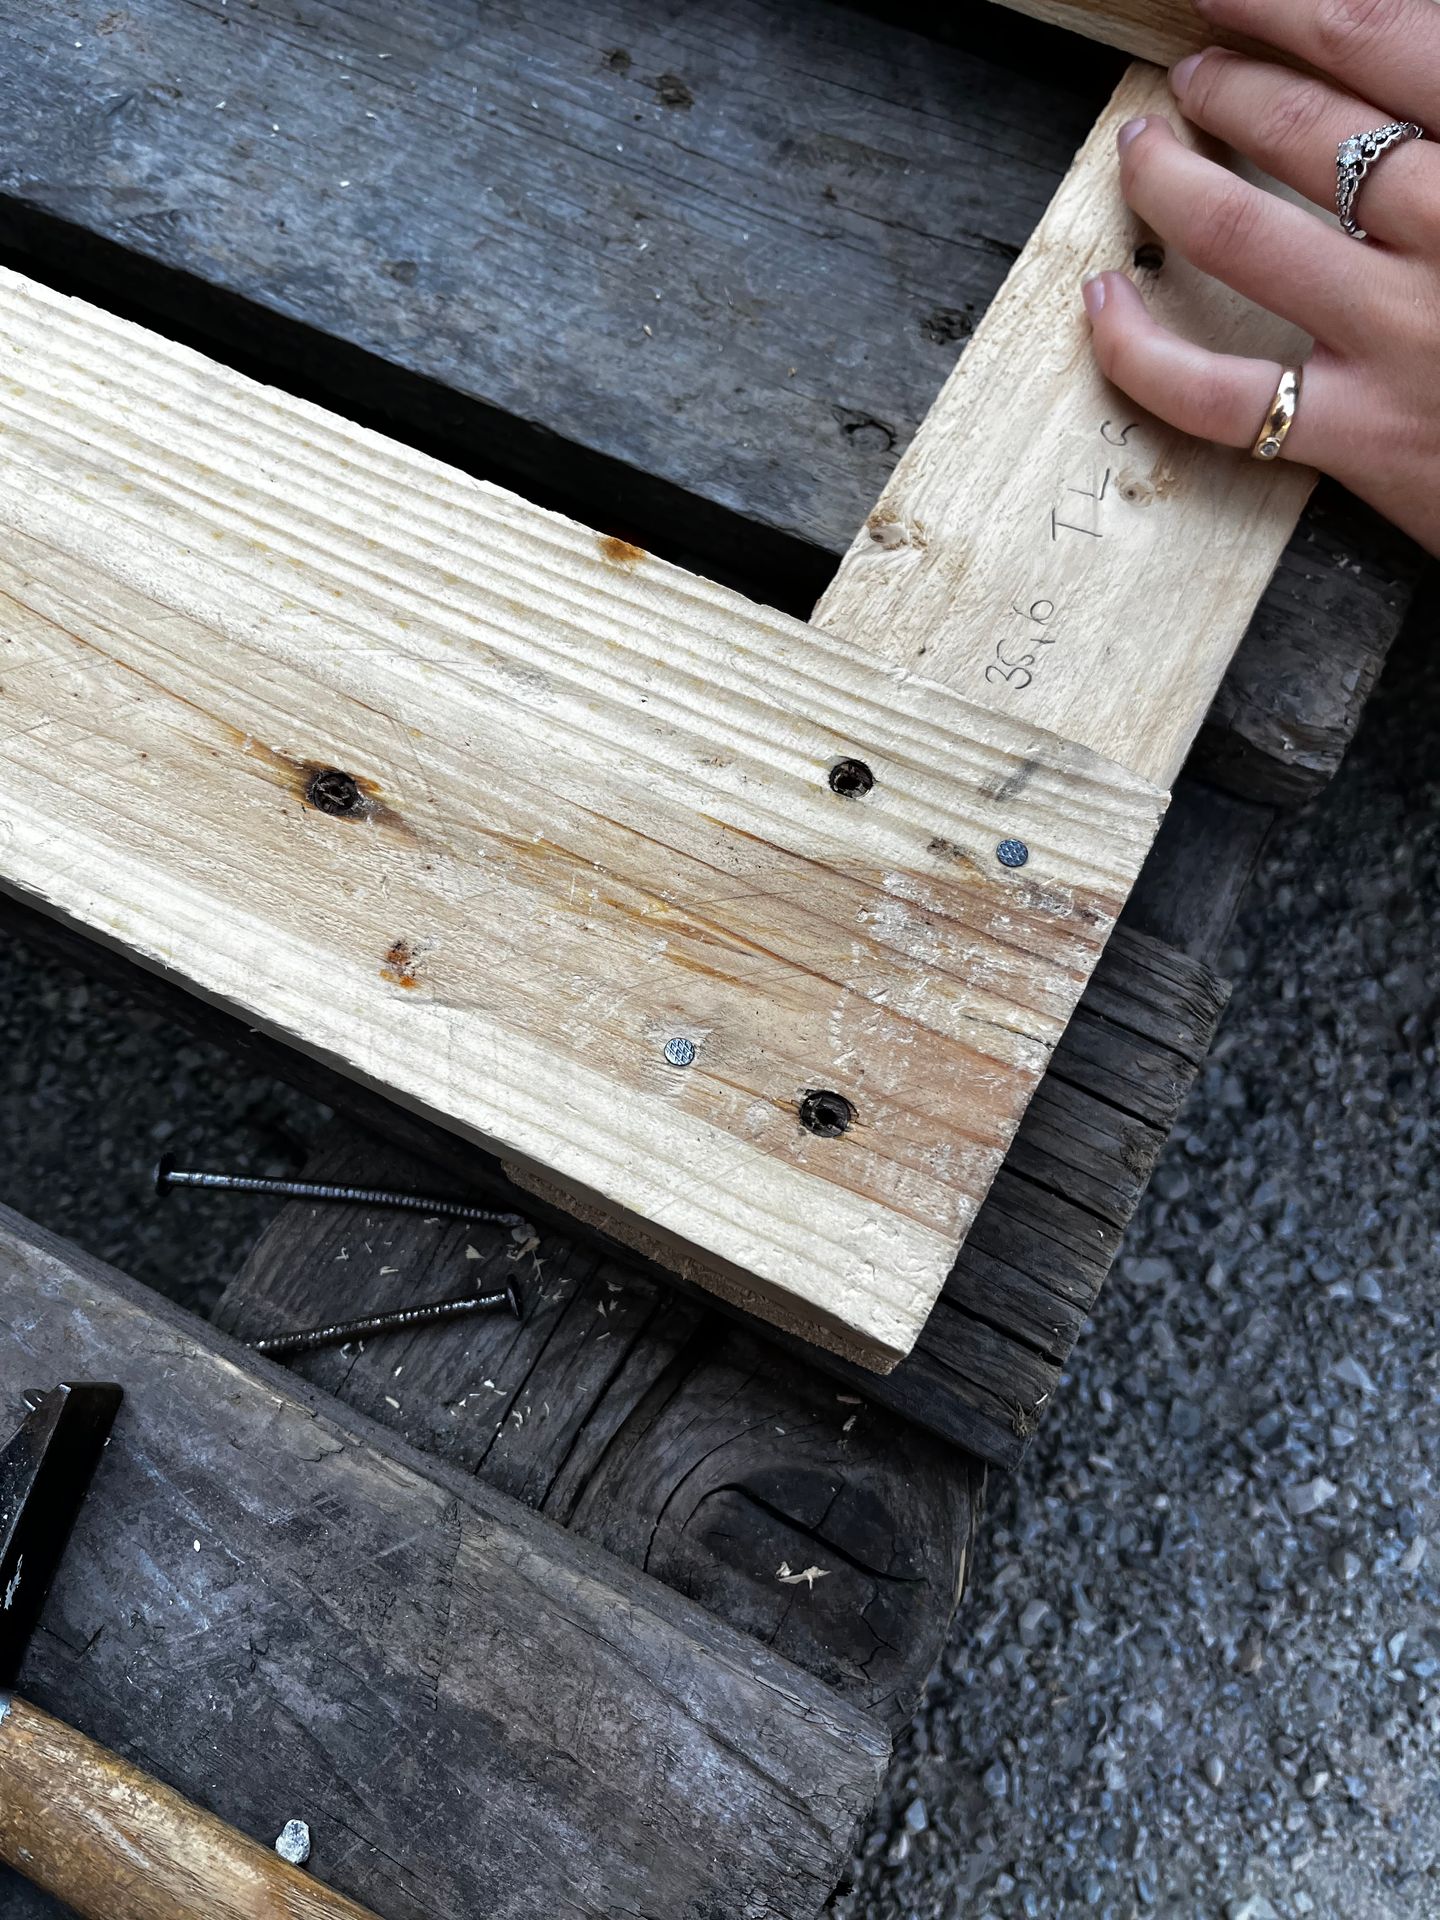
Then put the different sides together. The attachment points should look like this.


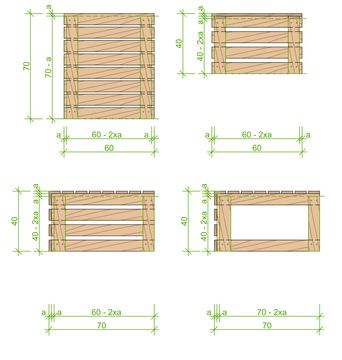
The storage box is very similar to the table. Take the drawing, the nails and your hammer and connect the wood pieces. The drawing shows you all the information, the lengths and where you have to consider overhangs.

Here you can see all the parts that you need to assemble the storage box. ( The way the pieces are arranged shows the correct way to attached them. On the right you see the lid.)

This is a more detailed drawing that highlights the right placement of the wood pieces. Pay attention to the overhang! ( the thickness of the wood- a)


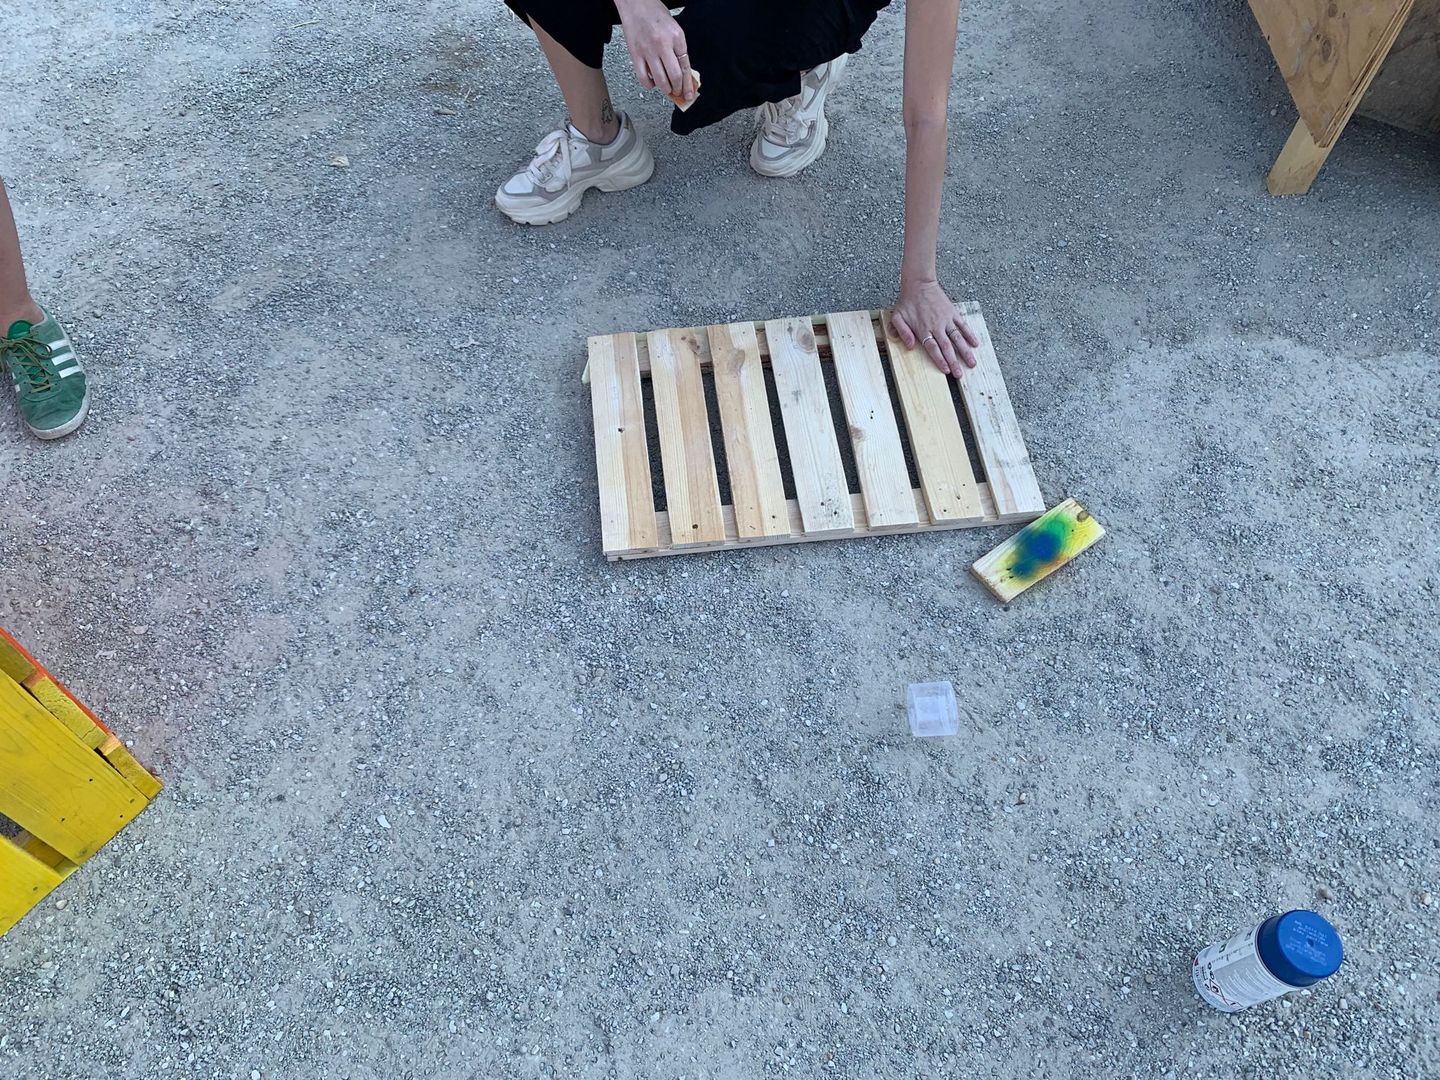
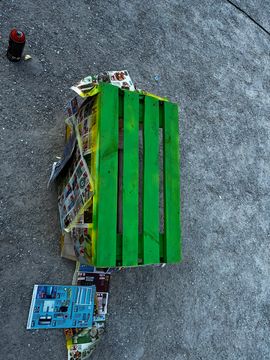
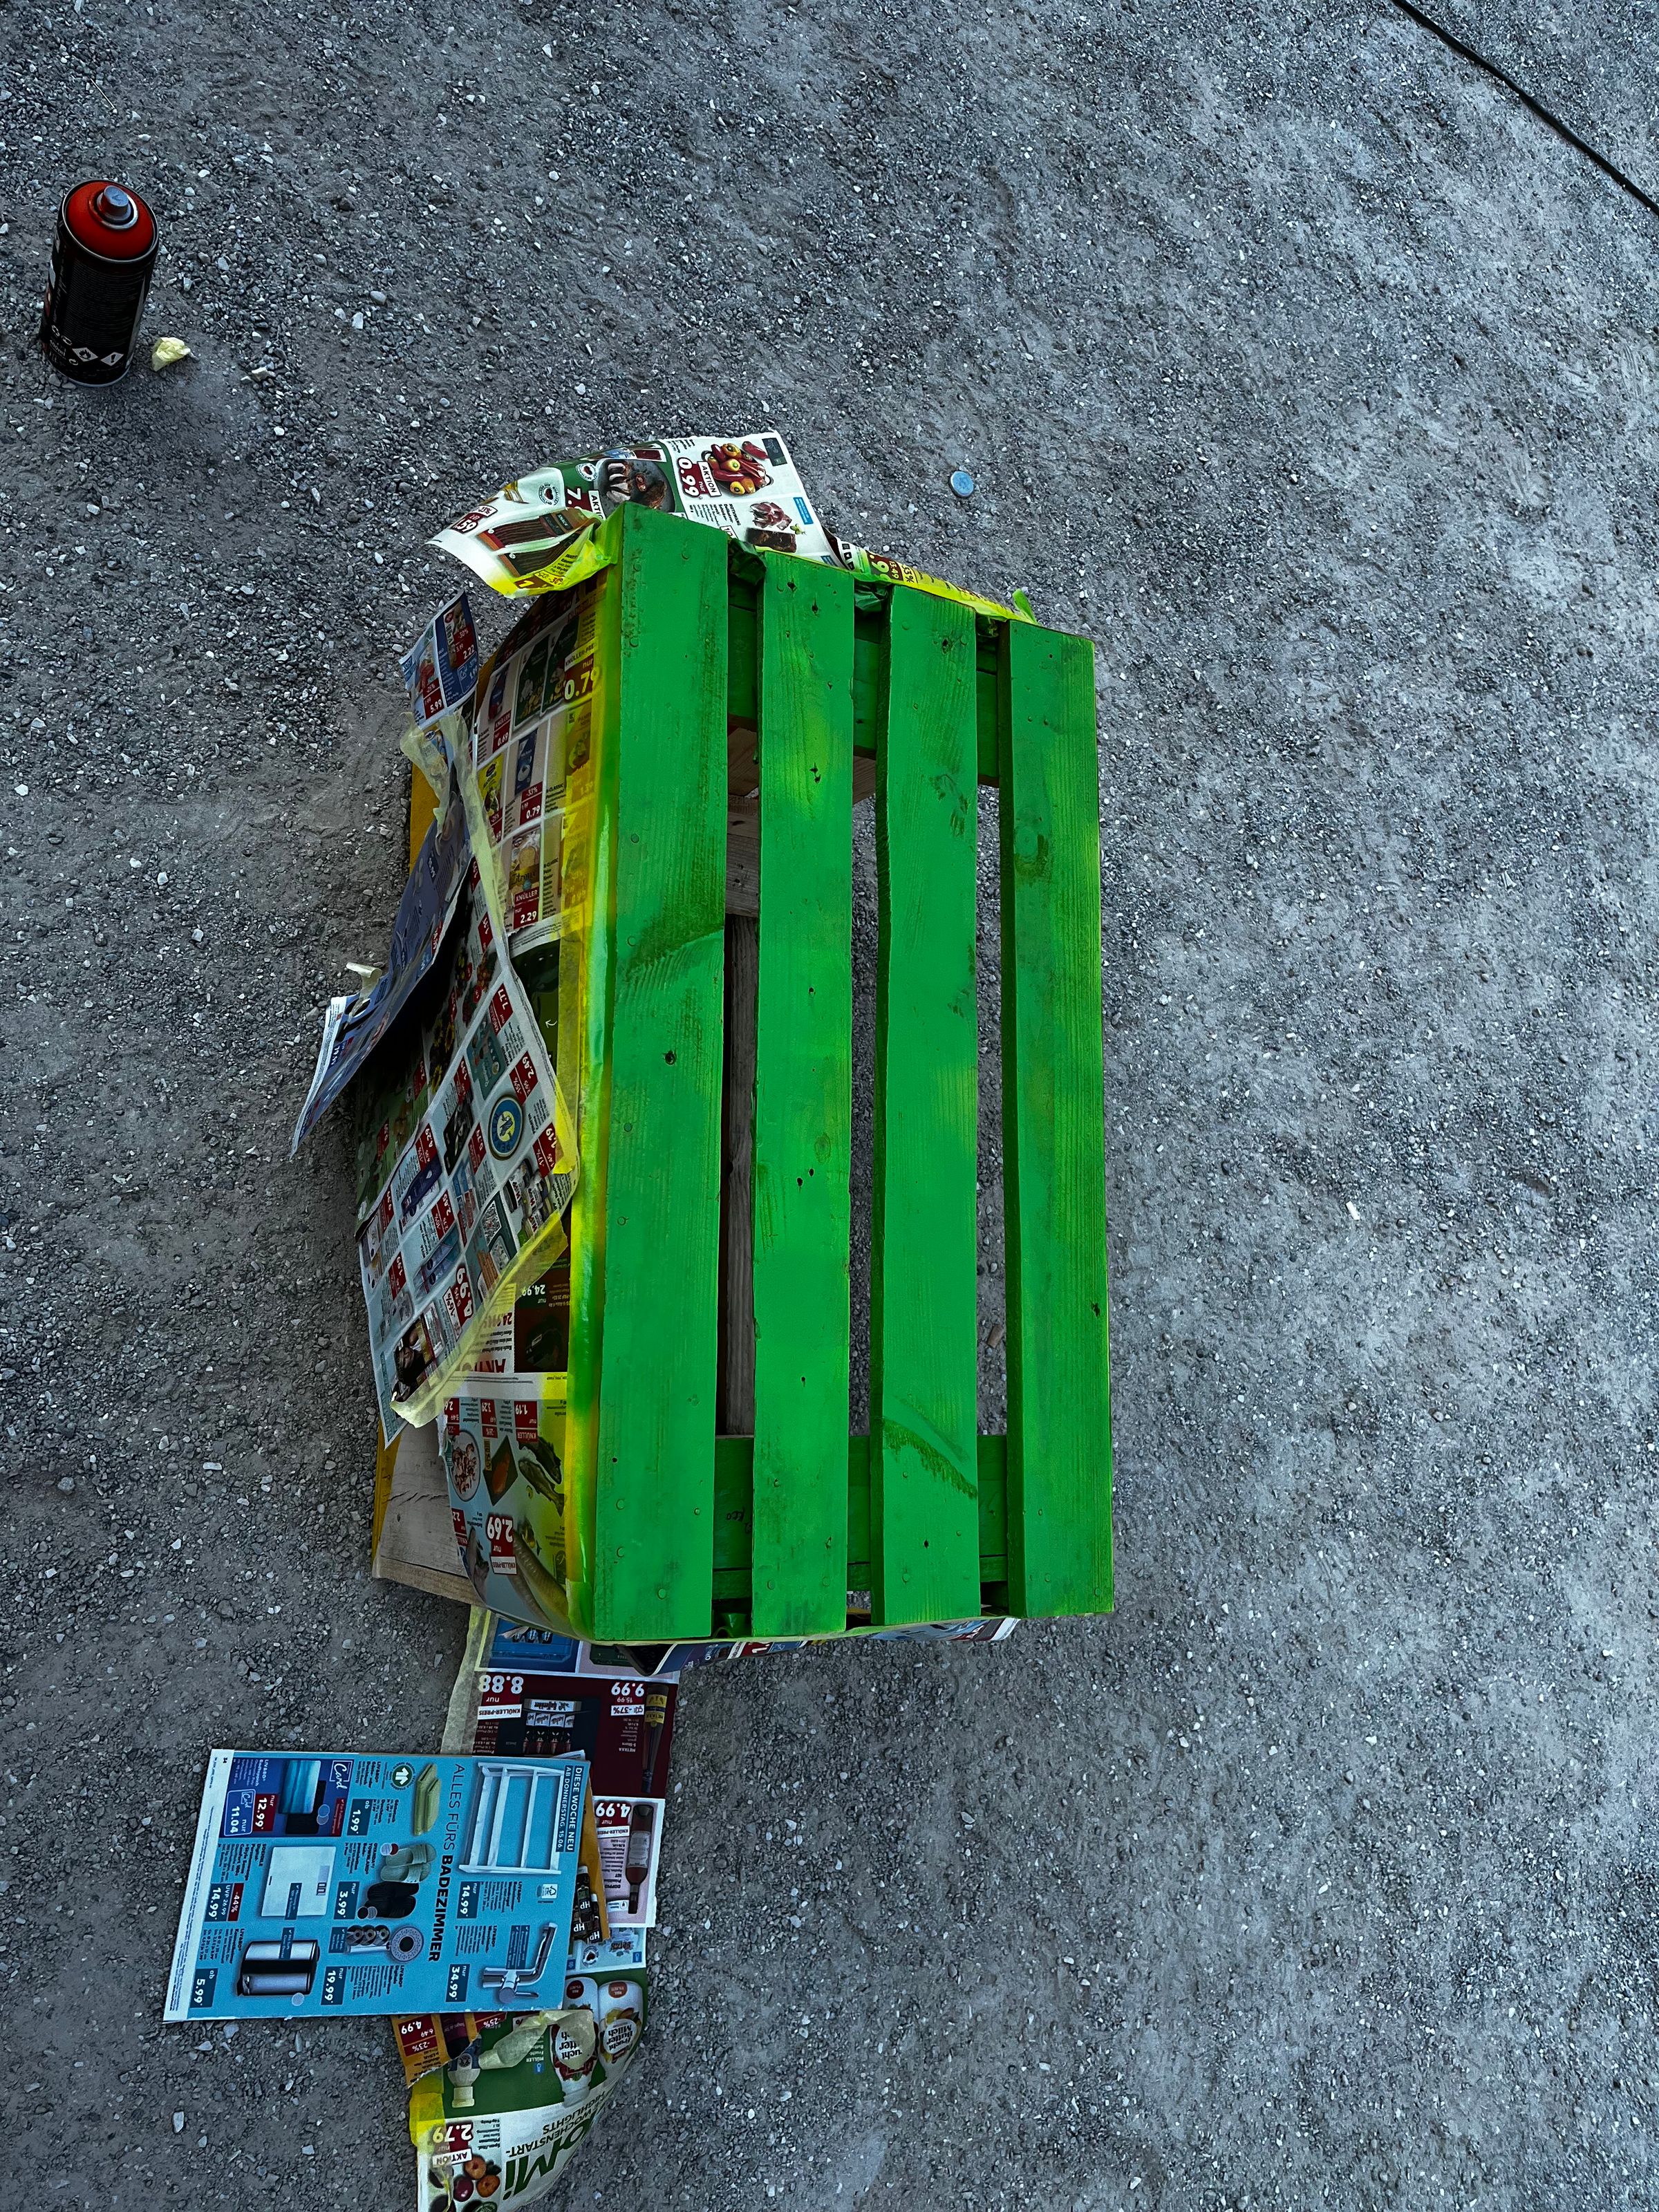
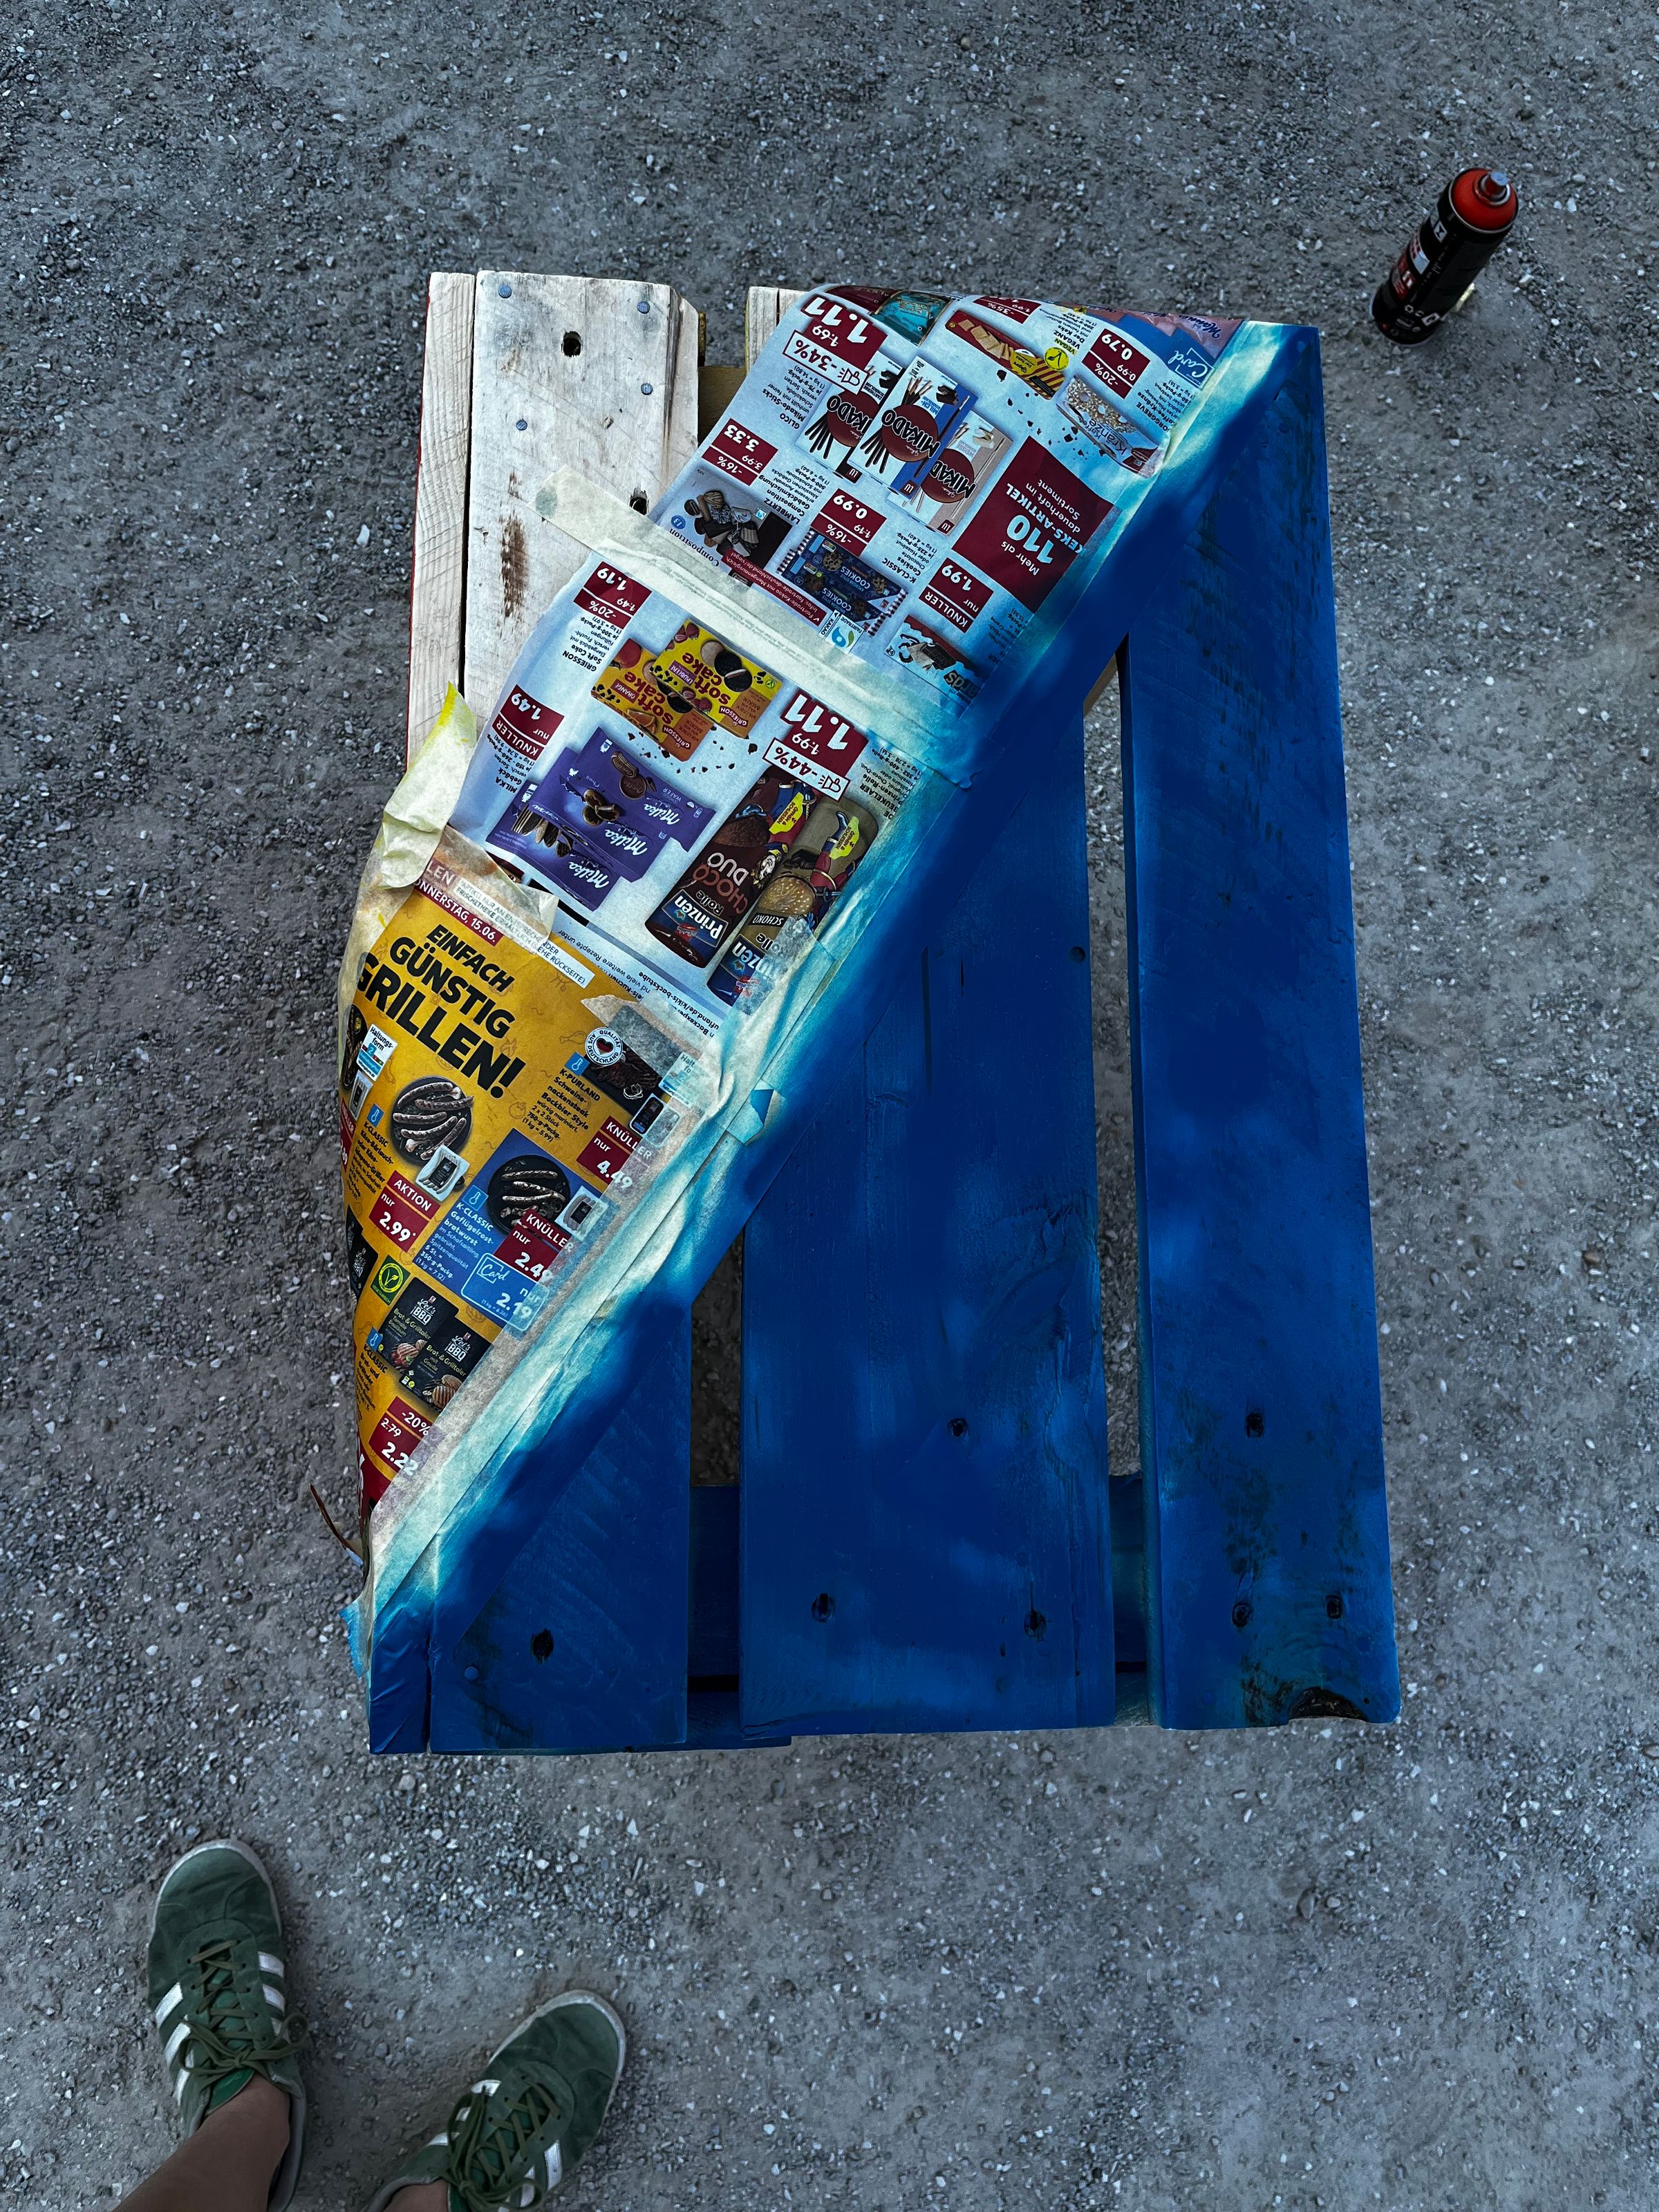
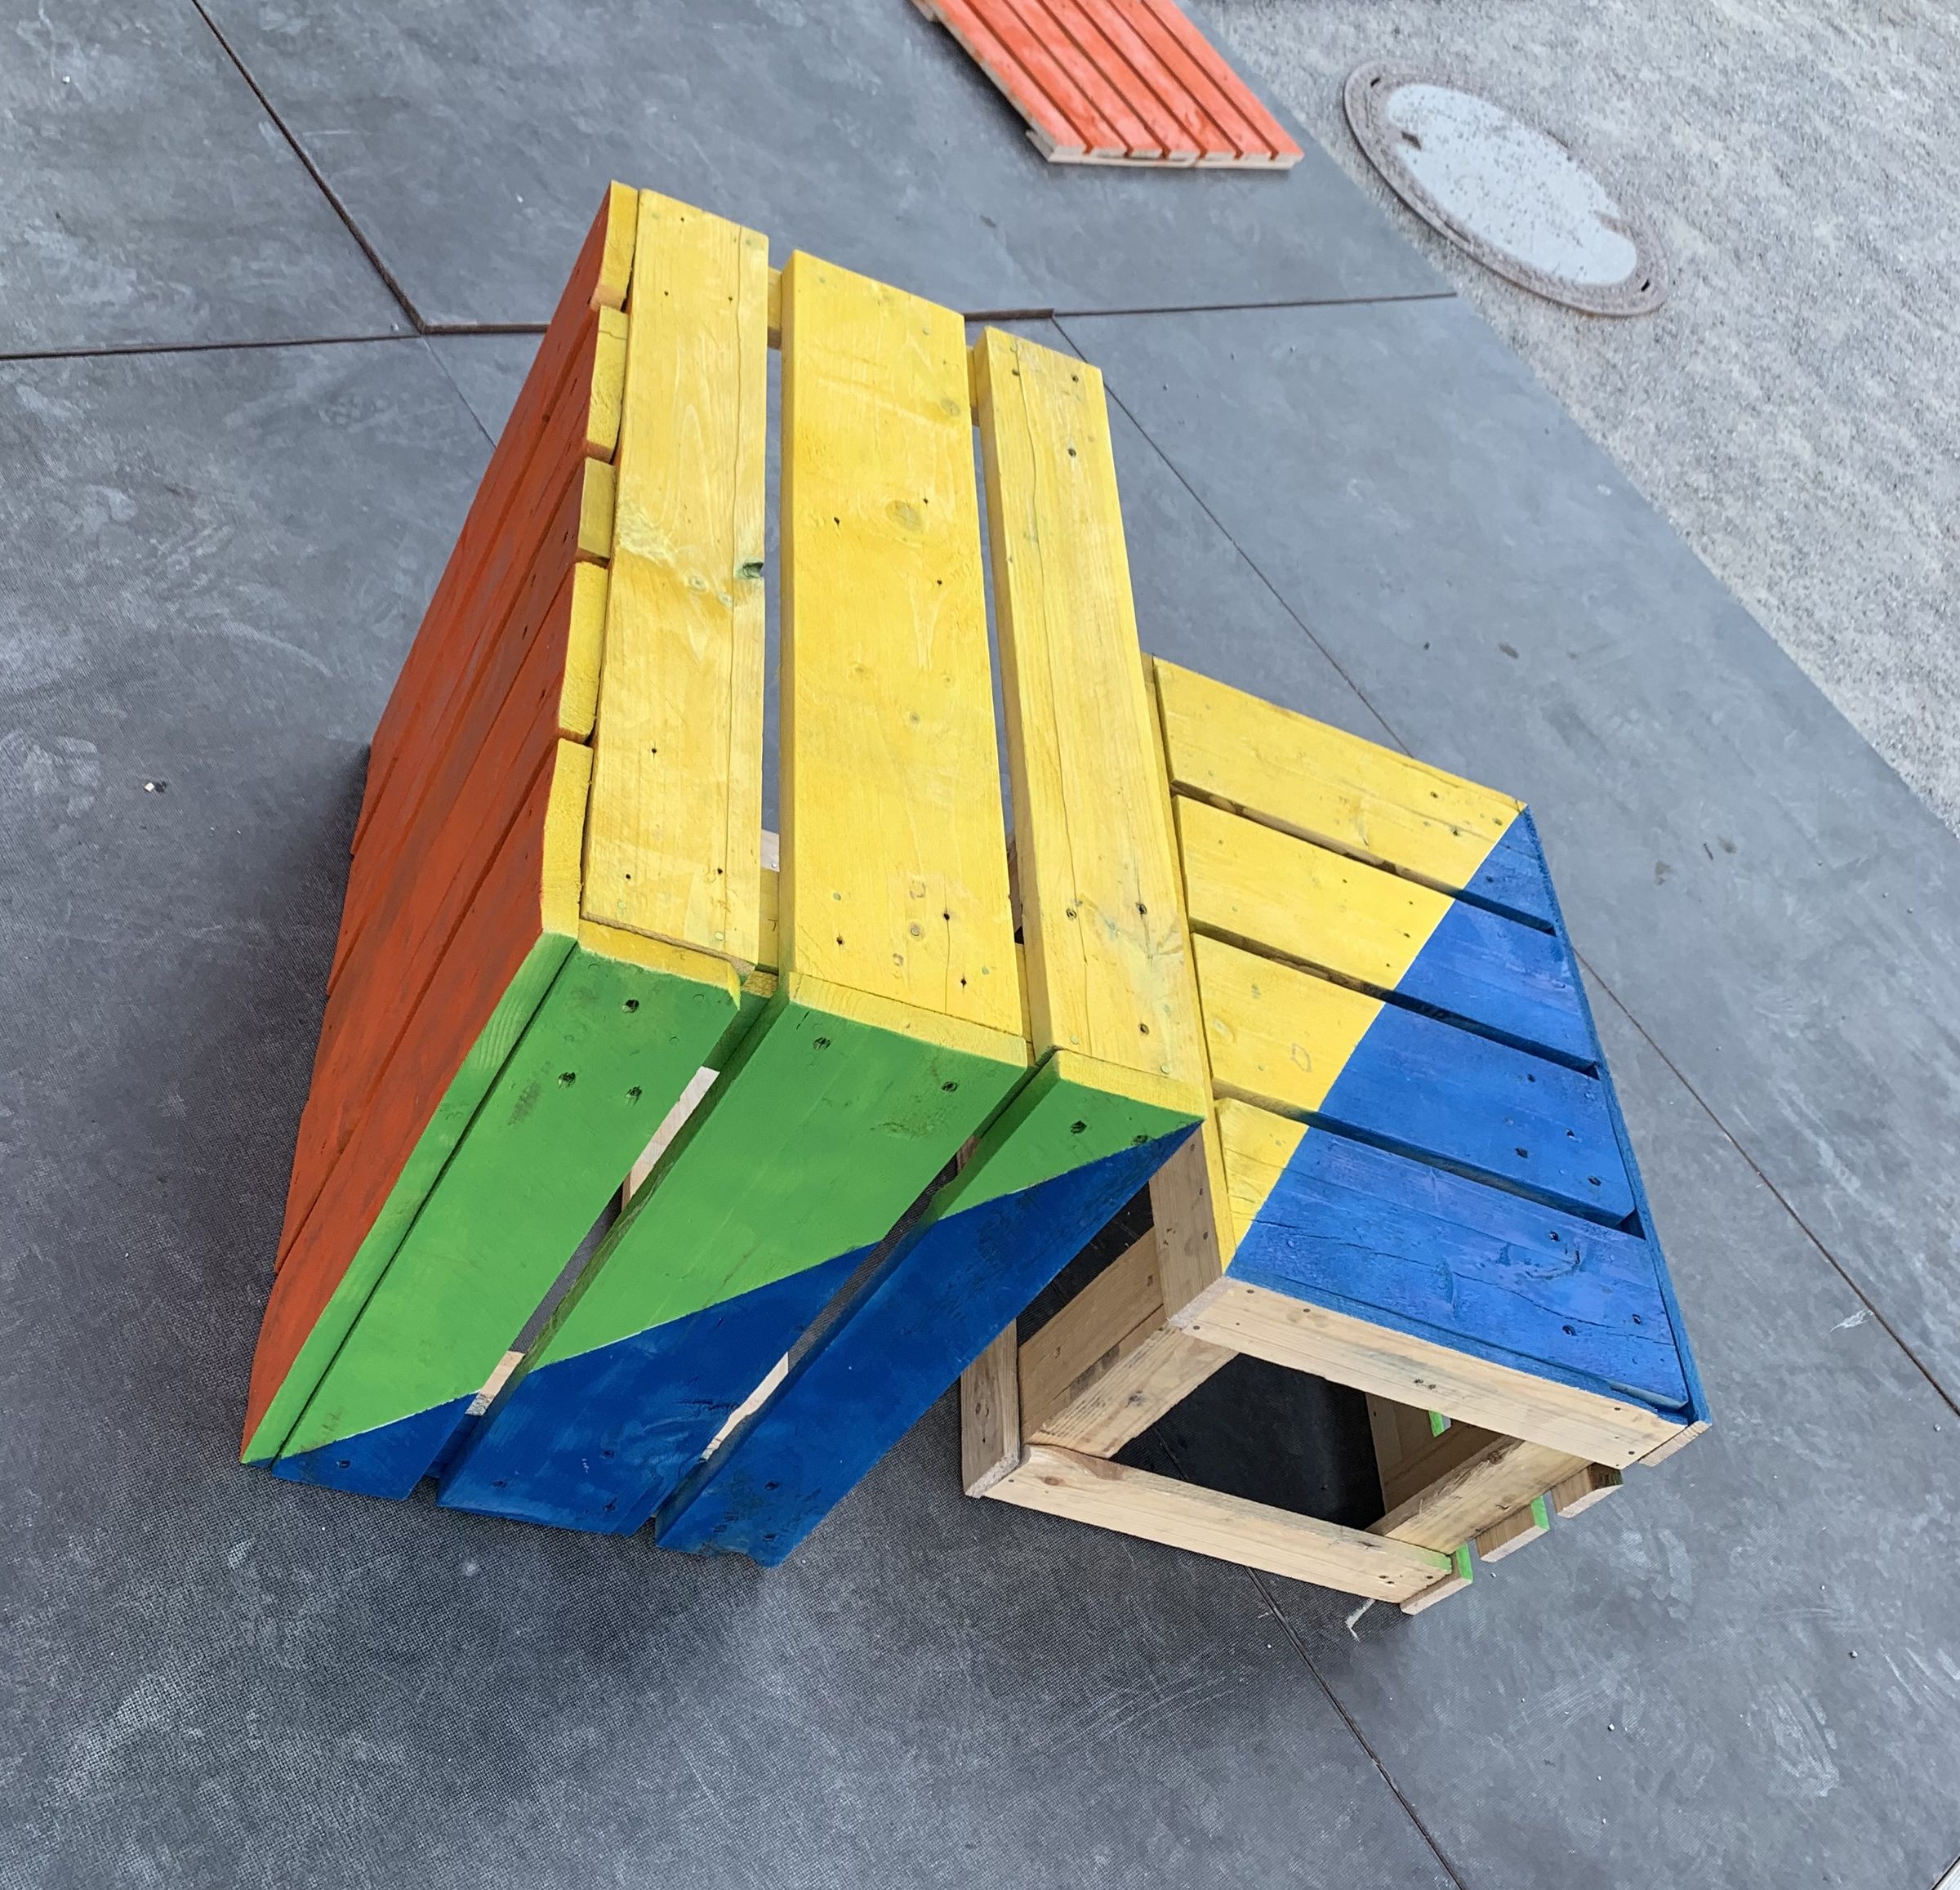
Give your furniture a great look! While painting, cover the other sides with paper to protect them.


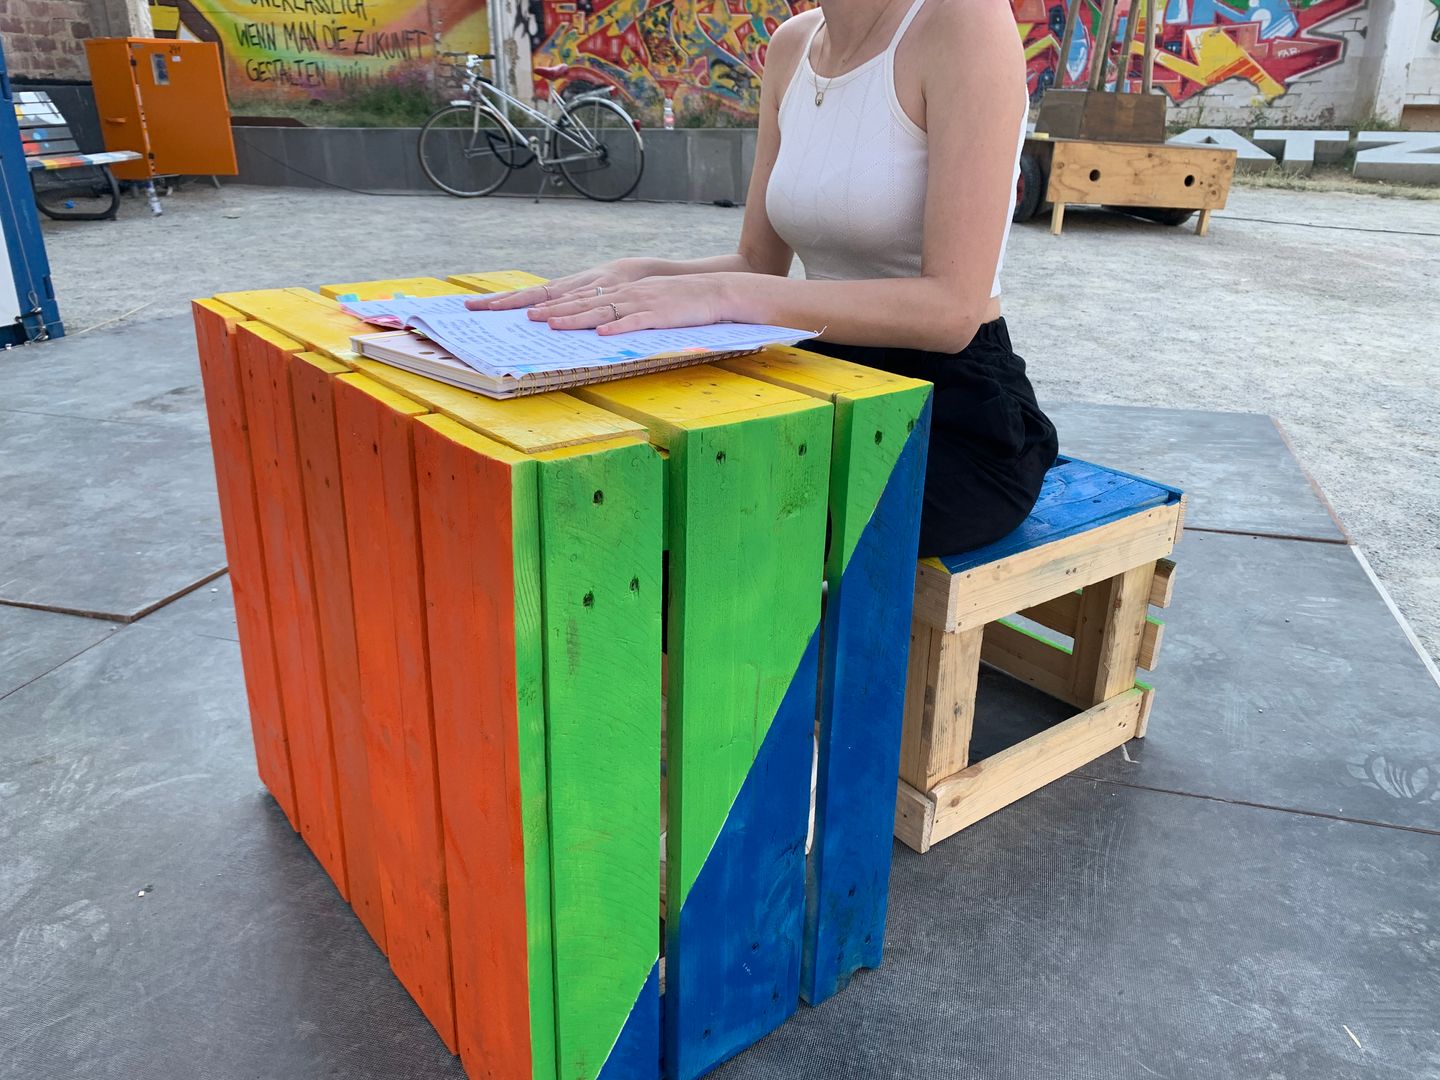
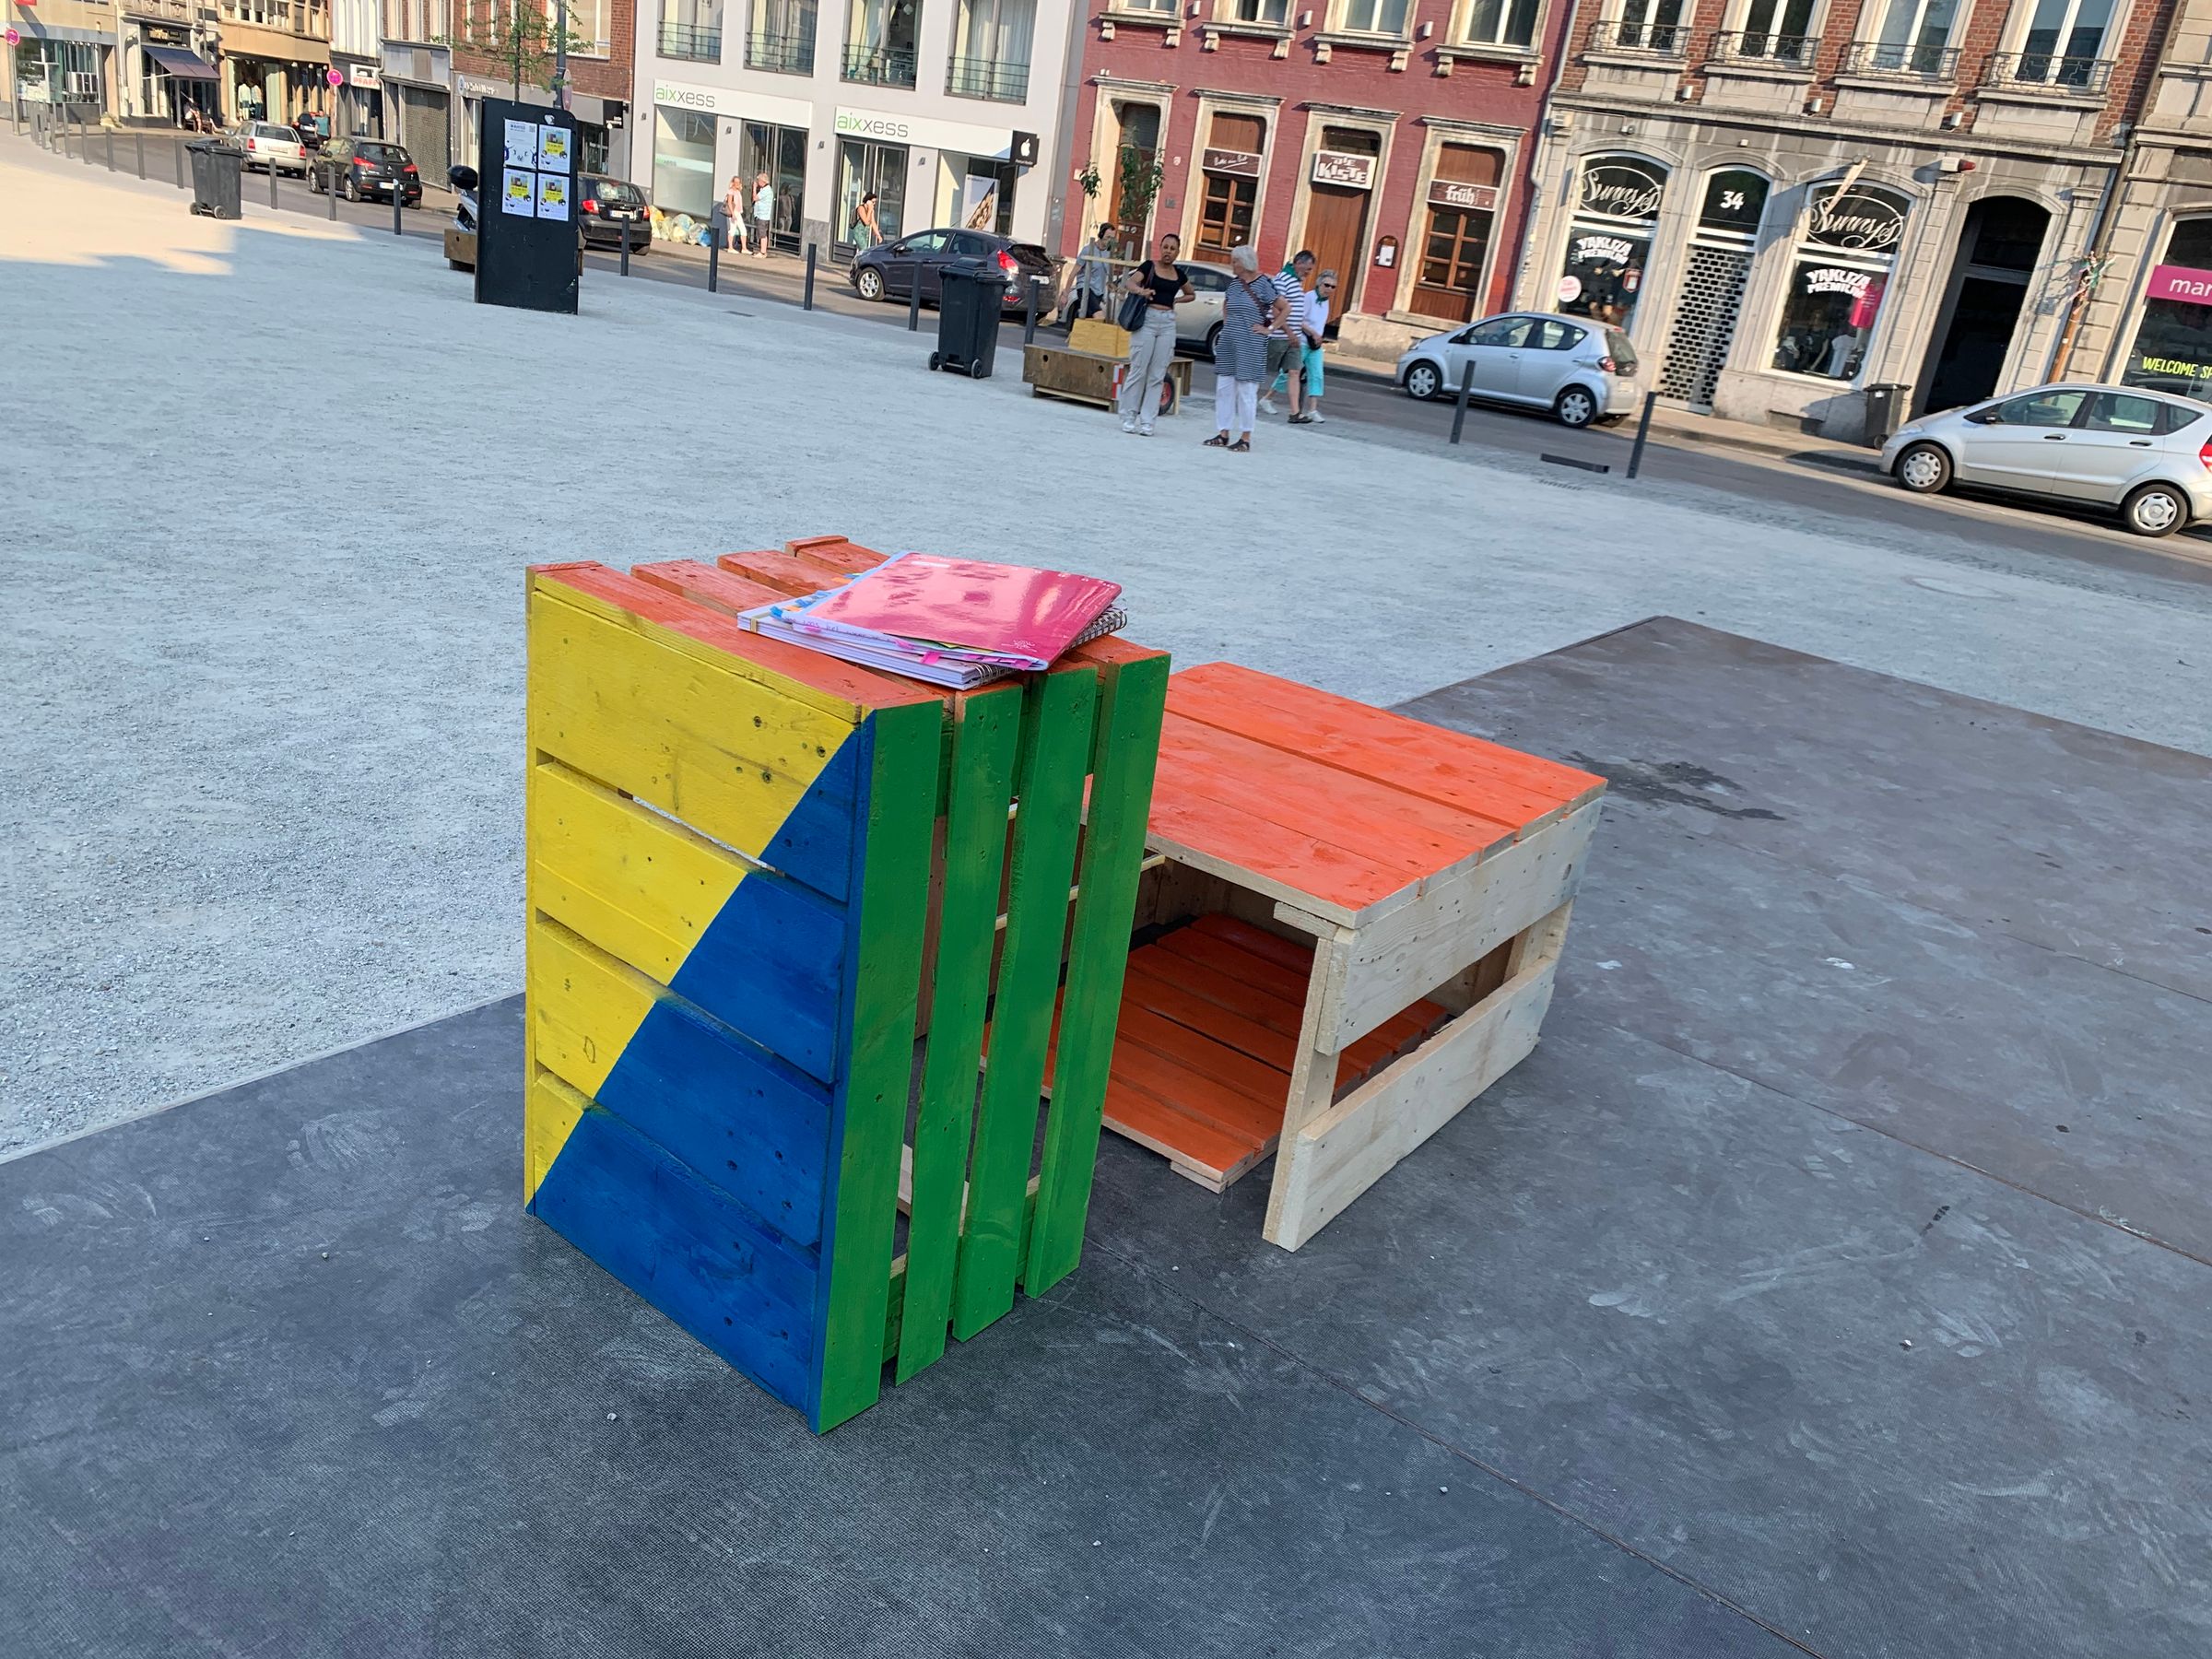
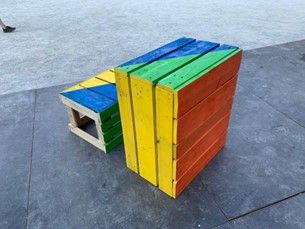
The way to use this furniture piece is very simple, and even easier if you colour it. You can match the colours on the surfaces to use the table in its variations.
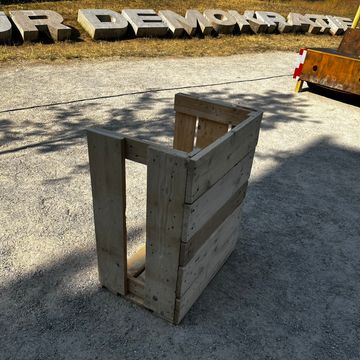
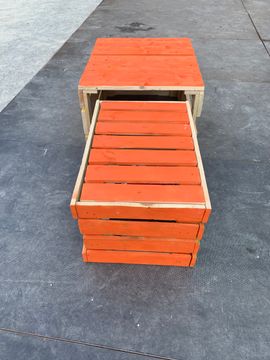
Use it as a couch or dining table and for storage.

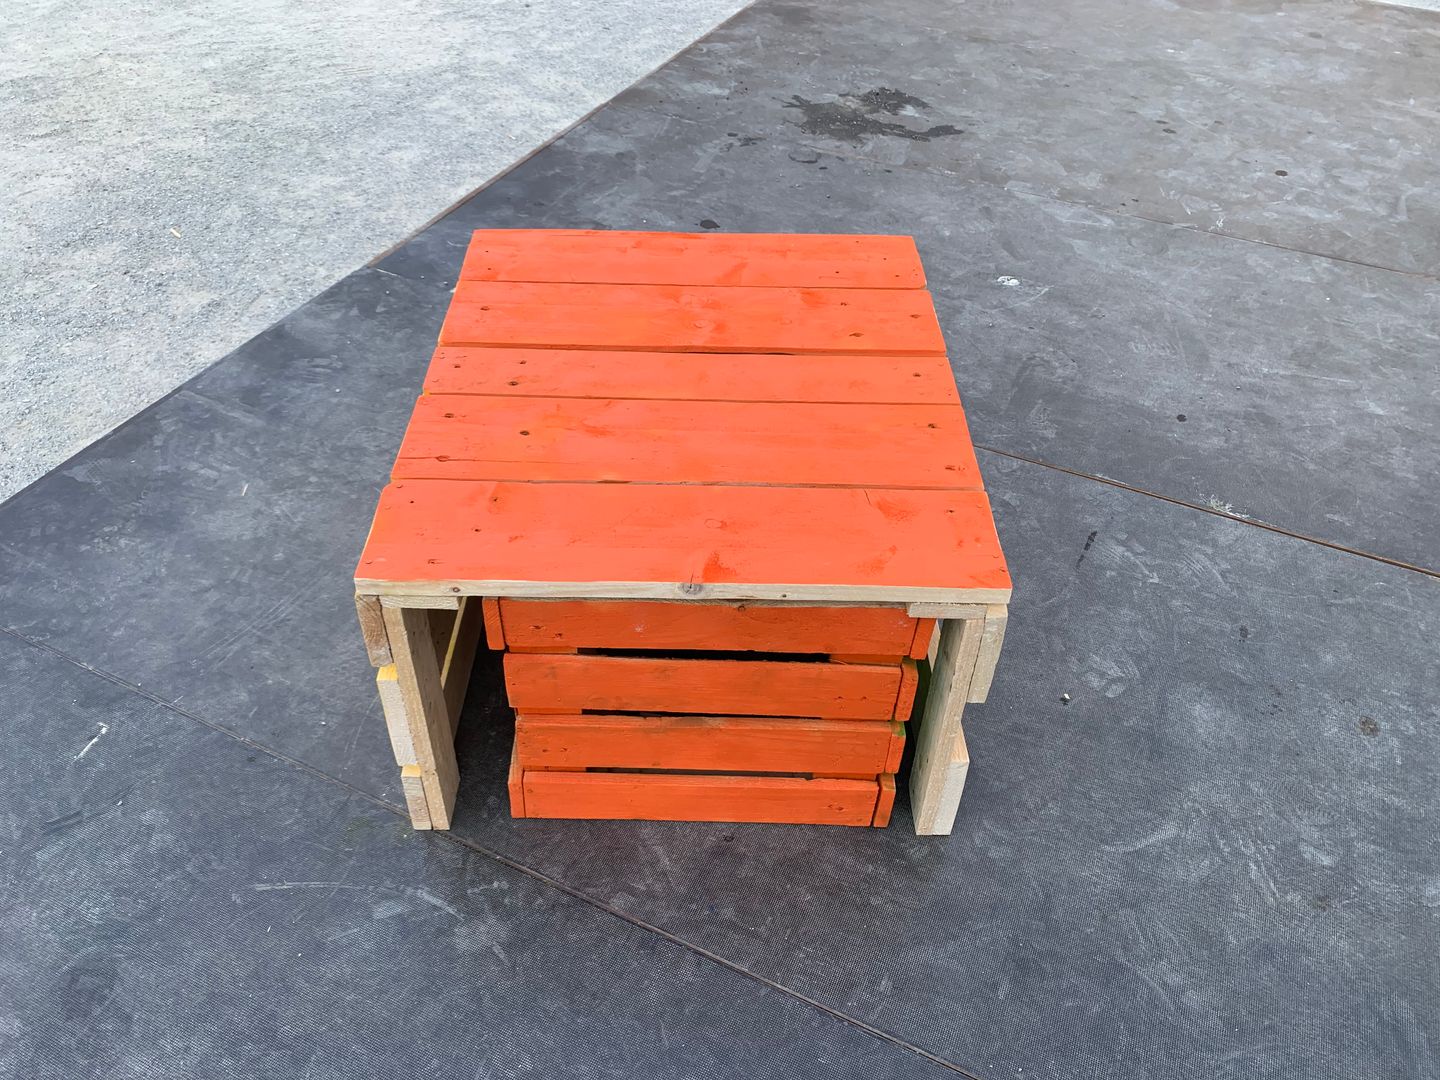
You can sit next to it and use it as a table. You can also use it as a bench and sit on it


Create colourful flooring from waste
By repurposing bottle lids, you can give your floor a vibrant and unique...
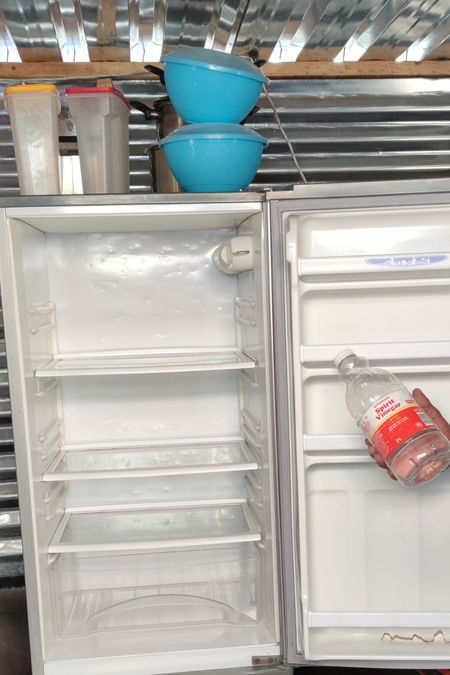
Safe money and the environment
Vinegar and bicarb are really great products for cleaning. They are...
Easy to make, to set up and to store
This small table is a good option if you do not have much space.
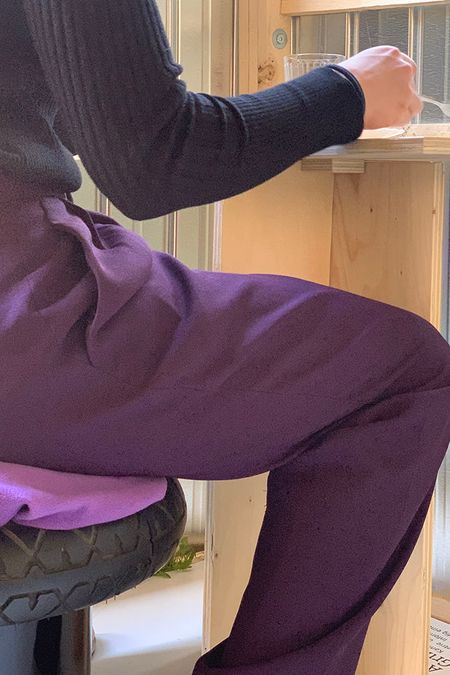
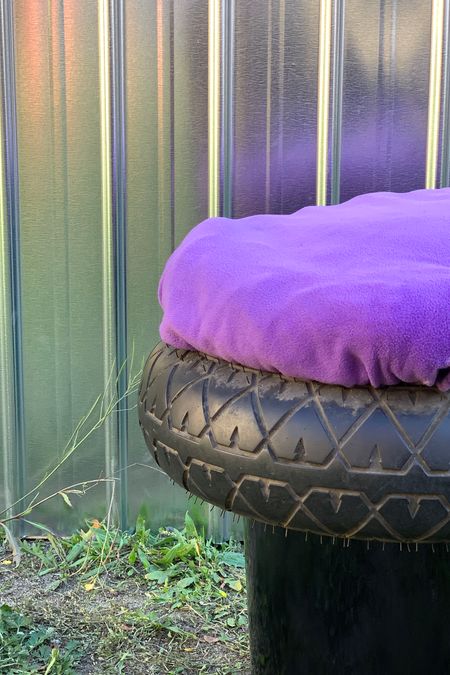
Chair during the day, toilet during the night.
Create a comfortable chair that can additionally be used either as a night...

On dooiy you find fun and easy hacks that make life easier. Just follow our simple step-by-step guides and create something for your home or community with little materials and tools. Want to start a business? dooiy might be the perfect starting point for you.

from dooiy
You don‘ t have to be an expert to start making with dooiy. Just choose an easy hack and get going. After you made a few, I am sure that you will come up with your own ideas.
dooiy is being developed by passionate people in Germany and South Africa.

To fulfil our vision, we are looking for partners, volunteers, donors and people who spread the word.
Learn moreand become a partner